My father sometimes mentions a nice paraphrase — “simplicity lies on the far side of complexity” — and it’s in this spirit that I think a lot about lighting. I’ve seen and endeavored some absurdly complex lighting schemes, only to find after many years of working, that a simple approach is often best.
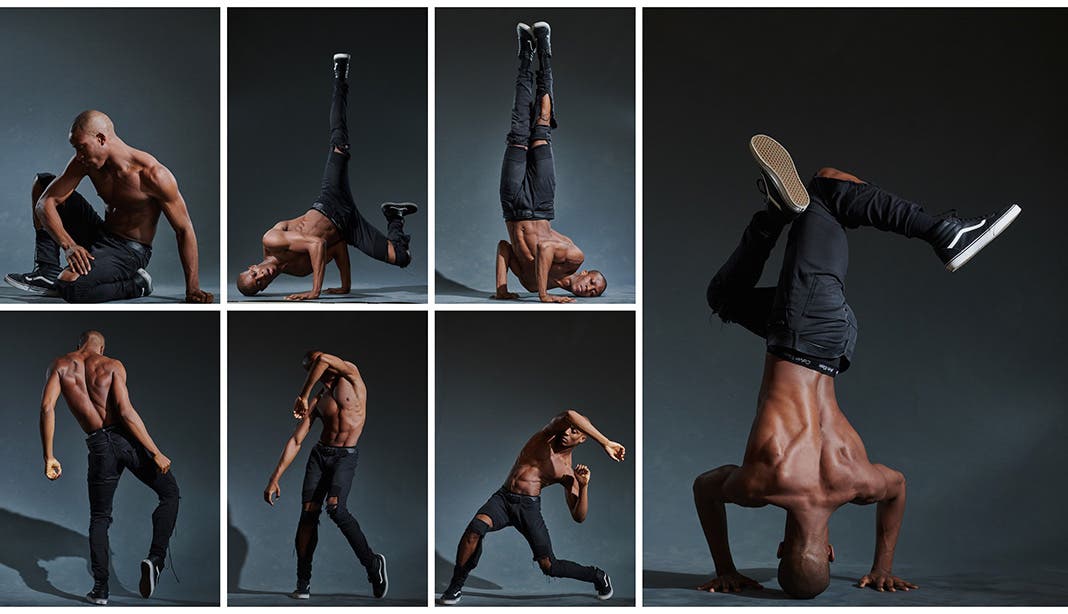
This is where key and fill lighting comes in — it’s a really simple concept, but the nature of something simple like this is that there is considerable distance between being exposed to the concept, and executing it with finesse, adapting to changing conditions, shifting and reacting, making it sing when applied to different subjects. You’ll see the concept in this article, and then likely face a considerable amount of time and energy getting it *just right*, but once on the other side, I promise it’s a simple concept that delivers visual magic. In the third part of this series, I’ll demonstrate the concept and apply it to three different subjects/approaches.
The “studio” in “studio lighting”: A concept, not a place
Studio lighting is all about creating a region of control that you place your subject in — isolating them from the available (and often fluctuating) light. Though I’m mostly offering examples made in a proper studio for this article, “studio lighting” in my use of the phrase is merely controlled lighting, and I often find myself on assignments creating the conditions of “studio lighting” in a space that in no way resembles a studio (cramped in a conference room, or working in a dance rehearsal studio).
Dial it in
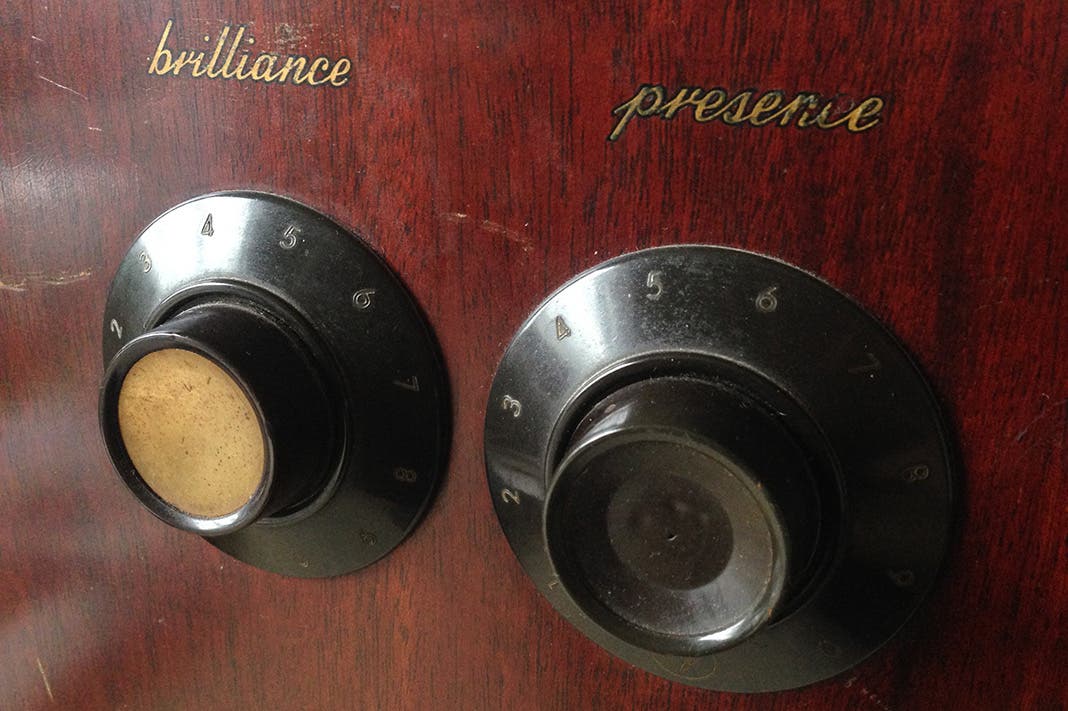
A few years ago, clearing the estate of a relative who had passed, we discovered his old stereo system with these two dials:
The key light
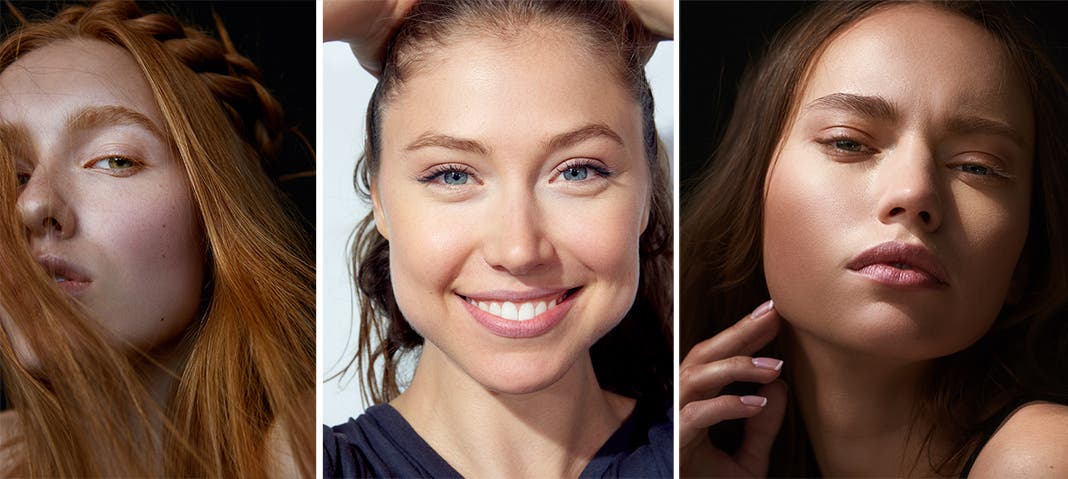
The key light has two main functions: it establishes the overall feel of the image; and sets the position and character of the shadows.
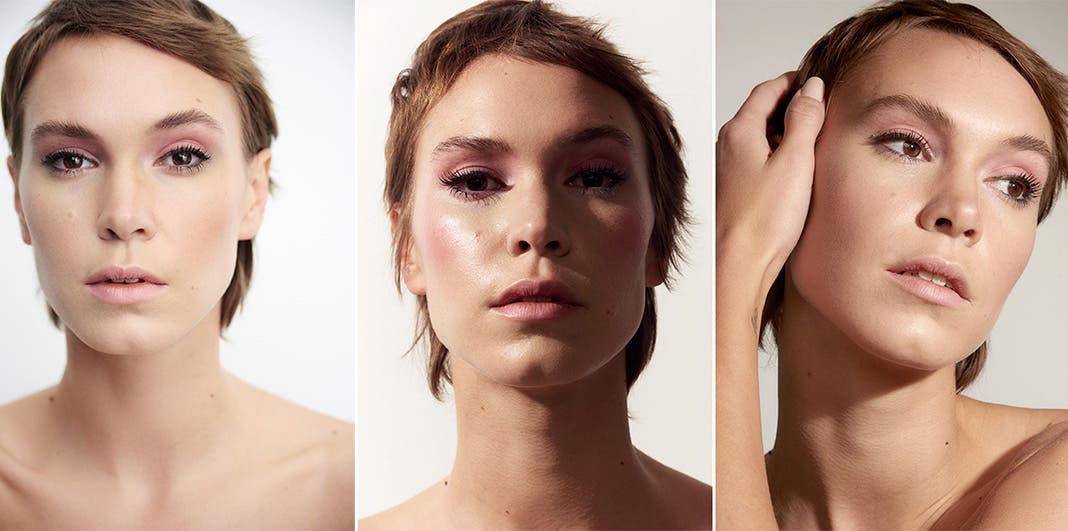
The “feel” of an image relates to the nature of your key light in that a large, soft source — a softbox (), Photek Softlighter (), or Octa () — will have muted highlights and will transition to mid-tones gradually. A “specular” key light — a beauty dish (), a high output reflector (), and a fresnel () — will have elevated highlights and move abruptly to mid-tones (aka *pop*, *snap*, or *kick*). Part of your job as a photographer is to play the role of an art director, and consider how these qualities relate to your subject and the mood you’re intending to convey, and get them in line, serving your desired end-goal.
Shadow character also contributes to the feel of an image. Is the shadow’s edge well defined? Does it have a gradual, soft transition?
And placement of the shadows can contribute to the image’s feel — in the case of Rembrandt versus broad lighting for example. But just as often it’s informed by practical considerations. Do I want a shadow on the wall behind the subject, or somewhere off to the side, out of my framing?
The fill light
Fill light controls contrast and shadow transparency — the greater the distance in metered exposure level the fill light is from the key, the greater the contrast your scene will have. This is known as “key to fill ratio” or simply “ratio”, and usually written briefly as a set of numbers such as 1:2. In this case the exposure value of the key light is double that of the fill — contrast is moderate. A 1:4 ratio, where the key is metered at 4x the output of the film, is very contrasty. High key, ethereal images usually feature a ratio that puts the metered values of the key and fill lights very close, e.g. 1:1.3. Metered values in all cases should be taken from the position of the subject, at what will be your point of focus. A fill light is any second source which elevates the shadows and can come from a myriad of origins: additional strobe; a reflective surface; bounce from a nearby wall.
When someone says “I only need one light because there’s only one sun in the sky” they’re often mistaken. Bounce, refraction and reflection are all secondary fill sources and help create character and are some the reasons we as photographers love natural light so much.
Tip: if you are seeing shadows projecting from a single point in your image in multiple directions, your fill light is too powerful, and has become a second key light, often leading to unflattering light. It’s important that your fill light be set sufficiently lower than your key light that it does not create secondary shadows. If you’re struggling to get the ratios right, start with your fill light off, then turn it on at its lowest power setting, gradually adding power and checking to see changes as you go.
Studio lighting: Practical considerations & compromises
The questions which inform your decision making when choosing a lighting setup and packing the gear required to drive the setup:
How large of a space do I need to light? Just the subject’s face, their entire body, or even bigger (the subject and surrounding environment)?
These considerations can inform what modifier you’re choosing to work with, and the space you have available to work in will exert its own pressures on how you tackle this question. For a small subject area, a 38″ Octa like the Glow Parapop () is a great choice, as would be a beauty dish. A large space is often covered by a reflective umbrella such as this offering from Westcott, or in the case of commercial photo production, the Elinchrom Octa is a classic go-to.
What feel is appropriate to my subject? Soft and moody, bright and poppy, high contrast and richly textured?
Often the answer to this question exists somewhere between your own creative compulsions and the needs of your client. And other times you will find that if you create compelling work of a particular feel, you will be sought out by clients looking to move their needs to fit or unite with your style. Bright and poppy is often the result of a specular, high key modifier with a silver interior, like a beauty dish, or a high-output reflector. The Photek Softlighter has long become a favorite among portrait shooters for delivering on muted, sumptuous detail.
How quickly do I need my lights to recover from each photo, available for the next frame at full capacity? Is my subject going to be moving, and how fast?
As a general rule of thumb, in the case of battery powered lights, like the Flashpoint series, the higher the maximum output your strobe has, the shorter the recycle time will be, especially at lower powered settings. Faster still are plug-in options, like monolights or pack and head designs. The focus here should be in creating a capacity for natural or playful cadence for your photography, and the faster your lights are available to shoot again, the greater your freedom is in allowing your subject to do their thing.
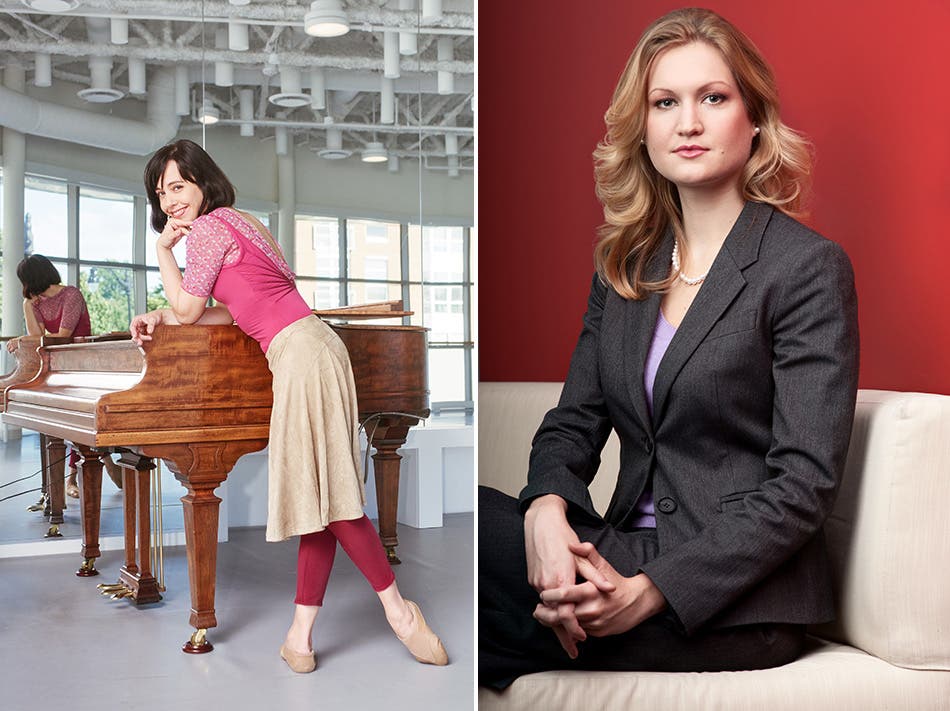
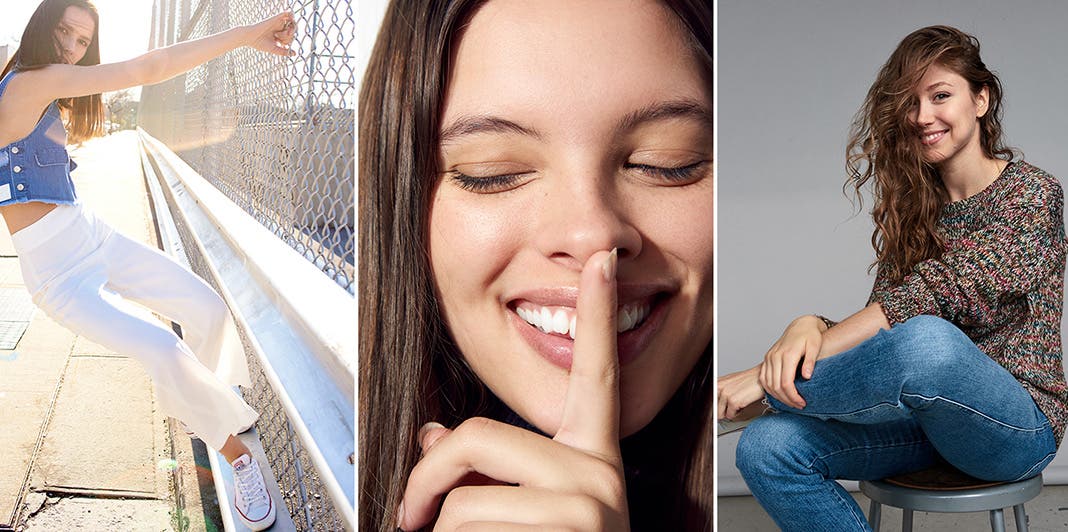
Up next: Join me for part 3 of this series, where I’ll put these considerations to practical use and demonstrate them for three popular types of photography: full length fashion, beauty, and action.