Working in cold weather presents problems for both photographers and their equipment. Cold-weather camera protection is critical when shooting under these conditions. Most cold-weather photography work will probably be done in the range from freezing down to 0 degrees F (-18 degrees C), since not too many places get much colder than that for more than a few days a year.
However, some areas have temperatures that go as low as -40 degrees. As I’m writing this in early January, the temperature in Fairbanks, Alaska, is -31 degrees F/-35 degrees C, while the South Pole is at a relatively balmy -18 degrees F /-28 degrees C. If it gets below -40 degrees, I’d seriously think about staying indoors! Still, most of those problems can be avoided Here are some tips from an expert on how to do winter photography.
1) Adjust Your Camera’s Exposure During the Winter Weather
Drastic changes in temperature also have a direct influence on photographic exposure. Exposure is usually insignificant to both film and digital cameras. The basic sensitivities of film and digital sensors won’t change much over the temperature range that you are likely to encounter. Though the cold doesn’t appreciably change intrinsic film speed, lower temperatures may significantly lessen reciprocity failure for film, so some adjustment of normal reciprocity correction factors may be needed for long exposures.
In extremely snowy conditions, where just about everything is white, you may need to dial in +1 or +2 stops of exposure compensation if you want white snow to be white, and not an 18 percent middle grey. Remember that most auto exposure systems assume the scene they are metering is 18 percent grey and expose accordingly. Some may correct for the brightness of snow in full sunlight when using an evaluative or matrix metering mode, so in that case, you might not need exposure compensation. Those shooting digital should review their images and check the image histogram to make sure that the exposure is giving the desired results. If all else fails, you can always fall back on incident metering!
Using a camera lens hood is another helpful accessory for protecting the front element of your lens from blowing or falling snow. Since snow tends to reflect the sky, it can take on a bluish cast on a bright, sunny day, especially in shadow areas, so a slight warming filter may help when shooting film.
You should also know your camera settings in snowy and cold environments. When shooting digitally, be sure to change your white balance to open shade, which assumes a warmer hue due to the effect of a blue sky. Even with digital, since the snow has a high UV reflectivity (80-90), using a UV filter can go a long way.
2) Keep Your Batteries Warm
Batteries lose a lot of their power at low temperatures. While this applies to all batteries, some do better in low temperatures than others. The best cold performance probably comes from primary (i.e., non-rechargeable) Li cells, followed by NiCd, NiMH, and Li-ion rechargeable batteries. They should all be fine down to -20 degrees C, though they will certainly have a lower capacity than they do at higher temperatures. Most will work for a while, even at lower temperatures.
If the batteries get cold and become depleted, they will usually regain power if warmed back up. Take at least two or three battery packs when shooting out in the field so that you can switch them between your camera and a warm pocket to prolong their functionality under colder conditions.
Use Hand Warmers
Another way to keep your batteries warm is to wrap a small hand warmer around the section of the camera that contains the batteries (usually the handgrip for DSLRs). Hand Warmers are small packets containing iron powder mixed in with a few additional chemicals, such as charcoal and salt. When the packet is opened and exposed to air, oxygen reacts to the iron, forming iron oxide (which is rust), releasing heat in the process. The reaction is quite slow, and the heat can last anywhere from six to 24 hours, depending on the size and design.
Since these are intended to be used to warm hands and feet, they don’t get hot as much, which usually makes them safe to use next to a camera.
Carrying a few extras for your hands and feet might not be a bad idea too! If you don’t want to wrap one around your camera and instead keep it inside a bag when not in use (see “cold soaking,” above), you can place a hand warmer in the bag next to the camera. It may not raise the temperature in the bag much, but even a few degrees can help mitigate the effects of the cold. Always remember that keeping your camera cold while also keeping your battery warm is essential during winter photography sessions.
3) Embrace Cold Soaking
During operation, digital cameras actually generate their own heat. With some early digital cameras, after continuous operation for a while, the batteries became almost too hot to touch! Modern cameras are significantly more efficient and generate less heat, but if you can keep that heat in the camera (by not cold soaking it), you may have fewer cold weather-related problems.
Cold soaking is leaving a camera out in the cold until every part is at ambient temperature. This is likely to increase the probability of cold weather-related problems. Since it can take quite a while for a camera to fully cool, if you only expose your camera to the very coldest temperatures when you’re shooting and put it in a pocket or a camera bag when it’s not in use, you’ll likely have fewer problems than if you leave it permanently hanging around your neck and fully exposing it to the cold. It may not be that much warmer in your pocket or your camera bag, but every additional measure helps. (See also the section “Hand Warmers,” below.)
One thing to avoid, though, is placing a cold camera under your coat (especially if you’ve been sweating) as humid air becomes trapped under your coat. This can happen even if you’re wearing a highly insulated coat in cold weather and you’ve been working hard, for example, by walking through deep snow. A cold camera or lens in a humid environment can result in condensation of moisture on both the optics and electronics, which is something best avoided. (See also “Coming in from the Cold” below).
4) Be Careful Opening Anything Plastic
At average temperatures, plastics are, well, plastic. They will bend a little, and some mechanisms depend on that such as plastic hinges and catches. Plastics may become quite brittle at very low temperatures and will break before they bend. This means you need to be quite careful when opening any plastic camera coverings or hinges, like battery compartment doors, to avoid accidental damage.
5) Beware of Metal Surfaces
Touching metal at sub-freezing temperatures with your bare hands can be quite a painful experience. Moisture on your hands can freeze and “glue” you to the metal surface! Since most modern cameras are either plastic or plastic-covered, this isn’t too much of a problem when handing cameras, but touching bare metal tripod legs with ungloved hands can be a problem.
To avoid this painful experience, you can get insulating sleeves or pipe insulation for the legs of your tripod, or instead, use a carbon fiber tripod to prevent ice burn. If you need more dexterity and find heavy gloves bulky, you can instead use thin silk glove liners at low temperatures to avoid using your bare hands. You can also check other essential accessories for snow photography here and give yourself a more convenient experience when shooting in the snow or under freezing temperatures.
For some camera systems, an external battery pack that connects to the camera via a cable is an option. This means you can keep the batteries warm under your jacket. However, the cable between the battery pack and the camera can be inconvenient. Note that alkaline batteries and particularly rechargeable alkaline batteries tend to underperform in colder conditions and should probably be avoided.
6) Protect Your Camera After Coming in from the Cold
A major problem with cold-weather shooting can occur not while you are outside, but when you come back into a heated area. Cold air is much drier, while the warm air inside a heated room often contains much more moisture. In fact, many homes use a humidifier during the winter months to keep the air moist because it’s more comfortable for people.
If you bring a very cold camera and lens into a room with warm, moist air, moisture will condense out of the air and onto the cold surfaces. The problem isn’t so much the moisture you may see on the outside of the camera or lens, but the moisture that condenses inside its internal parts. Electronics and moisture don’t mix well, and you really don’t want condensation on the inner elements of lenses either.
The good news is that the moisture will eventually evaporate if the equipment is allowed to warm up to room temperature. It might, however, take a long time. You can gently warm the gear with a hairdryer on a low setting to speed things up, but a much better procedure is preventing the moisture from condensing in the first place.
If you do get condensation on a camera, remove the batteries and don’t replace them until you are sure the camera has dried out. Just because a camera is “off” doesn’t mean that electronics are safe from damage. Many cameras are only in a “sleep” state when off, with power still applied to some components.
You can avoid problems if you seal your camera gear in an airtight plastic bag before you bring it inside. It will then be surrounded only by the very dry air from outdoors. You may get some condensation on the outside of the bag, but the camera or lens will slowly warm up in dry air inside the bag and will stay dry. Self-sealing freezer bags work well for this, but any container which you can seal will also do the trick. Just be sure to put the camera and lens in the bag before you go indoors. Once you’re indoors, it’s too late!
Should You Worry About Memory Cards in the Cold?
There are very few reports of memory cards having problems in low temperatures. Some industrial cards are thoroughly tested and specified for continuous use at temperatures down to -40 degrees C, but it seems that it’s really not essential to use such cards. The Sandisk Extreme memory cards are specified for use down to -25 degrees C, but even they are probably not required.
Most users seem to find that even at the lowest temperatures, most memory cards perform without problems.
I’d be a little wary of compact flash microdrives at low temperatures since they are mechanical devices and will most likely have cold weather-related problems. Fortunately, few cameras these days use microdrives.
Tips for Your LCDs in the Cold
LCDs (Liquid Crystal Displays) are also affected by low temperatures. LCDs may lose contrast and grey out, change the displayed information more slowly, and become quite sensitive to touch. Pressing on them may even cause the display to change color. Thankfully, these issues are reversible once the LCD warms up.
Do You Need to Winterize Your Cameras and Lenses?
Older mechanical lenses and cameras had to be “winterized” for use at low temperatures. Winterizing such equipment involved taking them apart and removing the heavy lubricants from their mechanical parts. This was either replaced with a very low viscosity lubricant or no lubricant at all. Before they could be used again at normal temperatures, they had to be taken apart again to replace the lubricants inside! This was not very convenient and, thankfully, not necessary for today’s cameras.
Modern digital cameras and lenses don’t typically use much internal lubrication, and certainly not the viscous grease and oil used with earlier fully mechanical designs. Consequently, the design and temperature range for digital cameras takes into account drops in temperatures, which means these modern cameras don’t need any special winterizing for operation in cold conditions.
How Cold is too Cold for my Camera?
Most cameras today are cold-proof and can function up to 32 degrees F, or 0 degrees C. Some cameras also have freeze-proof certifications and specialized weather-sealed bodies, like those made of magnesium-alloy, to make them handle the cold weather better.
Keep in mind that while cameras can often handle more frigid temperatures, batteries are more susceptible to changes in temperature. In fact, a drop of 10 degrees C (18 degrees F) can significantly deplete your battery life. Hence, you should remember to bring extra batteries with you, especially when working in colder conditions.
Tips for Photographing Snow and Snow Storms
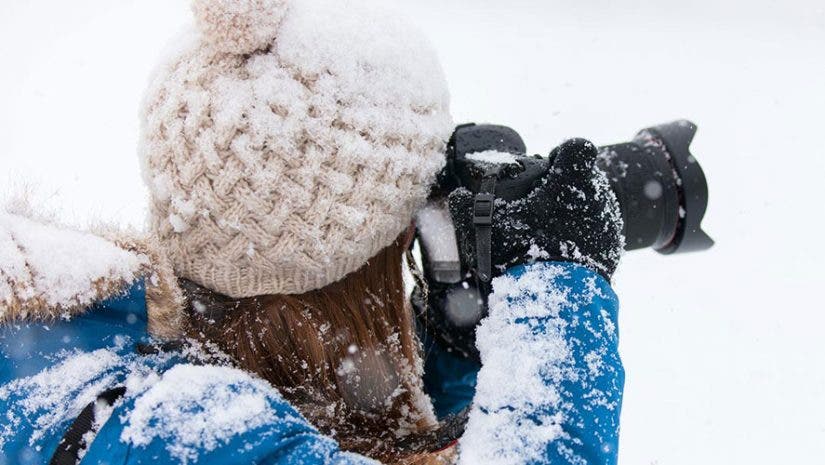
During active snowfall, it’s a good idea to use your lens hood to stop falling snow from leaving streaks or droplets on the front element of your lens. Keep a lens cloth handy just in case you need to clean up between shots.
If you want to capture the snowflakes falling in the scene, you can either take advantage of a fast shutter speed to freeze the snowflakes in motion, or drag the shutter just a bit to create streaks of falling snow. If you want to achieve a “snowkeh” effect, use the pop-up flash to illuminate the snow in the foreground.
Tips for Photographing Winter Landscapes
Winter landscapes are often far less textured than during other times of year. To create interesting compositions, consider making use of the negative space created by large swaths of snow. Search for striking shadows, sources of contrast, and other objects in the scene to help create interest in the frame.
During active snowfall, the sky is often unremarkable and overwhelmingly white or gray. Consider raising the horizon in the frame to focus on more attractive elements. Many snowscapes lend themselves well to black-and-white photography, so look for eye-friendly shades of gray in the scene.
How to Use Film for Winter Photography
There are two problems related to using film at low temperatures. The first is that at very low temperatures, the film can become brittle. If you bend it too much, it may actually snap, which means loading a film camera requires extra care. The second problem when using film under low temperatures is the low humidity of cold air.
The dry air allows static electricity to build up on the film surface, which may cause complications when rewinding the camera. You can actually get a static discharge and sparks inside the camera, which leaves marks on the film. The slower you wind and rewind, the less likely you are to run into problems from either brittle film or static discharge. Of course, on many modern cameras, you have no choice about winding or rewinding speed, so there’s not much you can do about it.
What are Some of the Best Cameras for Winter Photography?
Streamlined camera bodies with elaborate menus offer plenty of features and opportunities for setting adjustments. However, the easiest cameras to operate in cold weather take advantage of dedicated, tactile buttons, switches, and dials. Touchscreens are often finicky in cold weather, so if you plan to do lots of winter shooting outdoors, it’s a good idea to consider cameras that allow menu access beyond using the touchscreen.
Battery life is another important consideration. Mirrorless cameras are known for using up lots of battery with their electronic viewfinders and live view displays. Consider sticking to a mechanically-based DSLR for improved battery performance during cold weather shooting.
When shopping for a new cold weather camera, consider taking it for a test run with your gloves on. See if you can comfortably change the settings while keeping your hands and fingers warm. Does the camera feel safe and secure in your gloved hands? Or is it awkward and difficult to grip? By doing a test run, if it’s possible, you’ll be much more comfortable once it’s time to purchase the camera.
