The ingredients for good photography are high-end photo gear (i.e., high-performing cameras and lenses and the right accessories), technical skills (e.g., mastering exposure, camera settings, lighting design, etc.), and storytelling skills. However, you must have a recipe to transform these ingredients into stunning results. In photography, the technique is called composition. The golden ratio in photography can be thought of as a classic recipe for good composition.
To extend the comparison, as you wouldn’t use the same method for every culinary recipe, you shouldn’t use the same composition rule for every photo. Yes, the rule of thirds is good, but so is the golden ratio and others. As a nature photographer, I find the golden ratio the go-to rule in many scenarios, and here is why.
Using the Golden Ratio in Photography
In photography, the golden ratio refers to a composition rule that uses the mathematical golden ratio (aka the golden number or the divine proportion) to establish the visual elements’ proportions and positions in the frame. The golden ratio is approximately 1.618.
The Greeks discovered the golden ratio (hence the representation using the Greek letter phi (φ)), which has been used in arts, design, and architecture since around 300 BC. The name, however, is newer than that and attributed to 16th-century Italy and Leonardo da Vinci in particular. Both Greeks and Italians argued that using this particular number in their designs produced aesthetically pleasing results and relied on the golden ratio to create beautiful artworks and structures. You can spot it in the proportions of the Parthenon, the Great Pyramid of Giza, Leonardo’s Mona Lisa, and Salvador Dali’s The Sacrament of the Last Supper.
Furthermore, the golden ratio is something nature uses a lot. Take a look around you and you’ll easily find some natural design that respects the proportion. From the proportions of the human body to seashells to broccoli and sunflowers, the golden rule was used for sure in the grand design of our world.

Because we are so mesmerized by it, photography has adopted it as a way of creating well-balanced, naturally looking, appealing compositions.
The Golden Ratio vs Fibonacci Sequence
There is a strong correlation between the golden ratio and the Fibonacci sequence (i.e., 0, 1, 2, 3, 5, 8, 13, 21, etc.) discovered by Leonardo Fibonacci in 1200AD. It seems that the ratio between any two consecutive numbers in the Fibonacci sequence approximately equals the golden ratio (the exception is the first three).
Since the Fibonacci sequence, the geometrical representation of the golden ratio has been no longer two segments with lengths that respect the ratio but a two-dimensional representation with squares and circular arcs. And that has benefited photography a lot because now you can visualize the two-dimensional space of a frame in terms of the golden ratio.
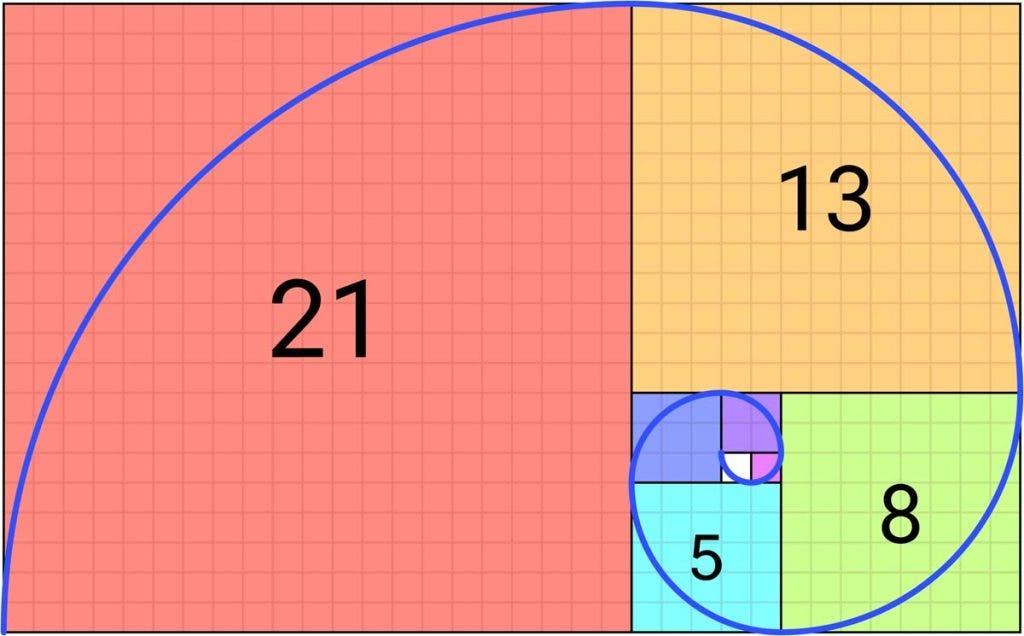
Furthermore, the circular arcs in the Fibonacci sequence representation (aka the golden spiral) have a major role in using the golden rule in photography.
How to Use the Golden Ratio in Photography
Considering both the segment and the square/spiral representations, you have two ways in which you can use the golden ratio to compose your photos.
The Phi Grid
The first and simplest is to use the 1.618 value as a guideline in positioning the subject(s), similarly to how you use the rule of thirds. Divide the frame into nine rectangles that respect the golden ratio. Place the subject(s) at their intersections or along the lines. The lines are closer together than they are to the edges of the frame, which creates a slightly different effect than when you use the rule of thirds (in which you have equidistant lines).
The grid based on the golden ratio is called the phi grid. You’ll often find it in professional photo editors as one of the guidelines for cropping.

The Golden Ratio vs the Rule of Thirds
Because the phi grid looks a lot like the rule of thirds grid, it is worth mentioning when it’s better to use the golden rule and when the rule of thirds. The phi grid offers a more natural perspective in which the subject is immersed in the scenery. It is inviting and leads the viewer towards the center of the frame, adding a bit of depth. It’s a better fit when the proximate surroundings of the subject are beneficial for the narrative. I also find it more beneficial for vertical subjects and scenery with two main subjects that seem to be engaged in dialogue.

In my opinion, the rule of thirds is more graphical and generic. I find it beneficial for horizontally aligned scenery (e.g., when the horizon is straight and clear), when the space around the subject or the frame’s areas are visually heavy in equal amounts, for decreasing the perceived distance between foreground and background, and when I want to underline the distance between two subjects. Of course, in most cases, it is a matter of personal preference.

The best way to decide between the golden rule and the rule of thirds is to photograph a subject using both, print the images, and look at them for a while. The one that draws you in and makes you spend more time looking at it is the winner. In time, it will become an intuitive choice you instantly make when framing a shot.
The Fibonacci Spiral
The second way of using the golden rule, the more complicated and artistic one, is to use the Fibonacci spiral as a reference. Instead of imagining the phi grid overlapping the frame, imagine the circular arcs that represent the golden ratio between elements. You can flip it any way you like and even multiply it if your scene has multiple subjects. Then, position the subject(s) along the arcs, with the most important one in the smallest arc.
Note that when using the Fibonacci Spiral, I find it better to use it for the composition of the elements of the frame instead of a guide for cropping, as this would make the focal point much more off to the side, which I don’t find so pleasing.
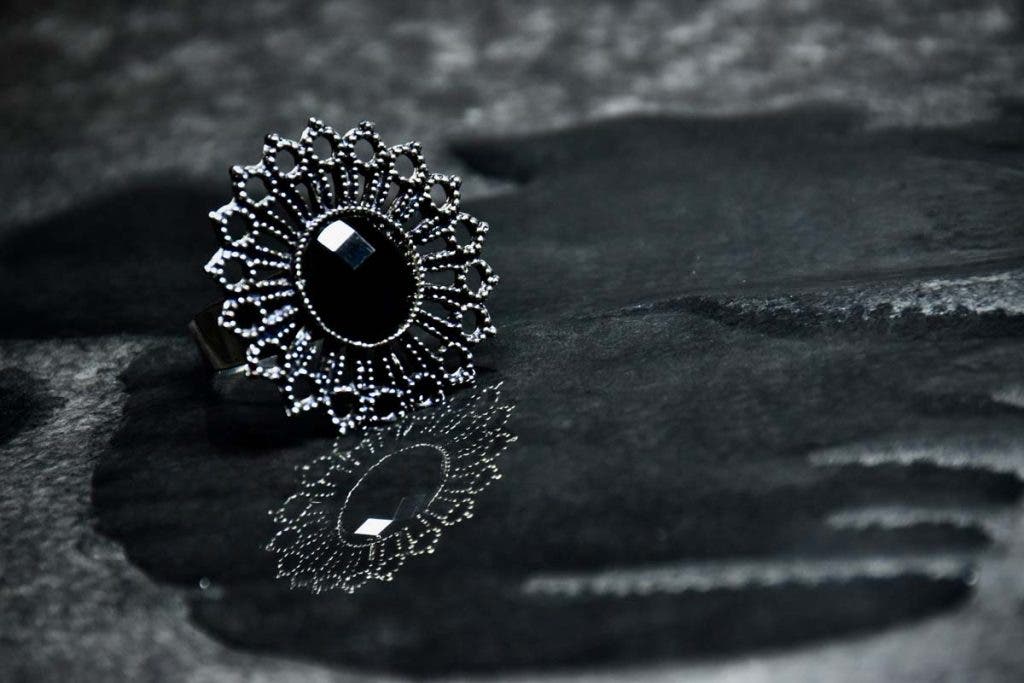
The largest arc acts as a curved leading line, so make sure you add meaningful items along the way. The viewer will go through the frame, starting from the smallest arc and continuing alongside the largest one. Using the spiral is more natural as you don’t often see straight lines in nature. It also provides a longer path through the frame, more depth, and a stronger connection between elements.
Example of the Golden Ratios
Let’s rule by example and explain how to compose a photograph using the golden rule step by step.
Natural Golden Ratio
The easiest scenario is to have a subject that includes the golden ratio by default, such as the petals of a rose. In this case, all you have to do is find an angle that showcases the pattern, often an above-shooting angle. Keep the smallest arc in focus and use a slightly narrow depth of field to blur the background smoothly.

Creating A Golden Ratio
In the next scenario, you don’t have the golden ratio by default. Still, you can arrange the items in the scene (e.g., commercial photography). Instead of aligning them or placing them randomly, try to follow an imaginary golden spiral with a main focal point and a beautiful, circular leading line. Even when you can’t change the elements in the scene, you can still adjust the camera position and angle to respect the golden rule. It helps to try unusual setups, such as shooting from the ground level or facing the camera up.
Phi Grid
The third example shows how quickly you can apply the phi grid to create a beautiful composition, especially in the context of street photography, where speed is essential. Find your subject and position it alongside one of the verticals of the phi grid. You may choose to add a visually lighter element along the other vertical or just use negative space to make your subject stand out.

In this particular photograph, because of the geometrical background, the golden rule is the best choice. Using the rule of thirds would have produced a distracting background and hidden the subject. A central composition would have flattened the scene and failed to make the subject stand out from the background as well.
FAQ: Golden Ratio in Photography
Use the phi grid for vast landscapes with nothing special happening in the foreground. Make sure to align the horizon on one of the grid’s horizontal lines and/or the highest elements on the vertical lines. If you have a foreground element you want to emphasize, use the golden spiral with the element in the foreground in the smallest arc.
The golden ratio is (sometimes) better than the rule of thirds because it appears in nature, which means it is more pleasant and natural-looking for the human eye. It also creates a bit more depth and helps create a dialog if you have two subjects in the scene. Used as the Fibonacci spiral, the golden ratio creates a naturally flowing leading line.
You can easily spot the golden ratio pattern that resembles seashells, for example. You can start by decomposing the scene into basic visual elements and then try to overlay the phi grid or the Fibonacci spiral, similar to a connect the dots game. Remember that not only objects pass as visual elements but also shapes, lines, textures, colors, light sources, and contrast.
Ideally, you want a 1.618 ratio. However, using the golden ratio in photography often relies on an approximation. You don’t measure exactly the proportion between elements. The only scenario in which you have a perfect golden ratio is when using the phi grid in an image editor to crop a photograph.
Concluding words
The golden ratio has been used for a long time in arts, architecture, and photography. Treat it as a tool you bring in your visual toolbox. Just as you won’t use a hammer for everything you need to fix in your house, the golden ratio is a tool for composition. Use it when it suits the scene, or you want to try a different approach. But before you can use it, you should practice it. So think about the golden ratio on your next photo shoot and use it in your compositions.


