A vignette is a dark border, commonly seen in photography. A vignette in photography can be created either by the optics of a lens, or done in post processing. Generally speaking, this technique is best done in post processing, and a lens with a lot of vignetting is usually not ideal. In most photo editors, you can do profile corrections to fix in-lens vignetting.
Why Use a Vignette?
You may be wondering why a photographer would want to intentionally darken the edges of their image. In most types of photography, the subject of your photo will live in the middle of the frame, or perhaps slightly off to the side. Very seldom is the subject of a photo on the edge of the frame. Using a vignette to darken the edges of your photo can help to bring attention to the subject. The human eye is drawn to lighter areas. By creating a slight darkness around the edge of your photo, you help to draw interest to your subject.
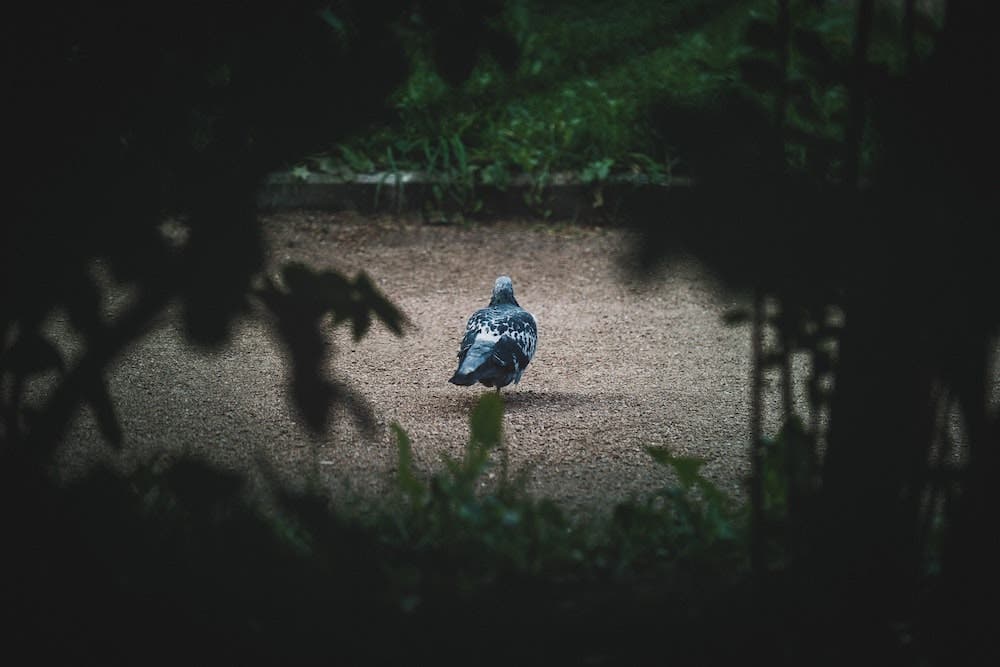
How Intense Should the Vignette Be?
Not all vignettes are obvious. In fact, the average person doesn’t even realize that they are present. The best vignettes darken the edges just enough to bring focus back to the center of the frame, but not enough that you can easily tell that the edges were artificially darkened.
Vignettes come in many shapes and sizes, but the end product always darkens the edges, while not touching the middle of the frame. Some vignettes can be very abrupt, while others are very soft. Each vignette should be recreated for each and every photo you edit to fit the photo.
When to Use a Vignette
Vignettes can benefit nearly any photo. Darkening the edges of your photo can help to bring more attention to the subject, and take attention away from the edges of your photo. Oftentimes, the edges of your photo can contain distracting elements, such as trees, foliage, rocks, or other highly detailed background elements. By darkening the edges, you help take away the distraction from the main subject.
Usually, you’ll want to apply a vignette as your very last step in editing. I find that using a vignette can really help bring the image together and add a professional touch to your photo. Using the perfect vignette helps to frame the image just right. Also, the vignette can help your photo feel a little more balanced to finish off your editing.
When Not to Use a Vignette
There are a few times when you have to be careful using a vignette. First, be careful vignetting a photo with a lot of blue sky. Darkening the blue sky can really bring up the saturation of blue, and make the sky look unrealistic. It’s important that your vignette keeps your image looking realistic. You don’t want everyone to realize that you’ve darkened the edges. It is much easier to pull off a subtle vignette when you are darkening clouds or trees, than darkening a blue sky. This is because the blue sky is not naturally darker further away from the horizon. Slightly darkening other elements in your photo are much easier to do seamlessly. However, images with blue sky can still be vignetted, but I recommend using a masking tool to avoid darkening the sky.
Another time to watch out for vignetting is when there is an obvious source of light coming in from the side of your frame. Again, you can use a masking tool to avoid darkening the source of light. It won’t look very good to darken your light source, but it looks great to darken the rest of the edges, and leave the light source alone.
You can find more information at 7 Post Production Mistakes to Avoid When Photo Editing.
How to Create a Vignette
There are a variety of different ways to create vignettes. For the sake of this tutorial, I’ll be showing how to do it in Lightroom. However, if you use another photo editor, most editing software are very similar in the way you create a vignette and the sliders available for customization.
First, you need to open your photo in Lightroom and navigate to the Develop module. Once here, you can scroll down on the right side of the screen to the Effects tab. Here you will see the option to adjust the Post-Crop Vignetting.
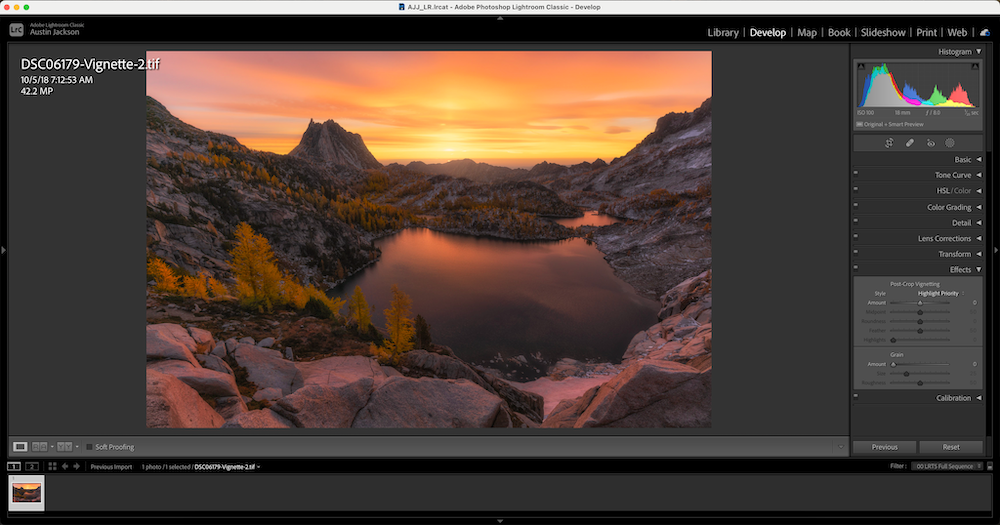
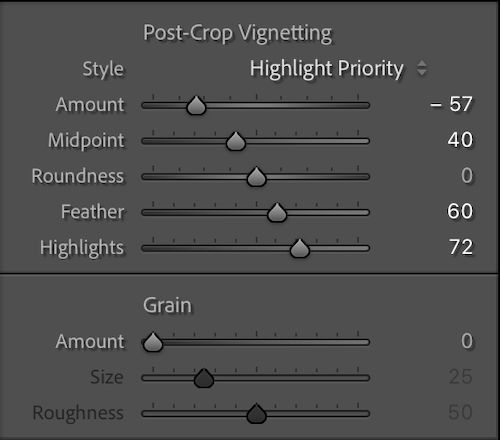
To apply a vignette, reduce the Amount slider (drag to the left). Once you do this, all of the other options will become available. Before we go any further, let’s talk about what each slider does.
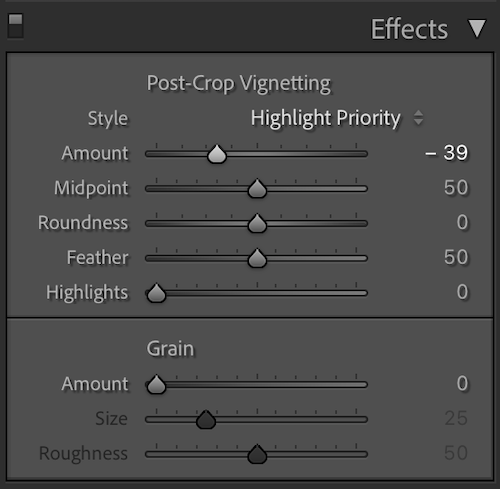
Amount
This adds more or less darkening effect to the edge of the photo. The more you move the slider to the left, the darker it will be.
Midpoint
This adjusts how much area will be darkened. By default, this is set to 50. If you go lower, more of your image will be darkened. If you go higher, less of the image will be darkened. Midpoint is basically an imaginary spot in the middle of the frame that is being protected from being darkened, and the higher the value of the midpoint slider, the larger this area gets.
Roundness
This adjusts the shape of the vignette. Increasing the value of this slider makes the vignette more round, while decreasing the value makes the vignette more square.
Feather
Feather adjusts the softness of your vignette. At 0, the vignette will have hard edges and look like a frame. At 100, the vignette will be very soft and seamless. Rarely will you ever want to decrease the feather, but you may increase the feather to create a more seamless vignette.
Highlights
This setting protects the highlights in your photo from being over-darkened. This is very useful when you have bright spots or light sources in your photo. By increasing the highlights slider, you will reduce the vignette on the brightest highlights in the frame.
When creating the vignette, start with the amount slider first. Bring this slider down (to the left) until you feel like the vignette starts to become very obvious. For most photos, between -50 and -15 is where you’ll want to be.
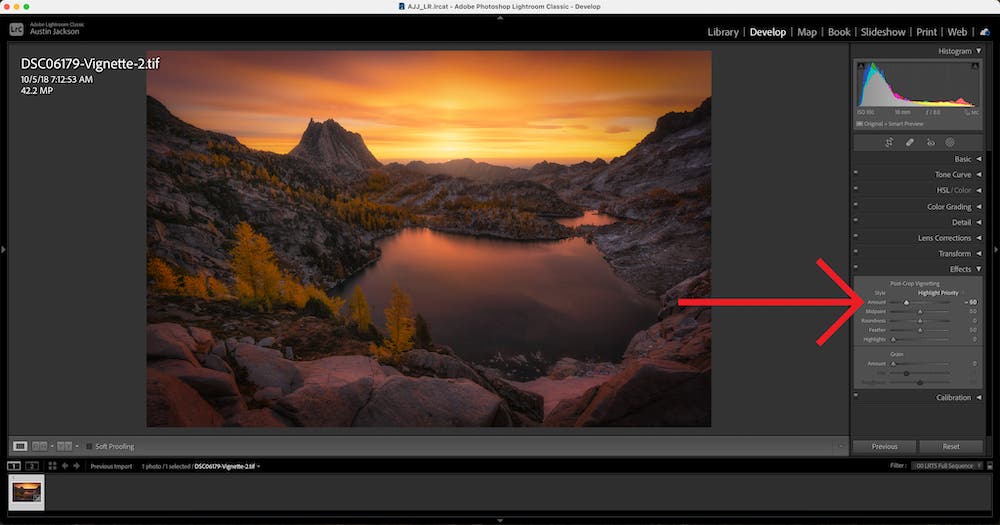
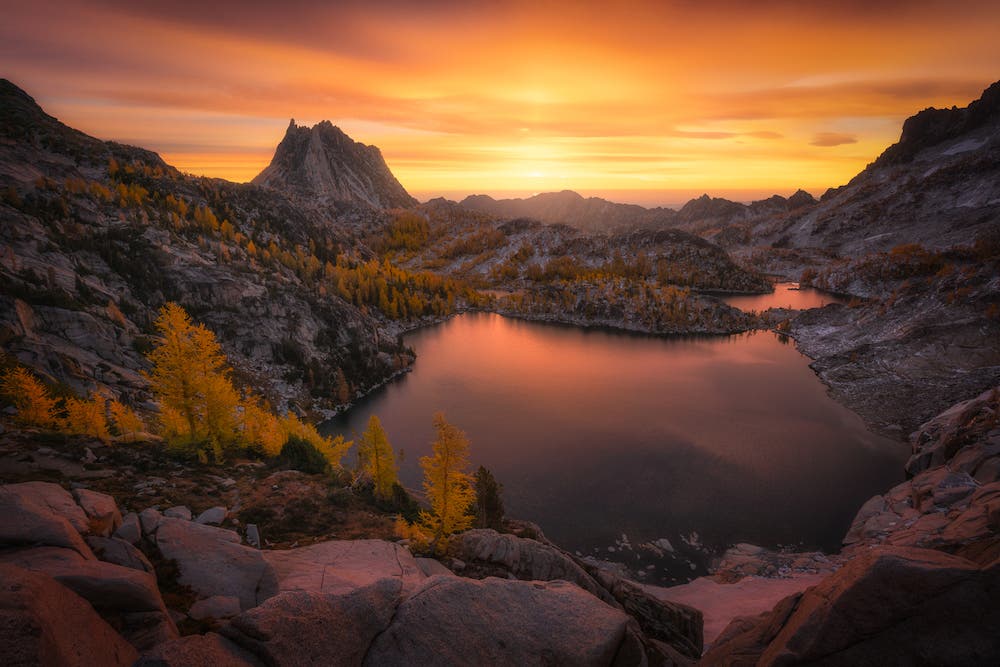
Next, adjust the other sliders to make the vignette look as seamless as possible. Remember, the best vignettes darken the edges enough to bring focus to the center of the photo, but aren’t so dark that everyone can tell that you’ve done it. In the example photo shown here, I decided to reduce the midpoint, and increase the feather and highlights, while leaving roundness at 0.
These settings resulted in this before and after. Notice how the vignette really helps finish the photo off with a professional look.
Tips for Using a Vignette
Apply the Vignette as the Final Step in Post Processing
Apply a vignette once you feel like your photo is completely done being edited. Using a vignette anywhere else in your editing process can make it more difficult to edit the photo. It’s always best to edit the photo without the vignette, and then add it afterwards to apply the finishing touches. If you edit the photo with the vignette on already, you can end up with photos that look off because you’ve made adjustments while the edges were darkened.
Use the Highlights Slider
Many photographers don’t know about and don’t use the Highlights slider. You should be using this slider on almost every one of your photos when applying a vignette. Protecting the highlights helps keep the image looking realistic and your vignette from looking too fake. Even if there aren’t any major highlights present around the edges, increasing this slider won’t hurt the image.
Remove Lens Vignetting and Add Your Own Vignette Later
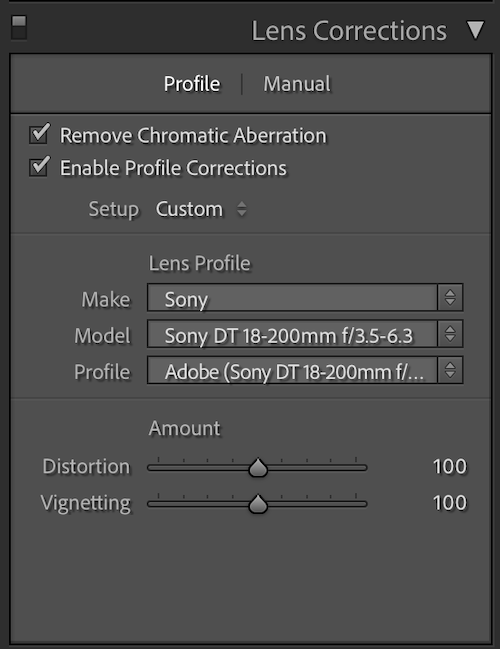
Many lenses will unintentionally vignette your image when you’re out shooting. Remove this vignette easily by applying Profile Corrections in the Lens Corrections dropdown. By enabling Profile Corrections, Lightroom can usually read the metadata off of your photo to figure out what lens you used, and correct the vignetting. You want to do this before editing your photo and then add the vignette back later because we want to have full control over the vignette. If you aren’t using Profile Corrections, you’re letting the vignetting created by the lens dictate the way your photo looks, rather than deciding how much vignette is necessary by yourself.
Avoid Vignetting if Important Subjects are on the Edge of Your Photo
For the most part, I wouldn’t recommend having any important element on the edge of your photos. However, if you do, avoid using a vignette and darkening these subjects. For example, if you have a large group photo, make sure your vignette isn’t darkening the faces of those on the edges of the group. This is where using the midpoint and roundness sliders can come in handy to adjust the vignette to just affect the top and bottom of the photo.
Utilize the Feather Slider When Applying Strong Vignettes
The Feather slider is your friend if you’re trying to really darken those edges. Using feather, you can apply a pretty heavy darken to the edges of the photo while still keeping the vignette looking seamless. Increasing the feather softens the edges of the vignette. Very seldom will you ever want to reduce the feather amount, because this hardens the edges, making the vignette look much more obvious.
Using vignettes can help bring your photography to a whole new level and add a professional finishing touch to your shot. Keeping your viewer focused on the center of your photo can help keep their eyes on your photo longer, and make each photo look more appealing. No matter what editing software you use, it should be easy to apply a vignette. Play around with different settings and get some practice using vignettes, and you’ll be a master in no time!


