The magic of a good portrait is a winning combination of an interesting subject and flattering (or dramatic) lighting. After choosing a subject, there are basically two types of light you can use: a main light and a fill light.
What is a Fill Light?
The goal of the main light is to provide basic illumination of the subject. This could be a strobe, LED, speedlite, constant light, or even sunlight. But the goal of the fill light(s) is to fill-in a shadow or shadows.
The key to using fill light effectively — and beautifully — is to not have it look like you are adding light that is creating shadows. The purpose of a fill light is to illuminate the parts of the subject that the main light cannot reach.
To illustrate some of the many techniques you can use for natural-looking fill light, I’ll share with you some of my favorite photographs from Venice’s Carnival, which takes places each year in February. We’ll start with examples using a hand-held LED light for the fill light, and then move on to using a speedlight.
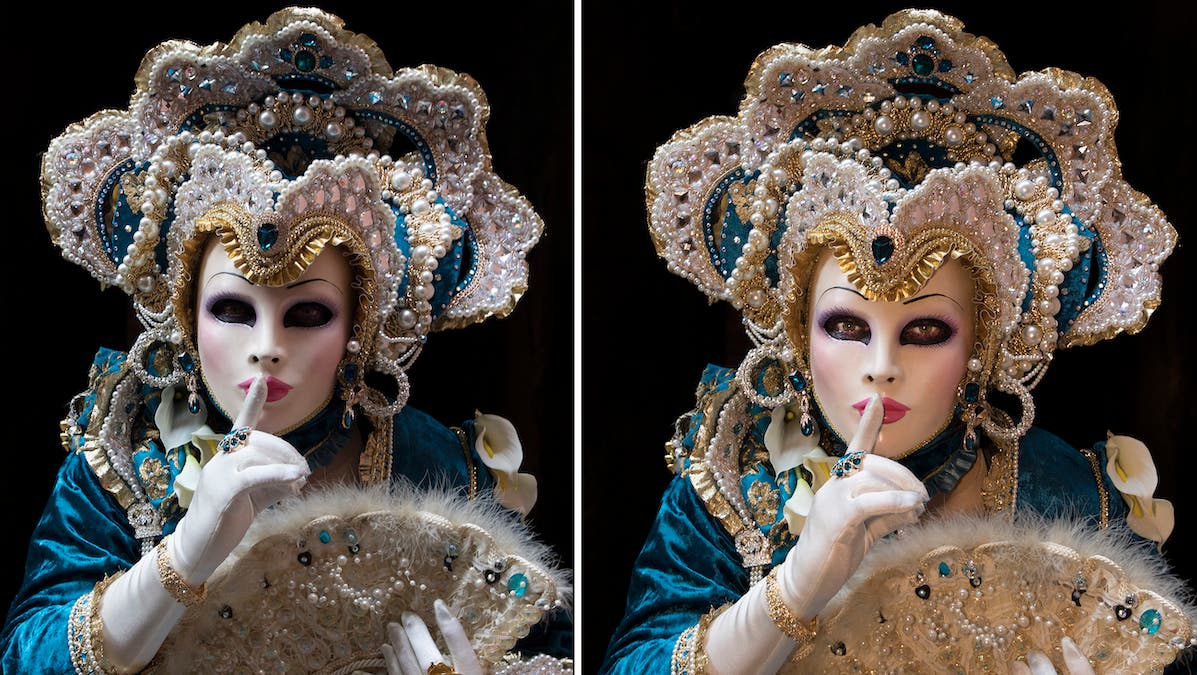
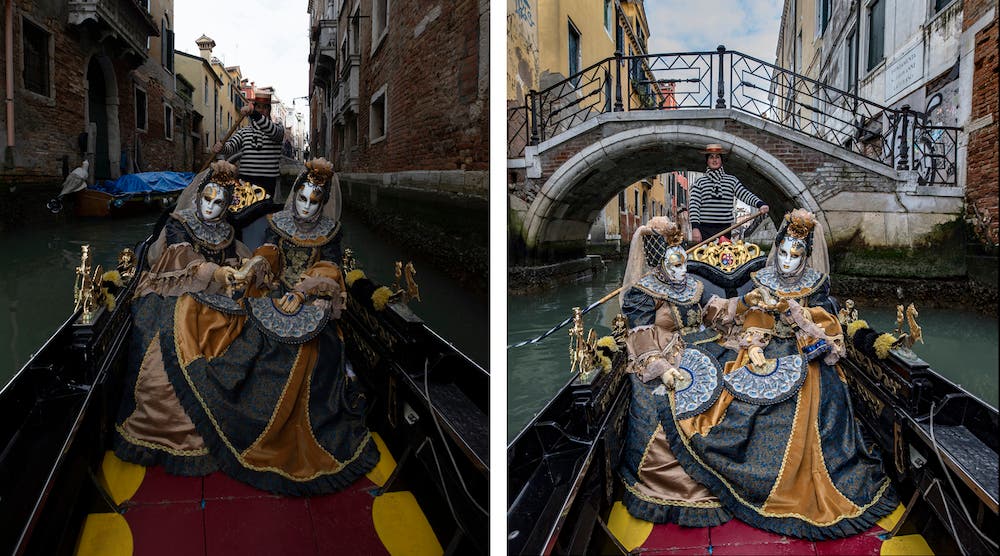
Compare the two photographs that open this article. In the left photograph, the model (who was standing in the shade) is illuminated by natural light only. If you like photographs with a sense of mystery, you may like this photograph because you can’t see the model’s eyes. However, if you think the eyes are a key element in portraiture, you’ll probably like the fill light photograph on the right better.
LED (Constant) Light
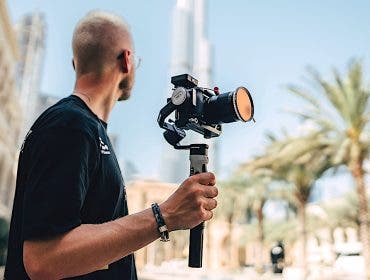
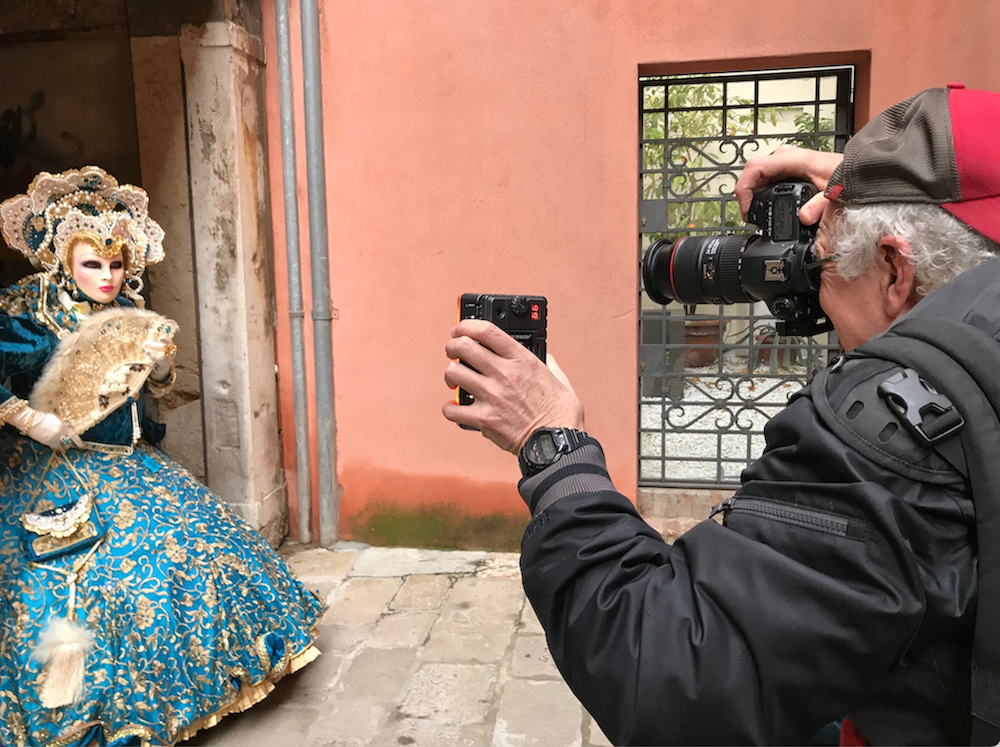
Above is a behind-the-scenes shot of me using a portable LED light onto the subject.
Here’s the technique I used to get a natural-looking photograph:
- Set your camera on Aperture Priority and set the correct exposure for a natural-light photograph.
- Adjusted the light output from the LED light by moving the light closer to and further away from the subject. I also played around with increasing and reducing the light output from the LED light.
- To “warm up” the portrait, use the warming panel that typically comes on a LED light. Another option would be to “warm up” the portrait in Photoshop or Lightroom.
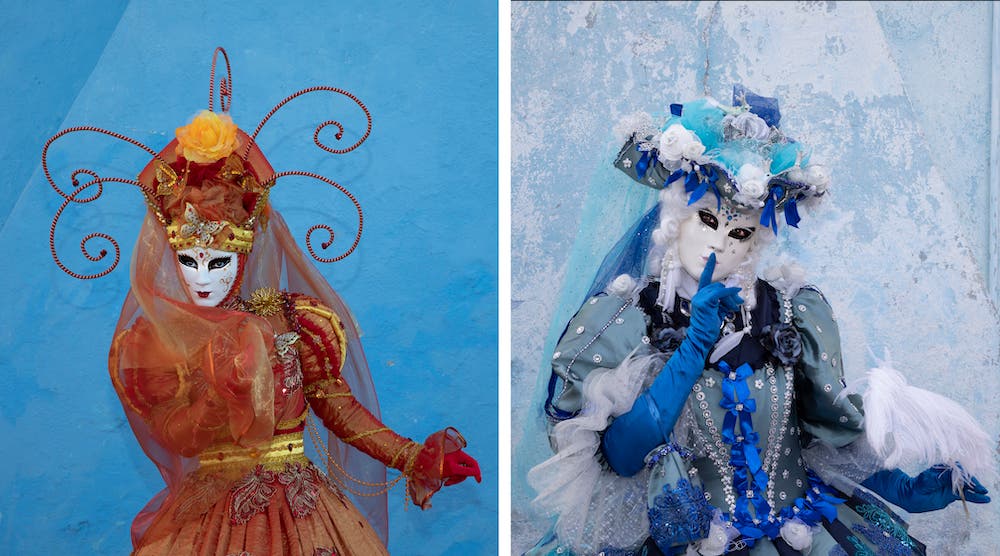
The photograph on the left is an example of soft, unnatural-looking shadows (on the wall behind the model) created by the fill light. The solution here — using the same LED technique described above — would be to move the model away from the wall. This is the technique I did when taking the photograph of the model on the right.
Outdoor Speedlight as Fill Light
Compare the two photographs above. The photograph on the left is a photograph using only natural light. The photograph on the right uses a speed light as a fill light: notice there are no shadows on or around the subjects. That’s because the light from the speed light balances with the natural light – which, again, is the goal of fill light in most cases.
But first, know that this is only one of several techniques for achieving the desired effect. For me, I have found that it offers total creative control over the light.
The technique is below:
- Set your camera on Manual exposure.
- Set the shutter speed at or below the maximum flash synch speed.
- Adjust the aperture so that you have a good exposure of the brightest part of the scene (in this case, it would be the sky).
- If your shutter speed is too low for a sharp shot (due to camera or subject movement), boost your ISO, which will let you shoot at a fast shutter speed.
- Take a shot with your speed light turned on TLL.
- If the subject or subjects are overexposed, reduce the light output on the speed light. If the subject(s) are too dark, increase the light output on your speed light.
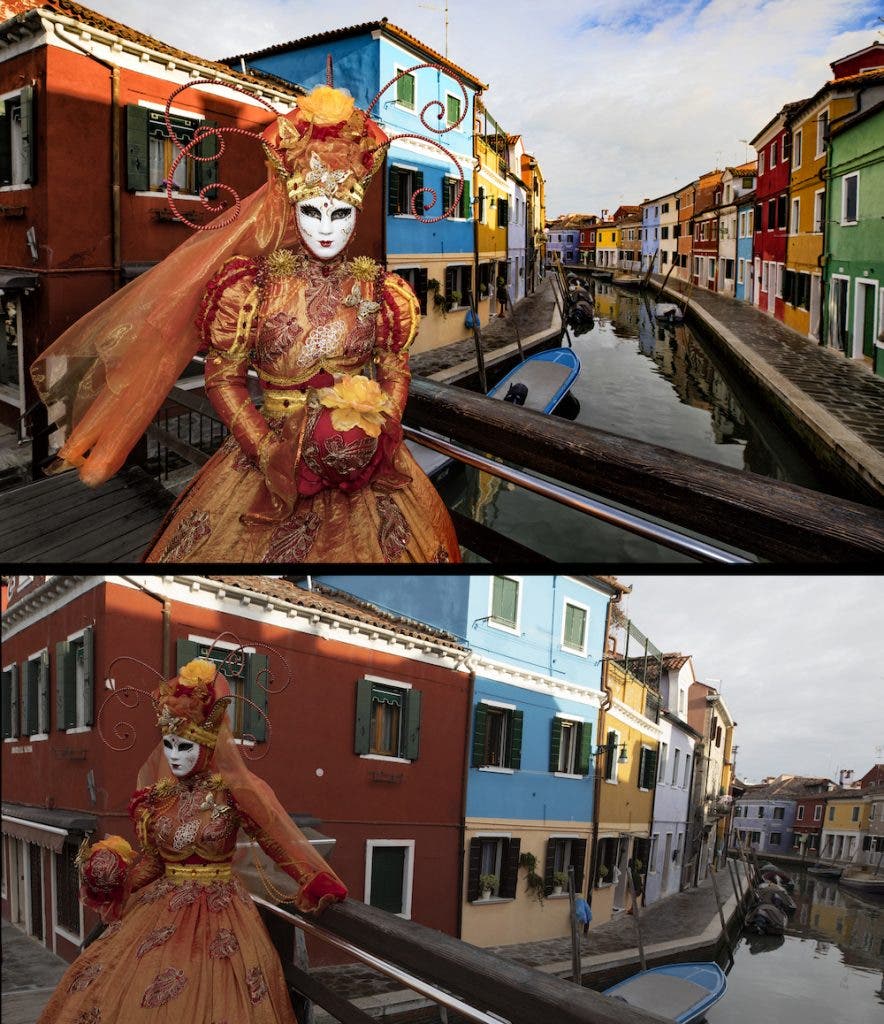
This technique is especially useful when a subject is in the shade and the background is many times brighter than the subject, as illustrated in the photographs above.
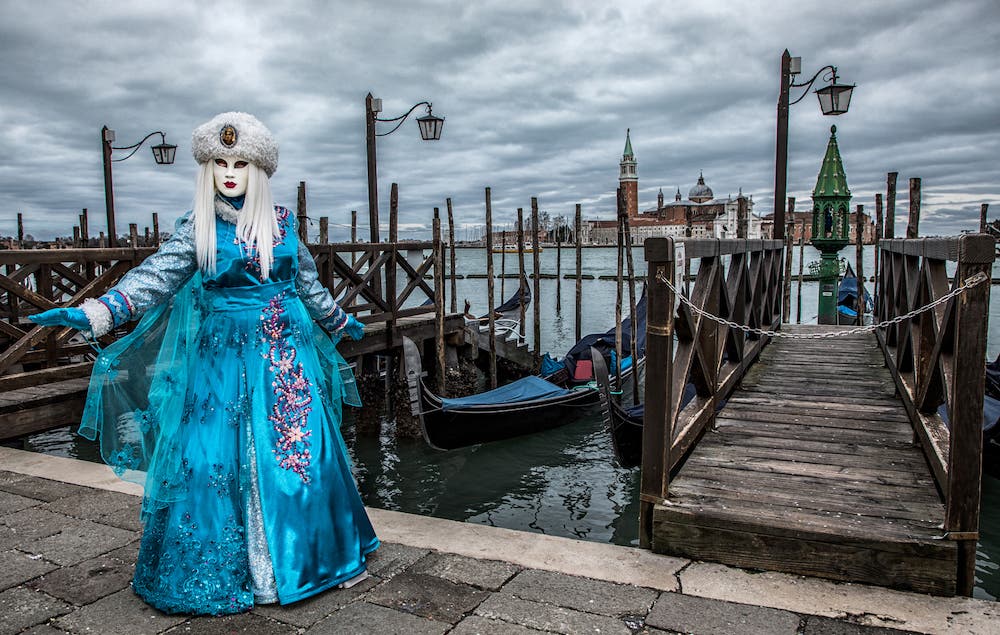
Here’s another creative idea: Make the background darker than the subject, so the subject stands out and the photograph takes on a darker mood.
Here’s the technique for making the background darker:
- Set your camera on Manual exposure.
- Set the shutter speed at or below the maximum flash synch speed.
- Adjust the aperture so that your background is underexposed — maybe by a stop or more.
- If your shutter speed is too low for a sharp shot, boost your ISO which will let you shoot at a fast shutter speed.
- Take a shot with your speed light turned on TLL.
- If the subject or subjects are overexposed, reduce the light output on the speed light. If the subject or subjects are too dark, increase the light output on your speed light.
Indoor Speed Light as Fill Light
Let’s move indoors and take a look at how we can use a speed light indoors for fill light. In both cases, I am using my Canon 600Ex Speedlite in a Westcott Softbox.
As a side note, I chose to use a speed light because it’s much more powerful than a LED light. This means you can photograph at a greater light-to-subject distance and — because a speed light is more powerful — you can photograph at lower ISO setting and use smaller apertures.
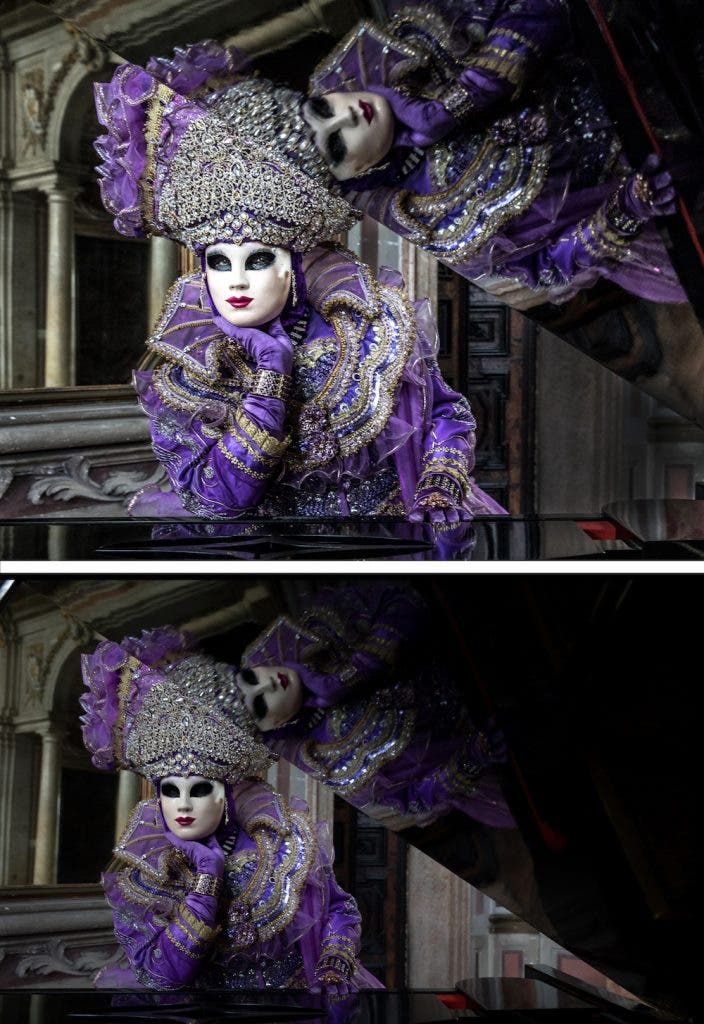
Take a look at the above fill light vs. no fill light comparison. Here, again, I used my speedlight technique to light the subject’s eyes.
Special note: Remember that a speed light has other effects on a photograph. It adds contrast and sharpness to the subject, even when it’s in a soft box.
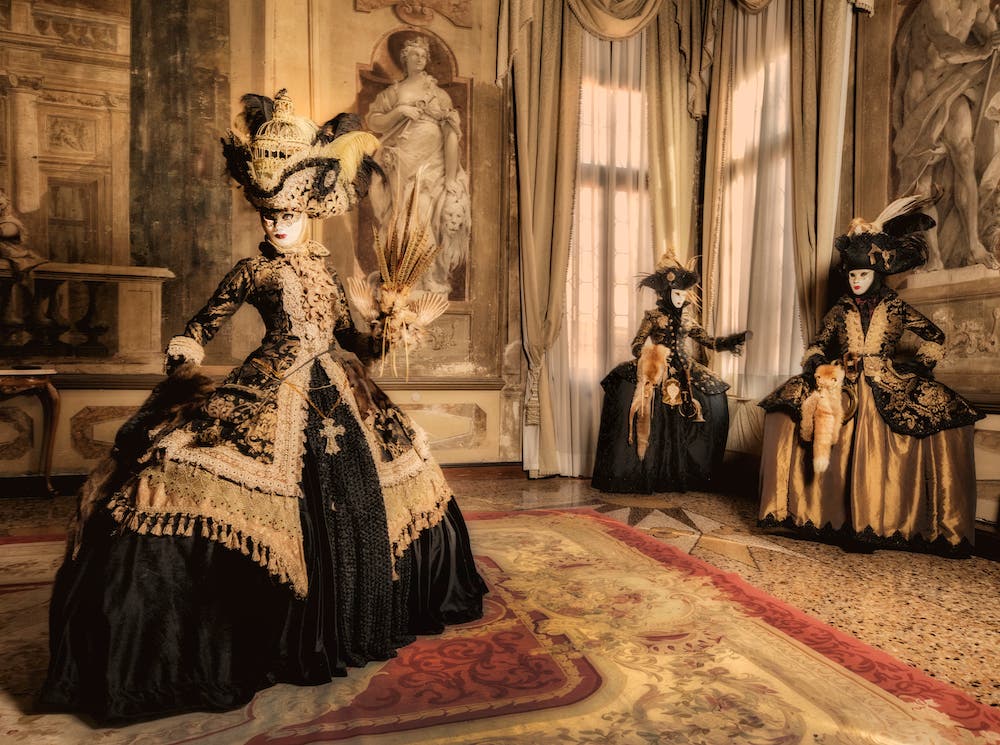
I’ve saved my favorite Carnival photo for last. This one only used one speed light.
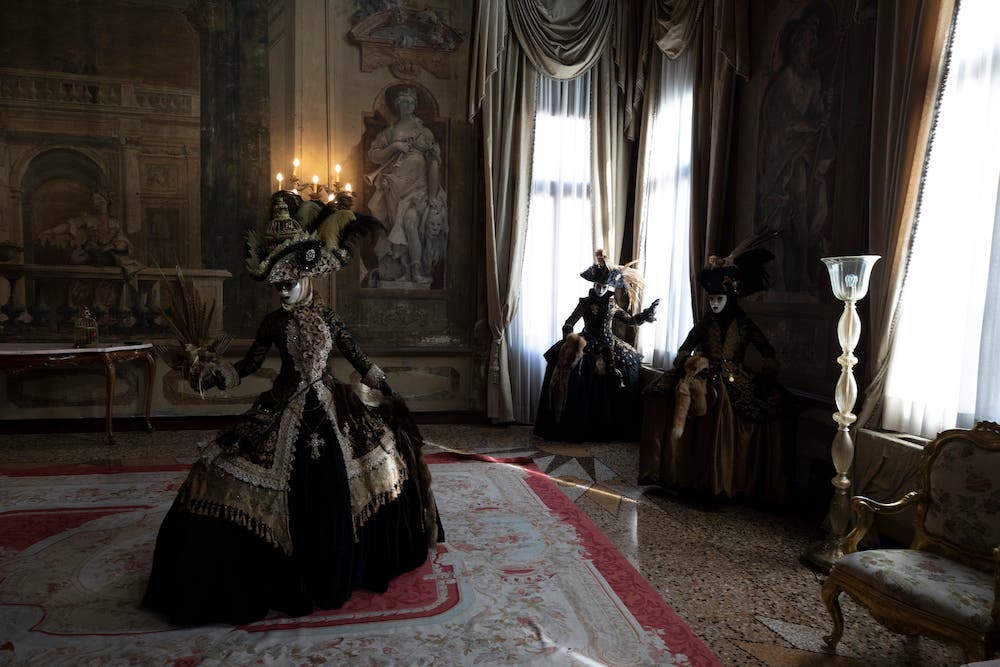
You’ll see the above photo is the same setting, but without the addition of the speed light. The windows are blown out and the subjects are too dark — due to the contrast range in the scene.
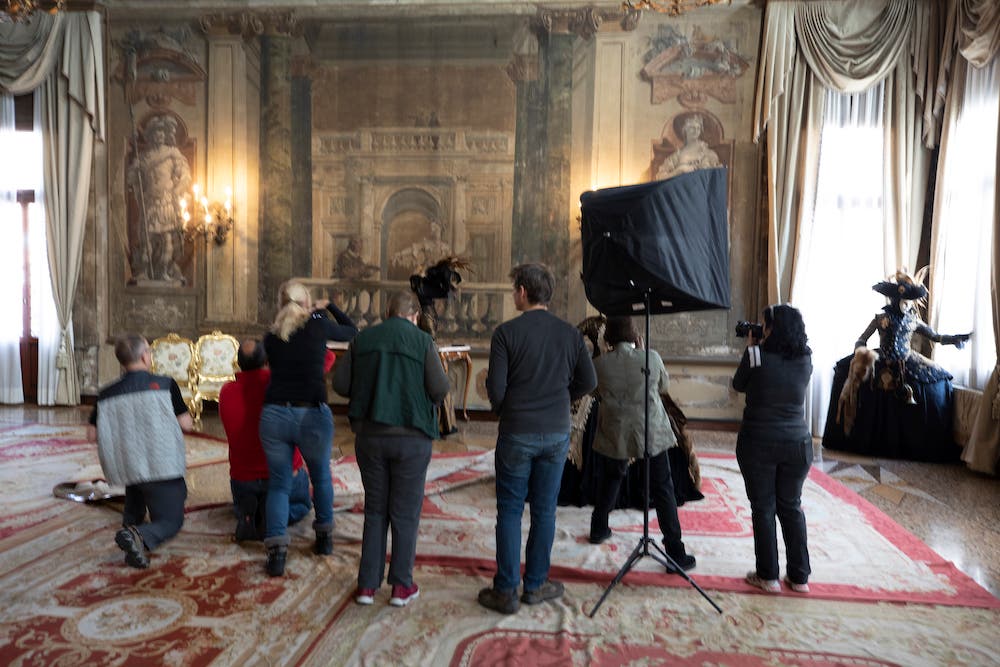
In this behind-the-scenes photograph, you can see my Westcott Apollo Softbox. I fired the speed light inside the softbox remotely with my Canon ST-E3 wireless transmitter, which was attached to the hot-shoe of my camera.
In this situation, I first set my exposure for the windows and then adjusted the output of my speed light to match that light source. This is similar to the subject-in-the-shade scenario that I demonstrated earlier.
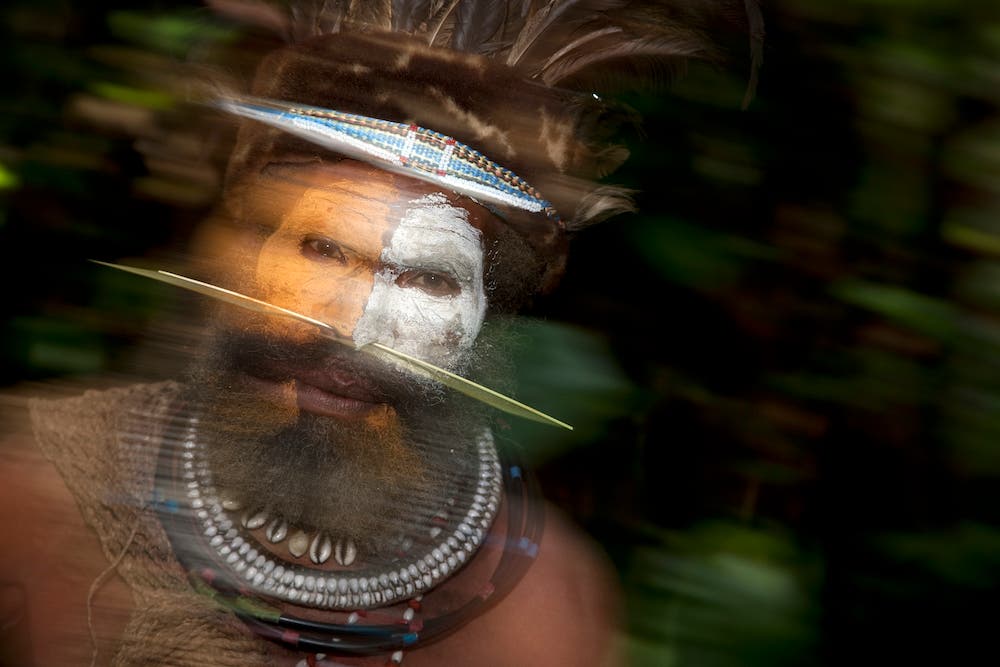
Now, I’d like to share with you a cool and creative technique for using a speed light as a fill light outdoors. To illustrate this, we’ll need to travel to the Highlands of Papua New Guinea.
The technique is called “Dragging the Shutter.” It’s a variation of my basic speed light fill-light technique.
Here’s how to do it:
- Set your camera on Manual exposure.
- Set a slow shutter speed, maybe ¼ of a second.
- Adjust the aperture so that your background is underexposed — maybe by a stop or more.
- You skip this step.
- With your speed light on TLL, take a shot while moving your camera from side to side, up or down, or a combination of the two (which is what I did here). To get the desired effect, you’ll need to experiment several times with the speed at which you move your camera and the slow shutter speed setting.
- If the subject(s) are overexposed, reduce the light output on the speed light. If the subject(s) are too dark, increase the light output on your speed light.
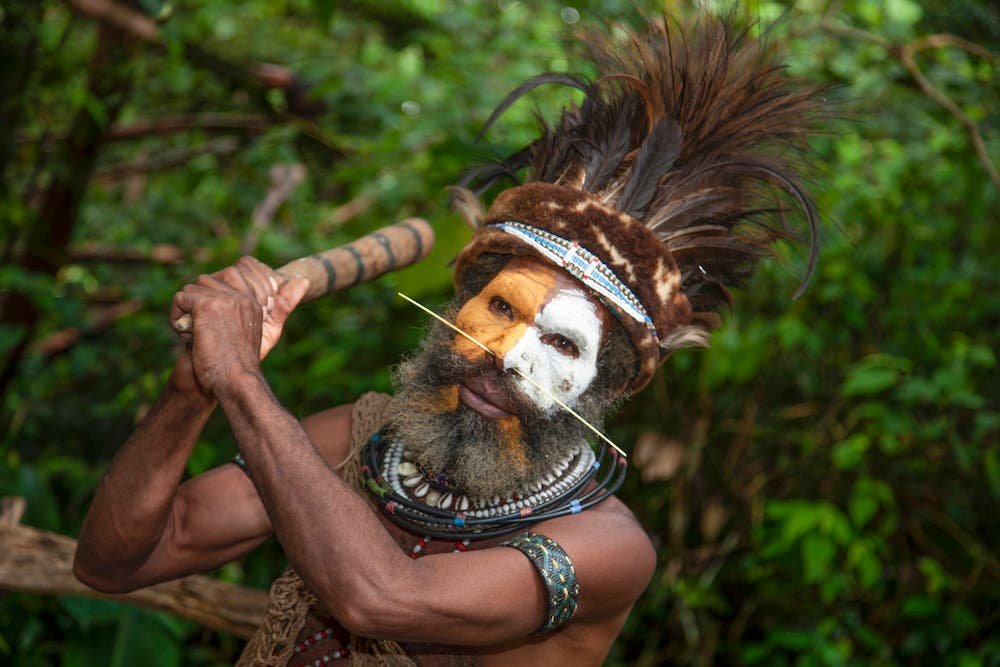
To illustrate how the aforementioned technique can add a sense of motion to a still image, check out this fill light shot of the same Huli Wigman taken without any camera movement.
Now that you have the information, have fun trying out the natural approach to fill light in your own photo portrait sessions!

