Of all the details we photograph on the wedding day, wedding rings are among the most important. They may come in all shapes and sizes, but each ring stands as a symbol of the newlyweds commitment to one another. As such, it’s a must that we pull out all of the stops to capture creative and meaningful wedding ring photos. In case you find yourself stuck in a creative rut or coming up short with new ideas, I’ve put together 10 tips and creative ideas to help elevate your wedding ring photography. Don’t be afraid to combine several of the techniques included in the tips below.
- Gather the Wedding Rings in Advance
- Find or Create a Beautiful Backdrop
- Use Glue Dots to Hold the Rings in Place
- Use Directional Light
- Keep It Consistent
- Go with a Macro Lens
- Break Out the Tripod
- Compose with Care
- Wear the Rings
- Bring It Home with the Edit
Tip #1: Gather the Wedding Rings in Advance
This might not qualify as a technique for wedding ring photography, per se, but it can directly affect your ability to photograph the wedding rings in a timely fashion. During one of your final talkthroughs before the wedding, which I usually do the week before the wedding, ask the bride to gather the rings and have them ready when you show up to photograph bridal prep. Timelines are tight as it is and you don’t want to waste time hunting down the rings. This tip really applies to all of the details the couple wants photographed.
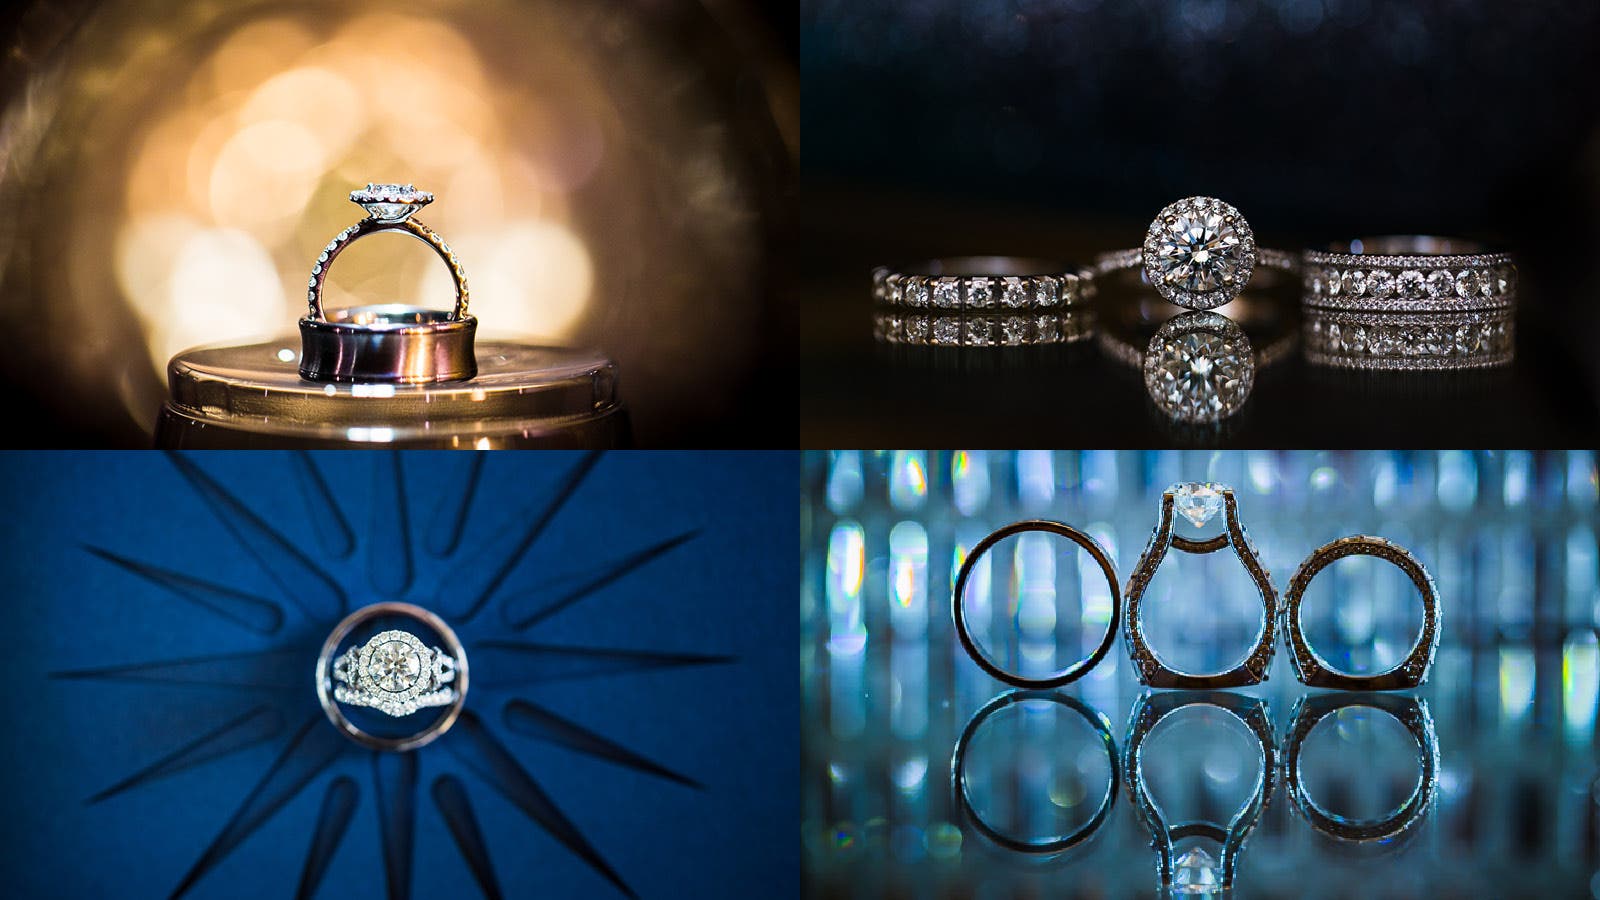
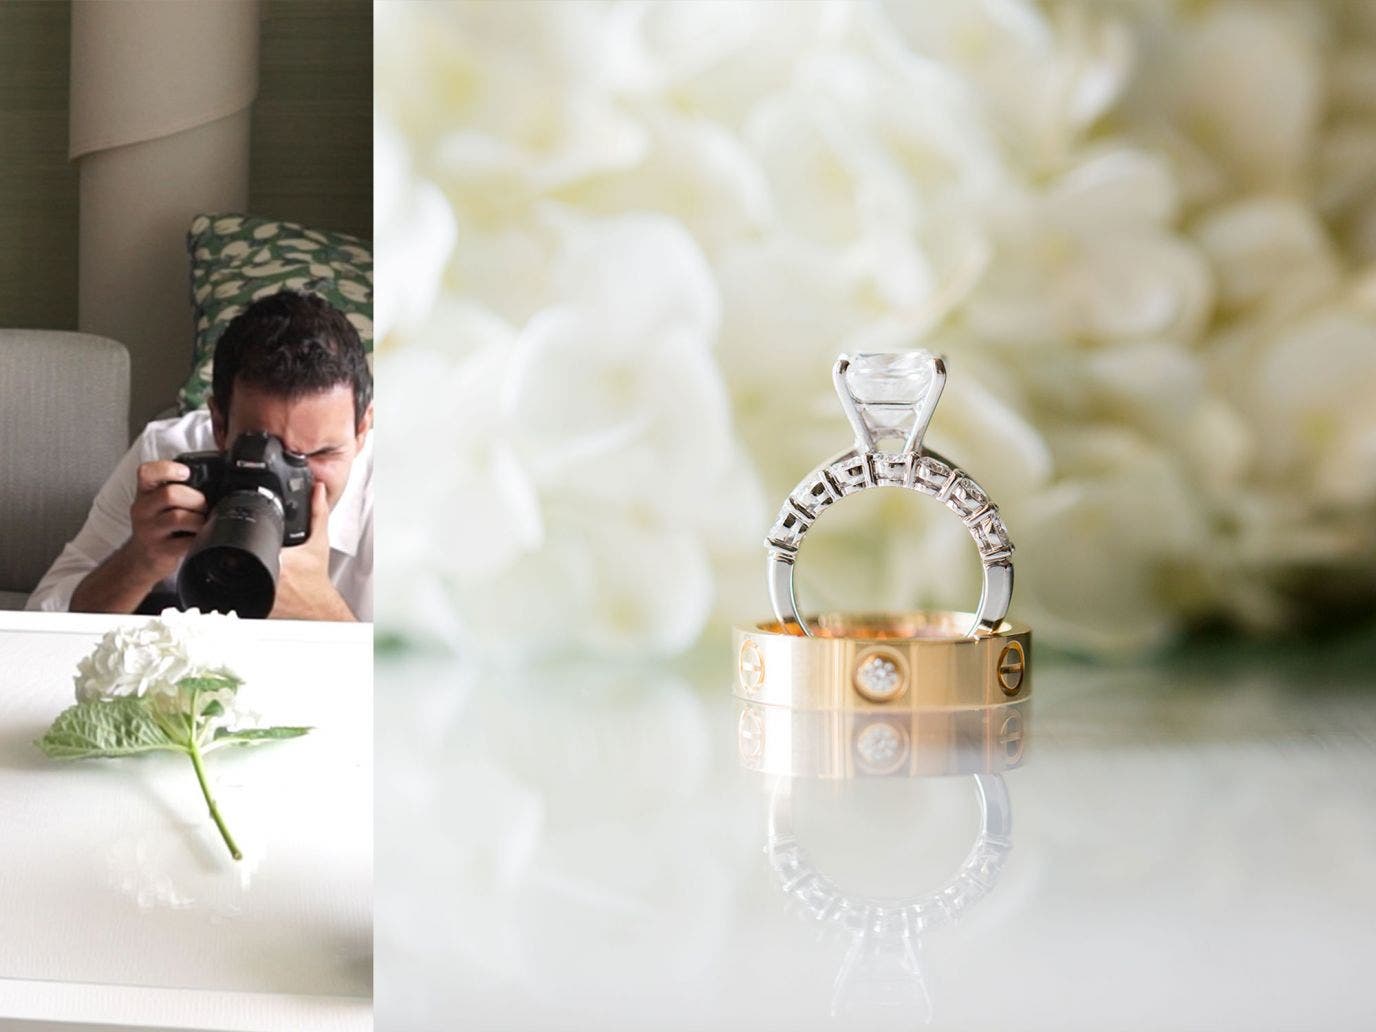
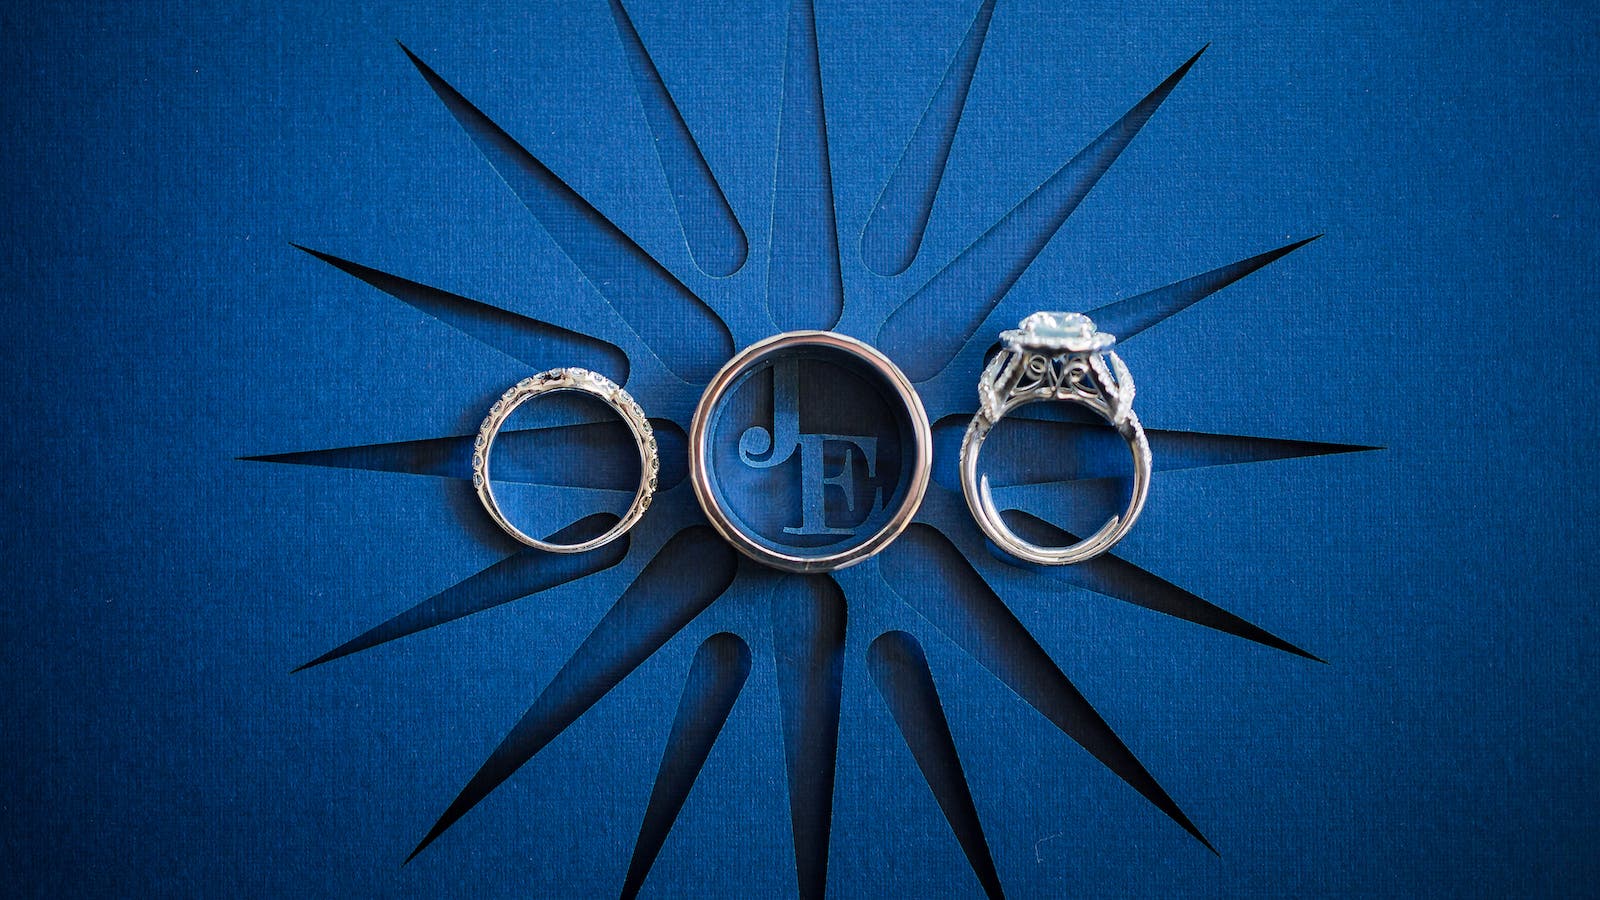
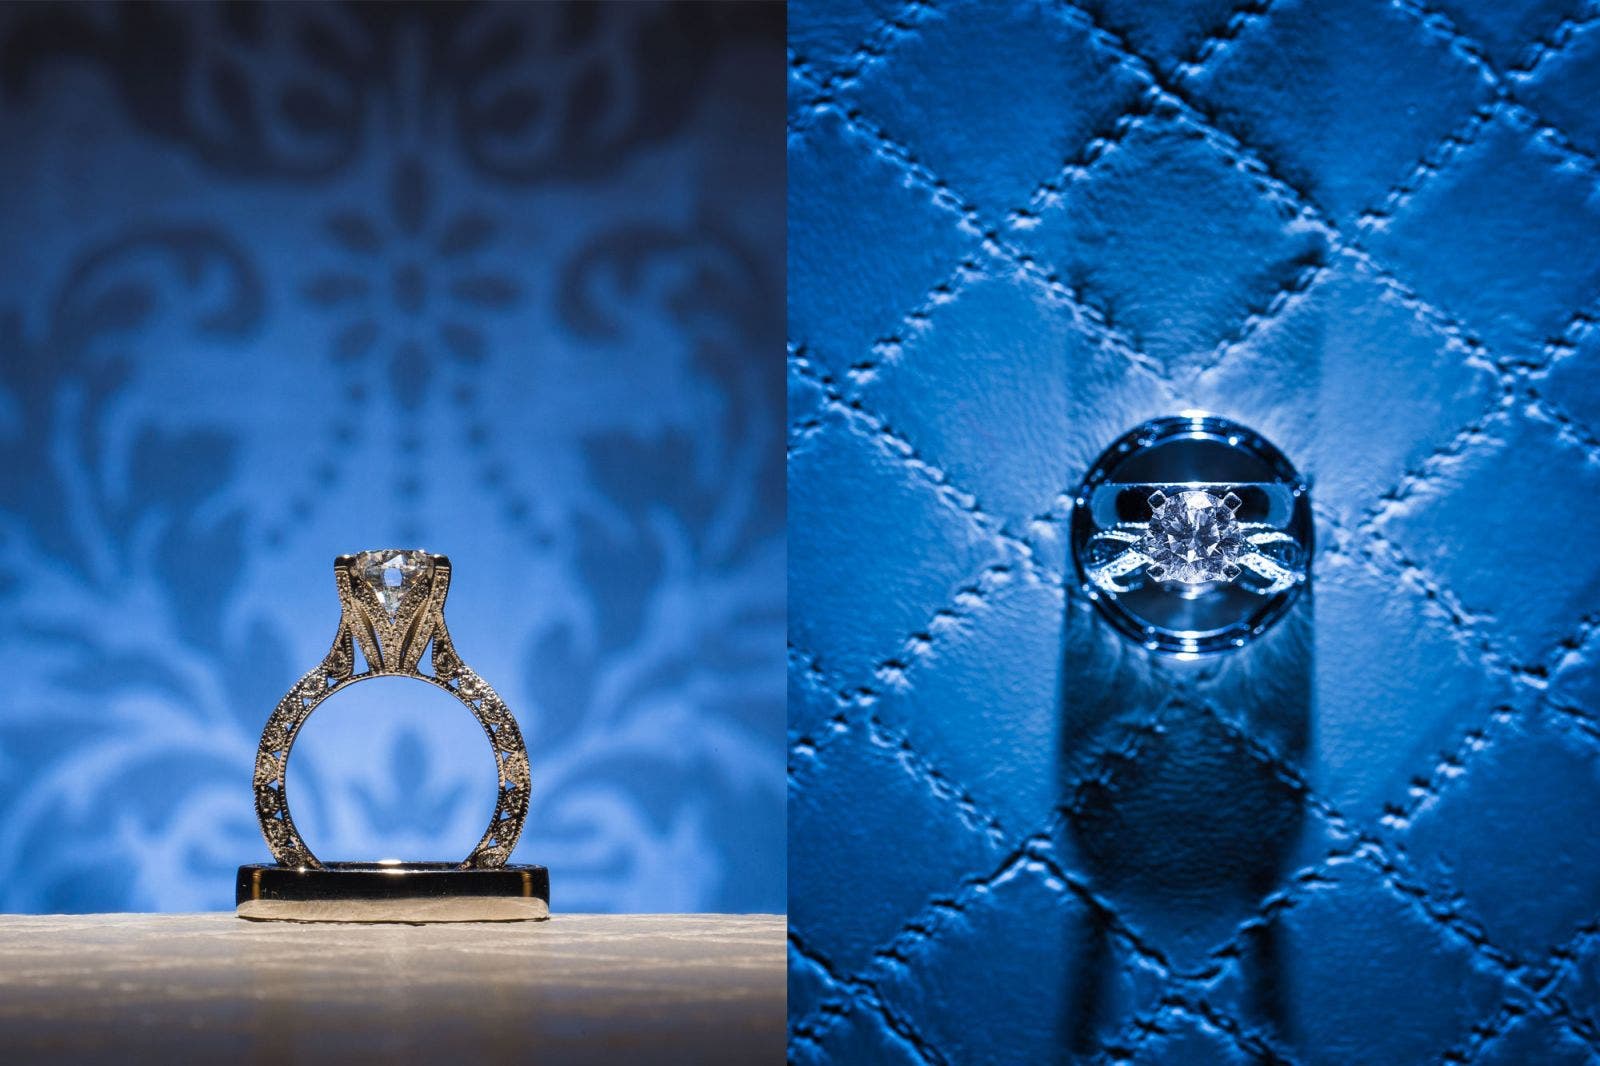
Tip #2: Find or Create a Beautiful Backdrop

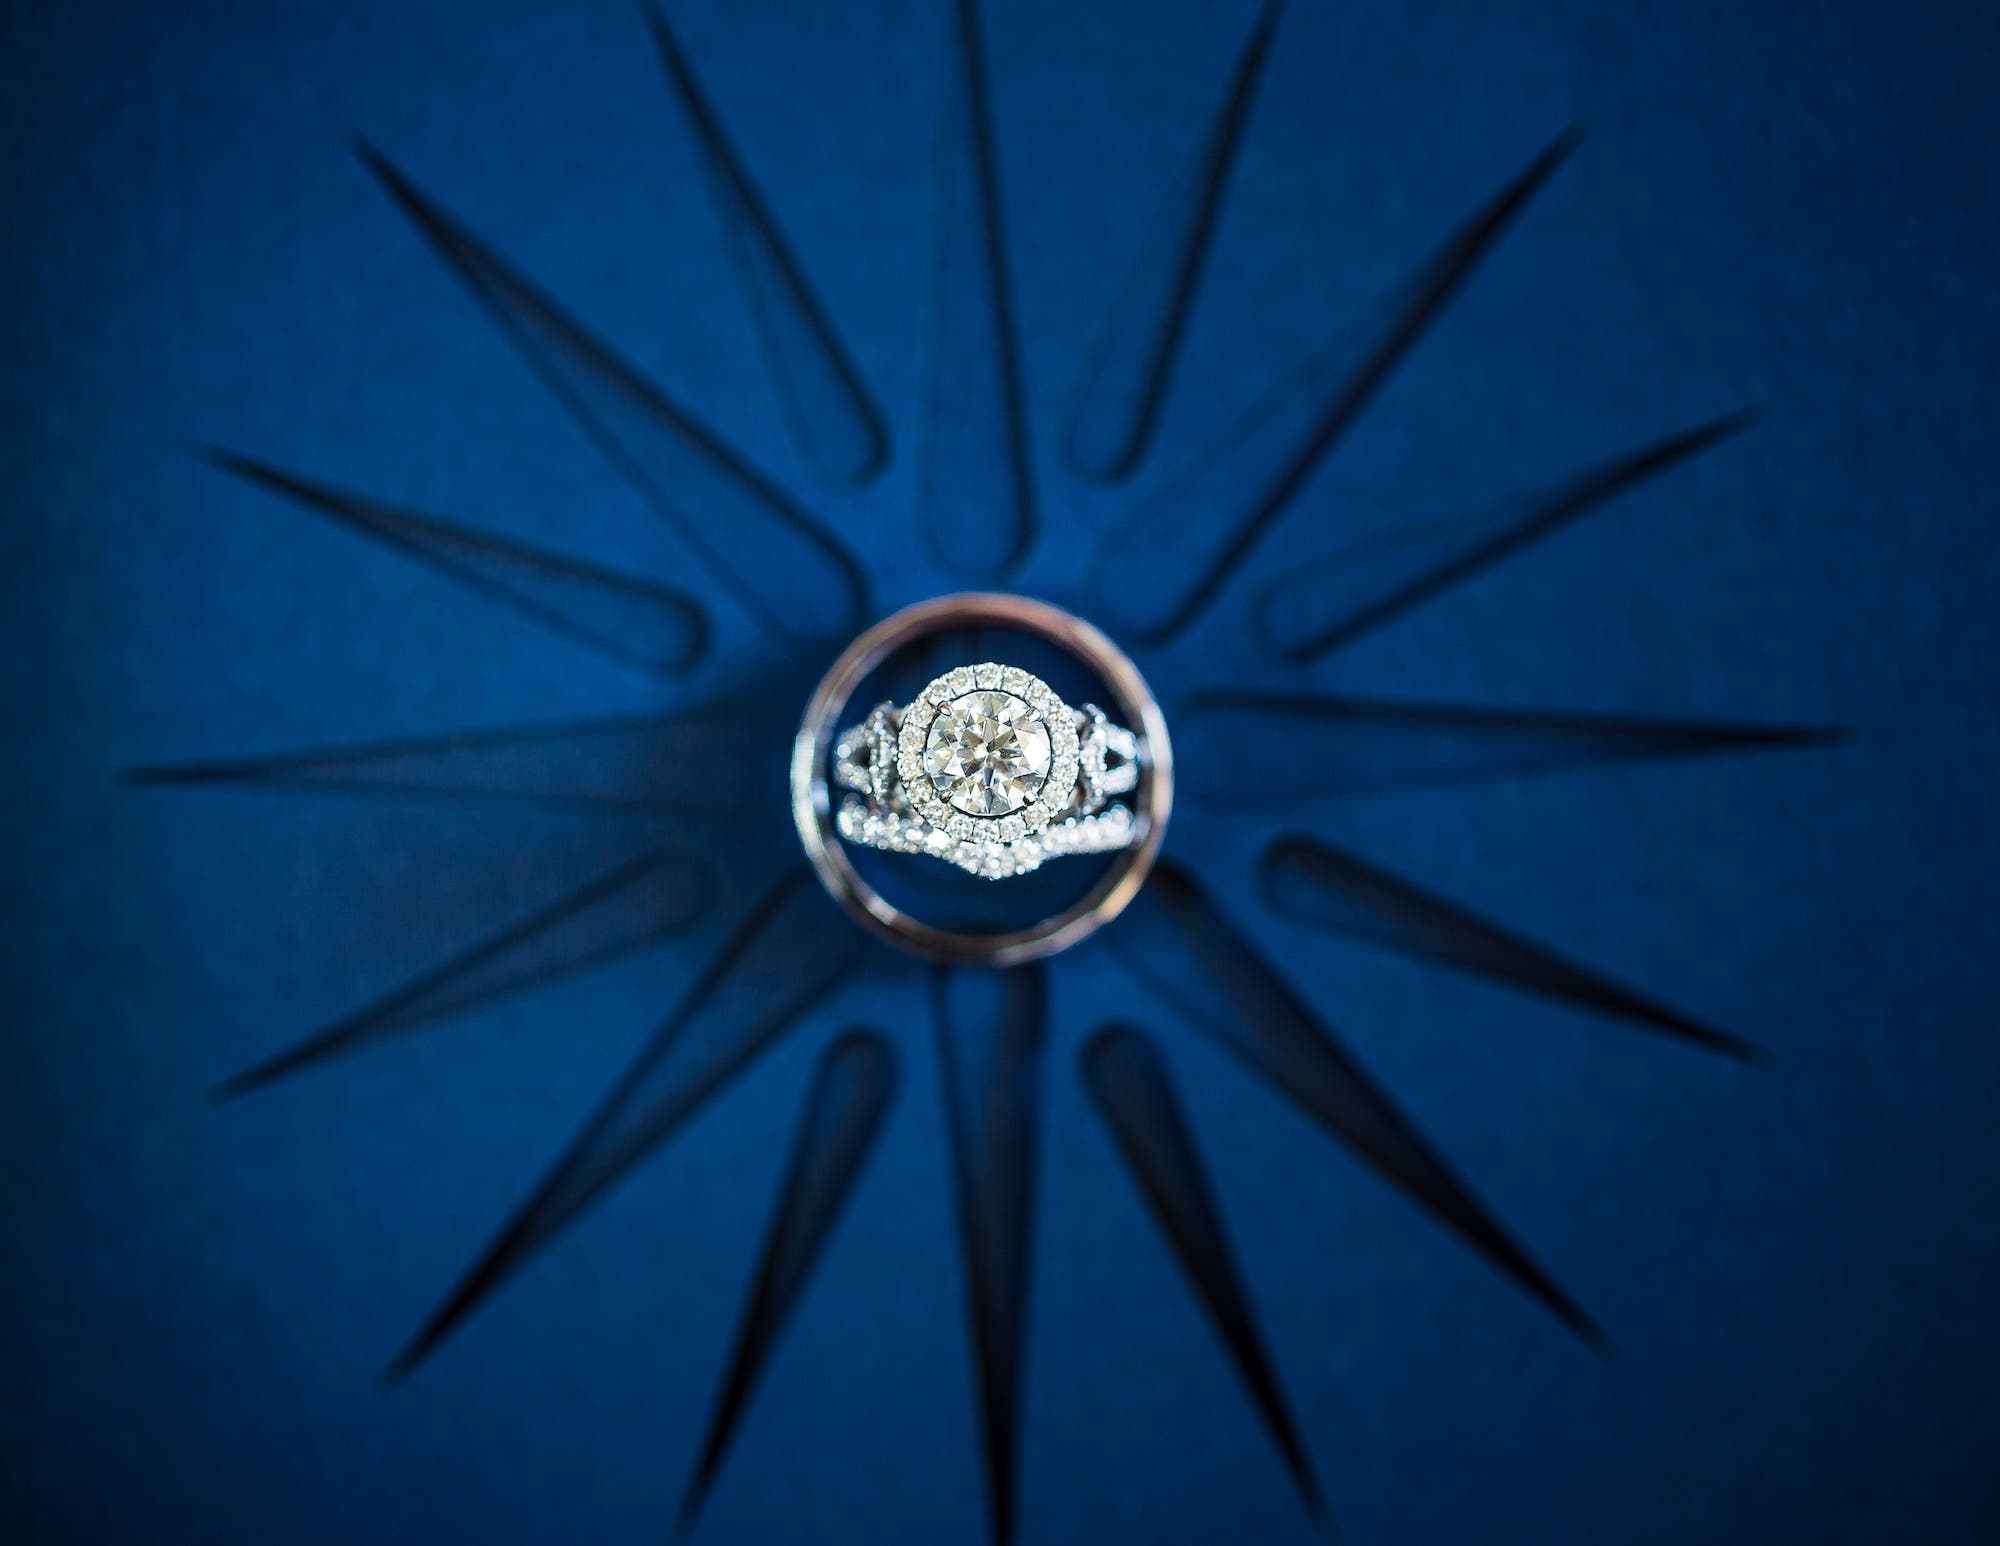
You know the rings are going to look beautiful, so make sure that you find a backdrop worthy of the rings. Sometimes, all you need is a nice texture on a chair and a bit of creative lighting to make the magic happen. In the image above, you can see we placed flashes on opposite sides of the wedding rings, facing one another, to create an interesting interplay between the shadows and the highlights reflecting off the shiny surface of the rings.
You can also incorporate more of the bride’s details into the shot, including the following:
Bridal Bouquet
Wedding Shoes
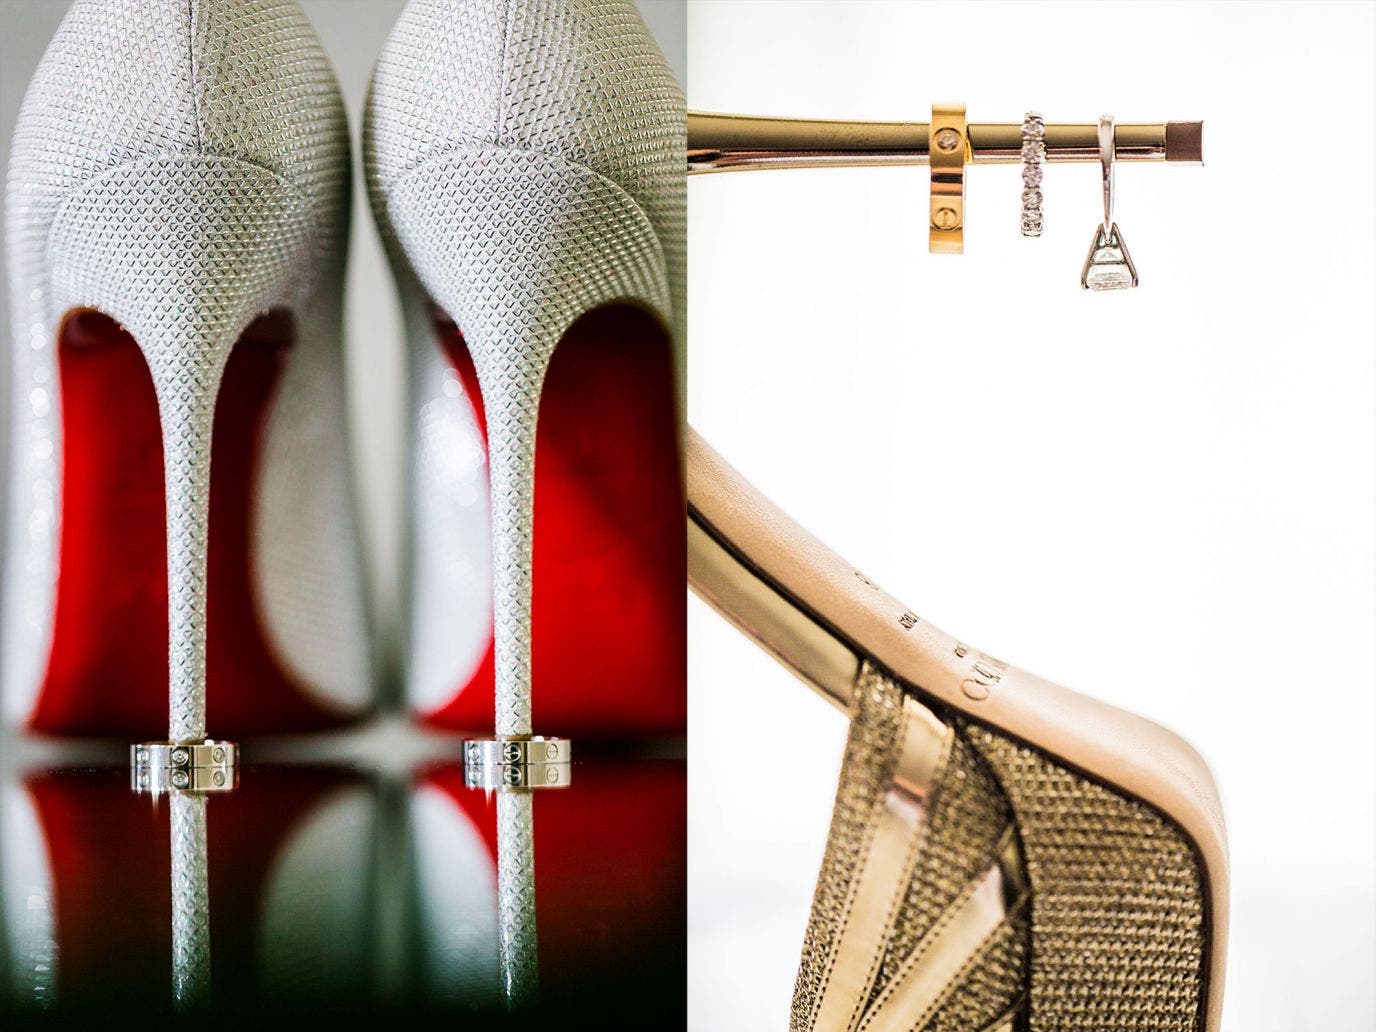
I should note that if you place the ring or other jewelry on or near the shoes, make sure it doesn’t offend the bride or her family. Some cultures frown upon placing sacred jewelry next to traditionally dirty objects like shoes.
Other Jewelry
Wedding Invites
Here are some other backdrop tools & ideas you can use to boost the visual appeal of your wedding ring photography.
Mirror, iPhone, or Other Reflective Surface
LED Lights | Pen Lights or String Lights

Interesting Textures | Furniture, Wall Paper, Etc.
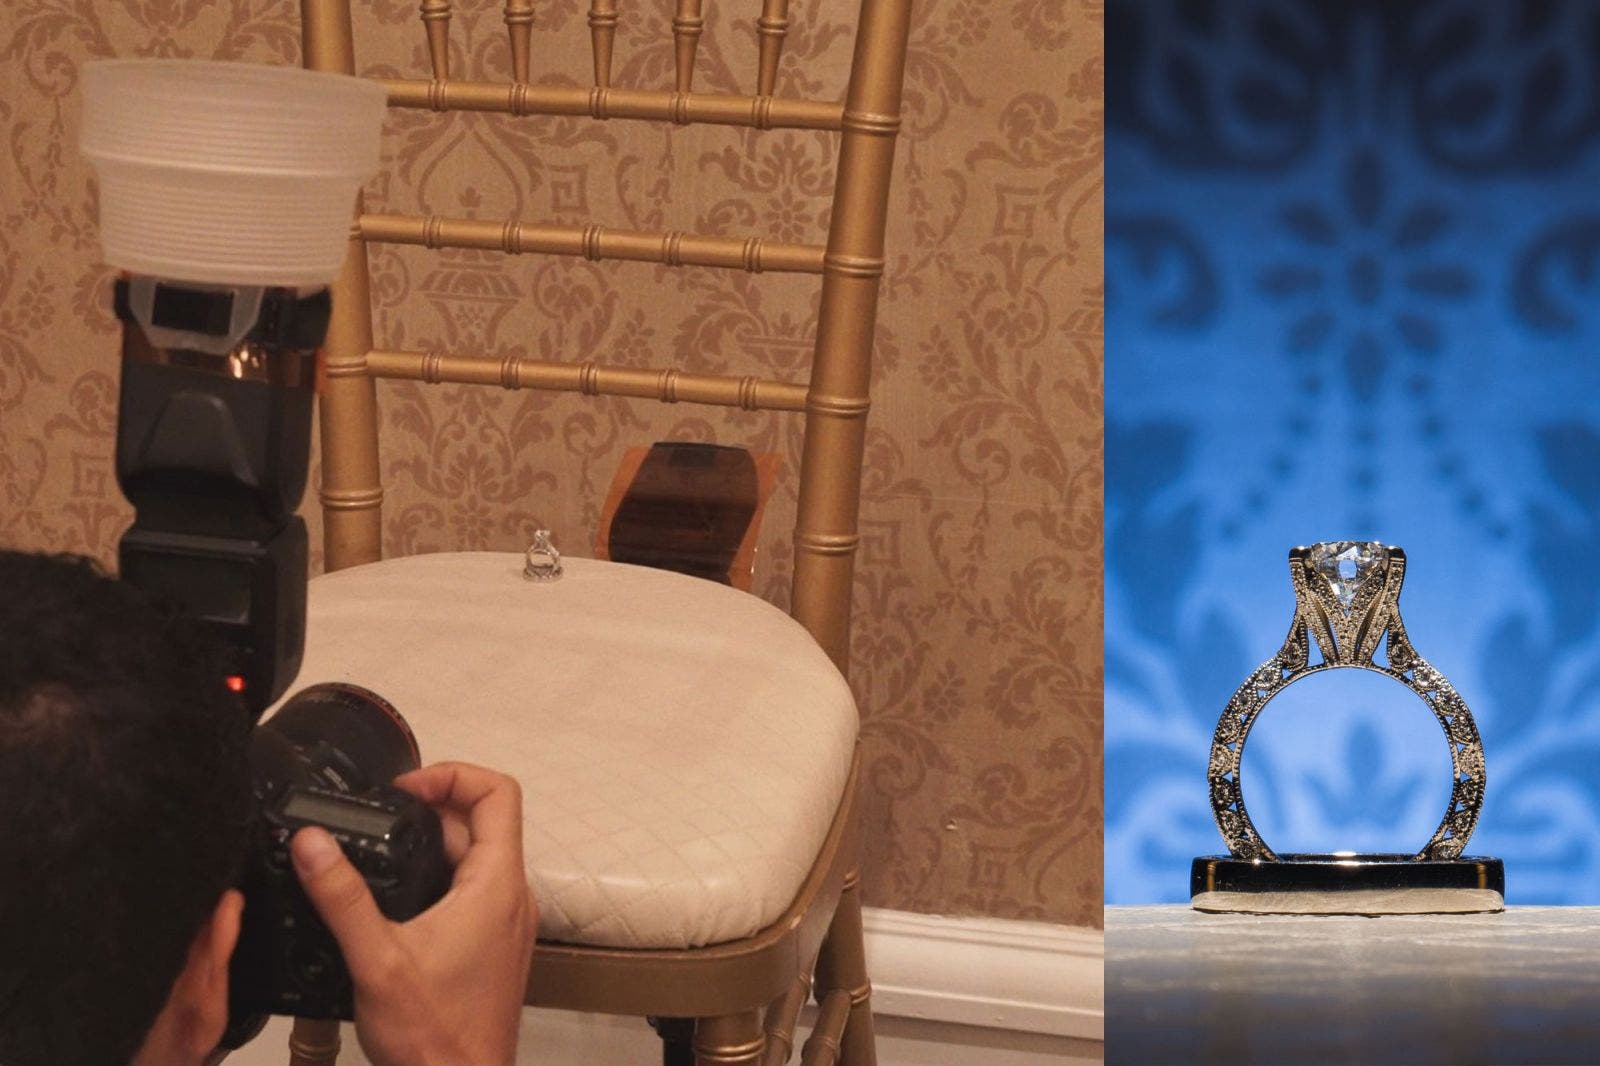
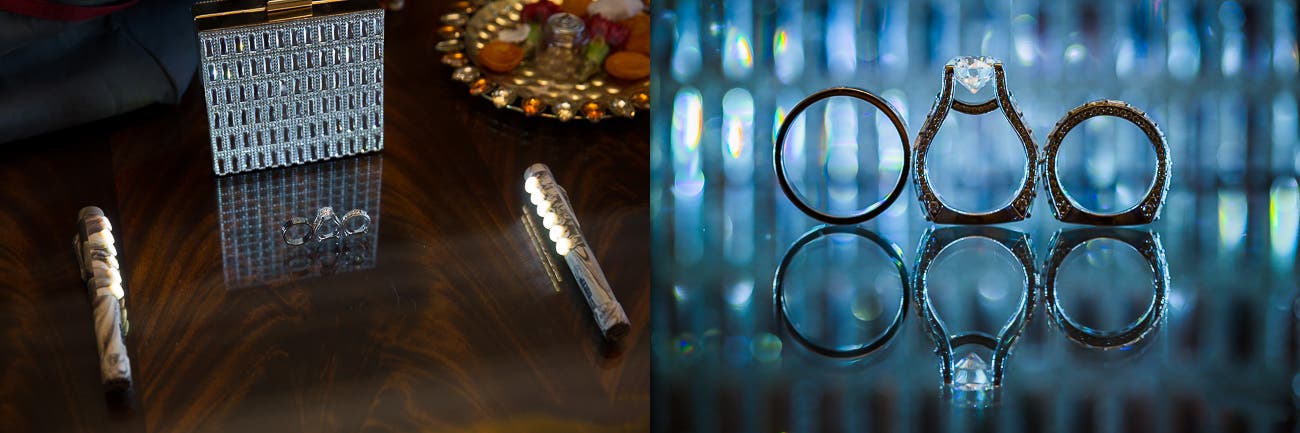
Tip #3: Use Glue Dots to Hold the Rings in Place
Once you’ve decided where you’re going to place the rings, I highly recommend using Glue Dots (if needed) to help keep the rings in place. They’re easy to use and keep out of sight, and they work on multiple surfaces. In the two images above (which are also featured in Tip #2), I used a tiny glue dot to keep the bride’s ring standing upright.
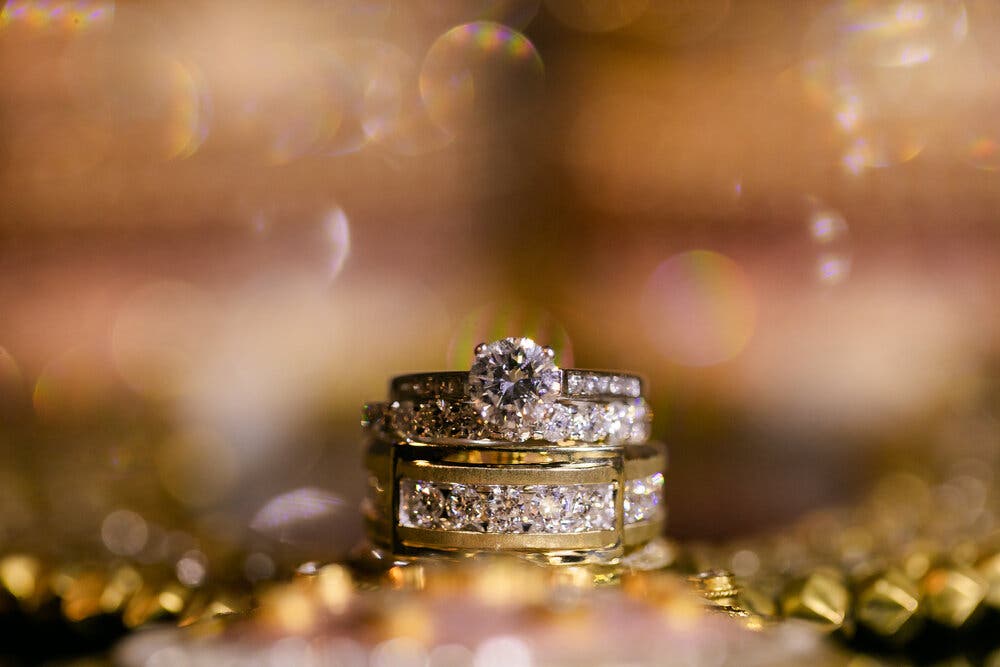
Tip #4: Use Directional Light
Shoot with directional light to add texture and dimension to the rings you’re photographing. Shadows create depth and visual interest. You can easily create and control your shadows by experimenting with different angles of directional light, either from off-camera lighting (flash, LED pen lights, video lights) or natural directional light on location. Flash is going to give you the most dynamic results, especially if you’re using multiple flashes, but the other lights work well for illuminating wedding rings against a dark background or adding a subtle rim light. Constant lights are nice to work with because you know exactly what you’re going to get before you press the shutter.
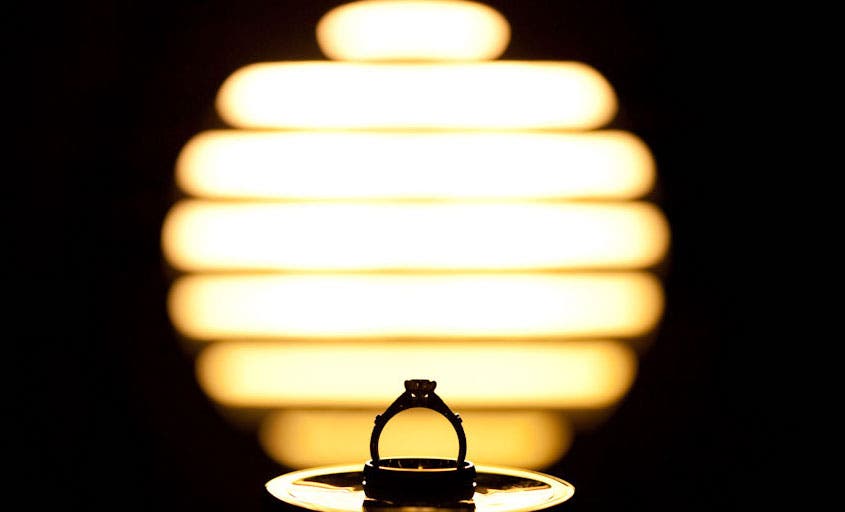
To mix things up, try lighting the space behind the rings to create a unique silhouette shot (see the image above).
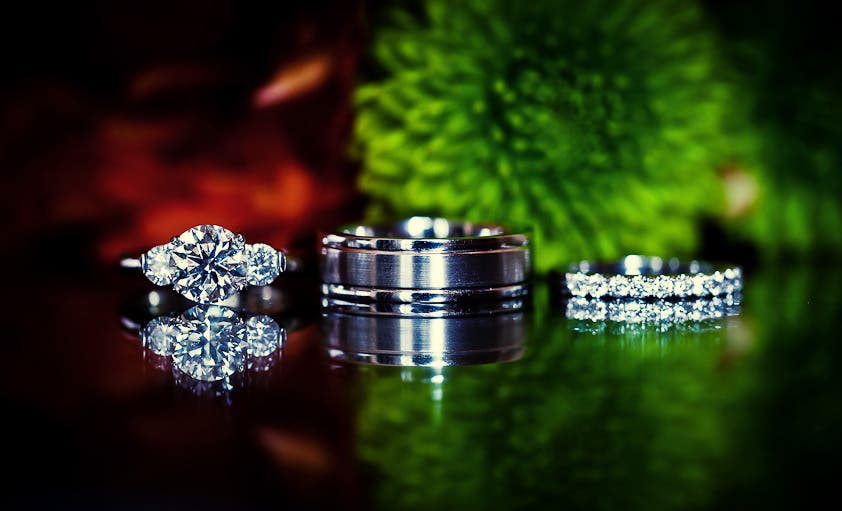
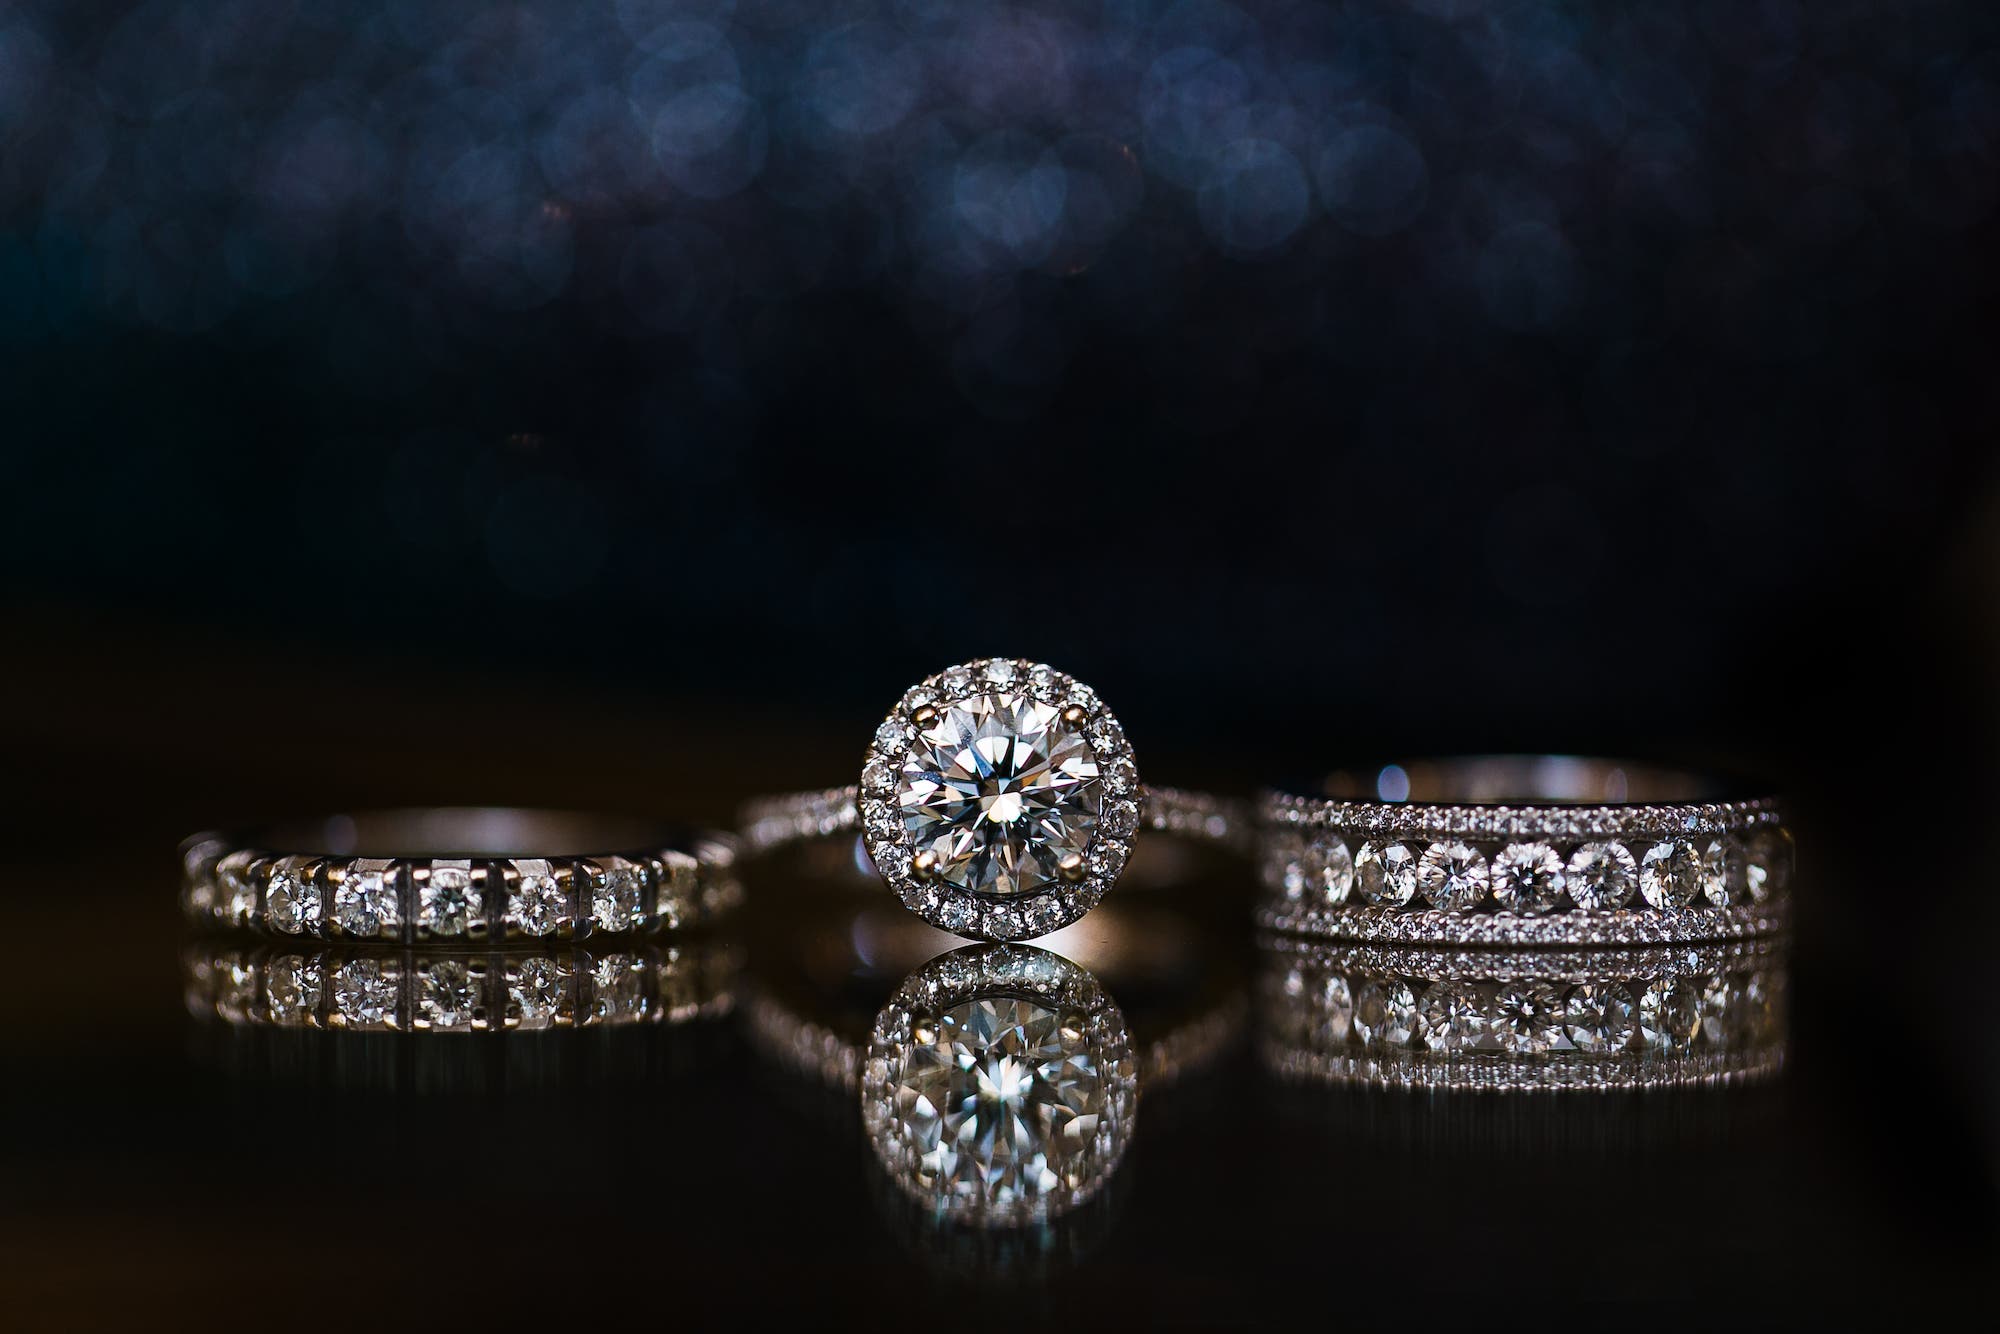
Tip #5: Keep It Consistent

Keep the ring photos cohesive with other detail shots in terms of lighting, background, color palette, theme, and so on. If you start photographing your images with bright & airy, high key lighting, use that same lighting style for all of the details, including the dress, shoes, and other jewelry/objects. If you start with a dark, dramatic look, carry that look through the series of images as well. Shooting with consistency will make it easier to design blog and album spreads, which in turn will help you generate more revenue.
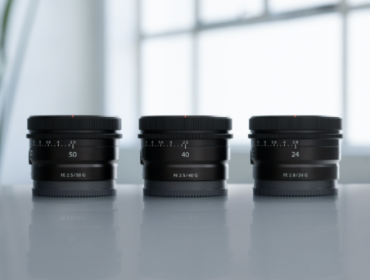
Tip #6: Go with a Macro Lens
It may seem like a costly investment if you only use it on occasion, but there is really no better lens for photographing wedding rings than a macro lens. It’s designed specifically for capturing amazing closeup details. I rely on Canon’s EF 100mm f/2.8L Macro IS USM Lens. It has been my go-to for years and it never lets me down.
Macro lenses tend to render an extremely shallow depth of field with a wide-open aperture, so I recommend capturing your ring shots with the aperture set between f/4 and f/5.6 to retain enough detail. Even then, the depth of field will be somewhat shallow; if you’re photographing multiple rings, be careful to line up rings to the same focal plane. You don’t want one ring to come out tack sharp while the others fall out of focus. Using manual focus and zooming in to check your focus can help ensure your photos are sharp.
Tip #7: Break Out the Tripod for Wedding Ring Photography
Most macro lenses, like the one I mentioned above, include image stabilization, but I still recommend using a tripod whenever possible while photographing wedding rings. Because we’re zoomed in to capture close-up details of the rings, camera shake is more pronounced. Whatever tripod you have on hand should work to minimize any movement. I typically carry a Peak Design Travel Tripod with me for a few reasons: It’s lightweight, sturdy, and easy to set up.
Tip #8: Compose with Care
I really can’t stress this enough: Pay attention to your composition. If you’re shooting for symmetry, then make sure you have it. Don’t settle for slightly off-center ring photos if it’s unintended. If ever details matter, they matter in ring photos. Well, they always matter, but they’re especially important here. Even the slightest imperfection in composition can prove a major distraction when shooting this close up.
Tip #9: Wear the Rings
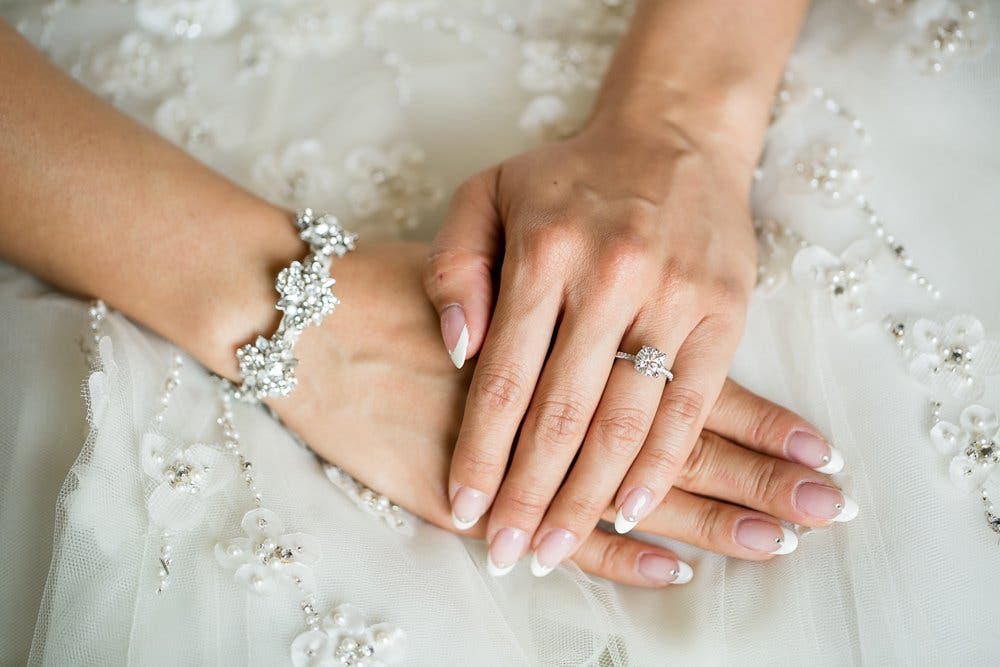
We’ve talked about photographing the rings as a product, but it’s also (or maybe more so) important to photograph details like the wedding rings on the bride. If you’re ever running short on time, asking your bride to wear the ring and other accessories for detail shots will allow you to get the pictures you need while also personalizing them. Some brides may even prefer the lifestyle shots over the commercial-style photos.
Tip #10: Bring Home Your Wedding Ring Photography with the Edit
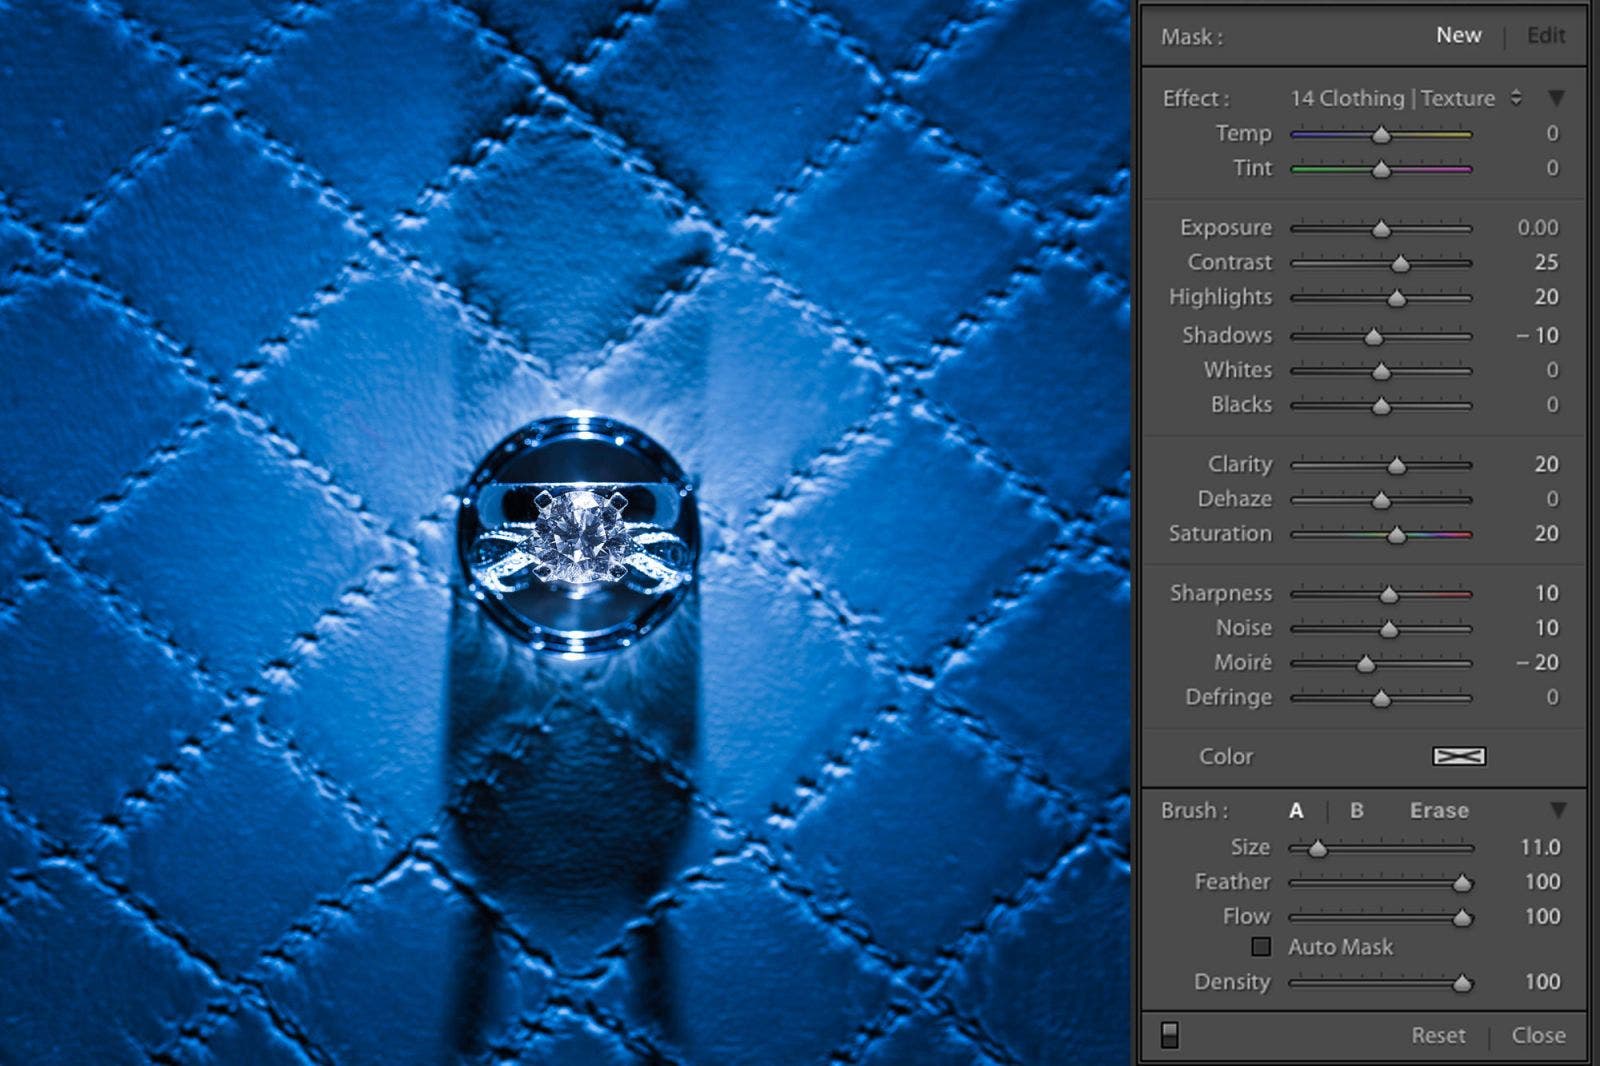
This is true for all portraiture, really, but is sometimes overlooked with wedding ring photos. Shoot for the edit and then edit accordingly. Granted, you’ll want to keep your wedding ring photos consistent with other images in the set, but detail shots often benefit from a slightly bolder edit, with added sharpness, clarity, and contrast. I also like to add a radial burn around my rings (and subjects in general) to draw more attention to them.
Conclusion
I hope you found these 10 wedding ring photography tips and creative ideas helpful. It might seem challenging at times to photograph the same thing over and over again while trying to find ways to keep it fresh. By following the tips above (as well as some other’s on the blog for photographing jewelry), however, we can establish a solid foundation and then mix things up based on the unique details we find at each session. The hardest part is knowing what to look for. Once we have that down, our wedding ring photography can’t help but get better.
Leave a comment below and let me know what other tips you have for capturing better wedding ring photos.