Of all the skills wedding photographers need to master along their journey, posing is often one of the most difficult. Recycling the same poses over and over can lead to a boring set of images, devoid of emotion, story, or character. On the other hand, a diverse set of wedding poses that match the couple’s style, make the couple look good, and take into account the small nuances of body language can be the difference between an average photographer and a great one.
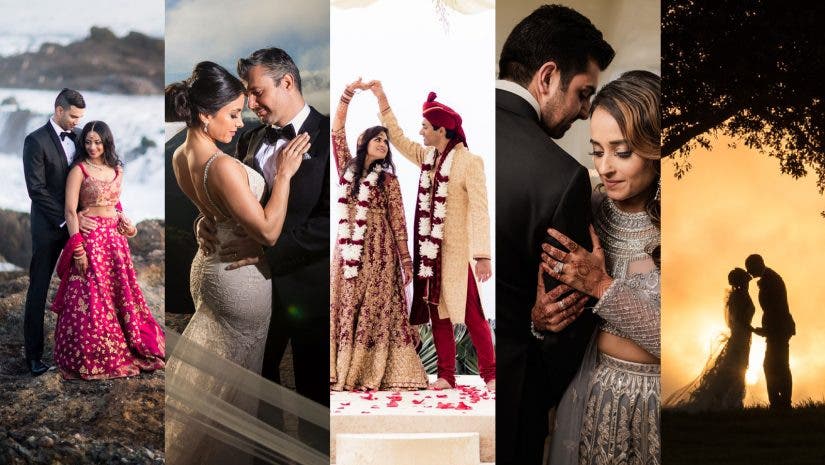
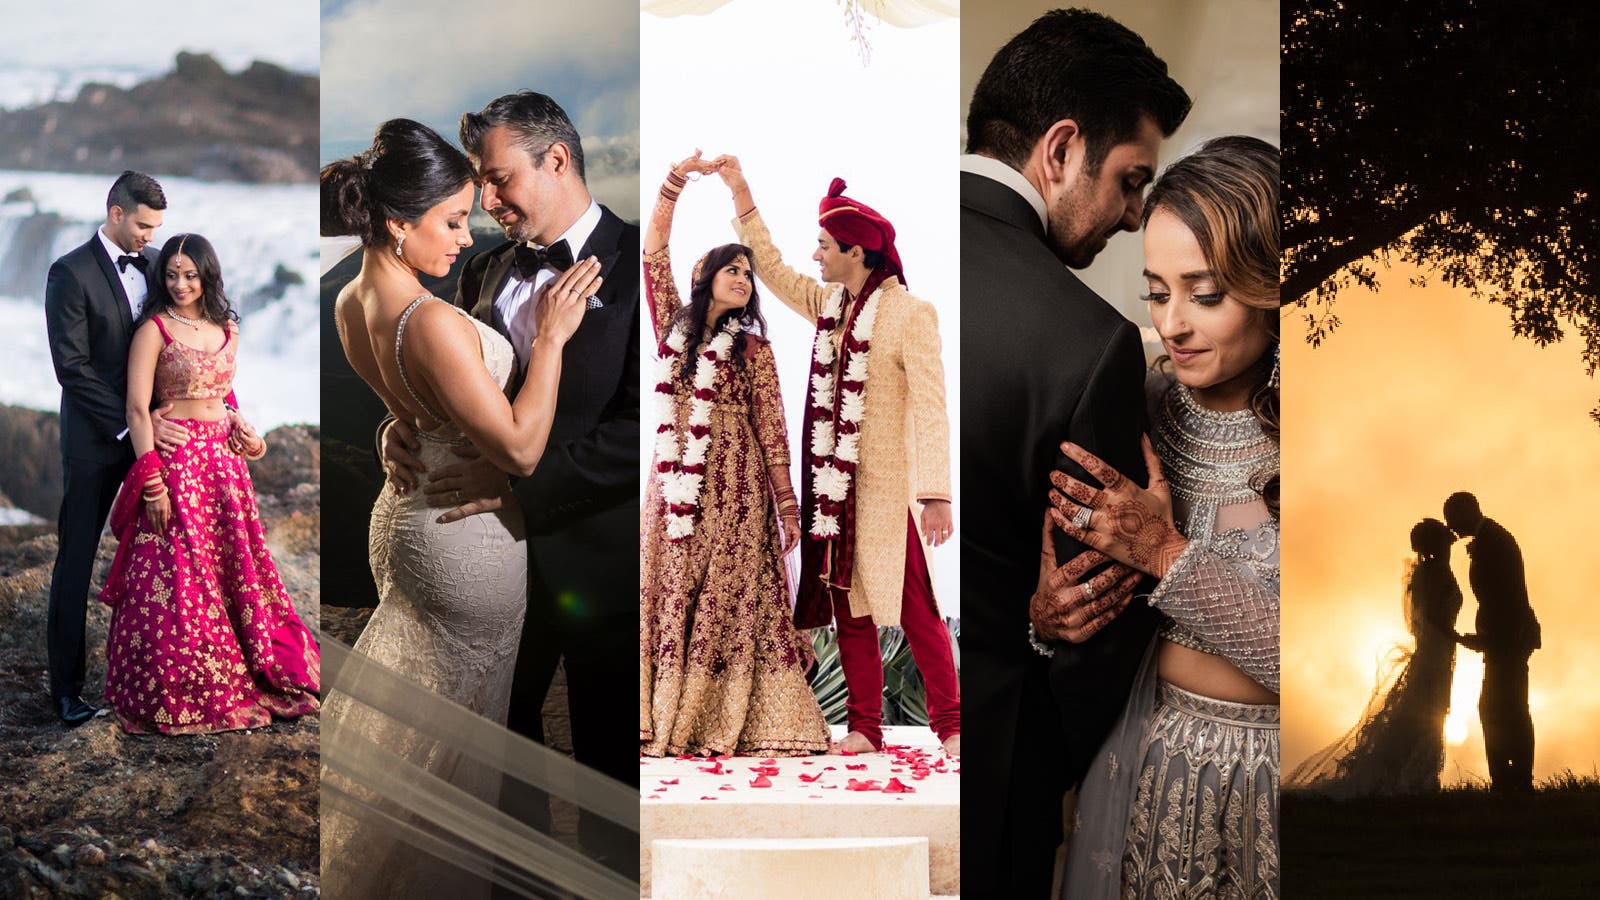
If you’ve ever stressed about how to pose couples on their wedding day, then this is the perfect article for you. In last week’s article of our posing series, we covered 5 Male Model Poses for Better Photos. This week, we’re going to dive into 10 wedding poses for natural photos, as well as some basic tips you can use to make any couple look great, no matter what. Here’s what we’ll cover:
- The V-Up
- The Closed Pose
- The Open Pose
- The Stacked Pose
- The Reverse Pose
- The Meet in the Middle
- The Dip
- The Walk
- The Spin
- The Staggered Frame
Foundation Posing Framework
Before we jump into the poses, let’s talk about the Foundation Posing Framework. What you might not realize is that most poses are built from one of five foundation poses. Once you’ve memorized these foundation poses, which are based on foot and shoulder position, you can apply them in any situation and use them as a foundation (hence the name) for all of your wedding poses.
Here’s a brief overview of the foundation posing framework from Adorama’s Youtube Channel:

I recommend going over the first five poses here with your couple at the start of your first session together. If you’re able to shoot an engagement session before the wedding day, that’s great. Your couple will already be comfortable with you capturing their photos and they’ll know what to expect in terms of how you’re going to direct them into poses, all of which helps move things along throughout the day. If your first time shooting your bride and groom is on the day of, then just run through these wedding poses with them at the top of the session.
Wedding Pose #1: The V-Up
The V-Up pose is a great place to start your wedding poses. It’s simple, familiar, and effective. When placing your bride and groom into the V-Up pose, tell them to imagine that their shoulders and hips are hinged together, like a door in a frame, and explain that their bodies should form a “V” shape as they face one another. Celebrity couples often strike this pose when pausing for photos on the red carpet.
Here are a couple of things to watch out for when placing your couple into a V-Up pose:
- Make sure the couple is connected at the hip
- Give the hands in front something to do, such as asking the groom to place his hand in his pocket and asking the bride to place her hand on her hip
- Do not leave the couple’s hands dangling by their side
From here, you can make micro-adjustments to get more looks from a single pose. A lot of these adjustments can be made by simply telling the bride and groom where to look. They can look at each other, the bride can look at the camera while the groom looks at her and vice versa, the groom can lean in to kiss the bride’s temple while she looks down and slightly off-camera, and so on.
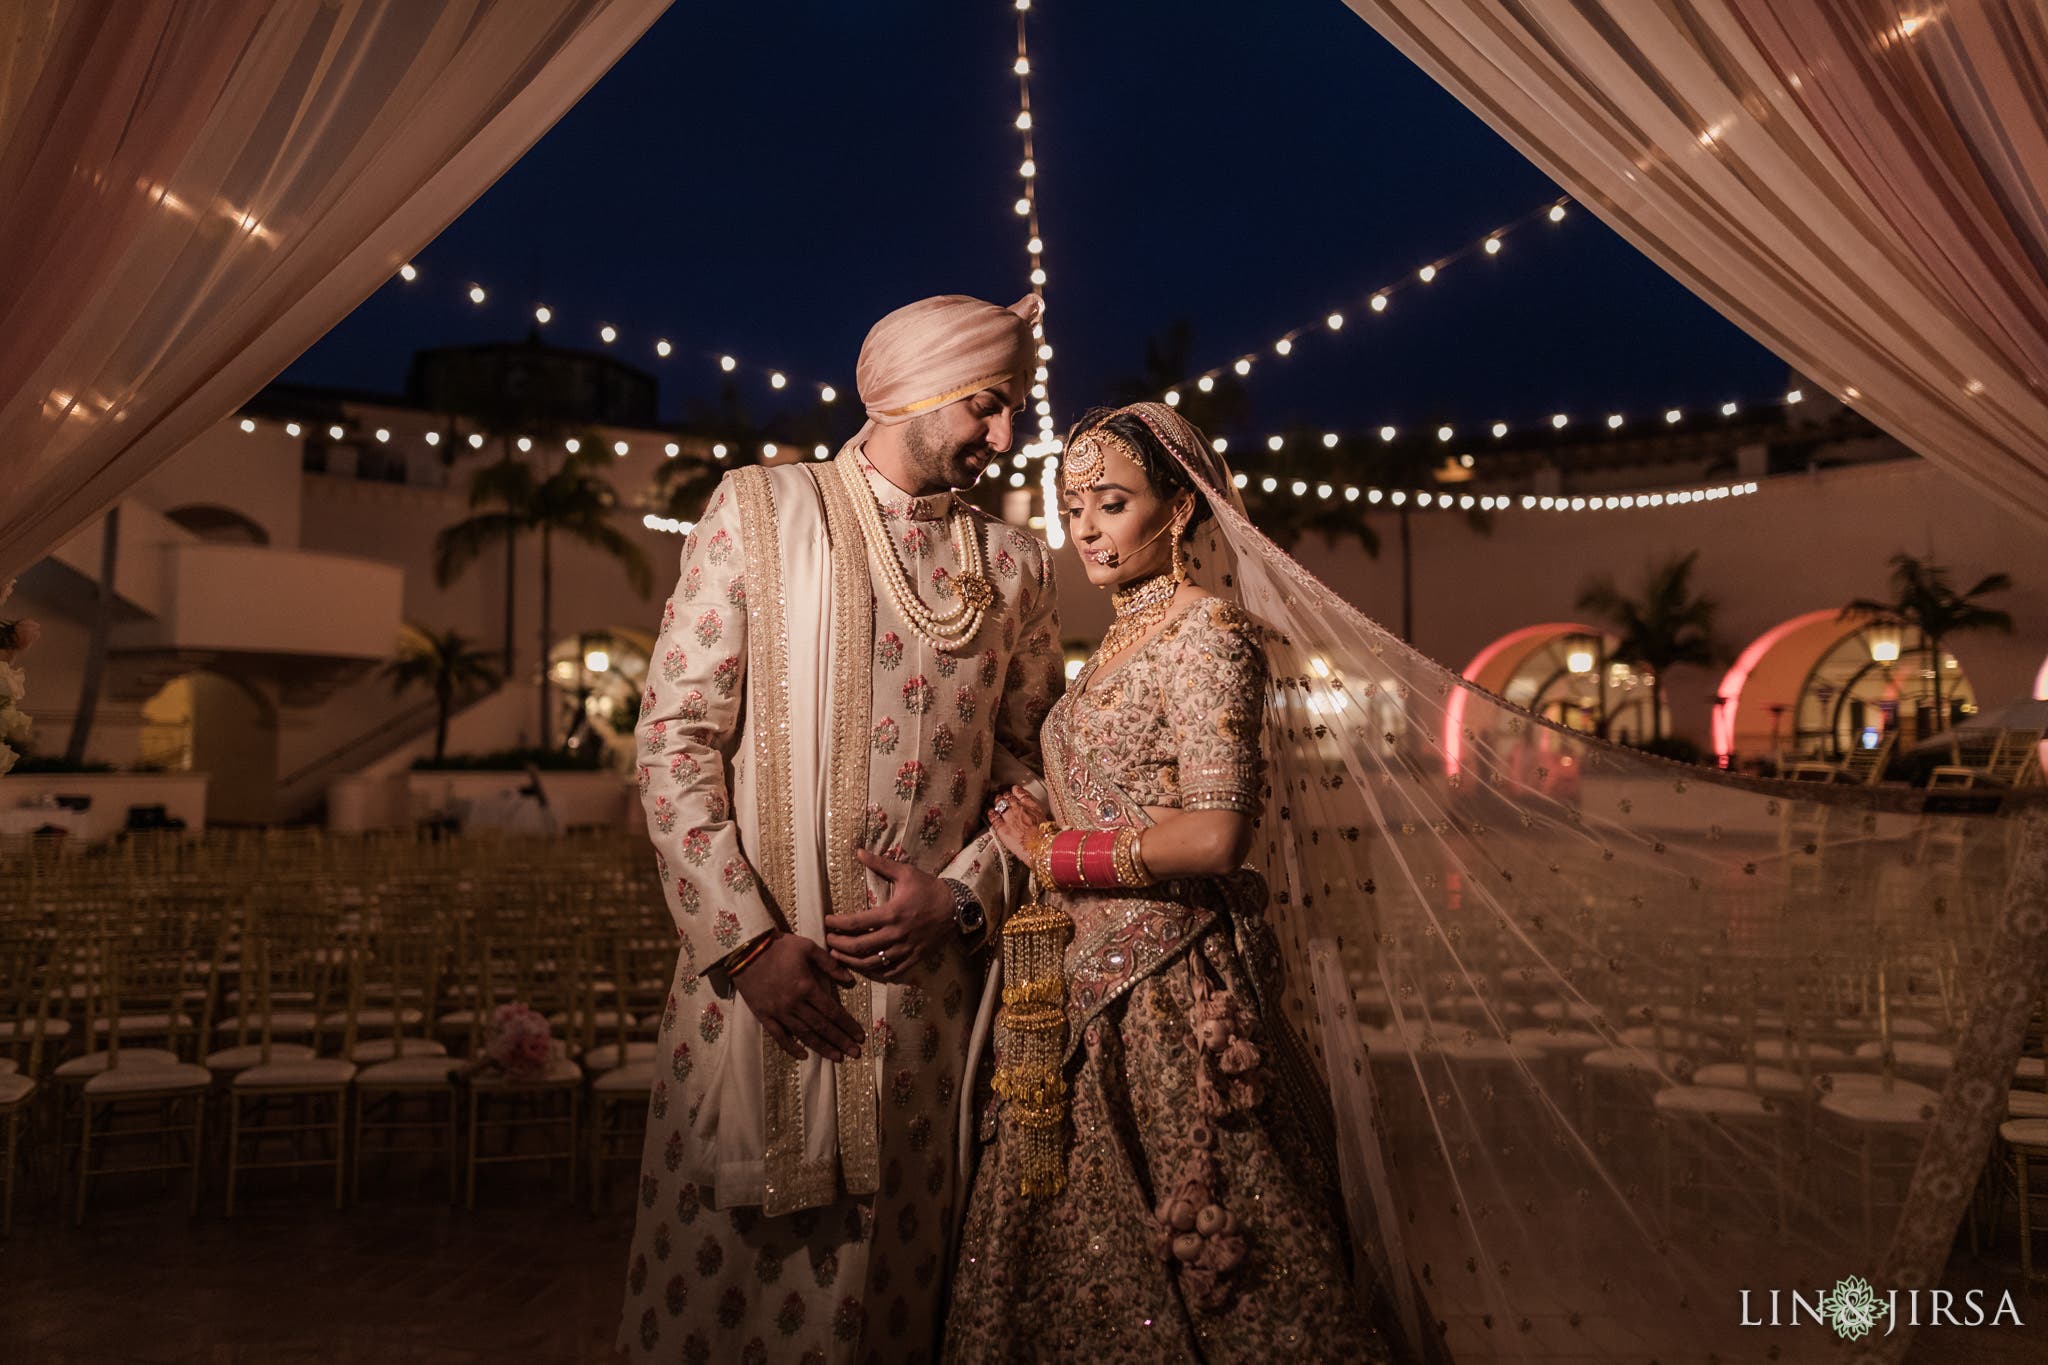
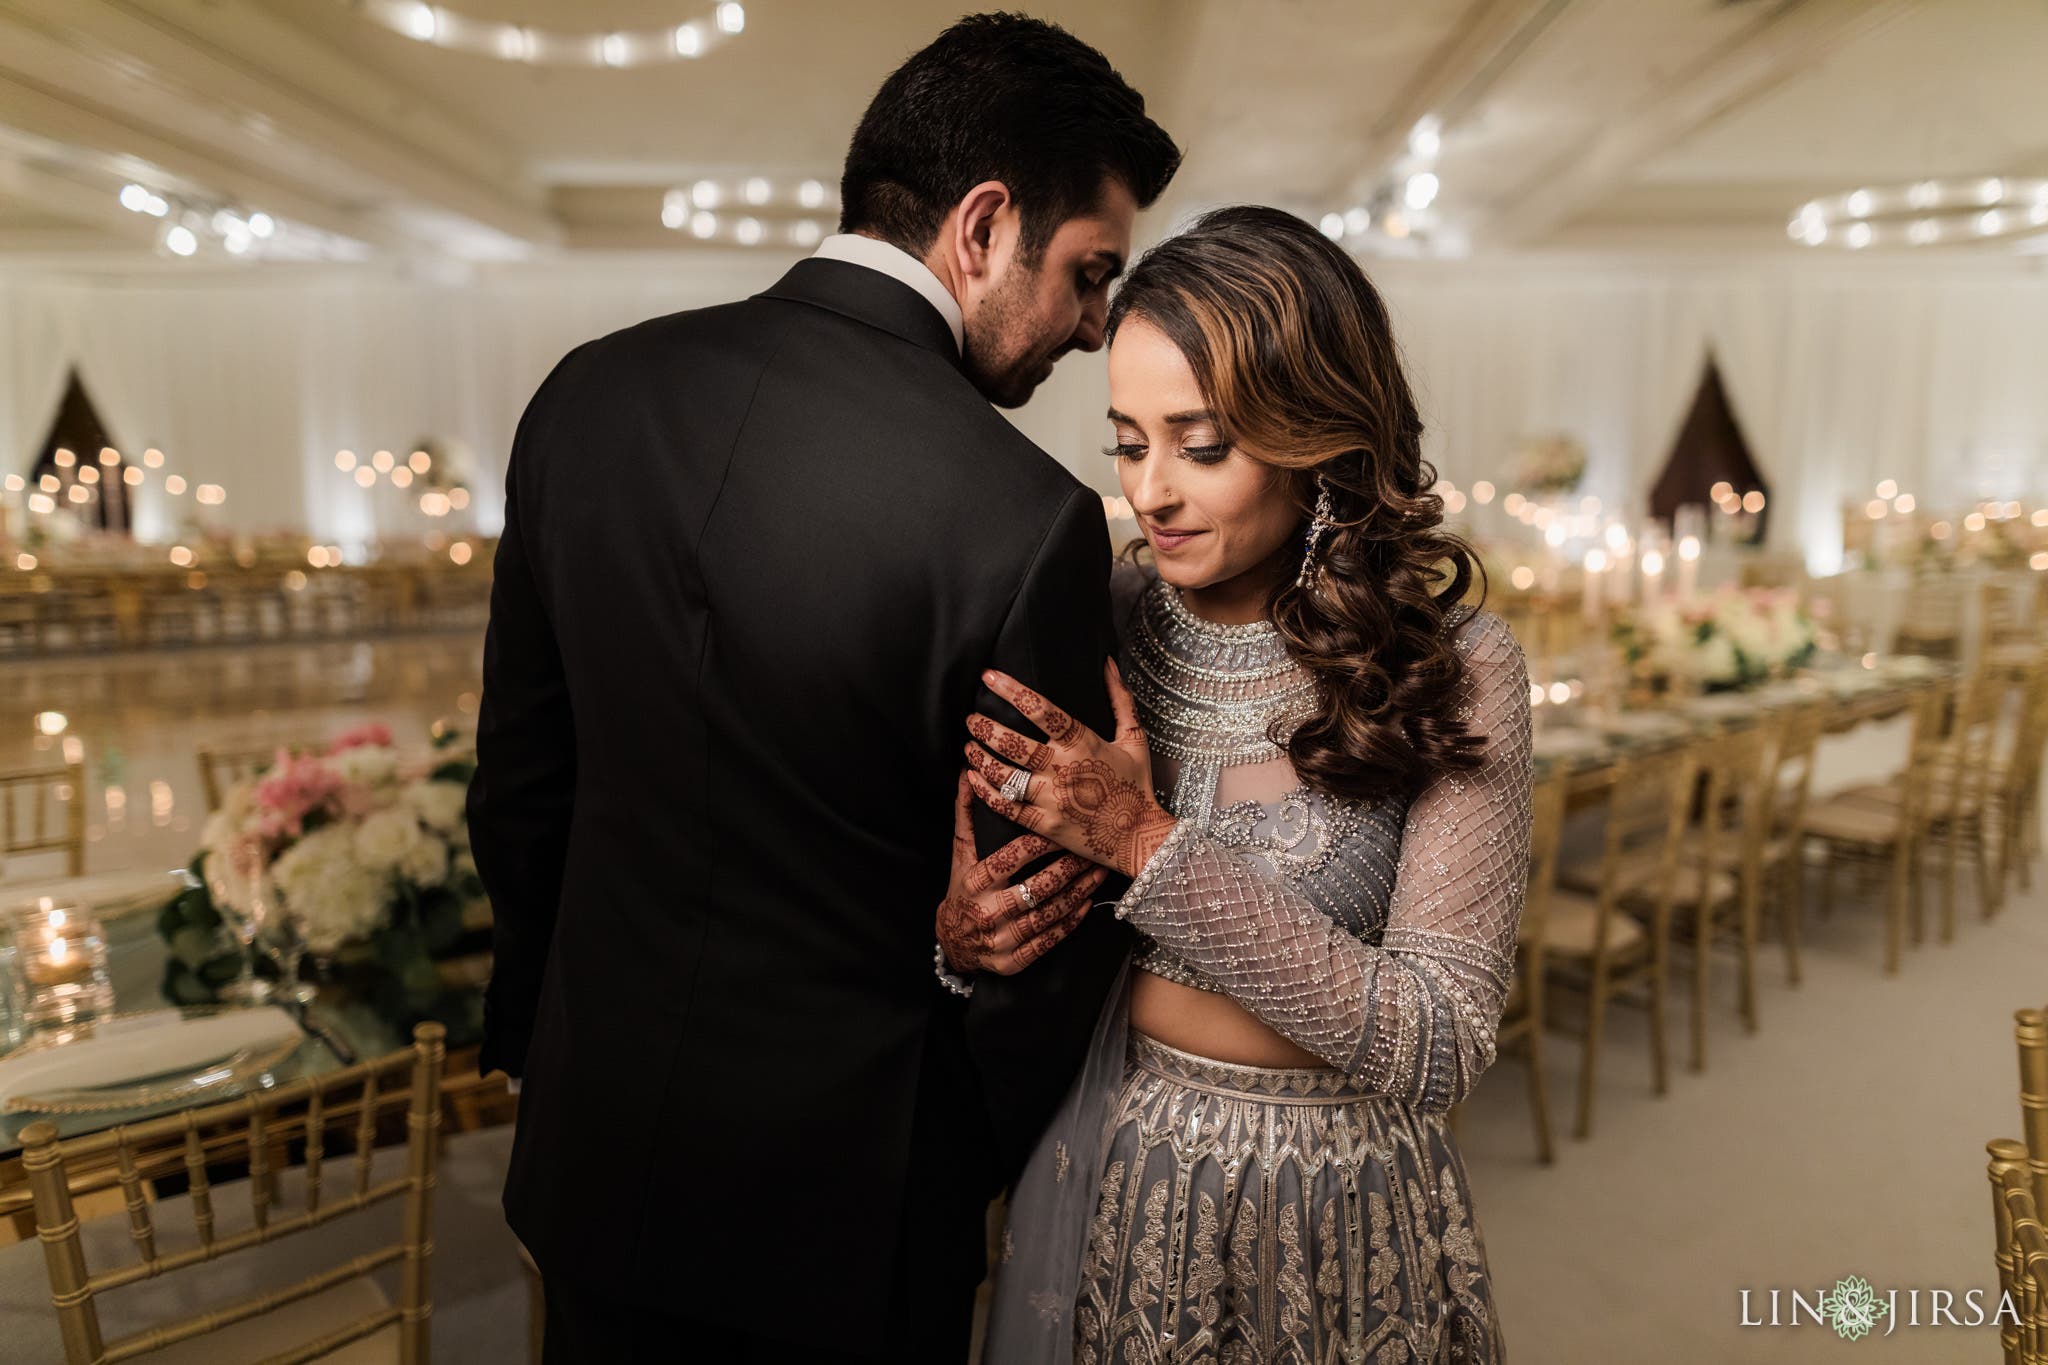
Wedding Pose #2: The Closed Pose
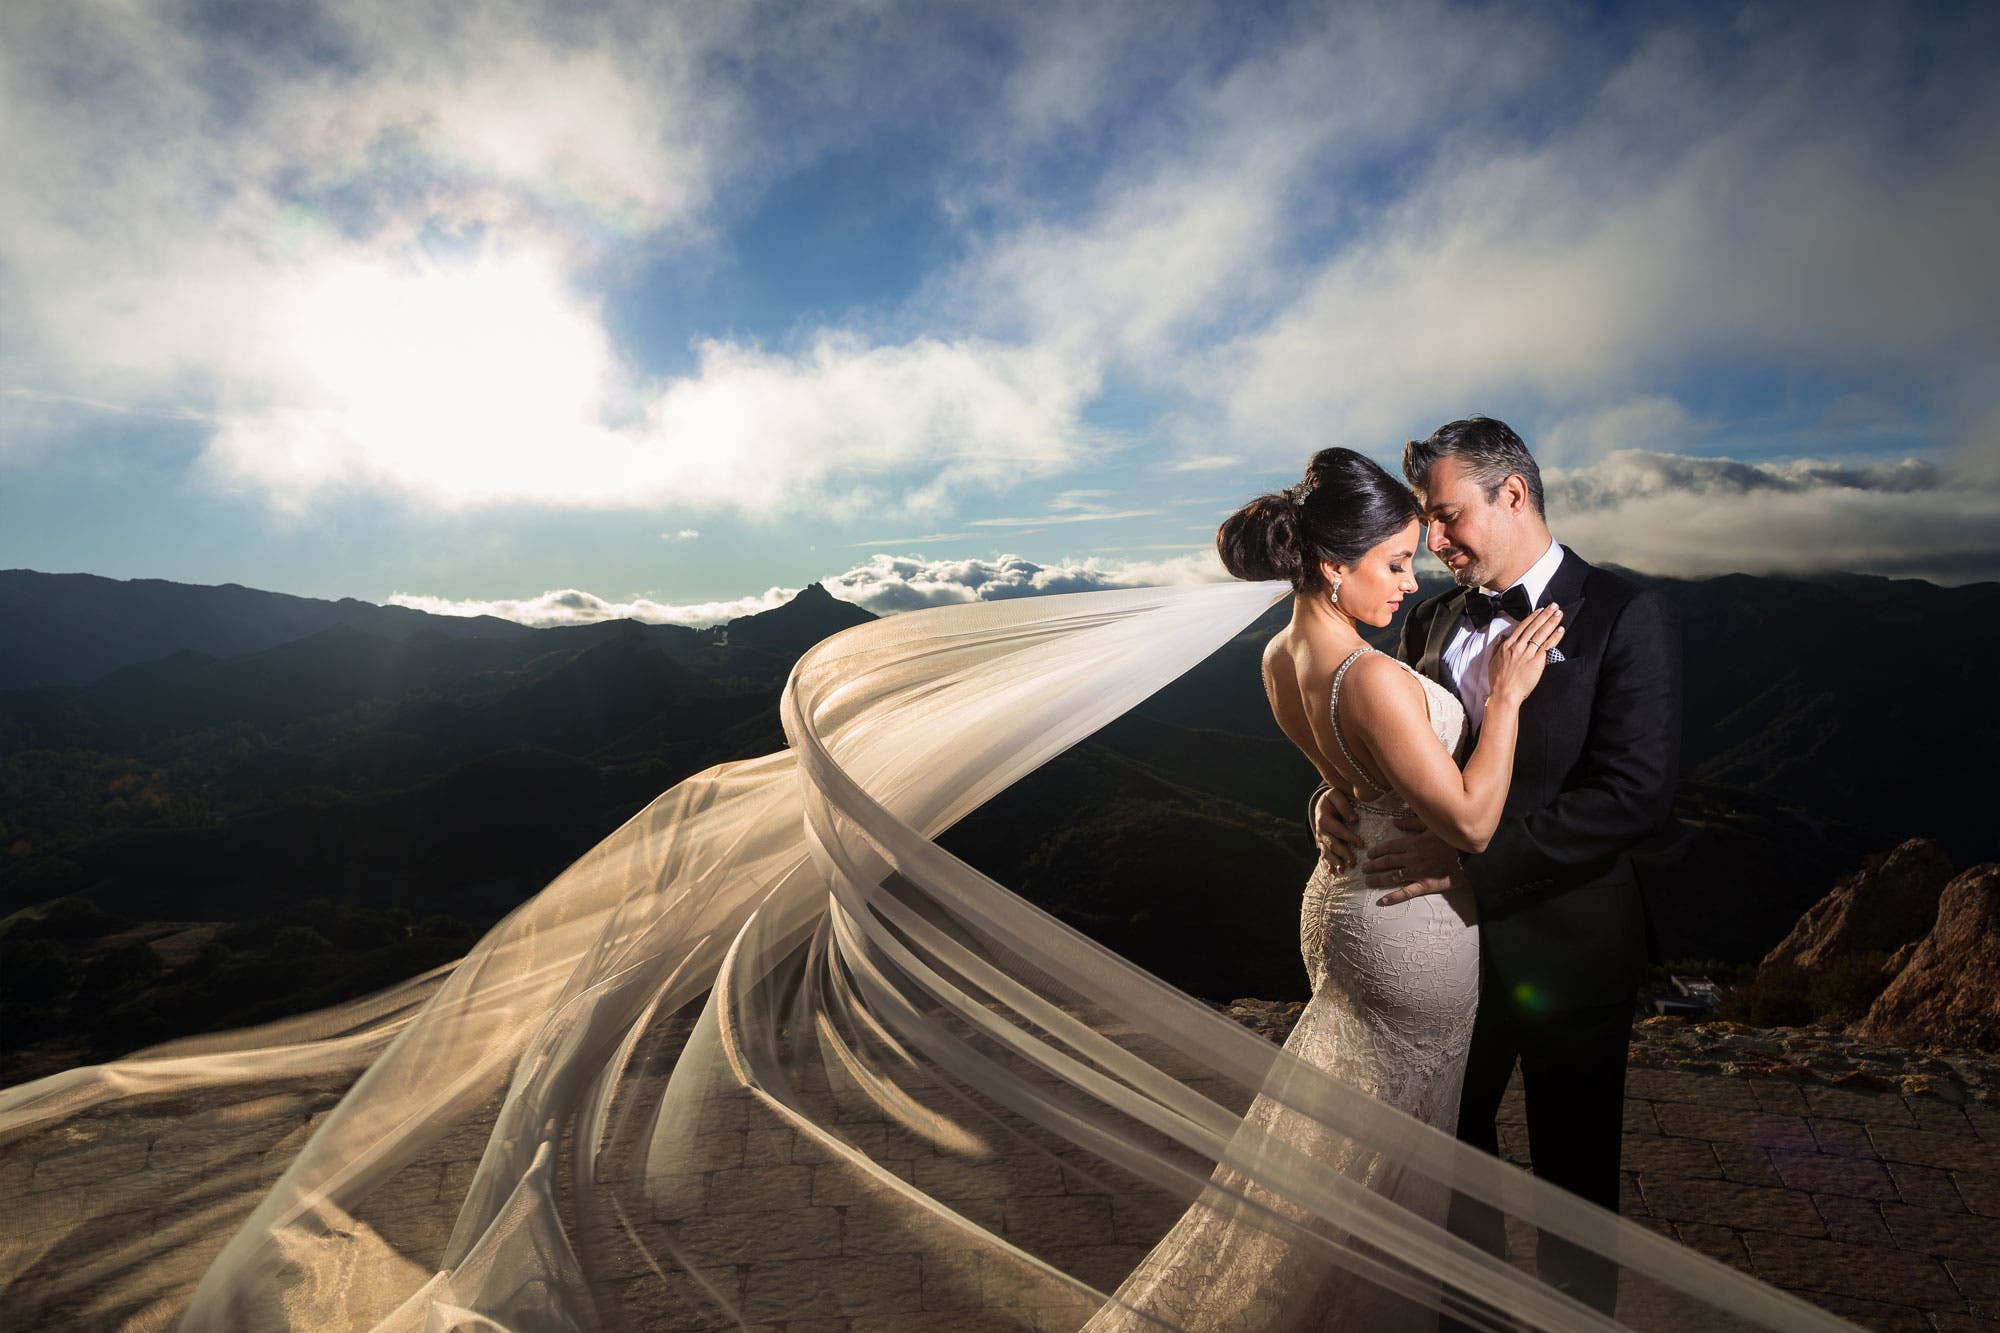
For the closed pose, the bride and groom should face one another with their chest, hips and feet squared up. You can refer back to the door hinge metaphor from the previous wedding pose when directing your couple into the closed pose. If their shoulders and hips are connected for the V-Up, ask them to close the door and face each other. Then if you need them to “open up” a bit, they should know what that means. If they don’t, explain it in more detail.
Here are a couple of things to watch out for when placing your couple into a closed pose:
- Make sure there’s no visible gap between the couple
- Direct their hand placement and avoid mirroring their pose (the easiest way to do this is to have the bride hold the groom’s arms or place one hand on his chest while he holds her waist); they can either hold hands or hug each other, etc.
The closed pose is a solid go-to for capturing intimate portraits of the couple. You can make micro-adjustments to further accentuate this intimacy by asking the couple to kiss or touch foreheads, and so on for more wedding poses. The more touchpoints you have for this pose, the better. Adversely, any gaps between the couple in a closed pose can quickly look awkward. In the example above, I incorporated the bride’s veil as a compositional element to draw the viewer’s eye to the couple.
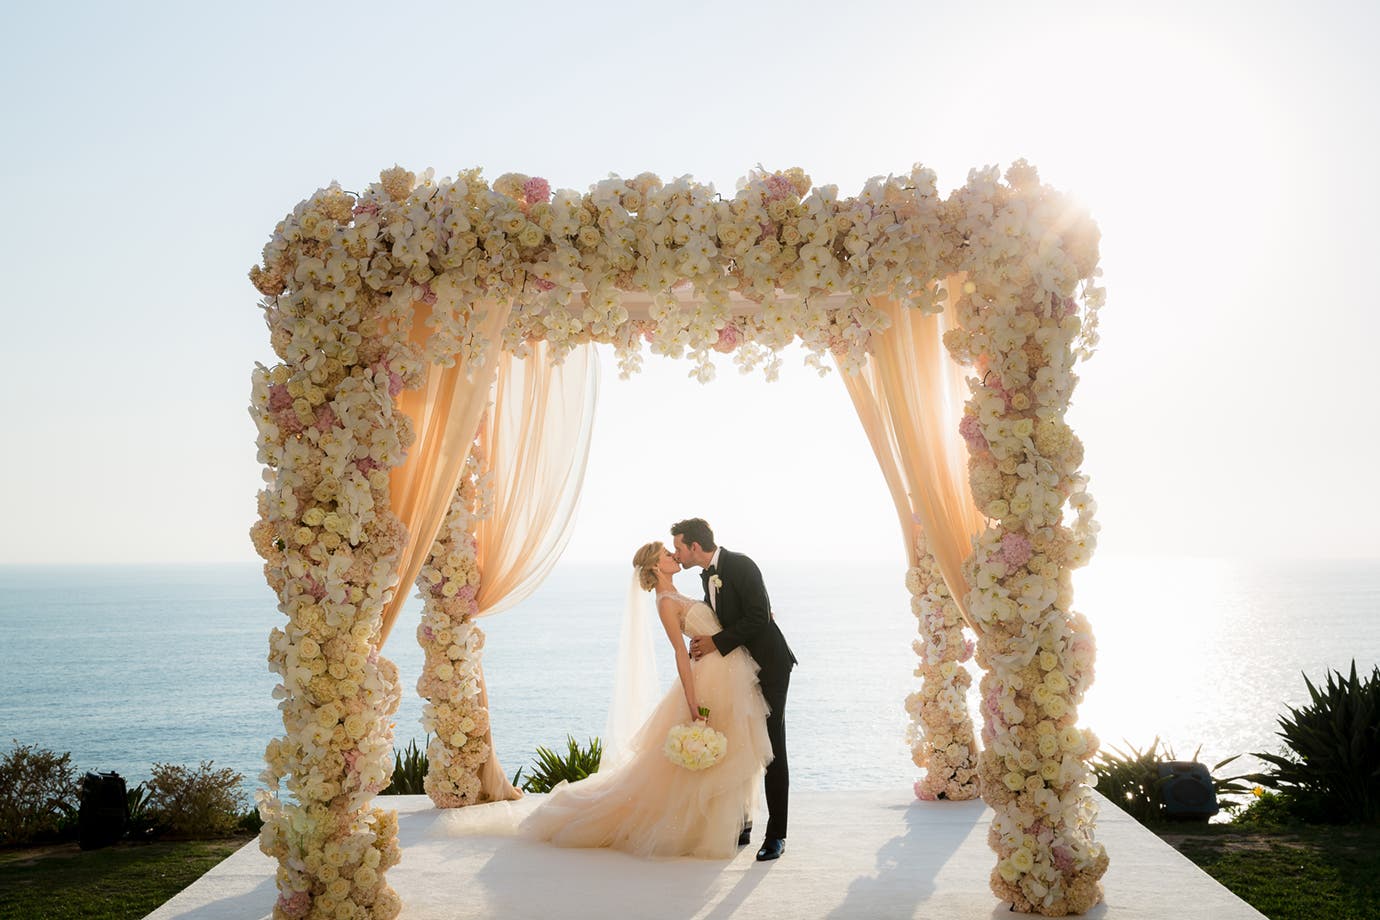
Wedding Pose #3: The Open Pose
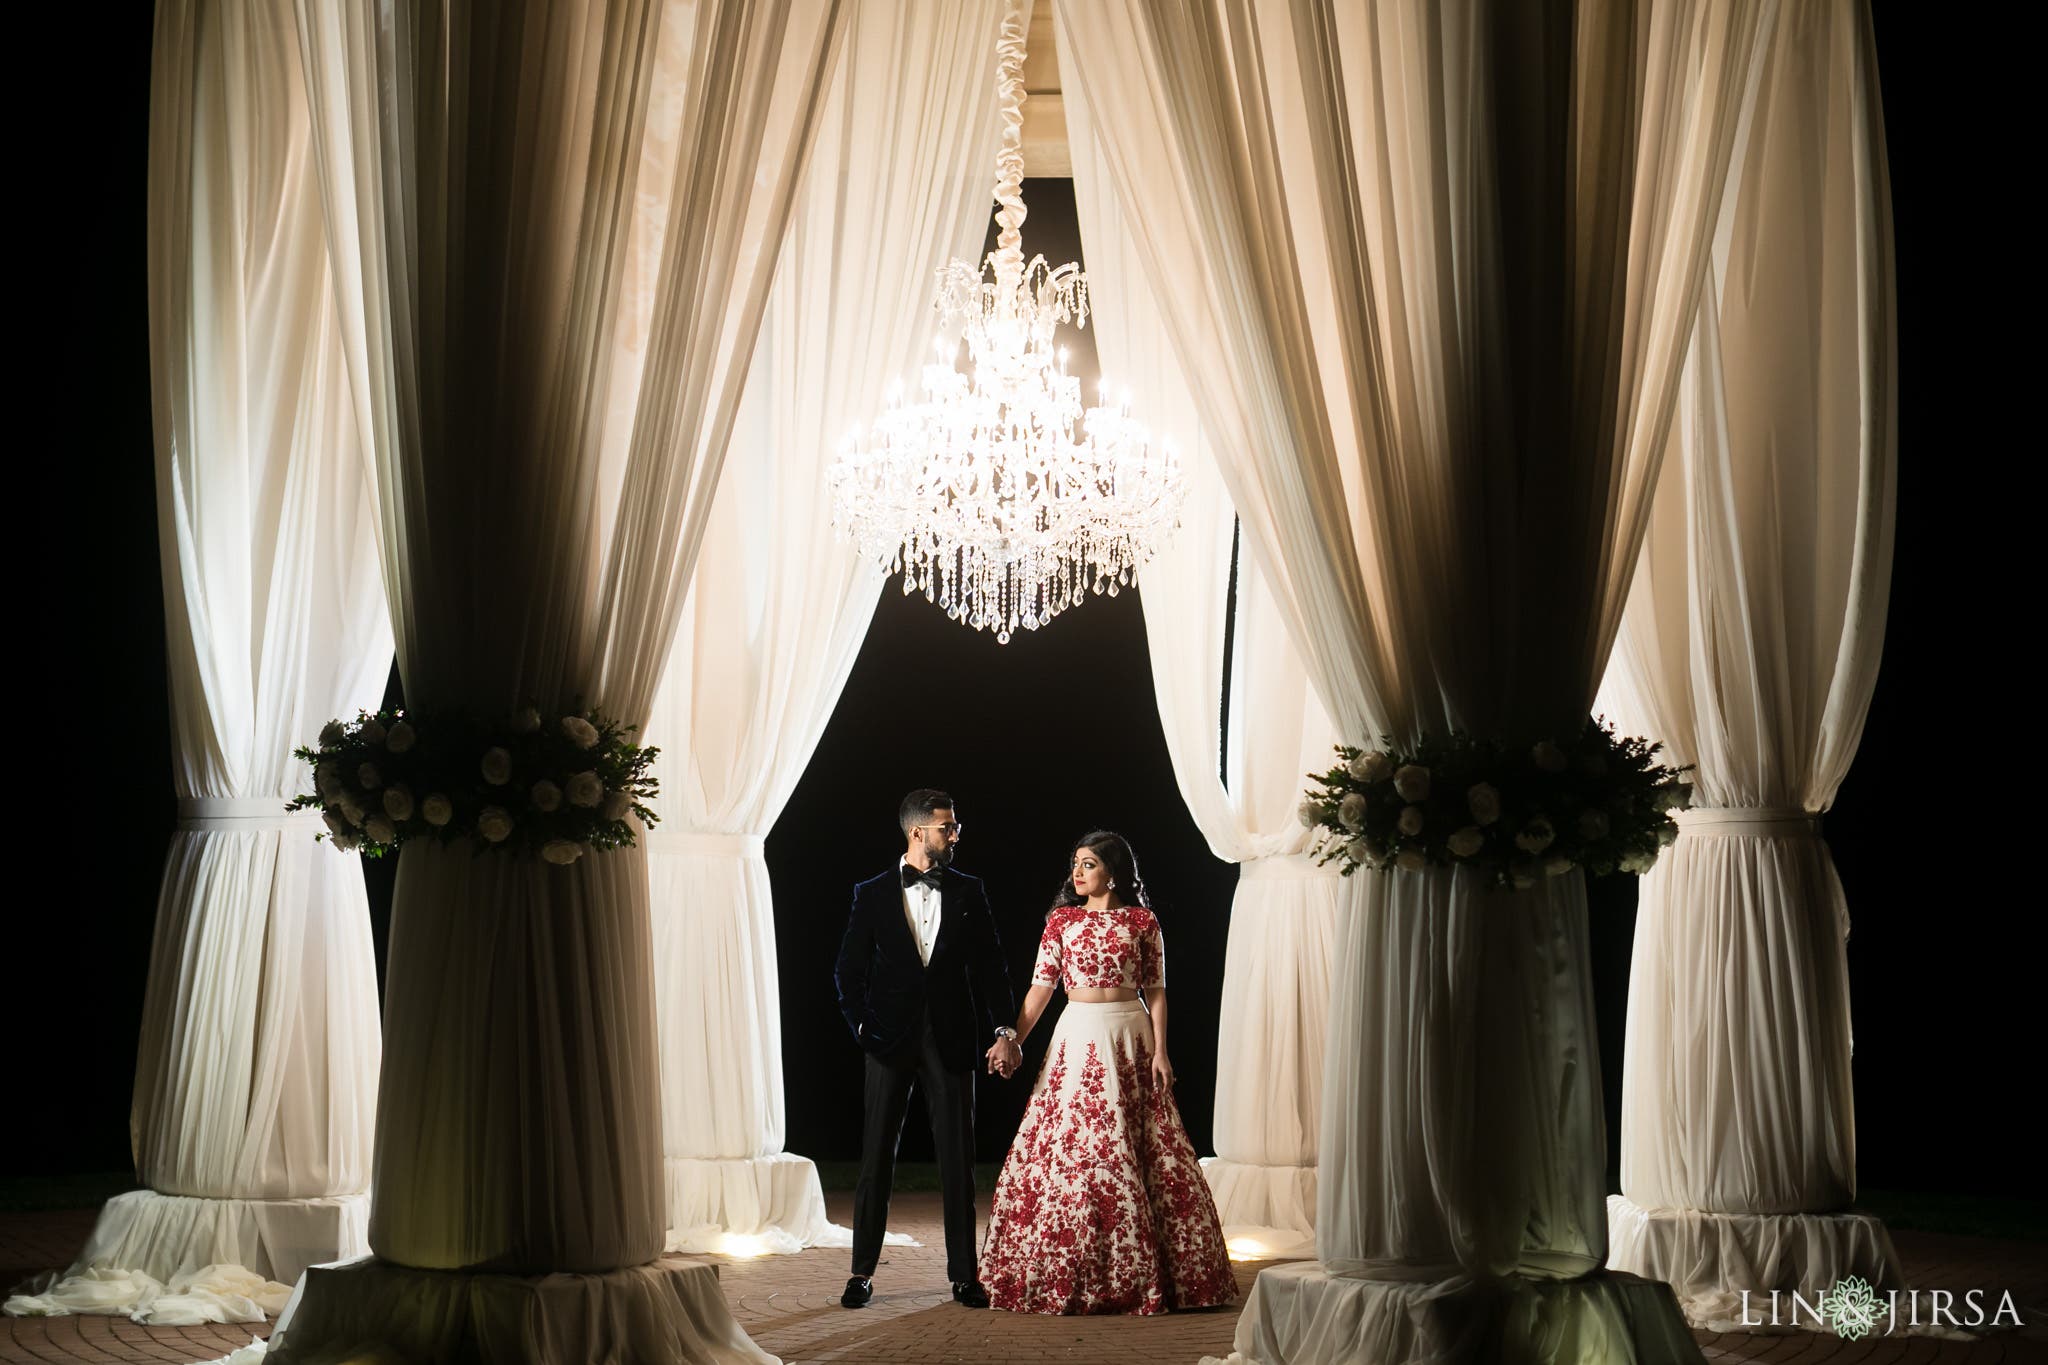
Just as a door can close, it can also open. For the open pose, the bride and groom should “open up” with their chest, feet, and hips all facing the camera. The open pose is perfect for highlighting the couple’s wardrobe, which is especially important on their wedding day.
Here are a few things to watch out for when placing your couple into an open pose:
- Make sure the couple’s chest, feet, and hips are facing forward (not just one or two, but all three of these elements)
- Direct the couple to hold hands in the center to create at least one touchpoint
- Ask the couple to look at the camera and then at each other to get a couple looks out of this simple pose
The open pose serves as a perfect gateway to transition into other poses on this list, including the walking and spinning poses.
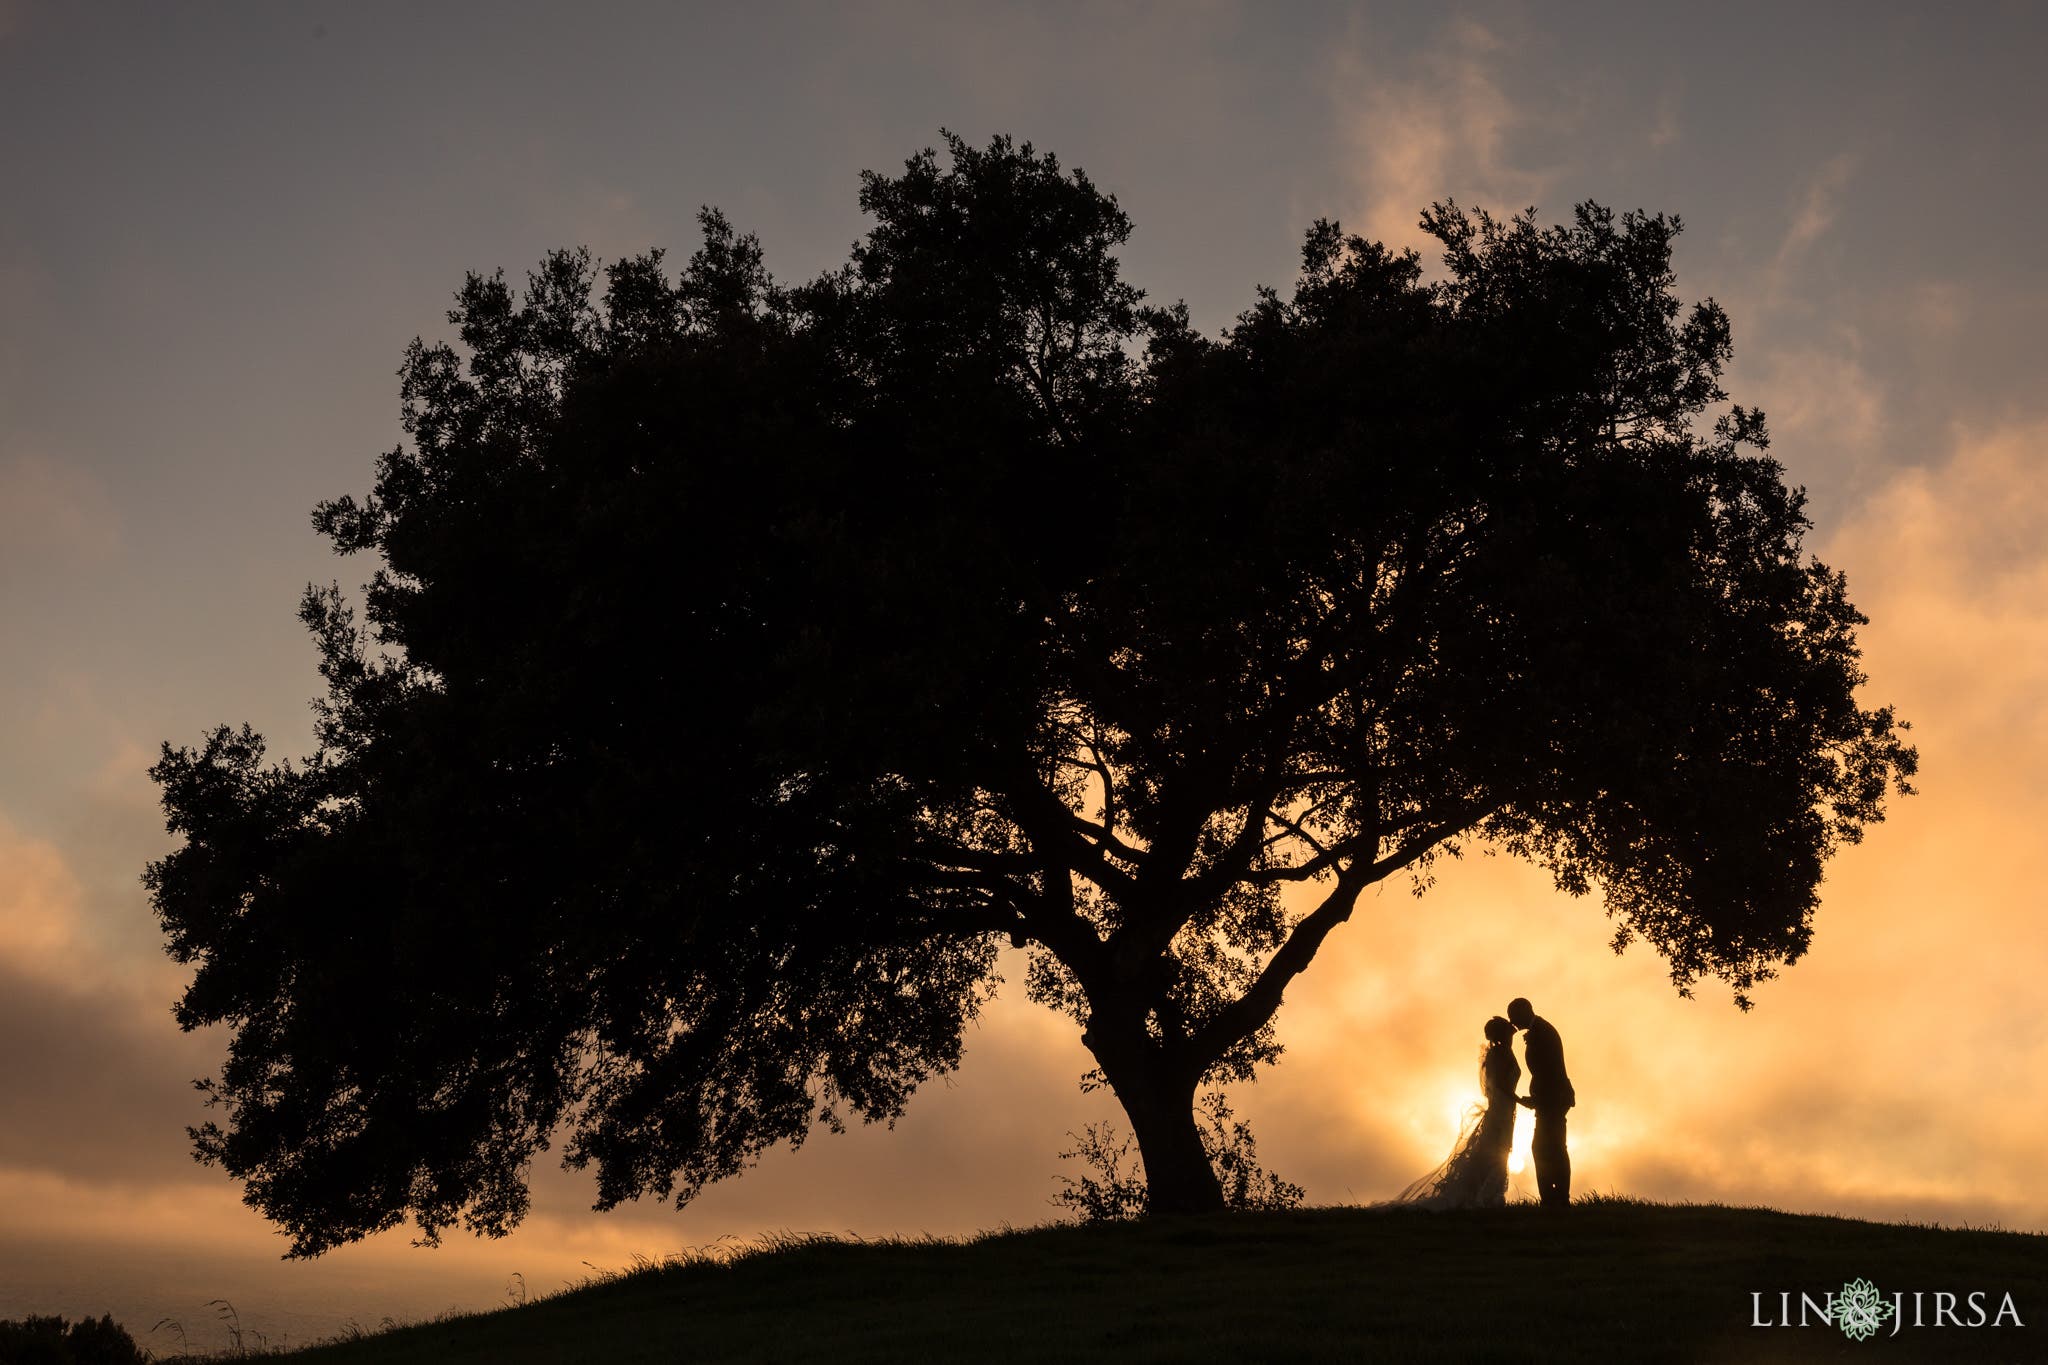
Wedding Pose #4: The Stacked Pose
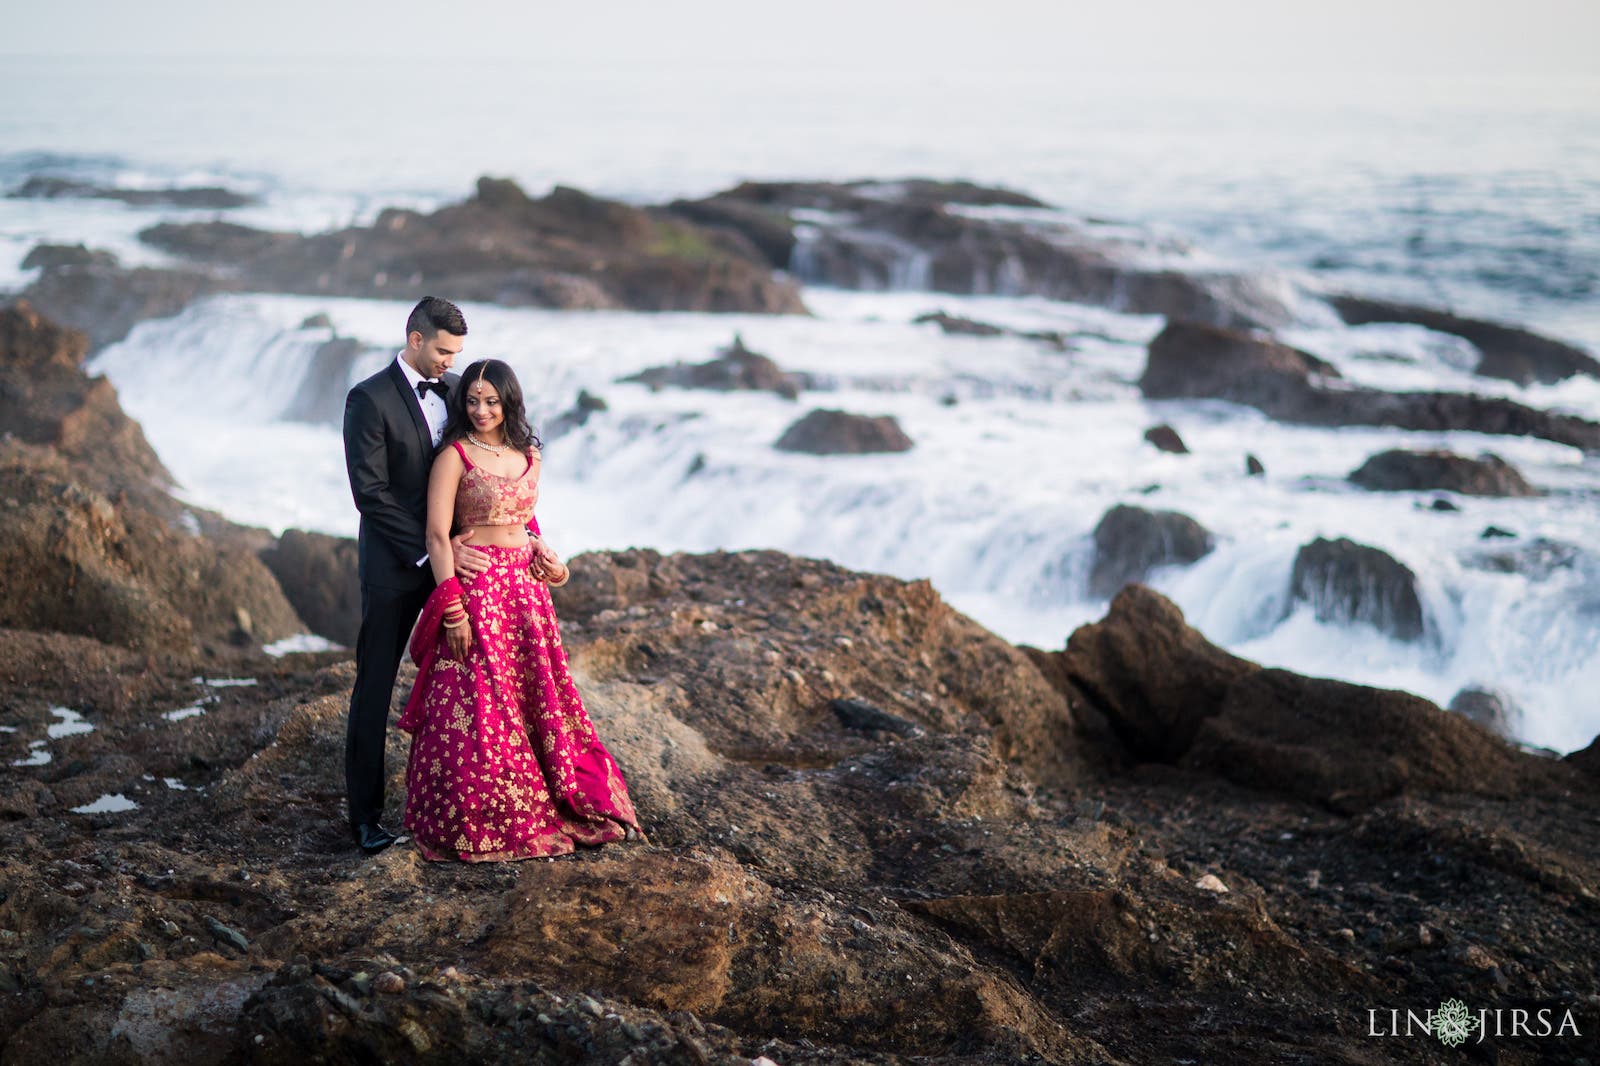
Made notorious and even faux pas in its application in cheesy prom portraits, the stacked pose, when done right, offers amazing potential when used correctly. For the stacked pose, the groom typically stands behind the bride while their shoulders, hips, and feet face the same direction.
The problem with this pose when used in classic prom fashion is that it brings unnecessary attention to the belly of the person in front, which is typically the bride. This happens when the groom reaches around from behind and clasps his hands across the bride’s stomach. The bride usually further accentuates the look by placing her hands on top of the groom’s hands, creating a mess of hands that serves little purpose other than saying, “Hey, check out the bride’s belly!” It’s a great compositional tool for maternity photos, but not much else.
Here are a few things to watch out for when placing your couple into a stacked pose:
- Place the groom in the back
- Keep the groom’s arms around the bride’s waist or wrapped across her chest
- Don’t overlap more than 20% of the groom
This pose works especially well for wide-angle, epic landscapes, in which the couple is placed in the lower corner, where they look at each other or even off into the distance toward the open space of the frame. Like most of the wedding poses on this list, the stacked pose does not require the couple to face or look into the camera.
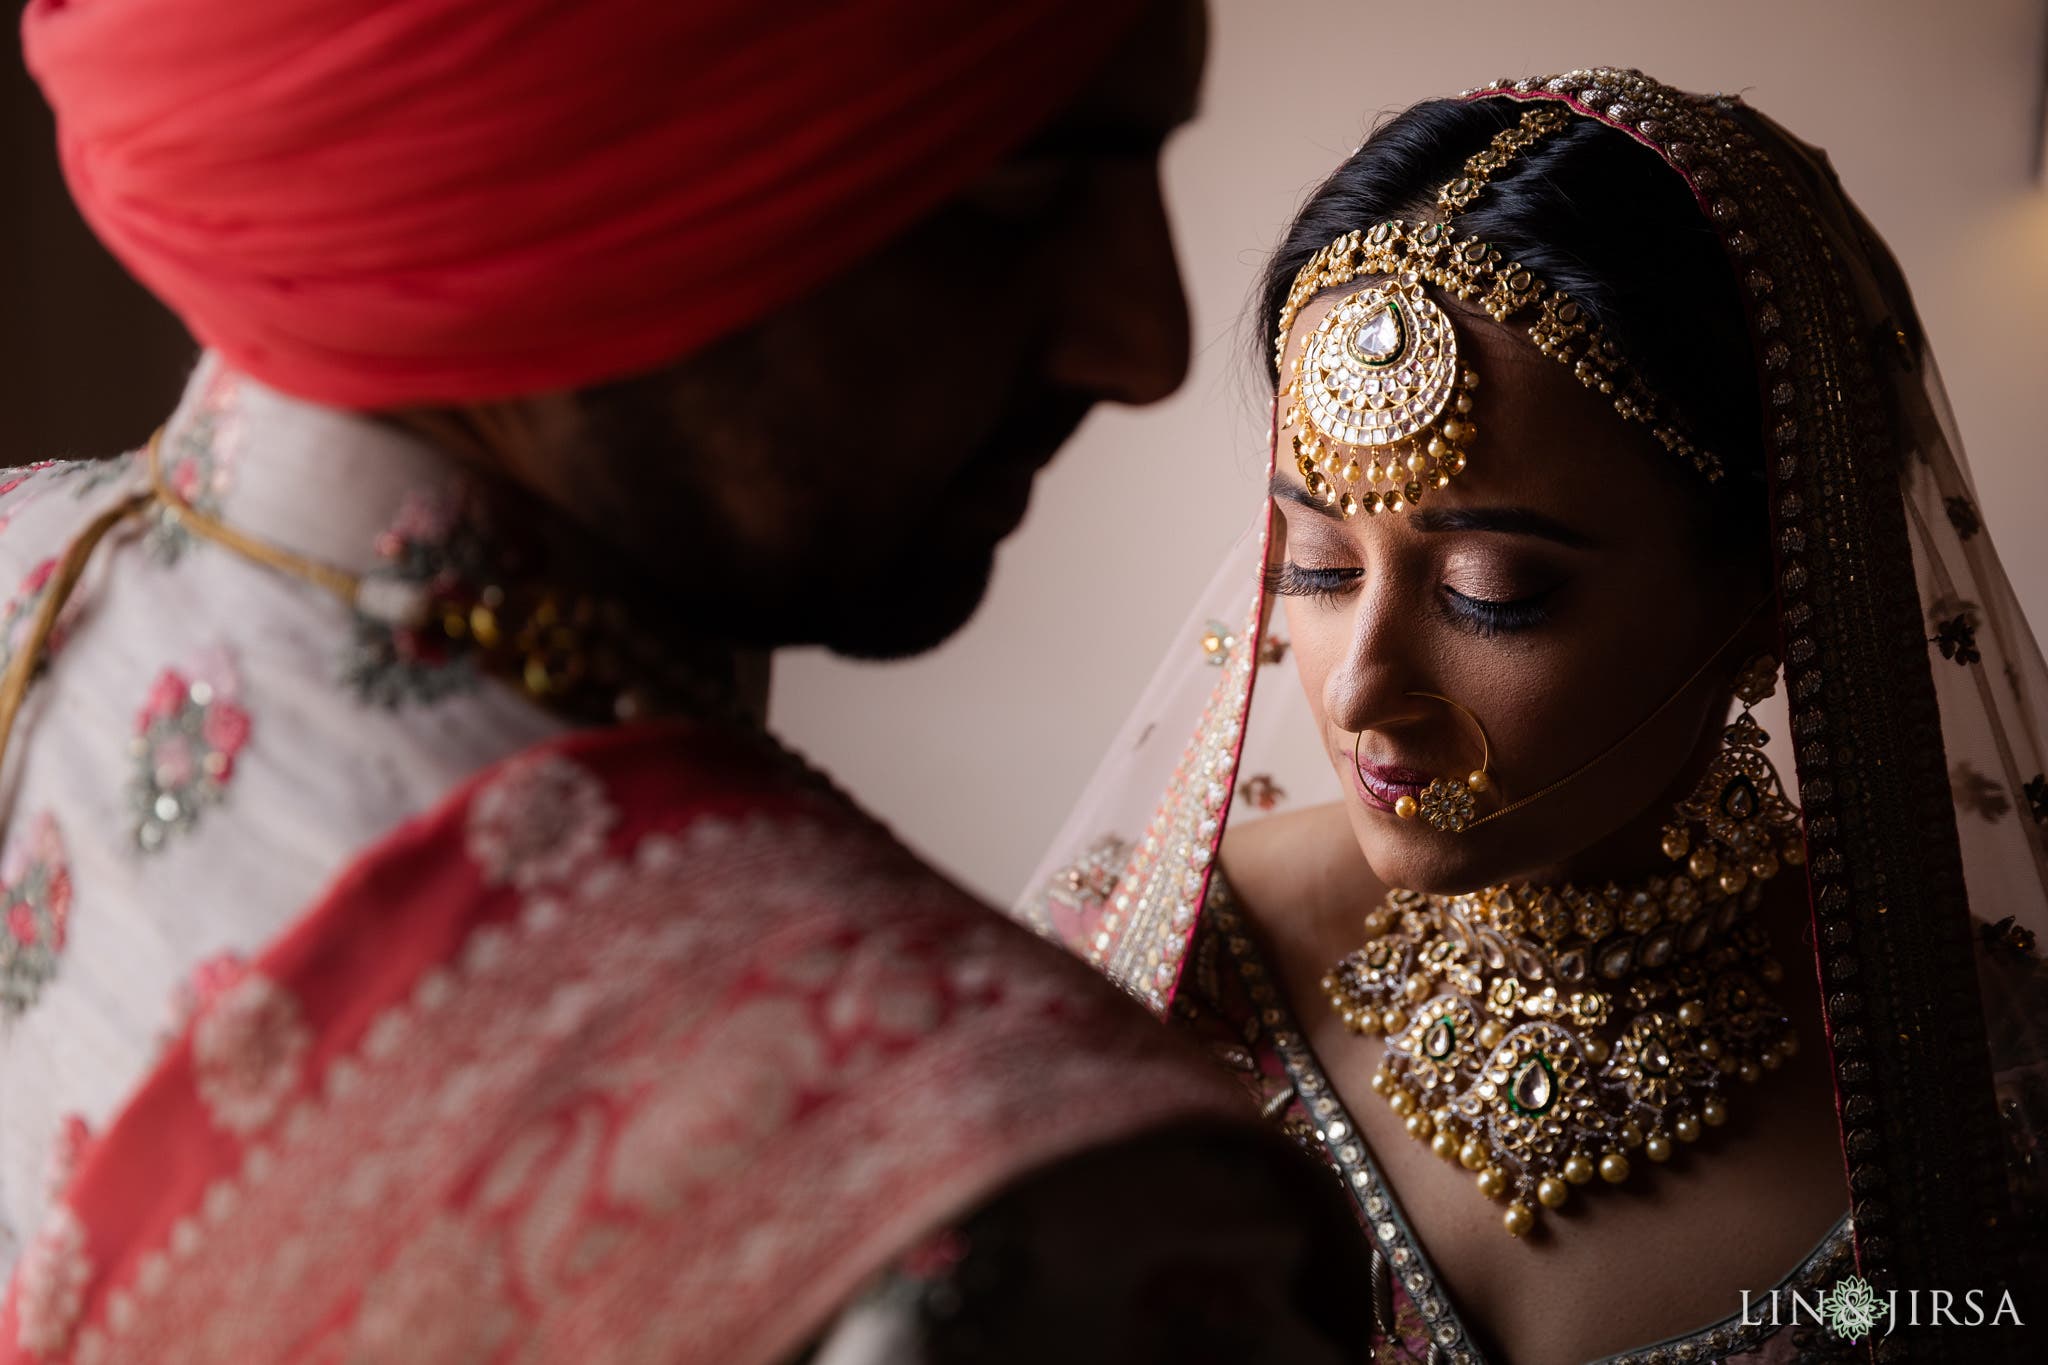
Wedding Pose #5: The Reversed Pose
For the reversed pose, ask one person to face away from the camera while the other person directly faces the camera. This pose works well to draw attention to the person facing the camera. More often than not, that person will be the bride, but not always.
Here are a few things to watch out for when placing your couple into a stacked pose:
- Hand placement plays a major role in determining the success level of this pose, so put in extra effort here to get this right
- Avoid splayed fingers, which happens when all five digits are stretched out and stiff
- Remind the bride to relax her hands and keep her fingers closer together
While I recommend capturing wide, medium, and closeup angles for most of the wedding poses on this list for storytelling purposes, the reversed pose benefits greatly from creative crops to draw the viewer’s focus to specific elements of the subjects, such as the bride’s ring as her hand holds the back of the groom’s arm.
Using Micro-Adjustments to Add Variety
The following five poses build on the previous foundation poses in some way and add variety to help you deliver a greater collection of quality images.
Wedding Pose #6: The Meet in the Middle
This pose combines elements of both the open and closed poses. In terms of distance between the couple, it more closely resembles the open pose, but the bride and groom can face each other as they lean in to meet in the middle for a kiss. They can also continue facing forward and lean in sideways.
Wedding Pose #7: The Dip
After capturing a collection of closed pose portraits, ask the groom to “open up” a bit and then dip his bride to create a dynamic portrait. It’s important to remember that this pose relies on the couple’s ability to pull it off. It can prove difficult to execute, and it looks painfully awkward if not done well. If the groom does not step far enough in or lean far enough over, for example, it can look more like he’s squatting. The goal is to more closely resemble a lunge.
Wedding Pose #8: The Walk
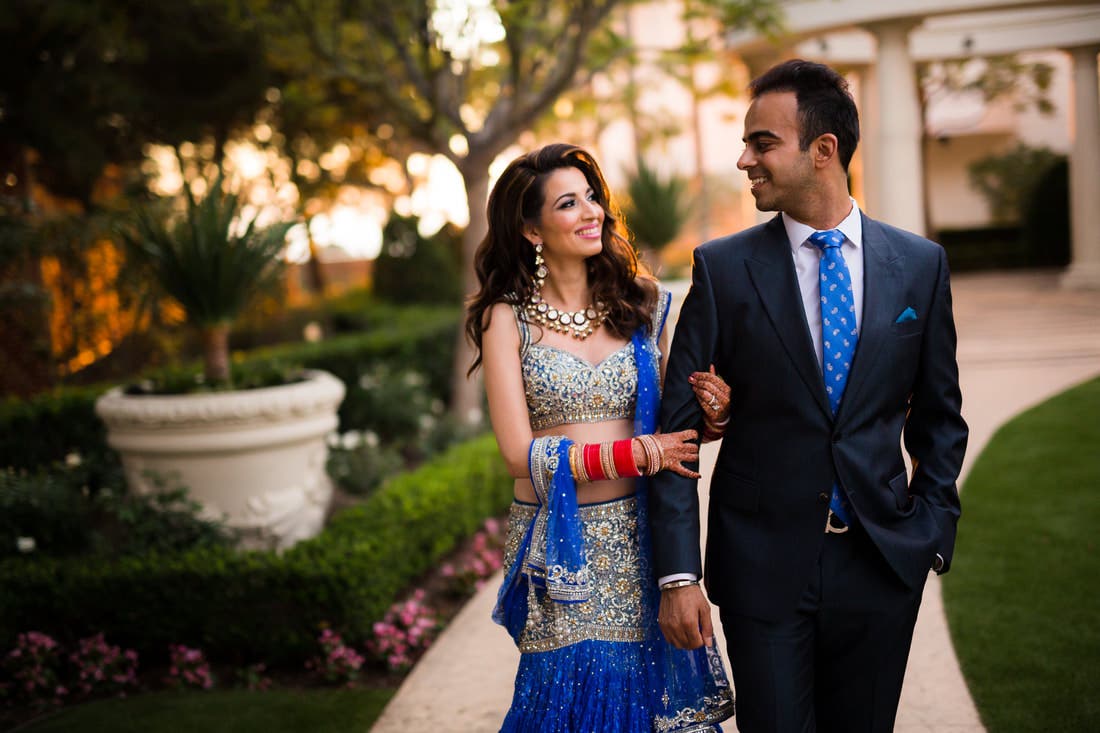
There’s probably no better way to introduce motion into your portrait session than to have your bride and groom take a walk. It’s a perfect pose for transitioning out an open pose.
To cue this pose, ask your couple to link arms or hold hands and then have them walk toward you. One reason couples like this “pose” is that they’re encouraged to just naturally interact with one another and talk, laugh, and so on. This sets you up to get natural, candid reactions, from your couple, and all you have to do is repeat the process until you’re sure you’ve captured a perfect expression. It doesn’t usually take more than two to three attempts to get what you need.
As an added tip, I generally demonstrate this technique to my clients before asking them to do it. My goal in doing this is to get them to walk in a way that will yield the most flattering results. For the brides, I suggest placing one foot directly in front of the other, heel to toe, and swinging the foot that is in motion a little bit wider out than normal. This helps ensure that it looks like they’re actually walking and not just standing still. I make similar recommendations for the groom, only with slightly less exaggerated steps. Finally, the walk should be somewhat slow-moving, which makes it easier to keep everything in focus.
Wedding Pose #9: The Twirl
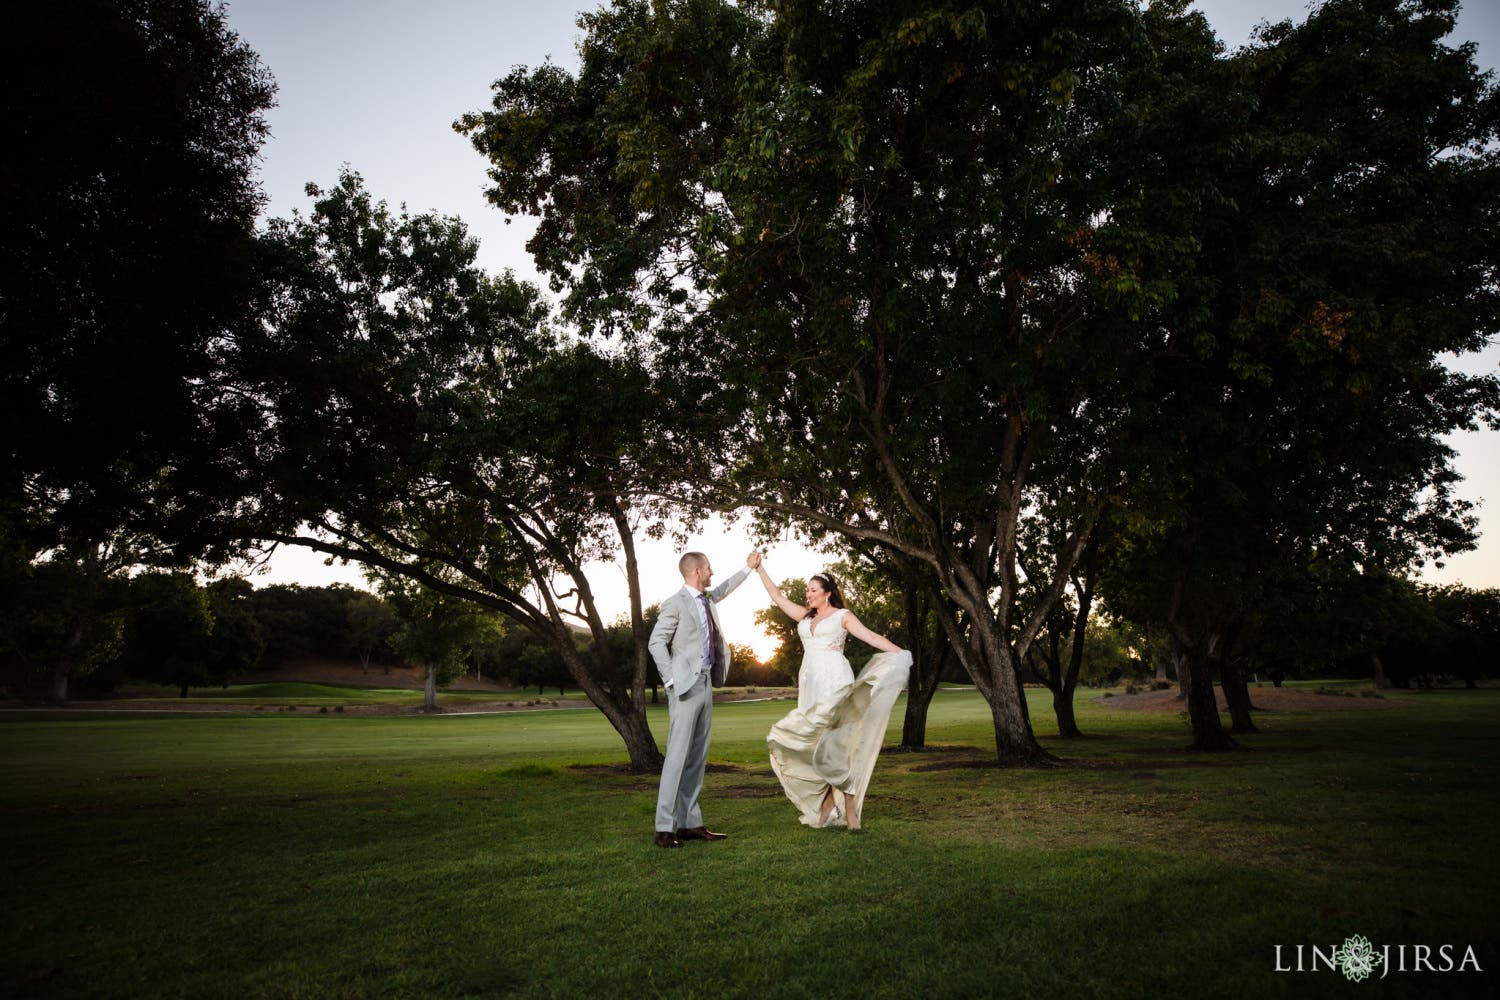
You’ve seen this pose a million times on the dance floor, but you really don’t need a dance floor to make it happen. The twirl is a popular go-to for the first look session as the groom spins his bride around to admire her in her wedding dress. This pose works well to show off the wedding dress while also introducing motion. Like other motion-inspired shots, it’s a good idea to snap several photos of the spin so that you have a better chance of capturing a flattering angle and expression.
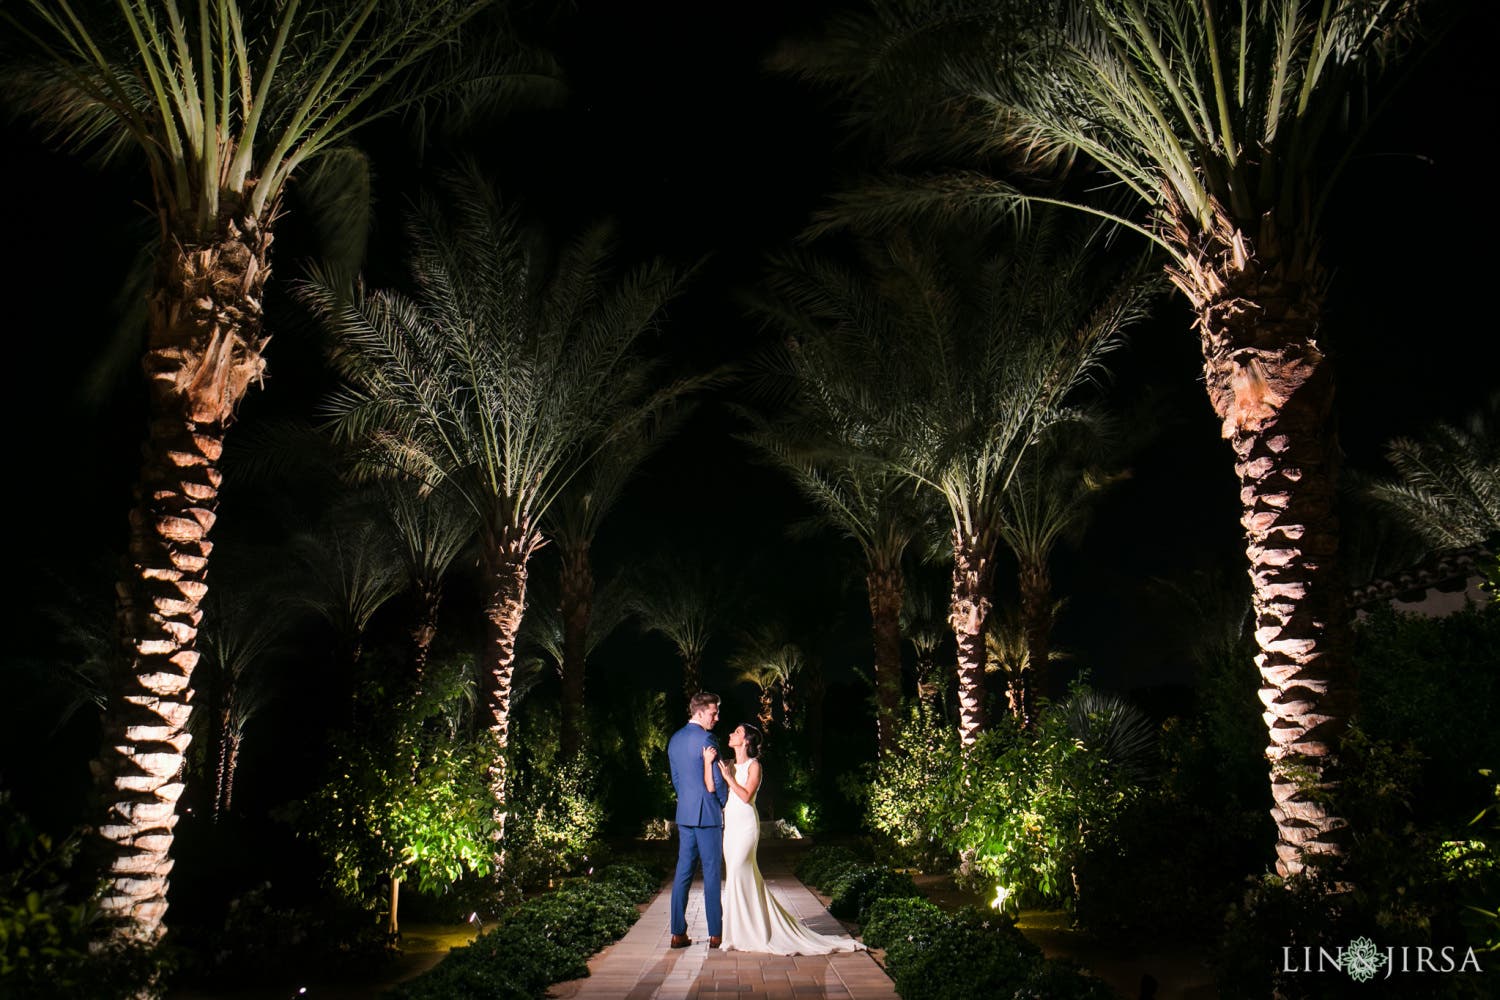
Wedding Pose #10: The Staggered Frame
This is probably the most unique pose on the list in that it completely separates the couple for the purpose of using one subject to create depth while framing the other subject. The beauty in this pose is that both the bride and groom are present while special attention is paid to one in particular. More often than not, I use the groom as a foreground object for framing the bride, but it can really work both ways.
For the image above, I simply shot over the groom’s shoulder and directed the groom to look away from the light, which cast his face in shadow. Then, I asked the bride to look toward the light, making her the brightest part of the scene, which is where our eyes are drawn. I used a fairly wide aperture to further separate my subjects, but I still wanted the groom to be recognizable in the foreground.
A Quick Note on Communication
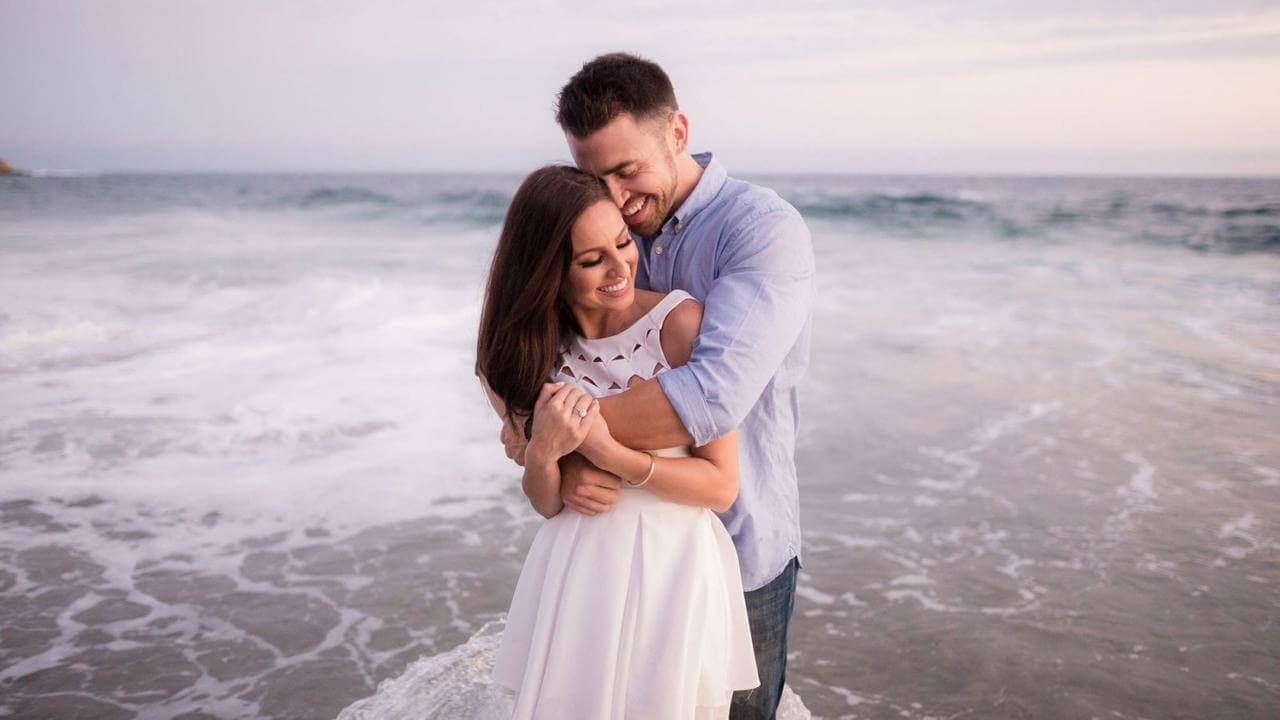
Now, with a framework for posing, focus on communication. It can mean the difference between creating cherished heirlooms and awkward throwaways. Try to direct your subjects into flattering, natural expressions using real-world examples. For example, in the image above, which I captured during an engagement session, I asked the groom-to-be to hug his fiancé as if he hadn’t seen her in five weeks. This was his authentic response and the moment looks completely natural, even though it was posed and directed!
Conclusion
At the end of the day, your job as a wedding photographer is to capture important moments throughout your clients’ day and make them look good in the process. The goal here is to help you achieve both by giving you a basic collection of wedding poses that can be modified as needed to best serve your couples while also springboarding your own creative ideas.
You’ll notice we only included 10 poses, but you really only need to remember the first five. If you do that, then you can create a seemingly infinite number of poses just by making micro-adjustments. That’s why we included poses six to 10 in an effort to show you what you can do using the basic framework. Put in the time to master these techniques and you should be set to make models out of all the subjects you photograph moving forward.