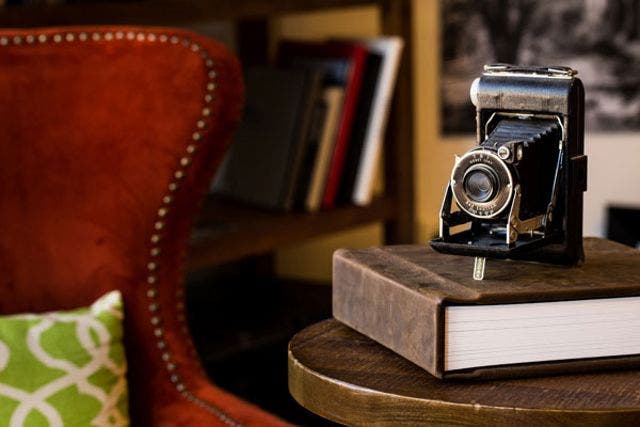
If you aren’t using photography in your efforts to sell your products or services, you are missing out on a powerful tool. However, the trick is to use this tool effectively. According to a recent article in the New York Times,the total number of photos taken in 2015 may reach one trillion, that’s right, 1,000,000,000,000. How can you stand out in a sea of a trillion photographs? Professional photographers are required in many instances, but as a small business owner, maybe one of the many hats you wear is a creative one. So if you are making some of your own imagery for your web site, your printed materials or for your social media channels, here are a few ways to make sure your efforts are making the greatest impact.
Simple Product Photography:
First, let’s talk about making photographic illustrations for your website or printed materials. I am a photographer, so one of my products is a leather bound wedding album. Notice that I didn’t just take a photo of the album on white; instead, I set up a household scenario suggesting how one might display their album in their home. We call this lifestyle. By showing the customer what they need and how they can use it, we add incentives to purchase the product.

Lighting a simple product shot does not require complicated lighting, just a large window (facing the sunless half of the sky) and a reflector. Position your product as close to the window as possible so that the window is to the right or left side of the product. The closer you get to the window, the softer your light will become. Set your camera on a tripod with a shutter release cable for a stable (shake free) photo.

The window will light up your entire scene from the side and give you a definite “direction of light,” which is what creates the volume you see in the photo. Your reflector then takes the excess light from the window and reflects it back on to your product to “fill” in some of those darker shadows. Move your reflector closer to or further away from the product until you can see the full detail in your shadows.

Image note: Compare the above image to the final photograph. Pay attention to the right hand side of the camera. In this image, the shadows are too deep, with little to no detail. In the final image you see full detail in those same shadows. This is the effect of adding the reflector.
While photographing a product, I find it extremely useful to compose and photograph in “live view” mode, so I can see exactly what my exposure and composition look like on the LCD screen. I also always shoot product images in Manual mode so I can control my exposure perfectly. (100 ISO, 1/6th Sec., f 7.6)
For more lessons on exposure and histograms, check out thesegreat lessons.

Image Note: Remember to activate your histograms in the camera, so you can be certain you are getting the proper exposure. Don’t allow the histogram to shift to the left or the right and clip the little mountains of information off the edge of the histogram.
Once I have my exposure and lighting the way I want it, I take the master shot. This master shot is the entire scene, it is the “life style” we are trying to portray. Then with the lighting unchanged, I move the camera to photograph the various product details that are important to sell this beautiful album to my clients.
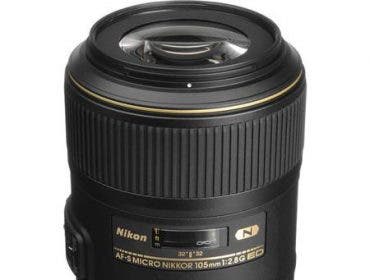
Owning a macro lens is an absolute must to get those serious details. As you look for those details, keep a close eye on the direction of light and make sure you son’t spin the product into a flat lighting situation.

Image Note: This image is taken with a Canon EF 100mm f/2.8L Macro IS USM lens. This lens allows you to get extremely close for your details and also includes image stabilization to keep you a little more stead when hand holding the camera. When shooting macro details, I highly suggest using a tripod.
Equipment used in this product photography session:
- 1 Bogen Tripod
- 1 Canon 5D Mark III
- 1 Canon EF 100mm f/2.8L Macro IS USM lens
- 1 Canon Shutter Release Cable
- 1 Large North Facing Window
- 1 Black Tripod Light Stand
- 1 Profoto Silver/White Large Reflector(also try using a sheet of white foam core as your white reflector)
- 1 “A” Clamp (to hold the reflector on the stand)
Product photography can be extremely challenging, even for a seasoned professional, so don’t get discouraged. Slow down, check your focus, watch your exposure and play with your lighting. And remember to tell some kind of a story with your image. Lifestyle sells.
Speaking of Lifestyle:
You may own a party planning service, or a yoga gym, a dude ranch, or a clothing boutique, either way, you have a lifestyle to sell. Make sure your images are promoting that lifestyle because that lifestyle is part of your brand.


Stay True to Your Brand:
If you are posting images on Facebook, Instagram, or any other social media channels, it is important to stay true to your brand. Even your Instagram photos should maintain a cohesive style and theme. If you are a travel company, then images from around the world would be an appropriate theme for photos in your social media channels. Maintaining a strong visual style to your photographs will help people correctly identify and associate your great images with your company or product.

Observe the difference between the previous set of social media images and those below. As a viewer you might even assume that each set was taken by a different photographer. Don’t confuse your fans. Stay consistent in your style even if that style evolves over time. Posting random photos that do not match your look will loose followers.

Working with and Lighting People
Since you sell products and services to people, you may need to photograph a few of them using your product, or happy about their services, or maybe you need shots of your technicians working in the field. When you do this, choose a location and a time of day that will allow you to photograph your subject with the sun behind the subject’s head (off to the right or the left). Doing this, turns the sun into a beautiful hair light. Never photograph people as they stare into the sun, and avoid allowing any rays of sunlight to strike the subject’s face. Instead, by placing the sun at their back, their face will fall happily in the shade of their own body.
Now, add one light about 45 degrees off to the right or left of the camera, which will give you a nice directional “fill light” on your model (who up until now has been in the shadow of her own body). Remember the large window in our studio shoot, created a softer light… the larger and closerthe light source is, the softer it will look.

Image note: Notice the extremely large Profoto Umbrella White XL. It is placed as close to the subject as possible just outside of the camera frame. Large light / close light = soft light.

Your goal with flash is to be extremely subtle as you fill in the shadows in the shot, just like we did with the reflector in our earlier studio shot, except now, you can adjust the power of the flash to increase or decrease to total amount of fill you are getting rather than moving the reflector closer or further away.

It is always important to work your camera in Manual mode, (if you understand it) and then take your time and manipulate the exposure until it is perfect.

In our studio product shot, we created volume in the image by lighting it from the side. We did the same thing in the following photographs, taken on a cloudy day in southern England. However, this time, our main cross light was not a window, but a flash with an umbrella and our “fill light” was the total ambient light coming from the overcast sky.

Photo Settings: ISO 100, 1/200 sec, f 5.6
Observe the volume in the photos of the bride and groom that is created with the use of the cross light (our flash and umbrella), but notice that there are no extremely deep shadows on the shadow side of their bodies because of the sky light, acting as our “fill light”.

Photo Settings: ISO 100, 1/200 sec, f 5.6
In the following behind the scenes image, the flash (Profoto B1 with a Medium White Umbrella) is being held up on a camera tripod for stability on a breezy day. A normal stand would blow over in the weather without a heavy sandbags to hold it down. Plus, a tripod collapses down for world traveling and can serve two purposes.

The Principles Apply Everywhere:

In the above image, only one light was used (a very large window above and behind the desert). Then a reflector was added in front of the cake, to “fill” the front of the pan and berries with detail. (ISO 100, 1/5th Sec, f 6.3)
Whether you are photographing people, products, food or landscapes, the principles all apply across the board. The lighting and composition of the photograph will capture the attention of the viewer, then the life style concepts will sell the product or the service.
Equipment Matters:
While you can find inexpensive substitutes for many things in photography (like a piece of white foam core as a reflector), there are many areas where the equipment really does matter. If you are just starting out and have not invested in a system, take your time, rent some gear and decide on a general camera maker, then start with the best camera body and lens you can afford.
The quality of your images will depend on two things: the camera chip or sensor that records the light and the glass (or lenses) through which the light will pass. Quality is important.
Camera sensors: Full frame chips have less digital noise than small NPS sensors, but cropped or smaller sensors have a telescoping effect on your lenses, so you can photograph distant objects with smaller lenses (for instance, a 100mm might now be closer to a 200mm lens).
Lenses: Lenses with wide apertures, like 2.8, 1.4, 1.2 are generally superior to those with higher f numbers. This is a great indicator of the lens quality, but it also allows you to capture more light and blur the background more. Also, when it comes to lenses, you do get what you pay for. If you can afford to, purchase the professional level lenses, they will yield far better results.
Micro Four Thirds Camera Systems: The Micro Four Thirds camera systems are a great way to get exceptional camera quality in a very small camera kit. If you are an amateur photographer and like to travel with your camera, this may be a great way to go. Because the chip is smaller, the lenses will be longer than on a 35mm full frame chip, and there will be a little more noise in the image, but these cameras are a far better option than a point and shoot for makingprofessional looking images. As a bonus, many Micro Four Thirds cameras use the same lens mount, meaning you can interchange the lenses between brands, so you can find a much wider variety of lenses for your camera.
Lights: Lighting is critical to every photograph. On a landscape image, you have to wait for the lighting. But a product image or a portrait requires you to either find the perfect lighting to to create it. Anyone who is serious about pursuing photography needs to own at least one flash or constant light source. I use small speed lights (the kind the go on the camera) when I need to be extremely mobile) and Profoto flashes when I need power. Either way, you want your flash to be an off camera flash, which means you need a flash and something to trigger that flash. The Canon 600RT and the Profoto B1 and B2 systems all communicate wirelessly with ease with their wireless camera triggers. Many other flashes too the same. If you don’t know which flash is right for you, go to the store and play with a few options. There are also great tutorials online on the subject of flash photography here.

The Basic Photography Kit:
- 1 Camera
- 1 Lens with the lowest f number possible and macro capabilities. 1 Tripod
- 1 Shutter release cable
- 1 Off camera light with trigger
- 1 Light stand
- 1 Reflector (or white foam core)
- 1 “A” clamp
Conclusion:
Photography is an extremely valuable tool in any business and a skill worth developing. The more comfortable you are with making your own quality images, the more opportunity you will have to put your company’s message out there in front of your customers in a powerful and impactful way. The tools you use are important, so make the investment with ample research and seek advice when you feel you are out of your depth. Most importantly, as you shoot, take the time to style your shots, slow your shoot down, and make sure you are taking quality exposures. Pay attention to the direction of light, light will work in your favor if you pay attention to it.
About Jared Platt:
Jared Platt is a Lifestyle, Wedding and Portrait photographer from Phoenix, Arizona. In addition to running a photography business, he travels the world giving lectures and workshops on photography, lighting and post-production. Learn more about Jared and his photography and workshops at www.jaredplatt.com.
See More:
Twitter: @jaredplatt
FB: jaredplatt
Instagram: jaredplatt
