As a photographer passionate about light and control… trust me, grids will change your life. When you learn to use grids in your studio photography, you fundamentally change the way you understand and control light. I experienced an incredible shift in the quality and precision of my work when I started regularly utilizing photography grids.
In this article, I am going to take you through the essentials of grids including what they are, how to use them, and the main ways they give you control. Finally, we will use multiple grids in a single shot to create a dimensional fashion shoot.
Be sure to check out the accompanying video on this topic on Adorama TV to see all of these concepts in action.
Furthermore, if you are just starting to fall in love with studio photography, you can also check out my 15+ hour lighting course at https://lindsayadler.photo/msl.
What is the Purpose of Grids in Photography?
Put simply, grids are used to restrict the spread of light in your scene. Depending on the lights or modifiers you are using, they may be attached directly to the light (as with Profoto monolights) or are an addition to modifiers. For example, you can add grids to soft boxes, silver dishes, beauty dishes, and even scrims.
Grids can be powerful to create tight pockets of light or prevent light from hitting the background. They channel the light to be more directional and have less spread/spill in the scene, resulting in a more restricted area of light.
Degrees of Grids
Grids come in varying degrees of concentration. Just remember this: the smaller the degree means the smaller the area of light. In other words, a smaller degree grid will give you more concentration or restriction.
Some modifiers allow you to purchase different degrees for more variability of control, and other modifiers just have a single grid option. For example, a silver reflector (or zoom reflector) usually offers several different degree grids (10, 20 or 30-degree grid). For most soft boxes, however, there is usually just a single grid option available for the modifier.
If you are looking to learn more about soft boxes, check out this article: Soft Boxes: Containing, Directing and Diffusing Light.
Here you can see a no grid — then 20, 10, and 5 degree grid attached to a Profoto D1. All are equal distance from the background and only the grid has changed.

How Do Grids Give You Control?
Grids help you to control the spread of light in the scene. Therefore, grids become powerful tools both practically and creatively. Let’s take a look at some of the main ways they provide control.
1. Grids Help Reduce Lens Flare
As you are now aware, grids help to control the spill of light. This is particularly important when adding grids to a rim light or in a small photography studio.
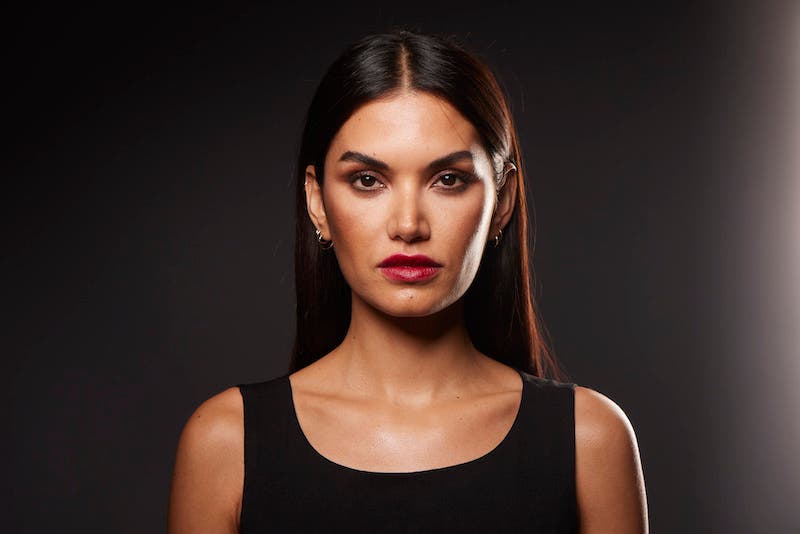
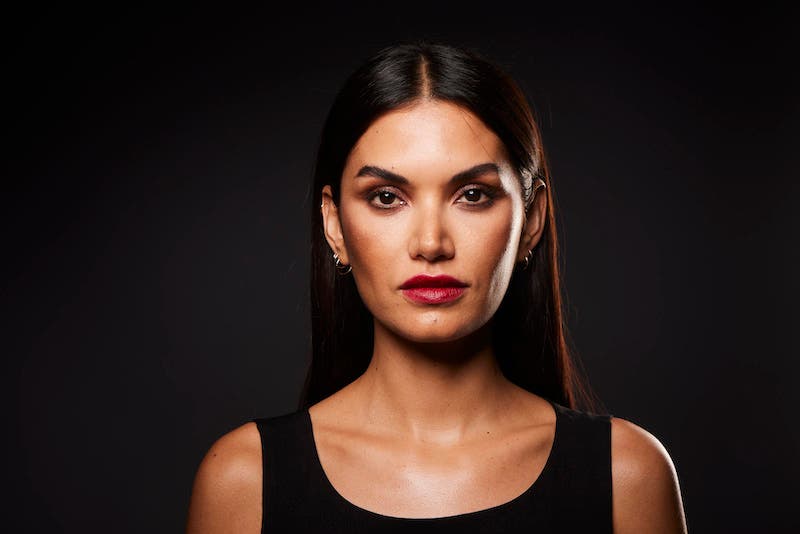
In a small space, a rim light may create an unwanted haze/flare on the edges of your frame. Adding a grid (like a grid to a 1×4 ft. soft box) reduces or eliminates lens flare.
Here you can see the exact same photo with a 1x4f soft box as a rim light, located to the back right hand side of the frame. In the first image ,you see there is a bit of haze or flare. By adding a grid in the second image, the haze has been eliminated because we have helped to reduce the outward spill of light.
2. Grids Control the Spill of Light
We have certainly addressed this point a few times before, but let’s talk about it as a broadly applicable and useful tool. When grids control the spill of light, how can this help you? We already saw it can prevent lens flare. Why else might it be useful?
Let’s say that you don’t want light to hit your subject’s feet because the floor becomes a visual distraction. Or, perhaps your main light is spilling on the background and creating unwanted highlights or shadows. Adding a grid to your main light can restrict light off both the floor and the background. Light restriction isn’t only making the light a smaller and more concentrated area, it also causes less light to hit the background as well.
In this first image, you can see the subject is lit full length with a beauty dish. In the second image, we have added a grid. Now the lower part of her body is dark and the background is receiving no light.

Perhaps you may think your light in the first shot is better — but that’s not the point. It’s not about better or worse… it’s about control. Now you can decide where to add light to the scene. Do you want the light at the bottom of the frame to be more subtle? If so, you can add a reflector or another light. Do you want to create a glow of light on the background? You can add a light specifically for that task. In other words, you decide where the light hits when you add grids.
Furthermore, in a small space, adding grids also has another practicality. Light bounces off of any surface. If you are in a small studio with white walls, it is basically like being surrounded by reflectors. By adding grids, you prevent the light from spreading as far. Therefore, you have more control.
3. Grids Create Pockets of Light
Creatively, it can be very powerful to use pockets of light. You can create a glow on the background behind the subject for separation or just a kiss of light on the face for a bit more pop. You can create dramatic low-key images with a tight area of light on the face.
These images were both created with grids directly on the subject and background. The shots are sculpted, dramatic, and demonstrate control that wouldn’t be possible without using grids.
4. Grids Create Depth by Layering Light
Lastly, grids are a powerful tool for preventing your images from looking flat. You can create depth by selectively adding layers of light into your shots, instead of evenly lighting everything.
Using one light to illuminate a scene is certainly not wrong. Although, sometimes people tend to just “throw” light everywhere… one soft box used to light everything from the subject, to their dress, to the background behind them. This can certainly look beautiful, but it can be very limiting when you want to sculpt or create dimension. Using multiple grids will allow you to control the spill of light and then carefully layer in light… but only where you want it!
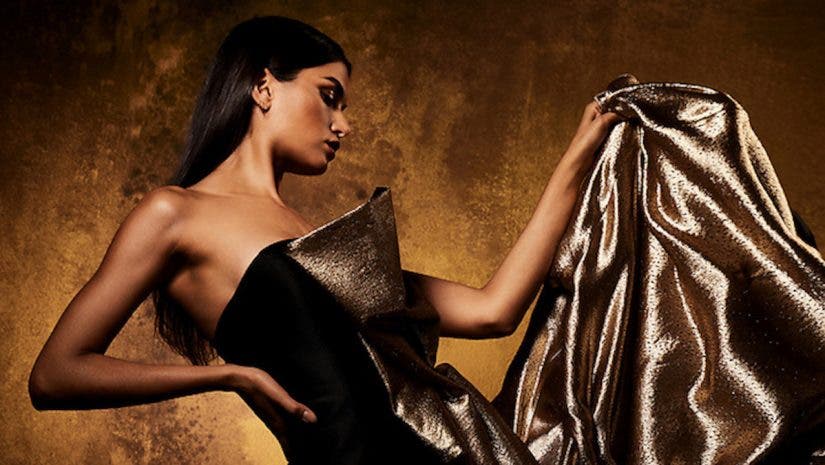
Let’s put all of these concepts together by taking a look at a fashion shoot where we create dimension. The goal of the shoot was to show how grids give you control and allow you to layer light in a way that creates definition, separation, and depth. There were four lights in the scene — each one with a grid.
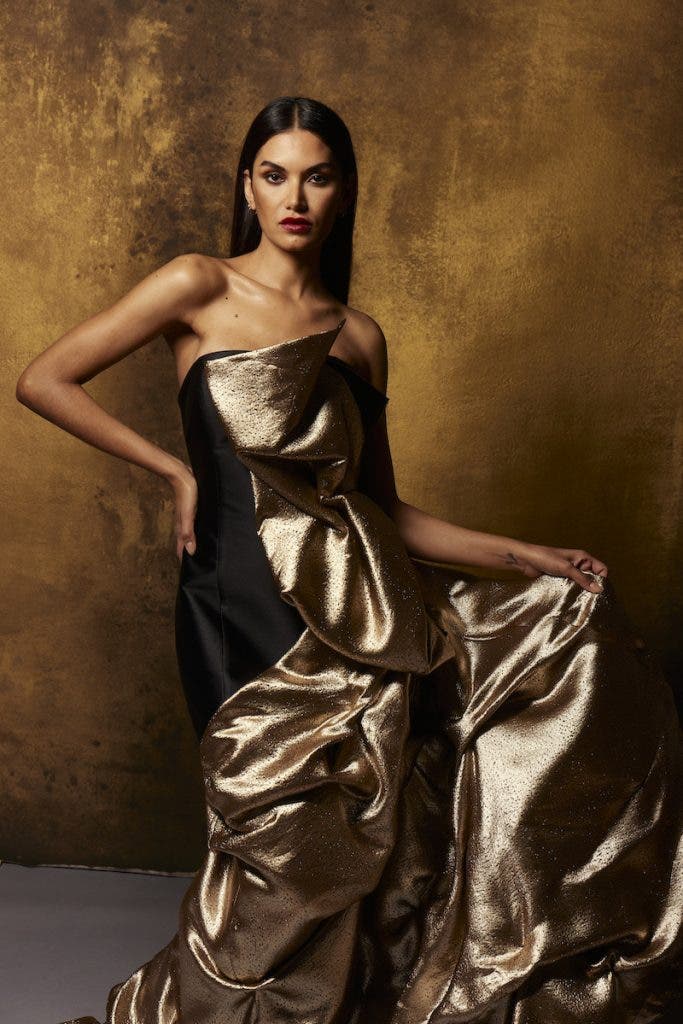
In this first image the entire scene is lit with a single beauty dish — no grid — to light the entire scene. It’s fine, but not necessarily refined. Let’s start removing and then selectively adding light back into the scene.
Here’s how I did it:
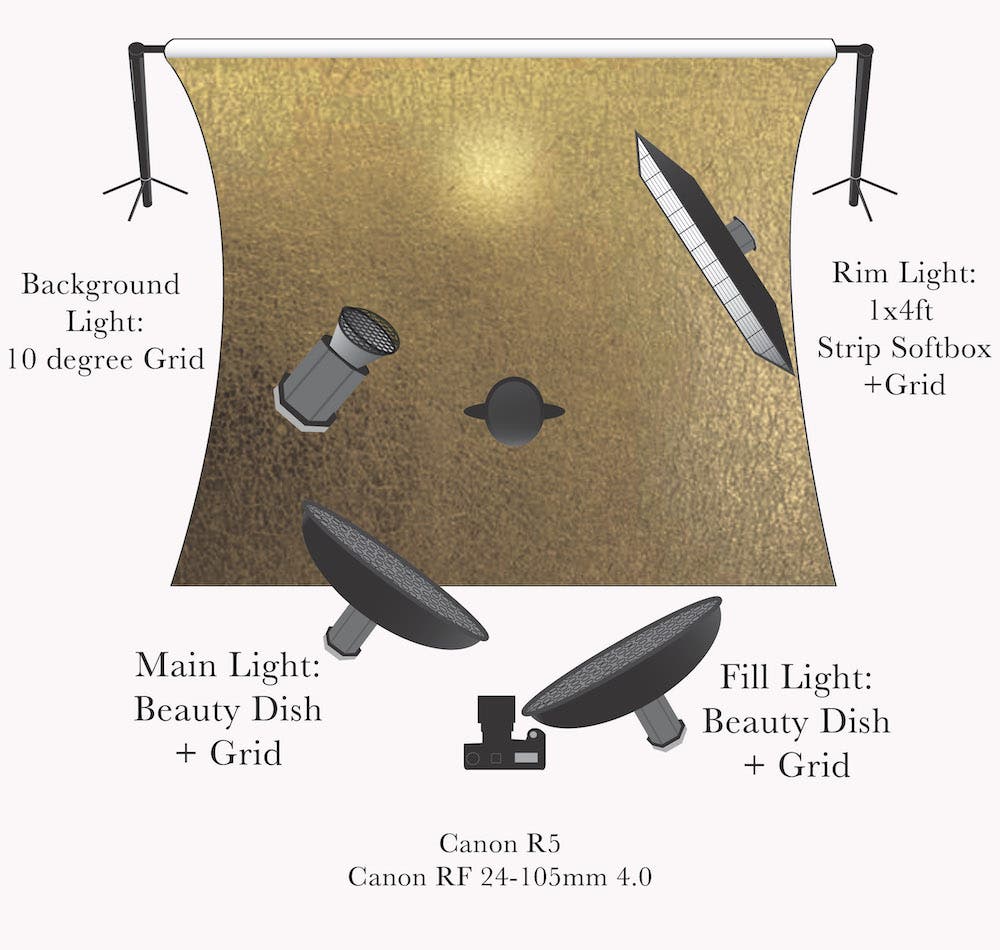
A grid was used on the main light (beauty dish + grid) to prevent light from hitting the floor and the background. The background and dress are dark, but we can address that by adding other lights.
A grid was used on a beauty dish and floor stand in order to control the light, so it would only be used to create more shimmer on the dress. This is how we can ensure that the model’s face is brighter than the dress and we can direct the eye in the scene.
Next, a grid was used on the background light to create a glow for separation. This helped the golden tone of the background shine through, while making sure the subject didn’t blend in. Notice how this creates a controlled separation when compared to the first shot.
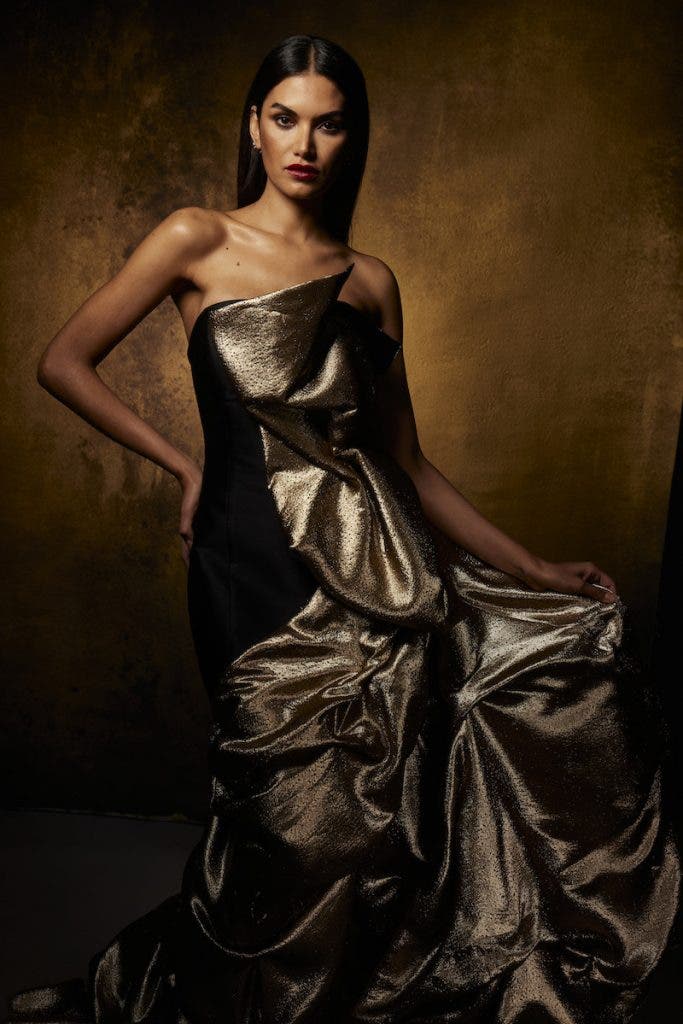
A grid was used on a 1×4 ft. soft box to create a beautiful rim light without too much spill or lens flare in this low-key shot.
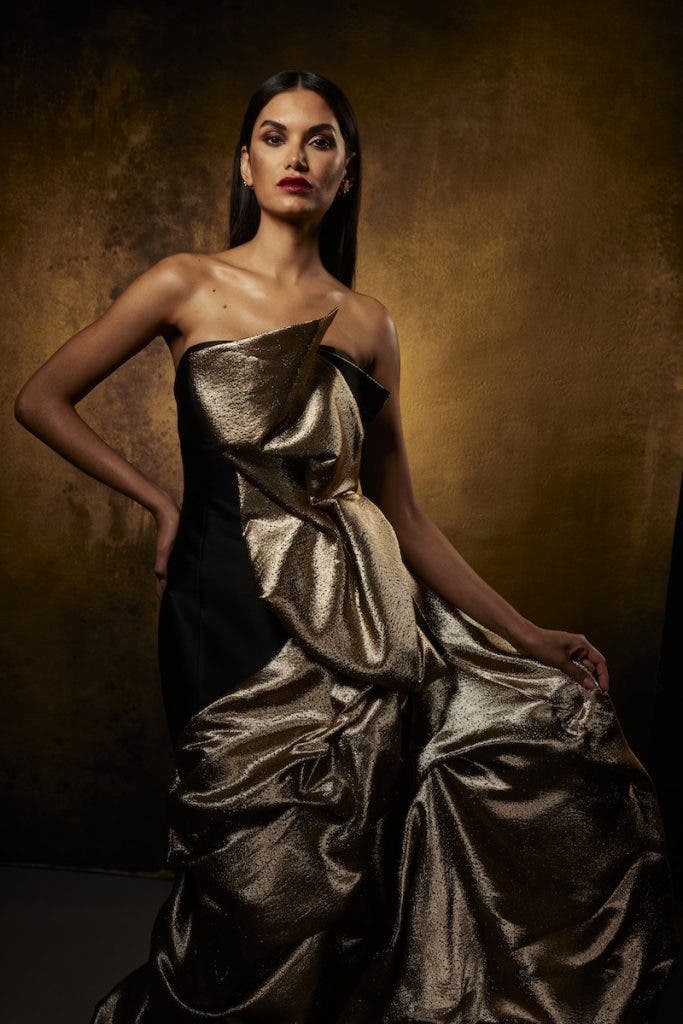
Bringing it All Together with Grids
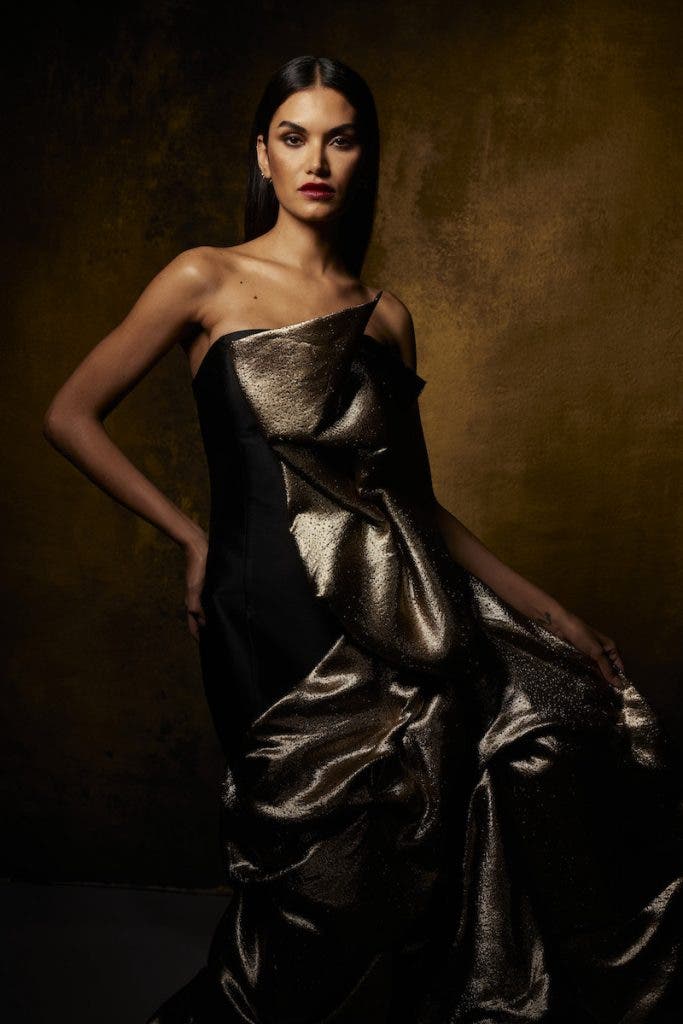
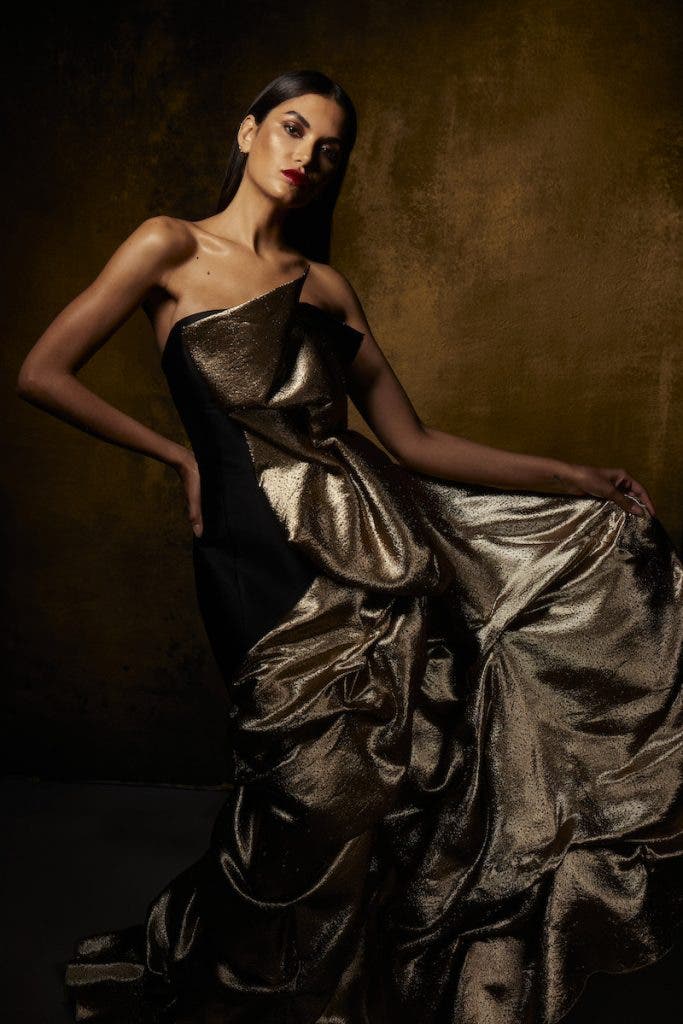
Lighting is just one part of the equation. Now we have to consider pose, expression, composition, and more to capture the perfect shot. These are two of the images that I created from this sample shoot. You can see they are carefully sculpted with controlled areas of light created by using grids. Is this the only way to light? No! But notice that I was able to make decisions about the shape, dimension, and exposure throughout the scene instead of letting the lighting chips fall where they may.
Looking to learn more? Check out What is a Fill Light? And How Can I Use It?
