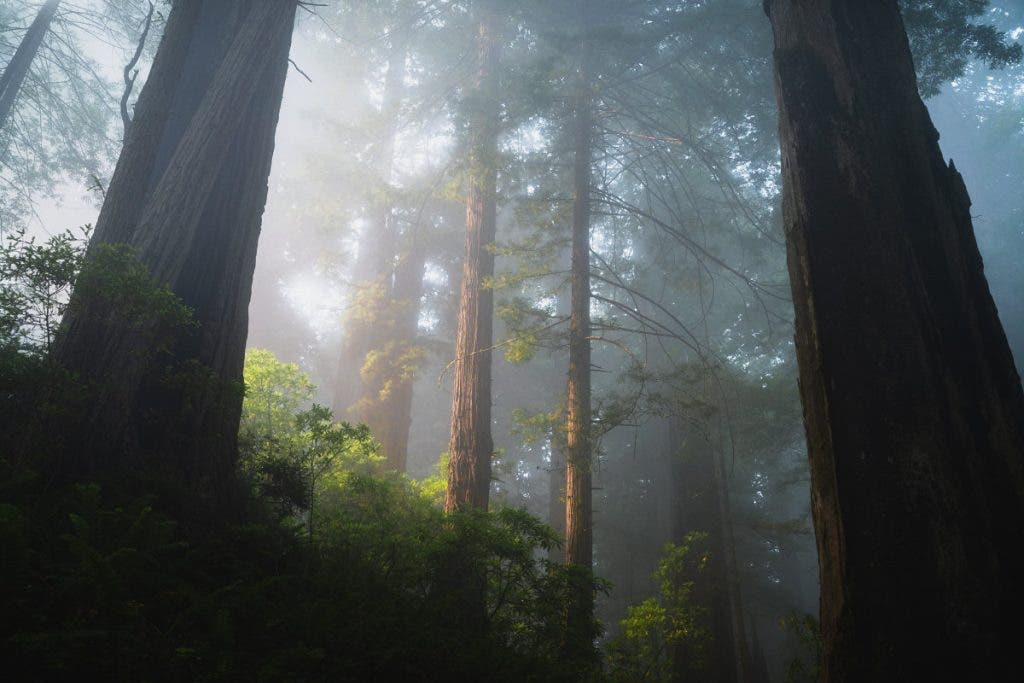
Whether you shoot people, plants, peaks, pets, or anything else under the sun, adding more depth to your photos certainly wouldn’t hurt. While you’ll never be able to turn your two-dimensional photographs into three-dimensional works of art, adding a little more depth to your images can help your image have a little more impact, throwing your viewers right into the scene. By using the tone curve trick in this article, you can add depth to your photos.
You can do plenty of things in the field to add depth to your images. Add foreground objects, use bokeh, shoot at the right time of day, and even use certain camera filters. But what can you do to add or accentuate depth in your images after the fact?
Luckily, this article has you covered. Let me show you how to use the tone curve in Lightroom, Photoshop, or RAW photo editors to give your photos more depth.
How to Use the Tone Curve to Add Depth
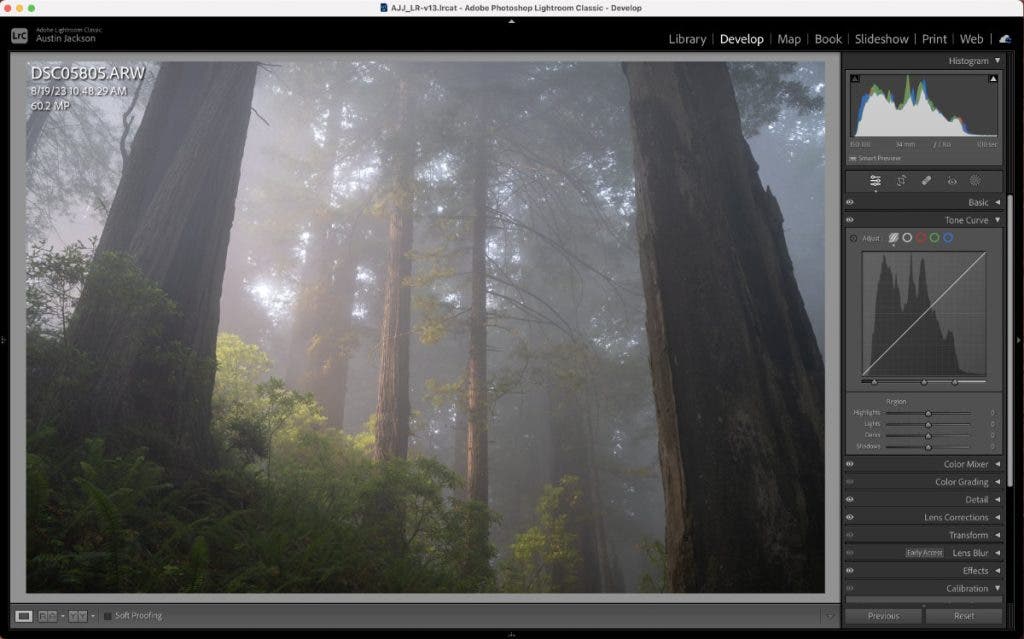
You can apply this tone curve trick in nearly any photo editor to add depth to your photos. Still, for the sake of this article, I’ll be using Lightroom Classic. This technique will work on a wide range of images but works best on images with a wide dynamic range. Images that showcase both very dark shadows and very bright highlights will work the best.
To begin, open your image in Lightroom Classic and select the Develop Module. Scroll down on the right side of the screen and open the Tone Curve box.

The curve that appears by default is the Parametric Curve, which isn’t quite as customizable as the curve we want to use. Change to the Point Curve, which is the white circle outline option. This curve allows you to create and adjust points however you see fit, unlike the Parametric Curve, which is somewhat restrictive on how you can modify the curve.
How the Tone Curve Trick Works
Before we jump into the adjustment, it’s essential to understand how the tone curve works. The graph you can see below the line is simply the histogram. The further to the left the dark area is in the graph, the darker the pixels. The further to the right, the brighter the pixels. When you adjust the position of the line, it changes the luminosity values of the pixels in your images.
Now that we understand how the tone curve works, we can jump into the adjustment. One of the most common photography editing techniques is to create an s-curve, where you make a point around the ¼ mark on the line and drag it down, then create another point on the ¾ mark and drag it up. By doing this, it darkens the shadows and brightens the highlights in your image, effectively creating contrast. This basic s-curve is an excellent way for you to apply contrast to your scene since it allows for complete customization, as opposed to the contrast slider, which is fixed.

Tone Curve Adjustments
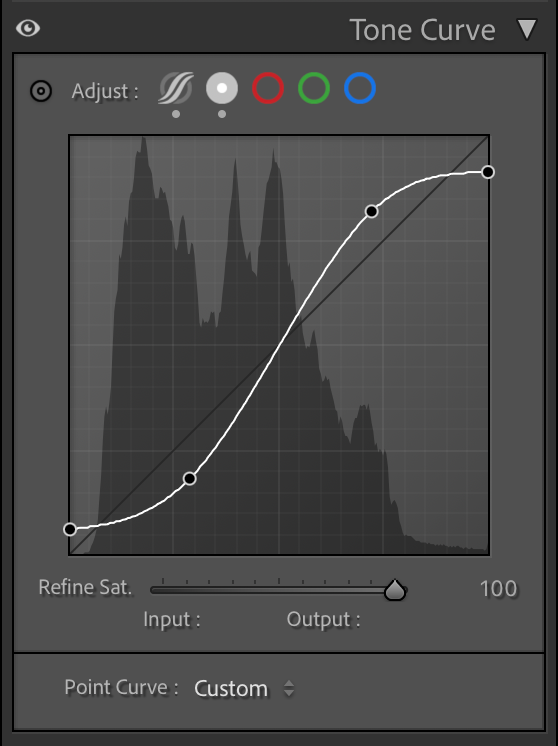
For many photographers, this would be the end of the road regarding the tone curve. However, I’ll show you a trick that will help add depth to your photos. Before you proceed, add just a bit more contrast than usual. Then, click and drag the very left point of the curve and bring it up. You only need to do this slightly, and you can watch the “Output” value change as you adjust this point upwards.
I generally find that somewhere between 5-15 points is enough. If you go much further, the darks in your image will become flat. If your image has bright highlights, you can also go to the top right point on the curve and bring it down slightly.
By bringing up the point on the left, you prevent the darkest shadows in your image from losing detail, which can happen when you use the s-curve. You keep the shadows dark by slightly bringing this point up, but don’t lose the details. Conversely, bringing the point on the right down protects the highlights from being too blown out. Again, you want to do this sparingly, as you’ll end up with flat highlights.
The finished look of the tone curve should look roughly like this. Each unique photo will have a slightly different result, depending on your taste.

Tone Curve Preset
Once you have the adjustment looking the way you want it, press and hold the eyeball in the corner of the tone curve box to toggle the effect off and on. If you need to adjust the curve, click and drag from the points you have already created rather than create more points. Finally, to save your adjustment as a preset, click “Custom” and select “Save…”. You are basically saving the curve as a preset for future files. However, I always recommend touching up the curve on each unique image.


Conclusion
This tone curve trick is one of many ways to add depth to your images. Still, it is one of the easiest ways to add depth to your pictures via post-processing in a way that isn’t going to overcook your image. Adobe has loaded Lightroom with many photo editing tools, and it can be challenging to know which tools help make your images more impactful. Apply this adjustment at any point in the photo editing process to add more depth to your photos!


