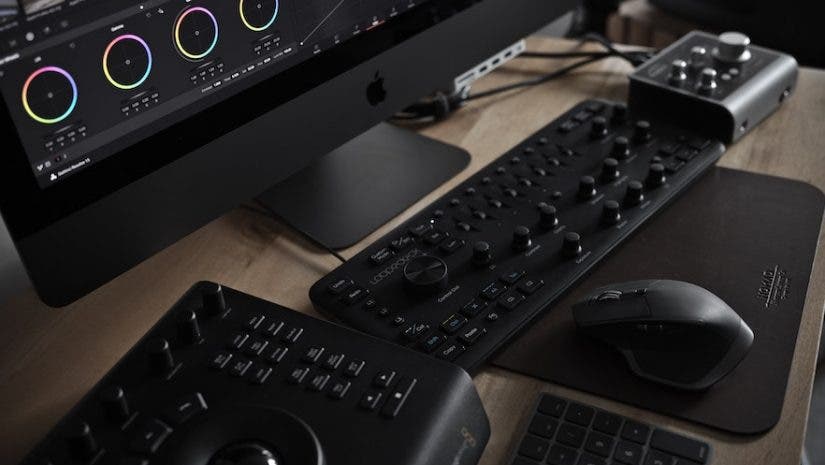
DaVinci Resolve is a non-linear editor (NLE) that was created to assist you with all areas of post-production, saving you time, money, and improving your workflow. It’s the ideal solution for content creators, podcasters, and both independent and large budget filmmakers.
When we last met in our Resolve series, we focused on a general overview of DaVinci Resolve. This time around, we’ll dive a little bit deeper into getting started with the program so that beginners can quickly navigate the software from start to finish and find some of the most commonly used functions inside Resolve.
DaVinci Resolve Popular Functions:
- Proxy creation submenu
- Auto align clips
- Video and Audio Effects
- Clip Gain adjustments
- Multicam clips
- Titles
- Transition Effects
- Keyframes
- Color wheels and Curves
- Multiple export formats
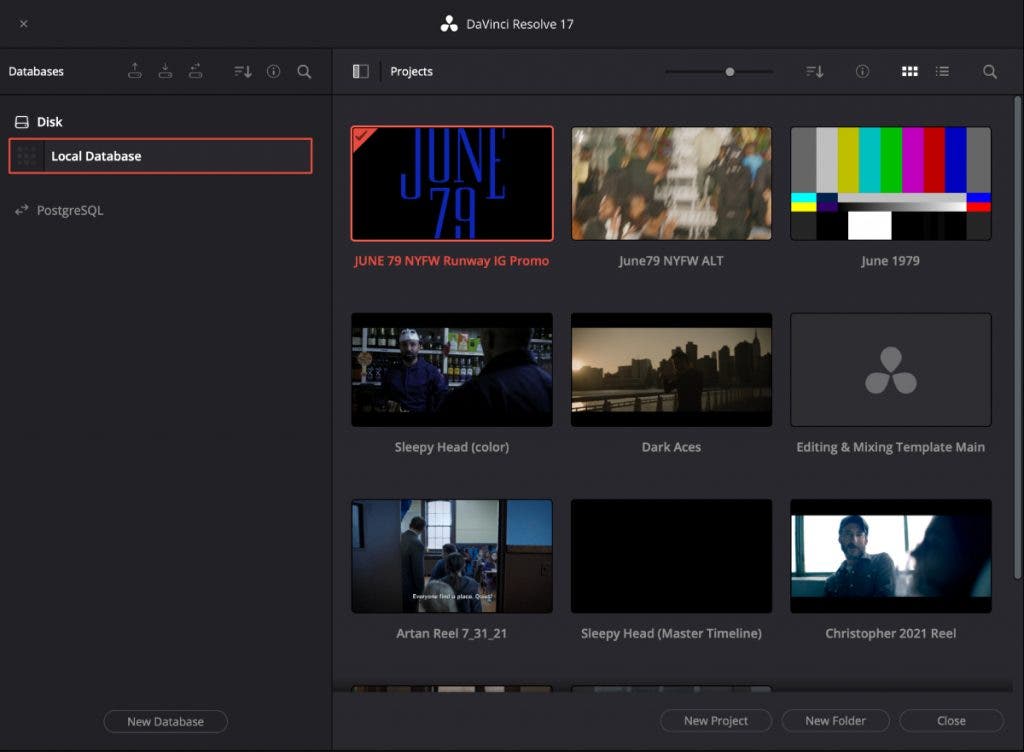
When you open Resolve, you’ll be greeted by the Project Manager page. You can create a new project or open an existing one. If you want to start a new project, choose a name that will help you easily locate the file later on. Once created, you’ll be taken to the main interface. You can return to this page by clicking the home button on the bottom right at any time.
At the bottom of the screen, you’ll notice several icons for Pages. Each one correlates to the specific section in a standard video workflow from left to right: Media, Cut, Edit, Fusion, Color, Fairlight, and Deliver. We discussed each of these sections in depth in our last article, in case you need a refresher.
Importing with DaVinci Resolve
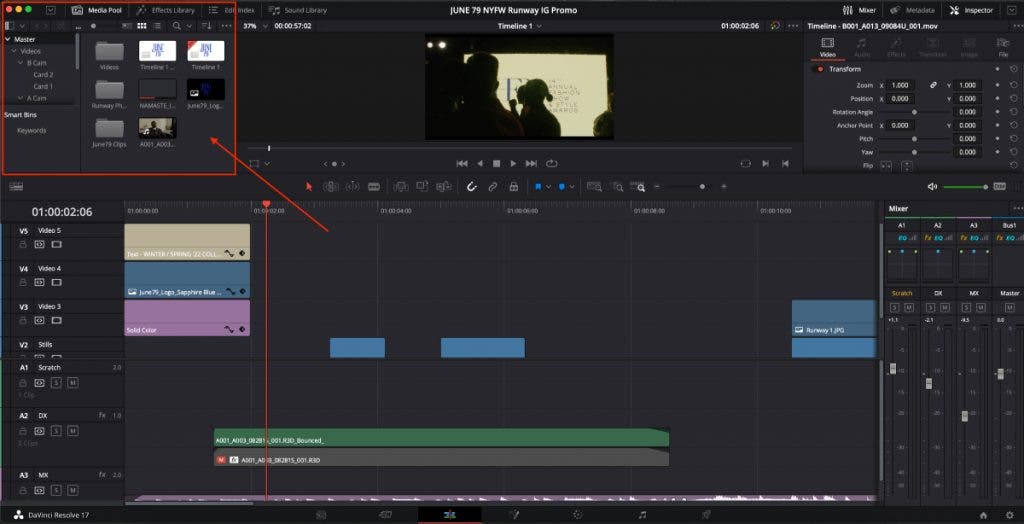
On the Edit or Media pages, you can import all of your video, photo, audio, and music files by simply dragging them from your hard drive and dropping them into the Media Pool window on the left. Importing on the Edit page is a simple solution for smaller projects and quick videos. If you’re working on longer content — such as short films or features — you may want to import and create Bins on the Media page. This allows for streamlined control and organization via folders. While you’re here, you can double click each file if you want to preview them in the main previewer window. You can now drop any of the individual files from the Media Bin onto the timeline below to start editing.
Timeline
The timeline is where you will do all of your main work, editing, and building out your video project. All files are showcased by clips and default to standard colors upon placement. Video files are blue and audio files are green. You can change the default colors by right clicking on each track and choosing, “change track color.” This is incredibly helpful when working on larger projects with multiple tracks to keep organization by groups: dialogue, music, fx, etc.
To play back or stop footage on the timeline, your basic controls are located directly in the center of the window with easily recognizable icons. Spacebar is a second option for playing and stopping footage from wherever the red playhead sits. You can click and drag the playhead to move it around and check single frames or sequences quickly. To save your project — and you should save often — use Command + S on Mac or Shift + S on Windows.
You can trim your individual clips by using the selection or razor tool or by dragging the sides of each clip inwards. Move clips by holding the mouse click and placing them where needed. If you place two video clips on top of each other, the clip in the back will get cut out. If you place a video clip on a track directly above another video clip, the one on top will take priority on the timeline.
You can also add video and audio fades by holding the little white tab on the top edges of each clip. Simply drag them to a point and playback the footage to find what works best for you. Additionally, you can use the Video Transitions section on the top left Effects Library panel and drag them to the end or beginning of a video clip for some added flare. Some of these effects include cross dissolve, dip to dissolve, and plenty of others.
Tracks
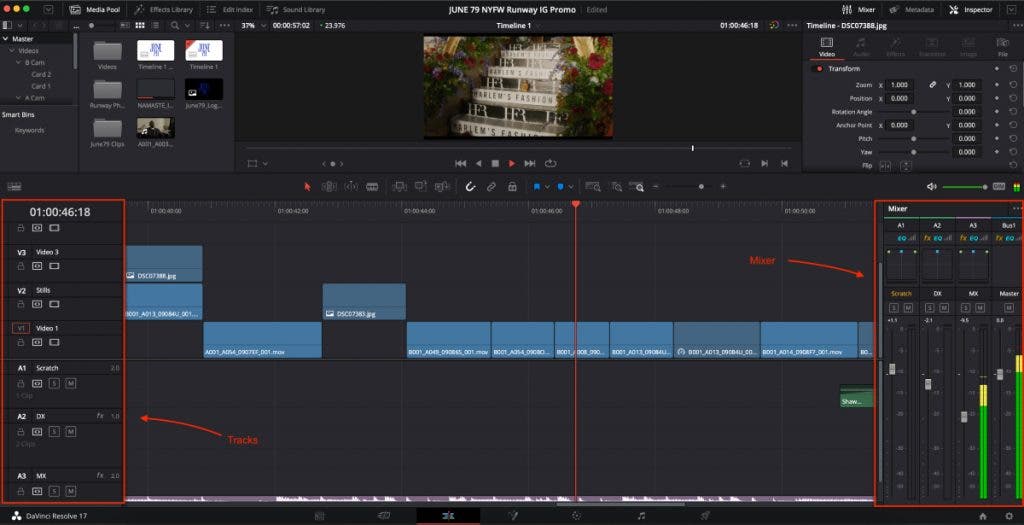
On the left side of the main window, you’ll see your track names with icons beneath them. You can rename tracks by double clicking on them. As mentioned earlier, you can change the track color and track type (mono/stereo) by right clicking on them as well. There are several icons shown on each track that serve different purposes.
For the video tracks, the lock icon does just that. It locks the track so no adjustments can be made. The video frame icon hides the video content on a particular track. While on the audio track you have S for listening to a single track, M for mute, and R for recording any voice over, foley, or ADR.
You’ll notice a thin horizontal line across the middle of your audio clips. By dragging this up or down, you can adjust the overall clip gain of that particular clip. If you want some added control on the volume levels, you can add what are called, “keyframes.” To add those, place your mouse where needed, hold option, and click. You’ll see a dot appear on the line. Add several keyframes to have more control and pull on the line to raise and lower levels at key points in a music track or for leveling out dialogue.
You will see the Mixer on the right side of both the main window and Fairlight page. This is where you’ll see the audio tracks listed that you create along with a Master bus. You can pull down the faders to adjust overall track levels when mixing your music. A good rule of thumb for a baseline audio mix is that you want your dialogue to stay out of red when looking at the color bar meters, and your music to stay just out of yellow. This is just a starting point. Mix to taste.
Inspector
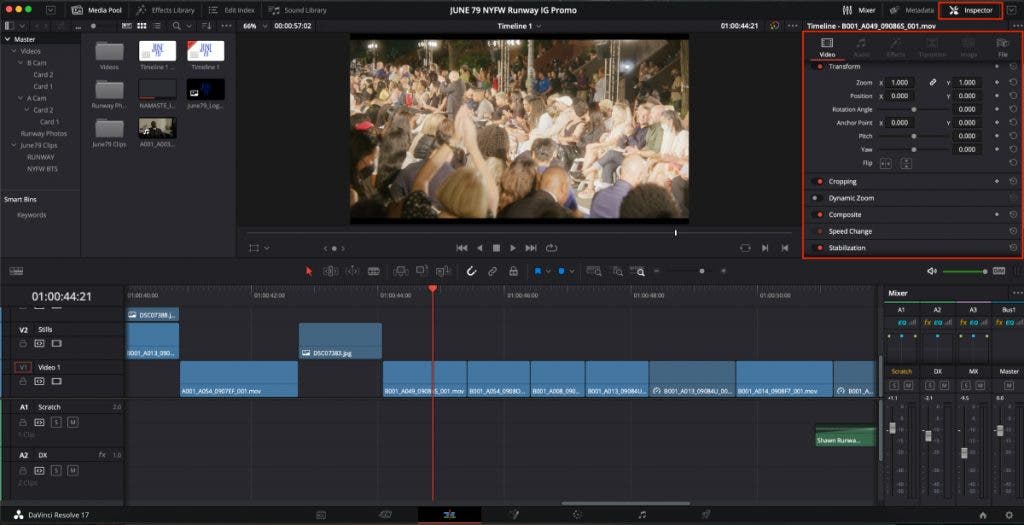
The Inspector Window on the top right on the main page gives you plenty of options to make extra adjustments to your video and audio. Some of them include titles, cropping, transforming, zoom, opacity, and orientation. The options work simply. Click the main section to show more options. To make adjustments, drag the slider. To undo any changes, press the reset icon. Press the red switch to turn off or on each set of options.
Under Video: Stabilization can help lessen shaky footage. Lens Correction helps to minimize any distortion in your footage. Change the opacity settings to make your footage less opaque. Dynamic Zoom crops into an image by a percentage set by you. Annotations allow you to add hand drawn arrows and icons to any video clip.
Under Audio: Here you can adjust the volume of an individual clip and pan the audio towards the left or the right. You can also add an EQ to a specific clip to filter out frequencies that aren’t pleasant to the human ear and environmental noise such as air conditioners and low traffic rumble.
Under Image: Make some basic color adjustments to your raw images using the same sliders as in other sections of the Inspector. First, choose your color space, white balance, and gamma options from the pull down menus that correlate to the type of footage that was shot. From there, you can adjust the sliders for contrast, exposure, color, saturation, etc. This is pretty much exactly how you’d find similar interfaces in Lightroom or Photoshop.
Color
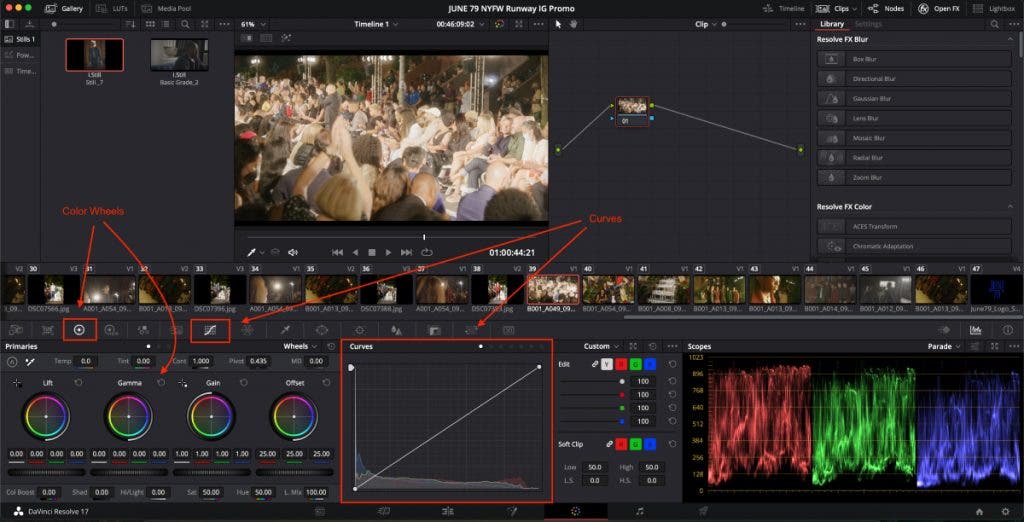
If you find yourself wanting to have more color control over your image, you can skip the Inspector window and click on the Color page icon on the bottom of the main window. If you’re new to color correction, this section can make you scratch your head for a minute because there’s so much going on. Essentially, it’s a professional toolset for color correcting raw footage.
It includes wheels, sliders, color curves, and color scopes. Resolve also has plenty of pre-installed LUTs for use with different camera profiles you can use as well as any you may already own.
To get started with some basics in the Color page, click on the color wheel icon. From there, you can adjust the lift, gamma, gain, and offset by adjusting the horizontal wheels. You can also select the Curves icon to start playing with the low, mid, and high tone color ranges. The curve display is essentially the same thing found in most photo editors.
Deliver
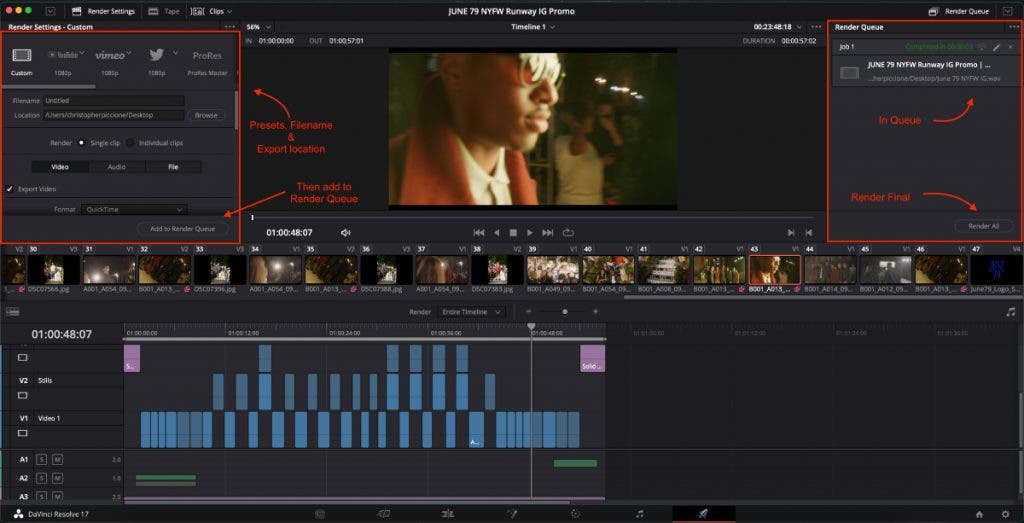
You’ve made your edits, added titles, adjusted your audio, spiced things up with some color and are now ready to export your completed project. Hit the last icon in the lineup at the bottom — the little rocket ship.
Adjust the highlighted region to select what section of your timeline you’d like to export. You can select any of the preset export options on the top left or enter your own custom audio and video settings in the regions below the presets. You can even export and upload directly to Twitter and Vimeo. If you’d like to export for Pro Tools or other formats, you have plenty of options to choose from available to you.
Now that you’ve got your parameters set, enter the file name and directory you’d like the files to save to. Click “Add to Render Queue.” You should now see your file in the list on the right side of the delivery page. Next, click on “Render All” and your file will now render out to your pre-determined save location.
DaVinci Resolve is a one-stop shop for all of your post-production needs. It has evolved from simply being a color-grading program to a formidable NLE over the years. New features and updates are released on a regular basis. So, if there’s a bug, it will be fixed as soon as possible. To download and learn more about DaVinci Resolve by Blackmagic Design, visit their website.
*The version of DaVinci Resolve at the time of this article was 17.3.1*
