Light is a vital part of portraiture. Heck, it’s a vital part of photography period. The word “photography” literally translates “to draw with light”. There are many ways to introduce and use light in a portrait and we’ll go into some of those ways and more in this second installment of my series: The Art of Portraiture. In case you missed the first article, check out, The Art of Portraiture: Composition, Depth of Field and Background.
LIGHT SOURCES
Daylight and a Reflector
Daylight is the cheapest and easiest way to light an image because most of a day, it is always there. The quality or characteristics of it may change due to the weather, but it is always available. A photographer’s optimal daylight situation is partly cloudy or overcast. This is mainly because when the sky is sunny and there are no clouds in the sky, first, there is no texture in the sky which is the result a cloud will insert into an image. Second, a sunny day tends to wash out colors. An overcast day will enrich colors.
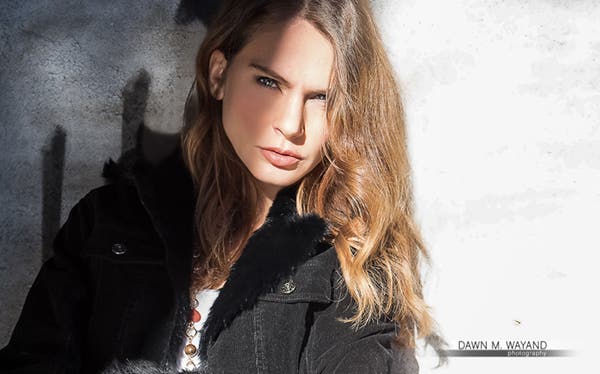
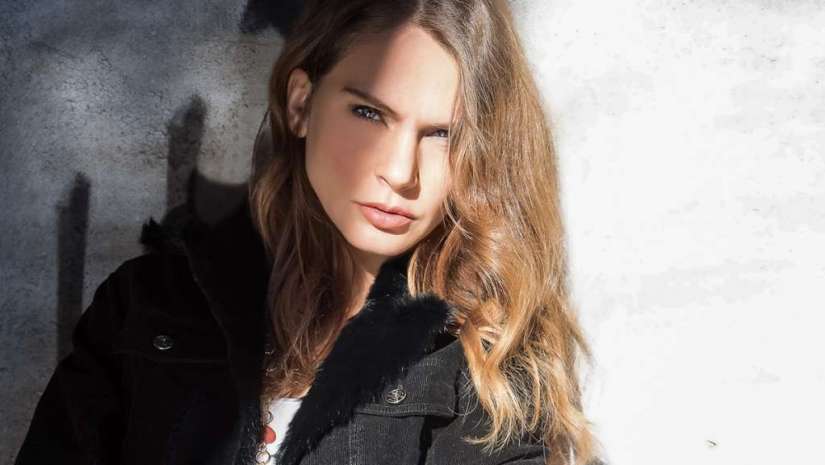
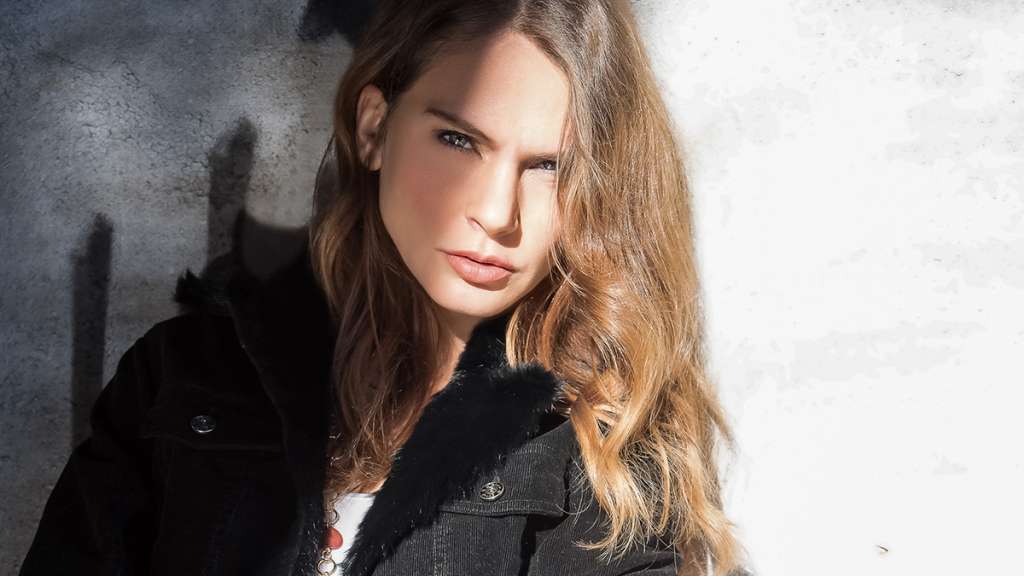
A reflector was used on the left as I wanted to play with shadow and bright sunlight.
Model: Daria Komarkova
Typically, you will want to position your subject with their back against the light source. A reflector is key to have on hand regardless of the weather since there is nothing to bounce light back onto your subject like a white ceiling or wall would. Whether you are creating a headshot, 3/4 shot or a full body shot, a large reflector is a terrific tool for bouncing a lot of light back onto your subject to fill in the shadows that appear under the eyes, nose, and neck.
Speedlights
Speedlights are an inexpensive light source that can be used on- or off-camera. They tend to be a versatile tool and a more convenient solution than a monolight or strobe.
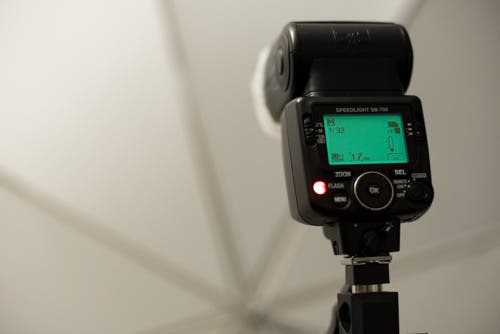
My Nikon SB-700 Speedlight.
While they are a tiny little light source, there light can be spread through the use of tilting its head and bouncing its light off of a wall or ceiling onto a subject, or it can be combined with a modifier such as an umbrella or softbox to widen its effect.
Continuous Lights
Continuous lights are as they are titled: continuous running lights. They do not flash like a speedlight, monolight or strobe would. Some of the benefits for using a continuous light are that many subjects tend to relax more under continuous lighting rather than a flash and that you can shoot wide open for a shallow depth of field. They are also great for shooting people that blink a lot. The downside to continuous lights is that you are limited on modifiers and a tripod is almost a must for the sharpest image when setting the shutter slower than sync speed. Continuous lights come in a few flavors: tungsten, fluorescent and LED lights.
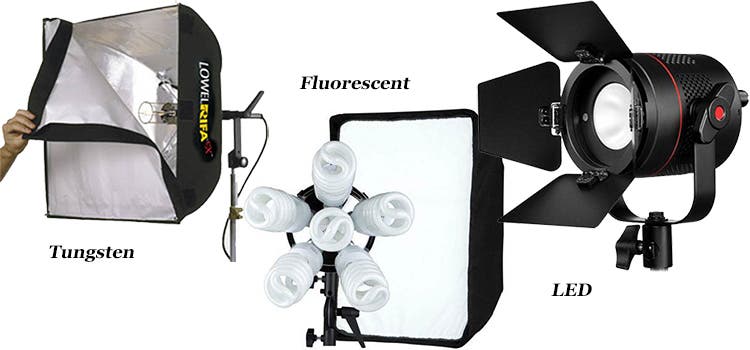
Left to Right: Lowel Rifa 66ex – 750 Watt Light, Westcott Spiderlite TD6 and the Fiilex P360EX Variable Color LED Lights.
Images by Adorama.
A few good recommendations I have tested and used in the past for continuous lights and that are available at Adorama are:
- Tungsten: Lowel Rifa 66ex – 750 Watt Light available for around $475.11
- Fluorescent: Westcott Spiderlite TD6 available for $419.90
- LED: Fiilex P360EX Variable Color LED Lights available for $795.00 each
Strobes
Strobes are generally the lighting tool used in studio portraiture as they emit a great deal of power and light your image for capture in a split second. They can work with almost any modifier that is compatible with their make (and sometimes, model), usually using a speedring adapter.
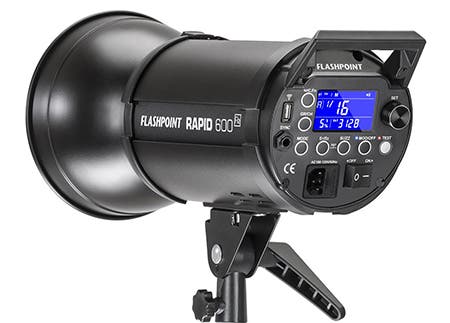
Flashpoint Rapid 600 HSS Monolight.
Image courtesy of Adorama
I recently found the Flashpoint Rapid 600 HSS Monolight with Built-in R2 2.4GHz Radio Remote System (Bowens Mount) to be a great find as they work seamlessly with other tools in the R2 family such as R2 Zoom Flashes when using one of the following transmitters:
Flashpoint R2 i-TTL Wireless 2.4 G Transmitter Remote for Nikon,
Flashpoint R2T 32 Channel 2.4GHz Manual and HSS Transmitter for Canon, or
Flashpoint R2 TTL 2.4G Wireless Remote and Triggering System – Sony
Other good systems that are a little bit pricier but offer superb quality are the Broncolor Siros 800 Basic 2 Monolight Flash Kit, WiFi which includes a great starter kit. I am personally in love with the Profoto B1 500 Air TTL Battery-Powered 2-Light Location Kit. These can be used in the studio or outdoors on location as they are battery-powered and they can come with the transmitter and do include a convenient backpack for travel.
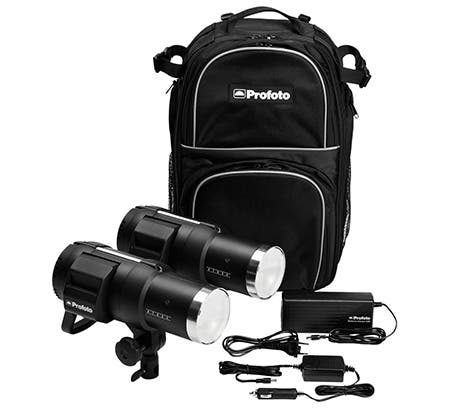
Profoto B1 500 Air Location Kit.
Image courtesy of Adorama
USE OF LIGHT SOURCES
There are many different lighting uses for monolights and strobes in a studio. Let’s jump into some of the main uses of these when shooting portraits.
Key Lights & Fill Lights
When working with multiple lights, a key light is the main light used to illuminate a subject. A fill light is sometimes used to fill in the shadows created by the key light to make up a more evenly lit portrait.
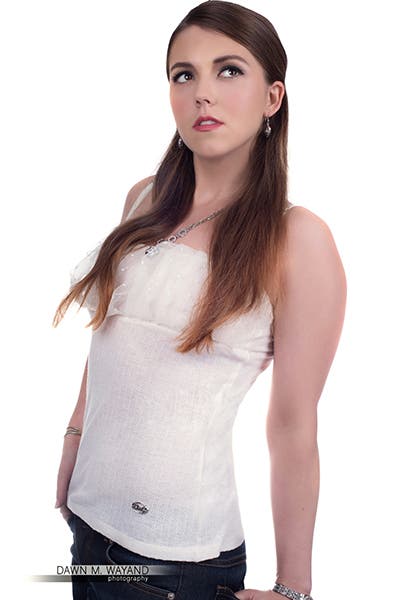
A key light was used on the right and a fill light was used at a lower power as fill on the left.
Model: Lizbeth Sawyers
Background Lights
A background light is used to illuminate a background and can be placed in several ways. I typically either place a floor light directly behind my subject angled up and shining on the background to create more of a circular effect on the background behind my subject or I’ll place a light on each side of my subject aimed toward the background either at different heights or the same height to evenly light the entire background.
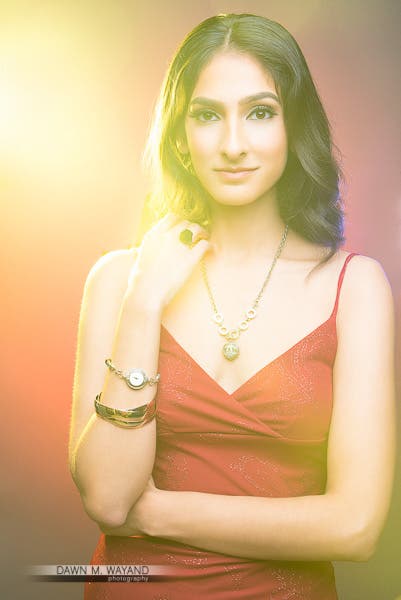
Here I used a floor light aimed up at the background behind my subject and attached a red gel to it.
Model: Deeksha Chawla
Rim Lights
A rim light is typically placed behind a subject aimed at the back of the subject and does just what its title suggests: it creates a rim around the the hair and shoulders and arms of a subject.
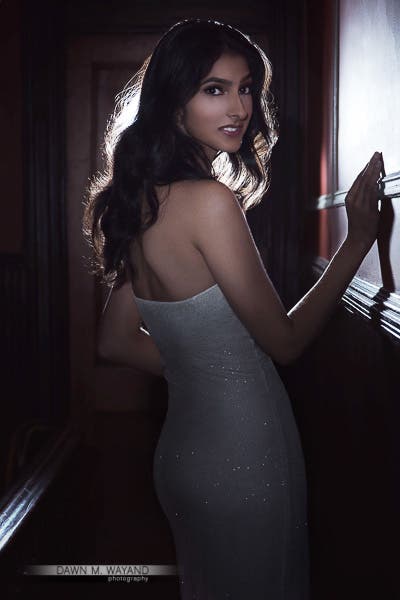
Use of a rim light.
Model: Deeksha Chawla
Floor Lights
While floor lights can also be used as background lights and rim lights, they are typically used when lighting full body shots to illuminate the legs and feet of a subject.
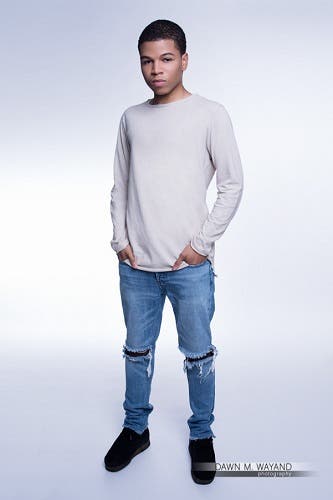
I used a floor light to illuminate my model’s legs and feet here.
Model: Baron Jackson
Hair Lights
Hair lights are used to create separation between your subject’s hair/head and the background or another subject in an image.
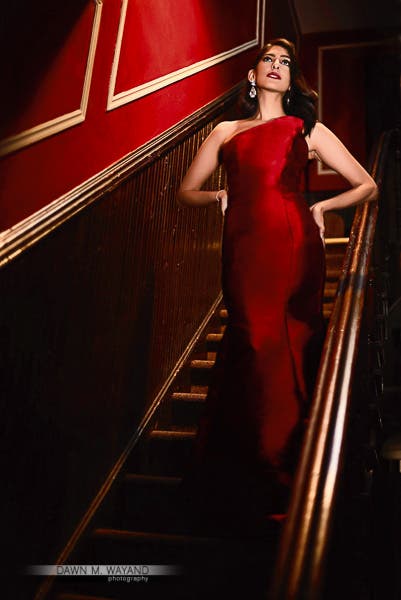
I used a hair light above my subject to illuminate her hair and to give a little rim to separate her head from the background.
Model: Deeksha Chawla
LIGHTING TECHNIQUES
We all aim to make our images look unique from others and while there are a lot of choices in how to shine some light on your subject, below are some lighting techniques to help get you creating more interesting portraits.
Rembrandt Lighting
Rembrandt lighting came to be known by its name through study of works from the artist, Rembrandt, and how he portrayed light in his paintings. In most, if not all, of his works, he worked light into his masterpieces much like we shape light in our photographs, but with one interesting niche that became a “tell” of his work: he would show light shining on his subject in a position that made one side darker than the other and that darker side would contain a triangle of light on the shadow-side cheek.
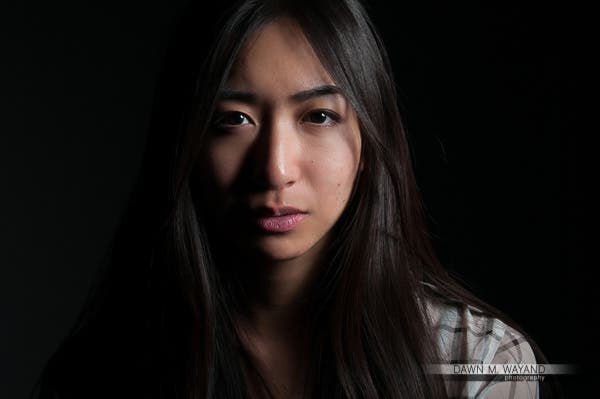
Rembrandt lighting.
Model: Tara Virada
Loop Lighting
Loop lighting is a lighting technique called such as its “tell” is that it leaves a loop pattern under the nose. The loop lighting setup is very similar to Rembrandt lighting setup except that the triangle on the shadow side never closes and the shadow of the nose appears to be pointing to and/or just touching the corner of the lips.
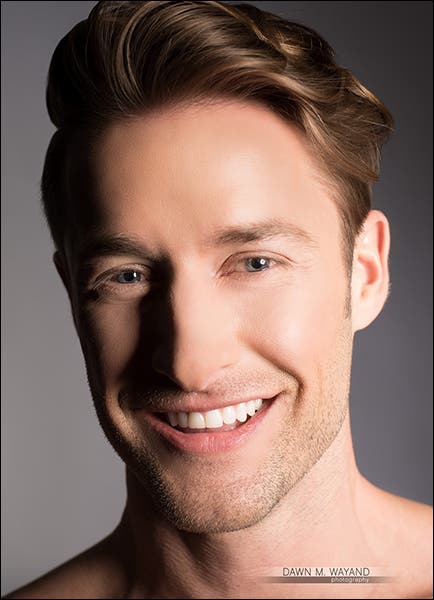
Loop lighting.
Model: James Karl Campbell
Split Lighting
A split lighting setup results in one side of the face being lit and the other side of the face being completely in shadow. This occurs by placing a light on one side of the subject or the other.
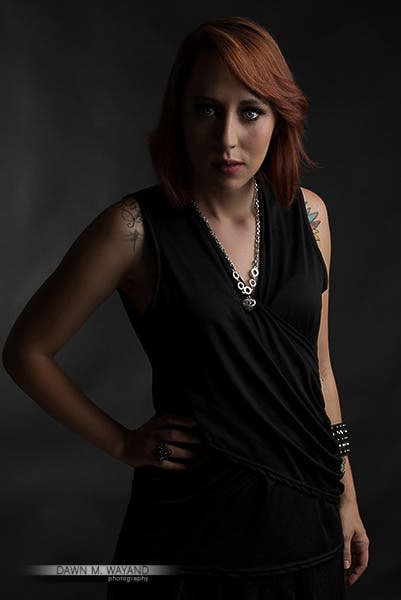
Split Lighting.
Model: Celeste Smith
Underlighting
Underlighting, sometimes referred to as “movie” lighting is a quick and easy one-light setup that reels in (no pun intended) a dark, dramatic effect and will help to sculpt a subject’s body and face. Typically, a subject is wearing darker colors, though a mix with whites or reds can also lend to a character’s look.
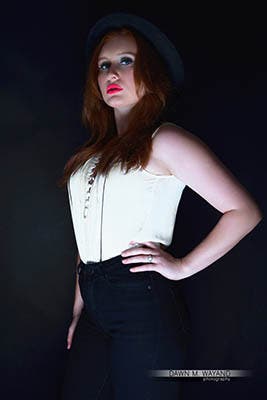
Underlighting example, sometimes referred to as “movie” lighting.
Model: Kathryn Hopkins
Doubleback Lighting
Doubleback lighting, which I also found to be also called as “badger” lighting is a creative two-light setup that helps to emphasize shadows which adds angles to the face and body. Depending on the power and modifier used, the shadows can range from harsh (which works for chiseling a man’s face) to soft (like in the image of my beautiful model, Kathryn, below).
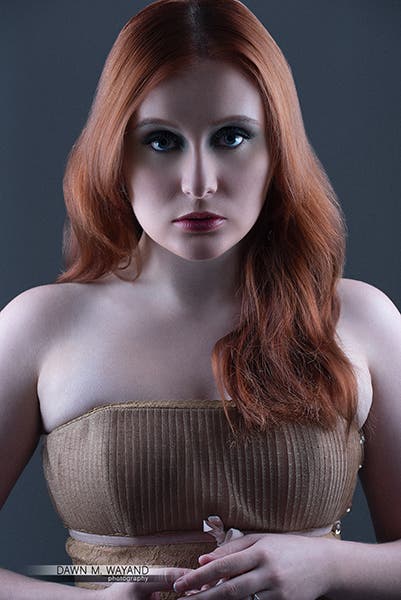
Badger or Doubleback Lighting.
Model: Kathryn Hopkins
The tell of this type of moody lighting is that it leaves inverted color markings rendered by the lights similar in look to those of a badger.
Butterfly Lighting
Butterfly lighting can be as little as a one-light setup (more if you want to light the background) positioned above and in front of your subject – high enough so that it creates a shadow under the nose similar to the shape of a butterfly.
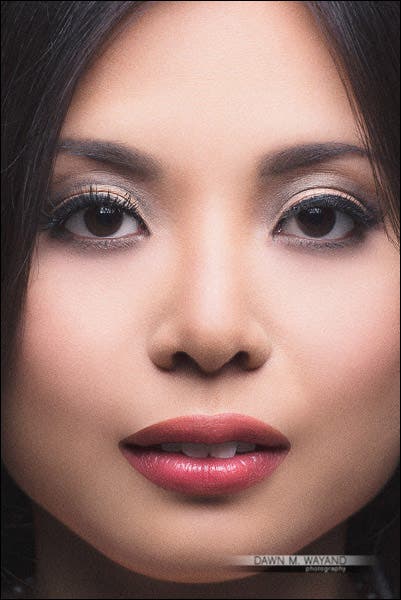
Butterfly Lighting.
Model: Shoko Fujita
Clamshell Lighting
Clamshell lighting is a form of beauty lighting that pretty much eliminates shadows on a subject’s face as the lights are positioned to cancel out the shadows each would create. It is generally used to emphasize natural beauty or to highlight makeup (usually for a skincare or makeup ad…) We used it artistically in the image below to highlight the creative color work that my hair/makeup artist, Gil Aldrin, created on my model.
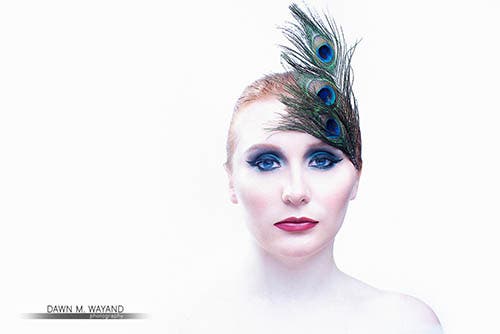
An artsy example of clamshell lighting using two lights for the clamshell and two background lights.
Model: Kathryn Hopkins
High-Key Lighting
High-key is a lighting style that is a results in little-to-no shadow on your subject, based on the level of brightness of your lights hitting a subject. High-key is based on lighting ratios. It’s not a lighting pattern – which is based on light direction. Many lighting patterns can work for high key lighting so long as there is minimal to no shadows. High-key lighting can be achieved when your fill light(s) project(s) the same level of brightness as your key light to fill in shadows. This creates a 1:1 ratio eliminating all shadows.
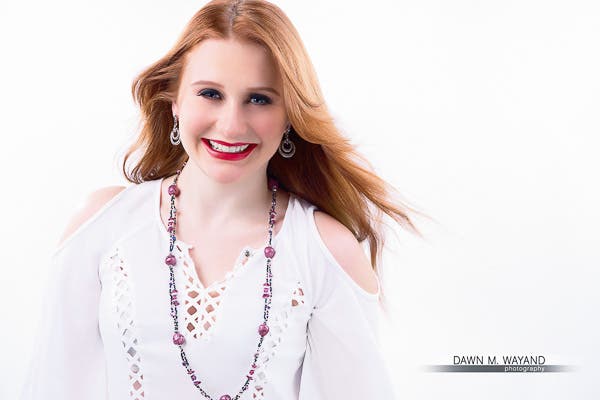
High-key image of my model, Kathryn – extremely soft shadow transition,
light-color clothing and a strong black point using two background lights.
Model: Kathryn Hopkins
Low-Key Lighting
“Low key” lighting is a more dramatic form of lighting that focuses on form and shadow. It is typically a darker image where the focus can be on part of your subject whether it’s their face, a body part or a certain amount of their whole body. It can be much more interesting when adding a little bit of rim lighting behind your subject.
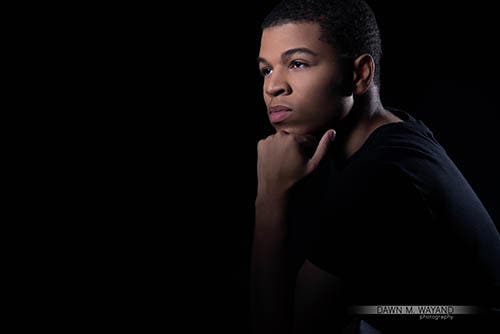
Result image of my model Baron based on a low-key lighting setup.
Model: Baron Jackson
LET THERE BE LIGHT…
Lighting a portrait can make all the difference between a good portrait and a bad one. As you can see here, there are several light sources available to you to use for different uses and to light in different ways. You can develop your own style just in the way you light an image. While I can light an image in any way (as shown above), my personal style, be it woman or man, is more on the darker side with lots of shadow – creating a moodier image. What’s your style?
