When you know what to expect, the starburst effect in your photos can be an amazing thing to capture. Although, if it happens by mistake, it can be a distracting mess that ruins an otherwise perfect image. Read on to learn what the starburst effect is and how can you use it to your advantage.
What is the Starburst Effect?
“Starburst effect” perfectly describes the results. A photo with this effect will have a multipoint star, typically on the light source. The number of points in the star (or stars) can vary and their lengths can be long or small. In order to capture the starburst effect, there are a few things you need to get right.
How to Capture Starburst Effect
Light
There is one essential tool that can’t be found in your camera bag. Starbursts all start with a bright source of light — the smaller and brighter, the better.
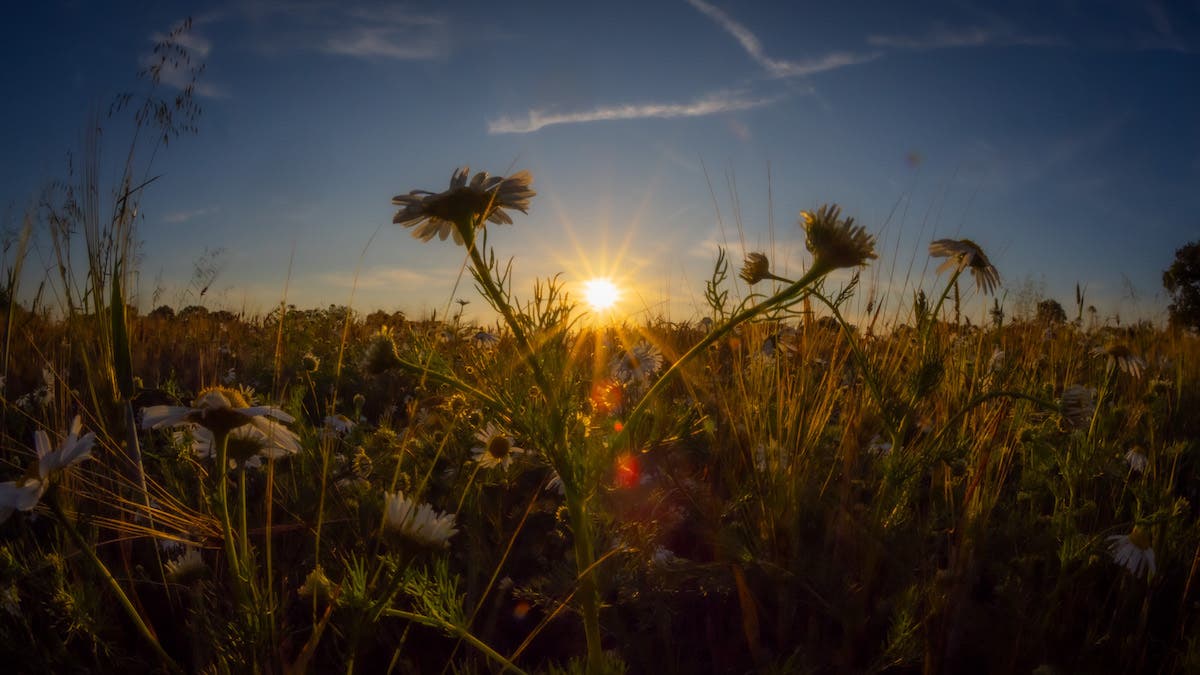
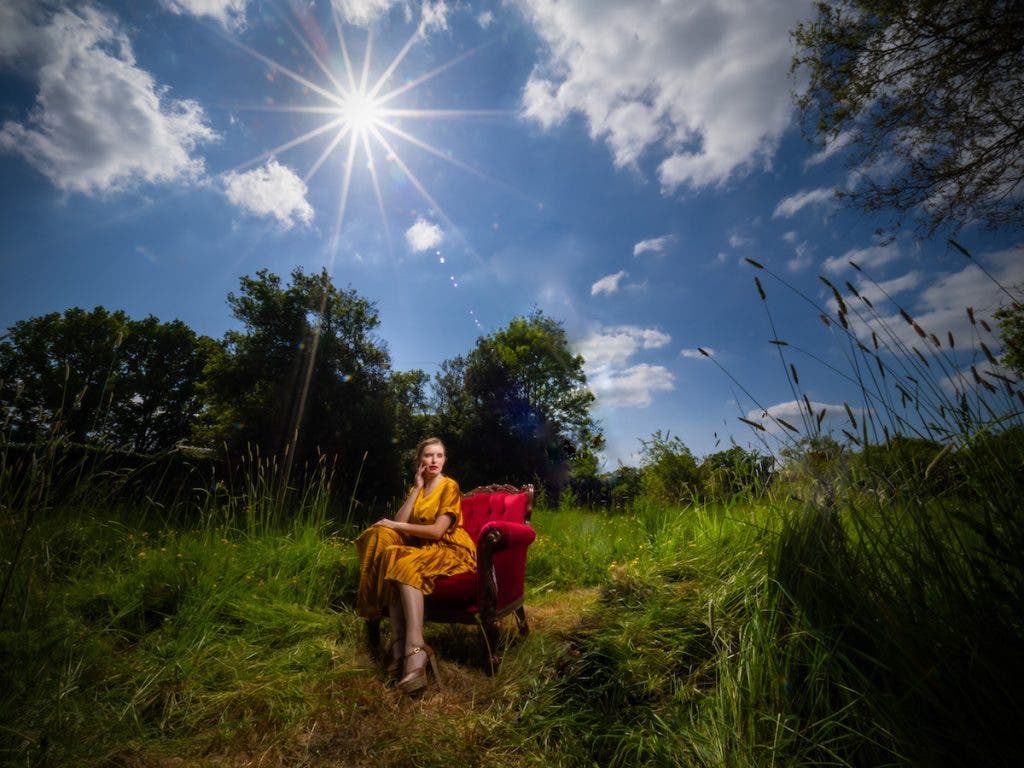
During the day, the sun is the best and brightest starburst producer available. You’ll need a moment when the sun is free from any obstructions, no matter how faint. A great way to test this is to look at the shadows on the ground. If the shadows are sharp and crisp, a starburst effect is good to go.
Composition
The sun will need to be in your frame in order for this technique to work. But don’t look directly at the sun and don’t point your camera at the sun when using a telephoto lens. Even if you’re using a mirrorless camera, this still isn’t a smart idea.
Lens Choice
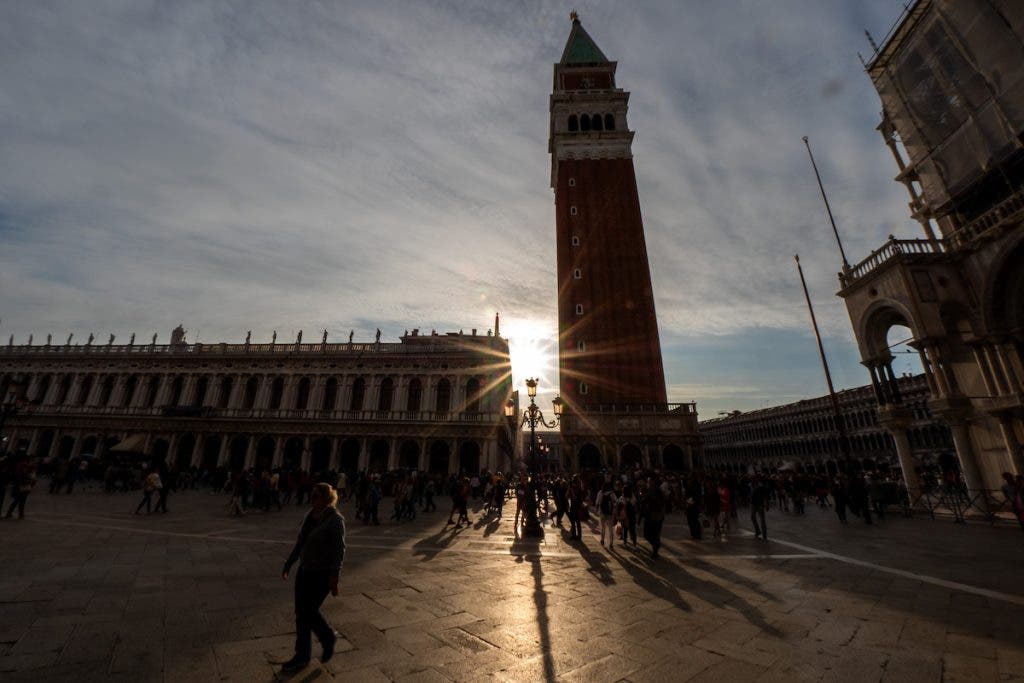
The rough and ready rule of starbursts is the wider the lens you use, the smaller the sun appears and the cleaner your starburst will be. So, for maximum starburst effect, reach for your widest wide angle lens.
Camera Settings
To achieve the starburst effect, the only camera setting that matters is the aperture. Shutter speed, ISO and white balance are yours to set how you want but you’ll only see a starburst when you have a super small aperture. Aperture Priority mode is the obvious way to go. Dial in the biggest F number you can (likely between f/16 and f/32) and let the camera handle everything else.
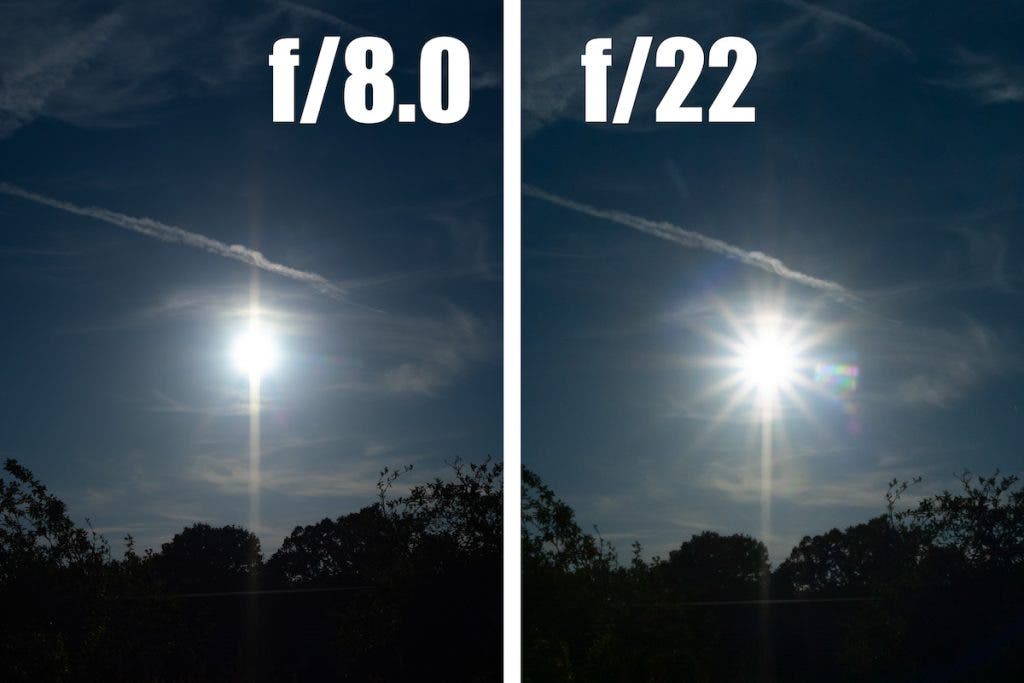
The starburst is actually a type of lens flare that’s a side effect of using tiny apertures (big F numbers) and disappears as the lens aperture is opened. That’s why you rarely see a starburst effect when framing up your photo unless you press the DOF preview button, which few cameras still have.
How to Capture Starburst Effect at Night
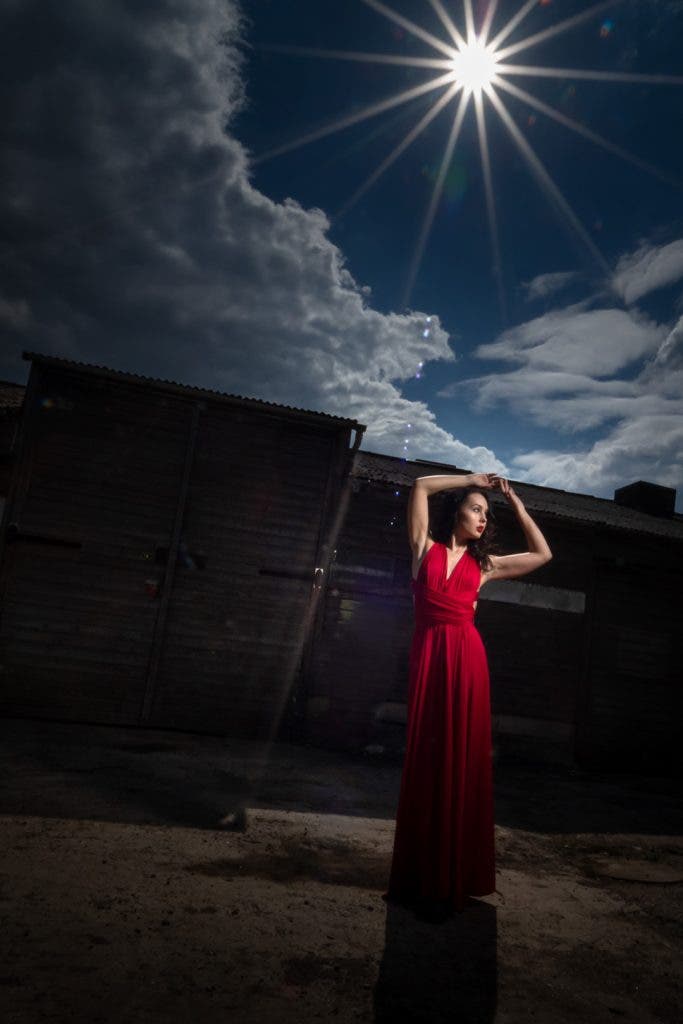
The fun doesn’t stop after the sun sets. Night time can be a goldmine for starburst hunters. The same rules apply if you can find small point sources of bright light. Cityscapes after dark are great locations, especially if you can find a view with colorful lights that illuminate the streets, plazas, bridges, stadiums, etc.
ISO
The same rules that turned the sun into a starburst by day also apply at night. The first thing to consider is setting a super small aperture. But working at f/22 in low light means you either have to push your ISO to high levels, or work with shutter speeds running into minutes. The compromise of slightly raised ISO and long shutter times is more workable when you have a travel tripod to hand. Use the camera’s self-timer or a remote release to trip the shutter without touching the camera.
Lens Filters
If you want to bypass a long exposure and small aperture, then a star filter is worth a look. You can choose between filters that give four- or six-point stars, and more realistic looking multi-point stars. And as the filters are clear, they won’t affect your camera settings if you want to take two photos: one with the filter and one without.
Just like any form of lens flare, starbursts are hard to control and often come with unwanted side effects. Ghost flare are those strange repeating shapes you see across your image. If they’re not to your liking, cloning and healing tools are the way to remove them.
Including the sun in your scene is always going to make the camera’s light meter do strange things. That’s why you should work with RAW files and pull up the shadows or lower the highlights as part of the process. The starburst effect is permanent and not something that you can easily remove after the fact, but a little post-processing goes a long way to clean up the results.
Tips for Shooting Starburst Photos
Depth of field is a combination of several things including aperture and lens focal length. When working with a tiny aperture and a super wide angle lens, this likely means everything will be in focus. But your images are not going to be tack sharp. Lenses are softest (especially at the image edges) at their aperture extremes and, for a starburst effect, that’s exactly where you’ll be. Then there is the complex subject of lens diffraction. This occurs when the sensor and aperture collude to soften your perfectly sharp images. Basically, don’t pixel-peep your starburst images.
Use exposure bracketing for a better dynamic range. If the sun is your starburst maker, having a choice of exposures gives you two advantages. First, you can select the “correct” exposure later. Second, you can combine the bracketed exposure into one high dynamic range or HDR photo.

Look for the darkness to see the stars. That’s not just a pointless social media meme — it’s also photography advice! A starburst is the brightest part of your photo so, if you can place it over something dark (deep blue sky, mountains, or buildings), then it will really stand out.
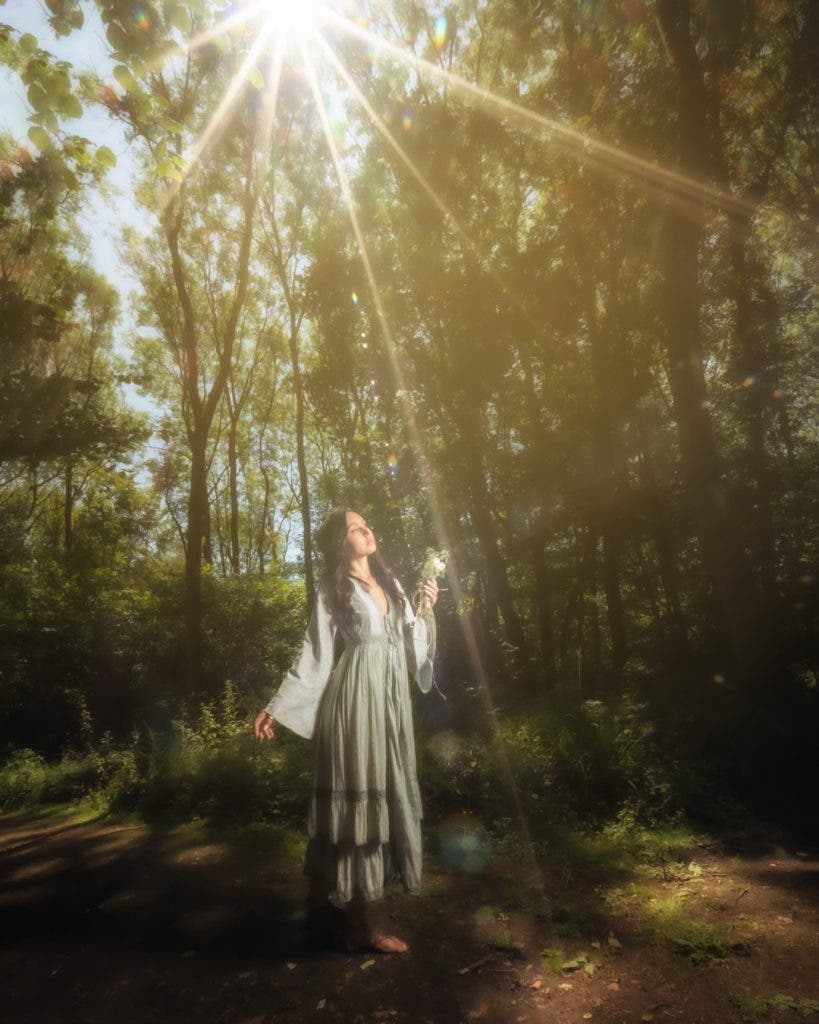
Don’t have a wide angle lens? Make the sun smaller by blocking part of it. Use the edge of buildings, tree branches, or curtains. If it blocks light, it will work. Frame up your image and then slowly move the camera until just a tiny amount of sunlight is captured.
Remember the smaller the light source, the sharper the starburst. The starburst effect is one of those rare opportunities where you as a photographer (or videographer) can instantly “wow” anyone who isn’t. Our eyes can’t see starbursts but, once you know where to find them and how to capture them, a starburst in your photo doesn’t have to be an accident. It’s a controlled, intentional effect.