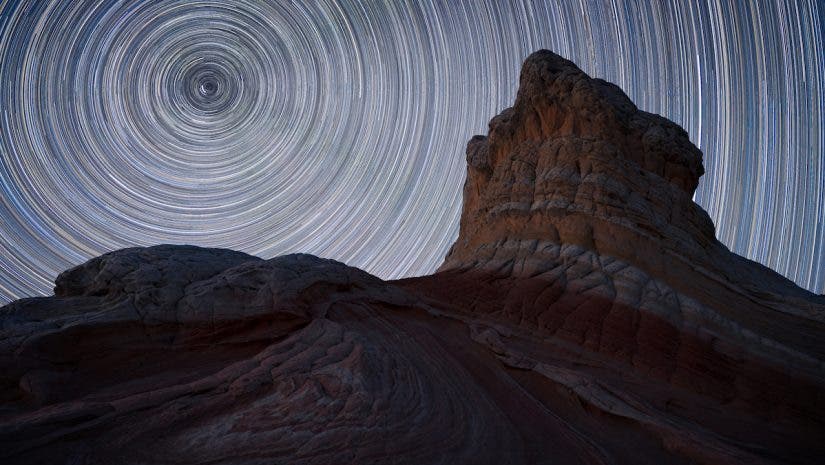
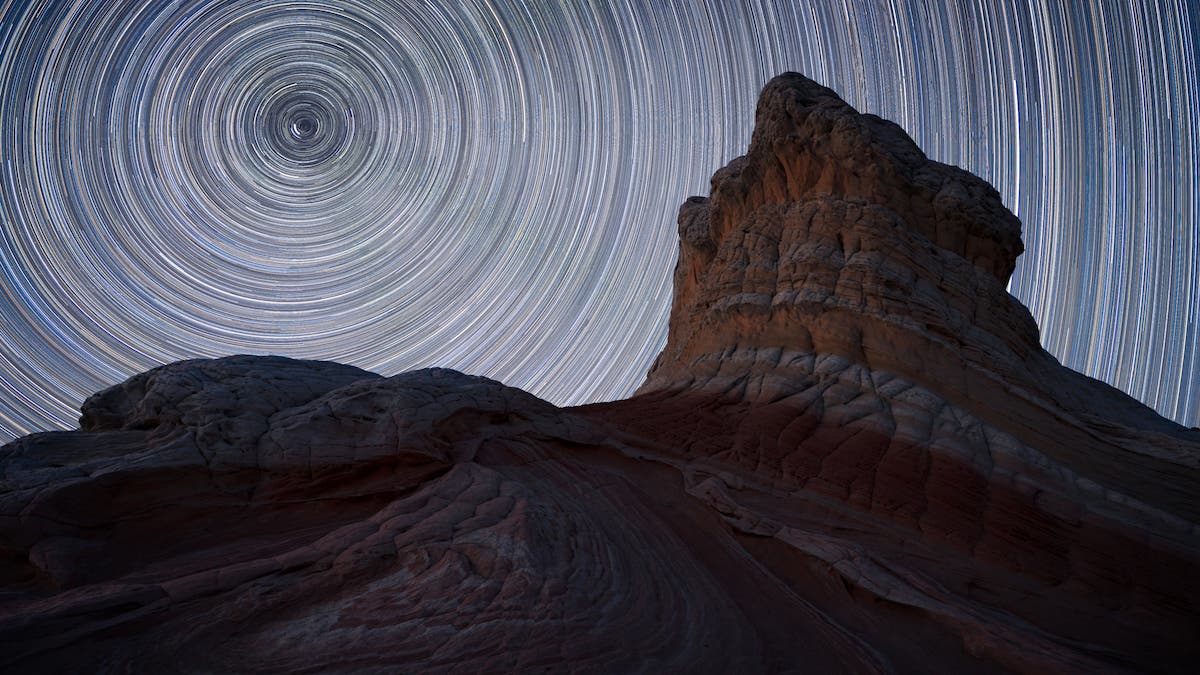
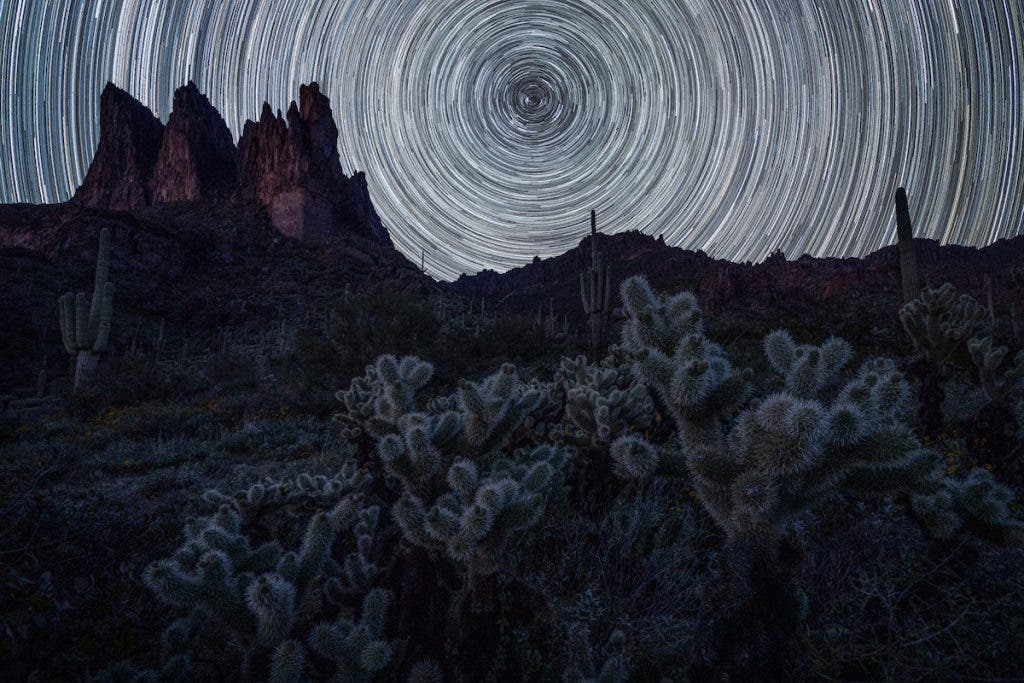
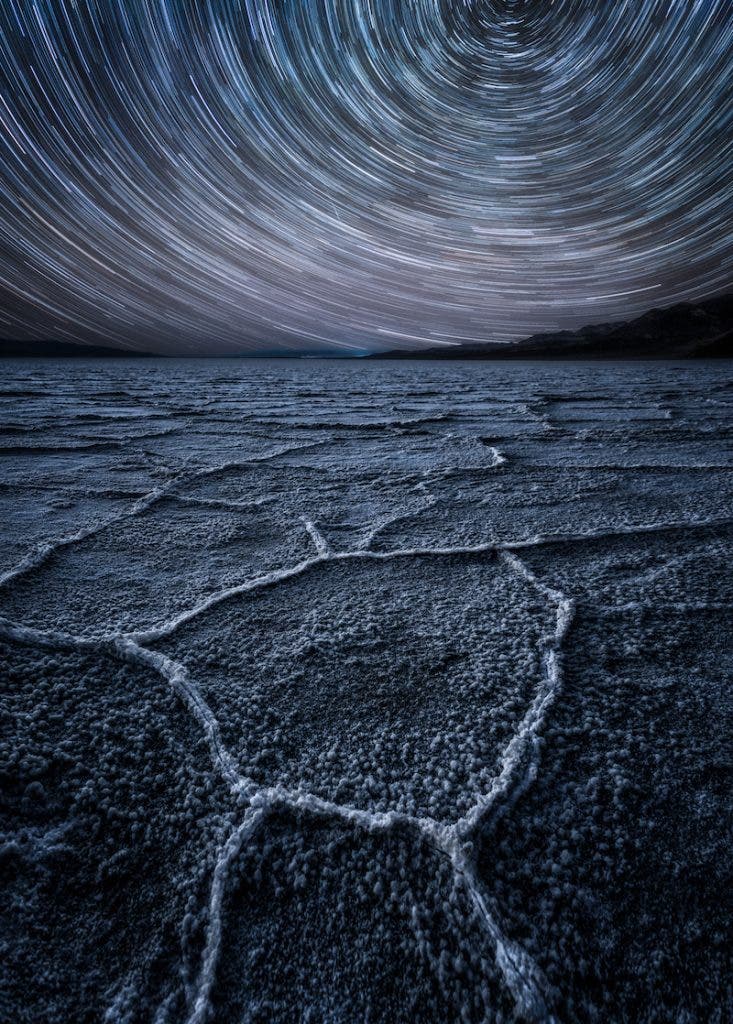
There are many different ways to capture awe-inspiring images of the night sky. Between blue hour images, shooting the Milky Way, or capturing astrophotography with a telescope, there are so many different ways to create compelling images. However, there is another way to capture the night sky that is often overlooked by photographers: star trails. If you’ve ever seen a photo where the stars look like they’re circling in the night sky, you’ve seen a star trail photo.
What are Star Trails?
If you’ve ever taken a long exposure photo outside at night, you may have noticed that it looks like the stars are streaking through the sky. Technically, it’s actually the rotation of the Earth that causes the streaking look of the stars, otherwise known as star trails.
Planning for Star Trail Photography
In order to shoot star trail photography, clear skies are an absolute necessity. You’ll start to notice streaking stars after most exposures longer than 20 seconds. Although, to truly get amazing star trail photos, you’ll need an exposure that is multiple hours long. Because of this, a gap in the clouds won’t work for star trail photography like it would for other kinds of night photography. You really need absolutely clear skies for multiple hours at night. Having even just a few clouds will break up the perfect trails that create circles in the sky.
Even when it’s clear, there are still some other weather conditions you should look out for. First of all, the less wind you have, the better. Windy nights can cause your tripod to move, giving you a blurry image.
Additionally, cold nights in humid climates may result in fog on the front of your lens, which will also ruin your star trail image. Ideally, you’d be shooting in a moderate temperature with little to no humidity and minimal wind for the best opportunity to get an amazing image.
Lastly, you want to look for dark skies. While it is possible to create star trail images in the city, darker skies yield more stars. This will make it easier to get the full-circle look to your stars in less time.
How to Photograph Star Trails
A sturdy tripod is absolutely essential for star trail photography. Since your exposure will be multiple hours long, keeping your camera perfectly still is a must. If your camera moves during the photo, your exposure will be ruined and you’ll need to start again. No filters are necessary, but you may want to pick up an anti-fog belt if shooting in a humid environment.
Single Exposure Method
Now, there are two primary ways to capture star trail images. The first method is by doing a single exposure. If you would also like to include a foreground, this method only works when there is no moonlight or artificial lights hitting your foreground. Set your aperture around f/4 and ISO around 3200-6400. Then, you’ll need a shutter release, or intervalometer, which you can use to take a very long exposure.
Set your shutter speed to bulb after you check your user manual to figure out how to use bulb mode on your specific camera. Then, start your intervalometer or shutter release. The longer the exposure and the darker the skies, the more circular your star trails will look. Release the shutter after a designated amount of time.
If done right, this method will give you a star trail image as soon as the shutter goes off. However, the single exposure method has a few downsides. First, having your shutter open for hours at a time can result in your camera sensor heating up, which creates more noise in your image. Additionally, if your tripod moves at any point in time during your shot, or if any light hits the foreground or lens, your whole image will be ruined and your time will be wasted.
Multiple Exposure Method
The second method involves taking numerous exposures and then using Photoshop to blend them together. If your camera doesn’t have a built-in intervalometer, you’ll need to pick one up. For this method, you will need an intervalometer, not a shutter release. Set your aperture around f/4, ISO around 3200, shutter speed to bulb, and then set your intervalometer to take at least 60 images at 1-2 minute long exposures. Once you return, you’ll need to use Photoshop to blend the images together to make the star trail (more on this below).
The benefits to doing your star trail this way is that your whole shoot isn’t ruined if the tripod moves or light hits your foreground. You can easily remove one image from the bunch, or keep the images before the movement/light and still create a smaller star trail. The downside is that this method requires you to combine the images in Photoshop afterwards.
Editing Star Trail Images
If using the second method to take star trail images, you’ll need to load your photos into Photoshop as separate layers. Load all the images onto one file, then select every photo layer except for the very bottom one. Then, change the blend mode to “Lighten.” This will cause only the brighter pixels to show through, allowing you to see only the stars go through to the bottom layer, resulting in a star trail image.
After you’ve merged everything together, or if you’ve chosen the first method of shooting star trails, you’re ready to edit. Most importantly, dial in the white balance. Most photographers shoot in auto white balance, which works poorly at night. Change the white balance to tone your photo how you’d like. Some photographers prefer cooler edits, while others prefer warmer edits. The choice is yours, but do play around to find the best balance.
After this, adding a little contrast, and increasing the brightness on the foreground (if you have one) will go a long way to help your image look amazing. I always like to add a vignette to my star trail images to finish off the image and add a very polished look as my last step.
Star Trail Photography Tips
Find the North Star
The most compelling star trail images are the ones where you see a full circle of stars rotating around one area. When shooting in the Northern Hemisphere, this spot that all the stars appear to rotate around is called the North Celestial Pole, or North Star. You can find this star by finding the Little Dipper, and then navigating to the top of the handle. This is the North Star, and all the stars will appear to rotate around it.
In the Southern Hemisphere, the stars all appear to rotate around the South Celestial Pole, which can be more difficult to find in the sky because it isn’t represented by a star. This will be the area where you want to place the upper third of your frame, but not too close to the edge.
Step Away from the Camera
Another piece of advice is to be patient. Many photographers new to shooting star trails get too excited to see their photos. As a result, they cut their exposure short or bump their tripod because they are sitting too close to the camera. To combat both of these problems, consider sleeping or taking a nap while your exposure is happening.
Better yet, if you’re out camping, that is the perfect time to try a star trail overnight. When you wake up in the morning, you’ll be stoked to see what you got!
Practice Manual Focus
Lastly, as with any kind of night photography, it’s crucial that you know your camera and other equipment extremely well. You’ll likely need to use manual focus. Practice adjusting manual focus and using your camera in the dark to prepare for your shoot. Even if you have a headlamp, using a camera in the dark is still going to present unique challenges if you don’t know your gear very well.
Conclusion
Star trail images are some of the most attention-grabbing images. If you ever spend time camping outside, or if you live in a dark area, it’s so easy to give this technique a try while you sleep! Best of all, if you already own a camera, lens, and tripod, all you have to buy is add an intervalometer to your toolkit.