
As photographers, we carry the techniques that we’ve mastered like tools we can use to craft beautiful imagery on command. Some of these techniques require considerable time and effort to perfect, while others prove less demanding. One of the easier-to-use techniques we have at our disposal also happens to be one that clients absolutely love, especially when we use it effectively. I’m talking about silhouette photography. We have many means of creating silhouettes, using natural light or flash, shooting indoors or outside, or combining silhouettes with other compositional techniques to express our artistry. Regardless of the genre in which we shoot, we can make our clients happy and/or enhance our portfolio with the addition of silhouette photos.
What Is a Silhouette?
Put simply, a silhouette can be defined as a dark shape and outline of someone or something visible against a lighter background. Because silhouettes rely on shapes over details, they serve as a basic graphic representation of whatever it is we’re photographing. For this reason, silhouette photography works well when shooting in dim light. We can capture the essentials to create a compelling scene without the need for overt details. Our subjects can range from small objects, to people, to trees, bridges, and buildings. Anything we can place against a brighter background will do.
To help you add silhouettes to your list of tricks, we’ve put together the following list of six silhouette photography tips and ideas.
6 Silhouette Photography Tips and Ideas
1. Place Your Subject in the Brightest Part of the Frame
1b. Outdoors: Mid-day vs. Sunset vs. Night
1c. Indoors: Window vs. Flash
2. Mind the Details
3. Bump the Shadows for Effect
4. Use the Camera You Have with You
5. Add a Creative Spin
6. Accentuate Silhouette Photography during Post-Production
Let’s get started!
1. Place Your Subject in the Brightest Part of the Frame
As a general photography composition rule, placing your subject in the brightest part of the frame typically makes the most sense. Our eyes naturally gravitate toward the brighter areas. In silhouette photography, this standard holds doubly true, because silhouettes require a lighter background. Why not carve your silhouette against the brightest area to maximize contrast and draw the most attention? The level of brightness, however, will vary depending on when and where you’re shooting and the mood you’re trying to set with the image.
Outdoors: Mid-day vs. Sunset vs. Night
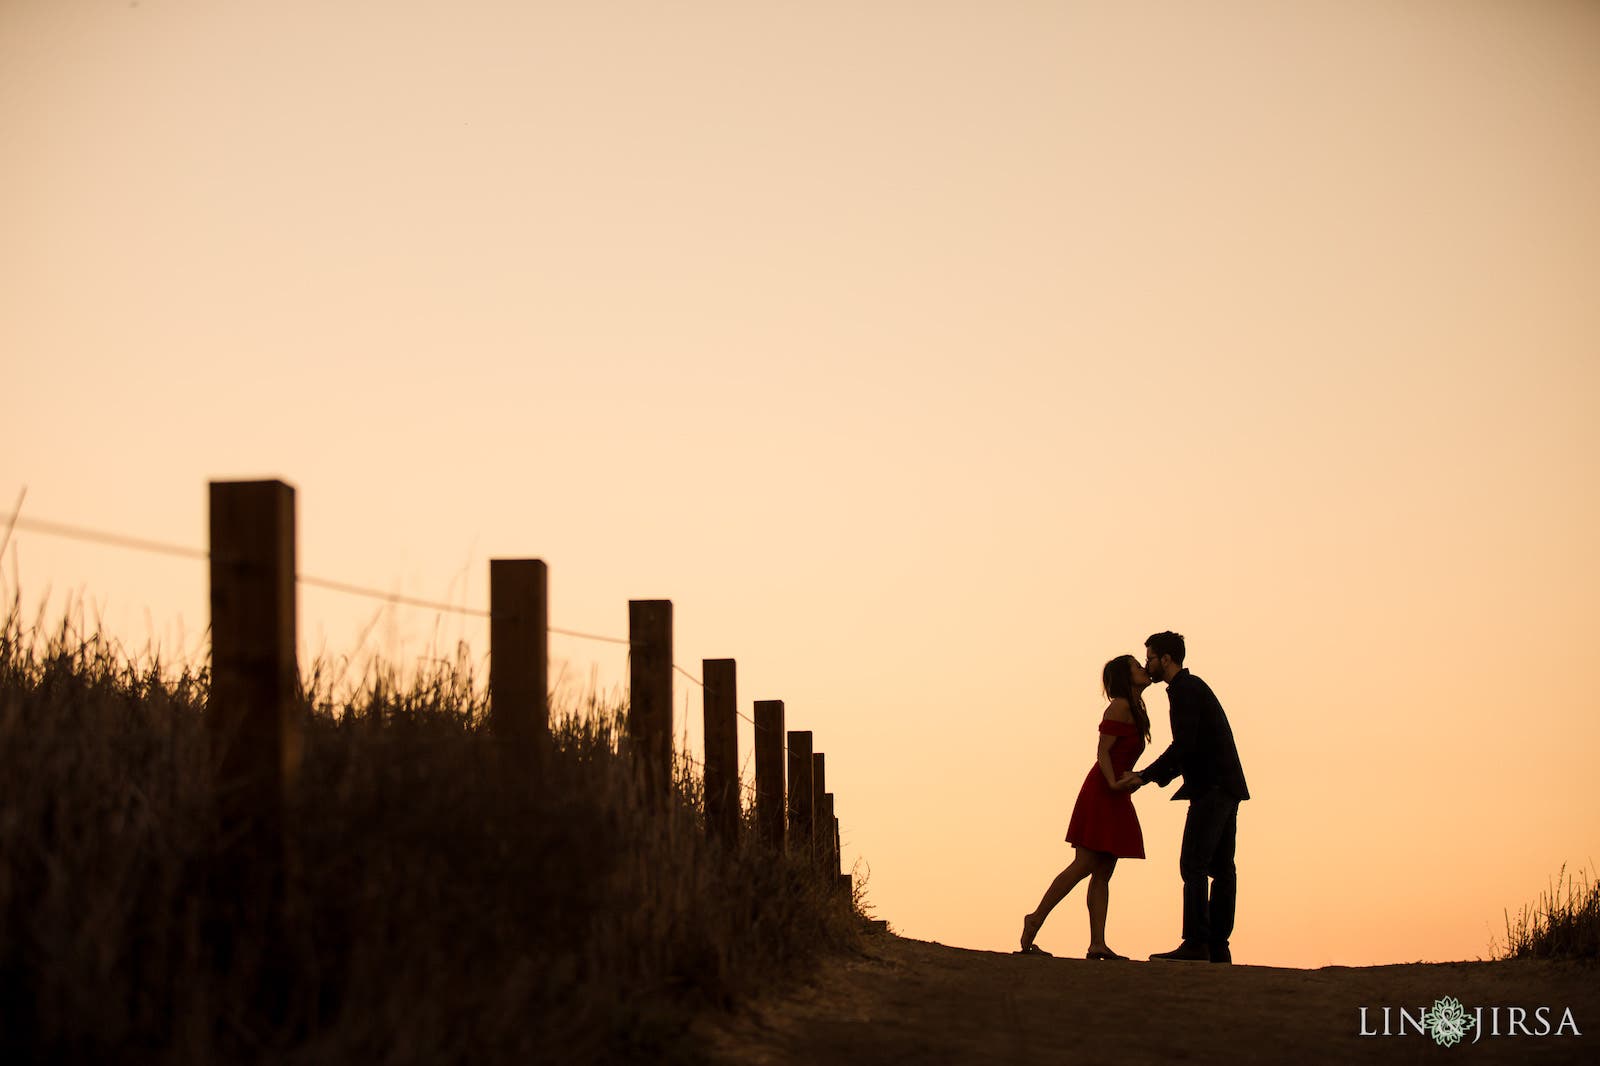
When you’re shooting outdoors, weather and the time of day will significantly impact your ability to photograph a silhouette, especially if you plan to use ambient light. Most photographers prefer to shoot silhouettes during sunset, when the sun lies just over the horizon. You do have other options, of course.
Mid-Day Silhouettes
Because we rely heavily on high contrast and dim lighting for silhouette photography, shooting silhouettes in the mid-day sun is not really ideal. It can be done, however, as Gavin Hoey illustrates in the video above. Although it may require a bit of scouting, all we really need to do is place our subjects in the shade and shoot against the brighter backdrop, a common theme with this technique.
Sunset Silhouettes
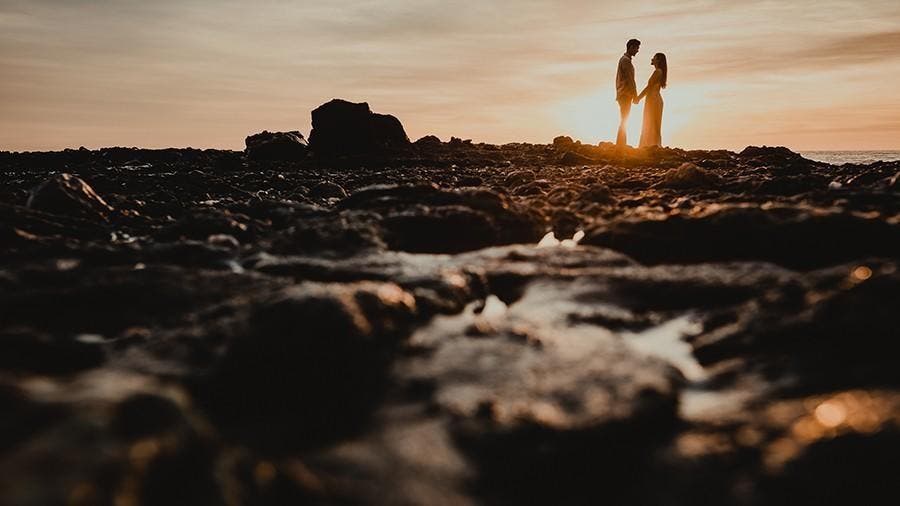
If you find yourself shooting around sunset, which is ideal, I recommend using the shadows to create a dark and moody portrait! You can always break out your HDR photography techniques, and the dynamic range on most cameras will preserve more shadows than ever before, but we don’t necessarily need a perfect exposure to capture an epic silhouette.
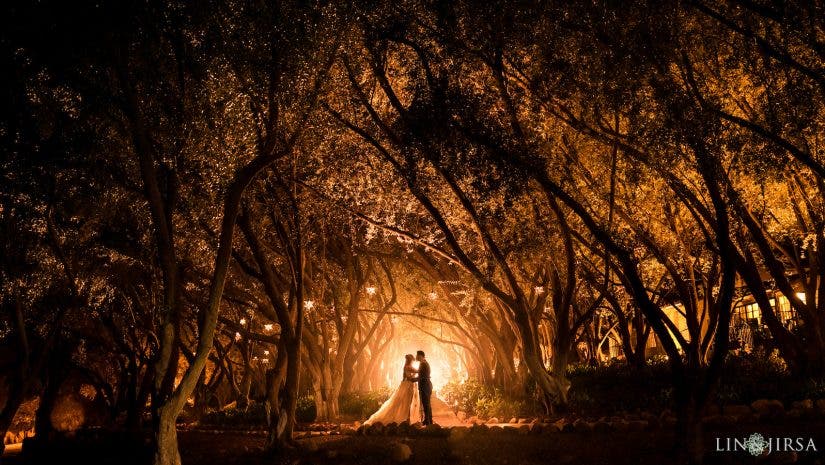
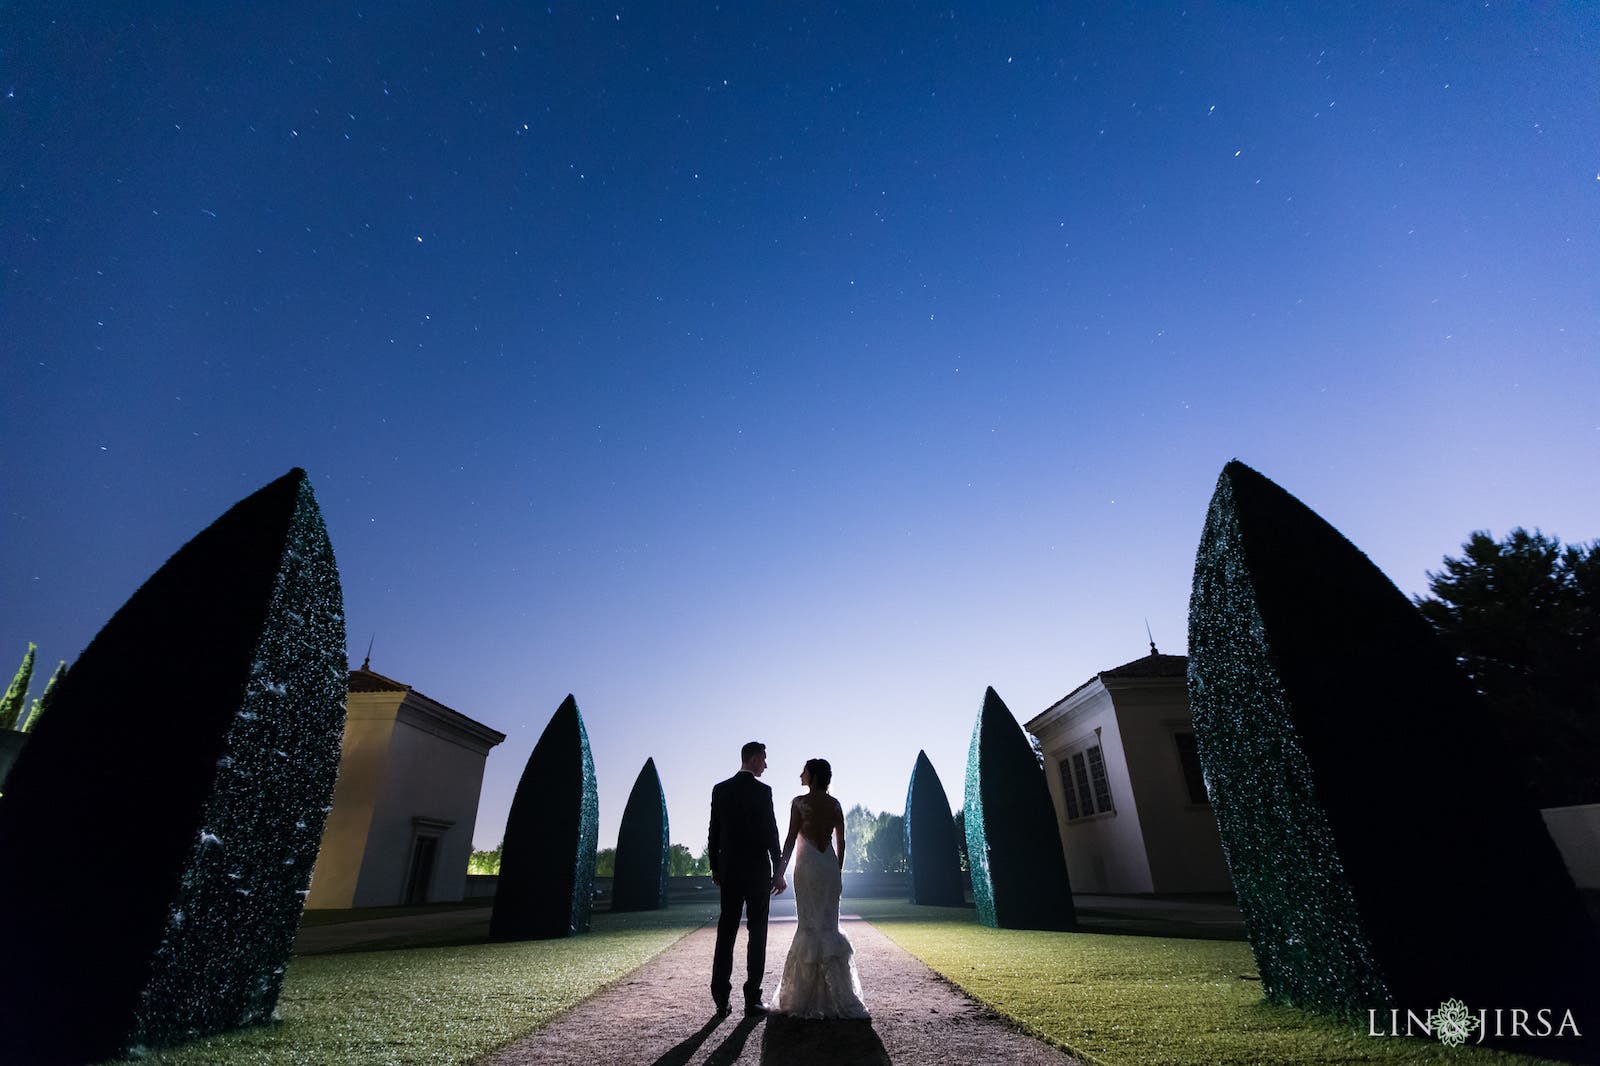
Nighttime Silhouettes

Even after the sun sets, we still have options for photographing silhouettes at night, especially in city environments. Streetlights can go a long way for backlighting a dramatic urban silhouette. We can also use flash photography at night to create backlit silhouettes. For the example above, we set up a basic long exposure shot (aka shutter drag) with a 5-second shutter speed to catch light trails of the passing cars where we placed the camera while also capturing our couple’s silhouette in front of an off-camera flash on the street below.
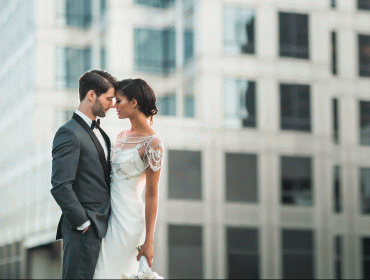
Indoors: Window vs. Flash
At first, it might seem we’d be limited to using flash photography to create silhouettes indoors, but windows make excellent light sources for photographing silhouettes. Let’s take a closer look at our indoor options.
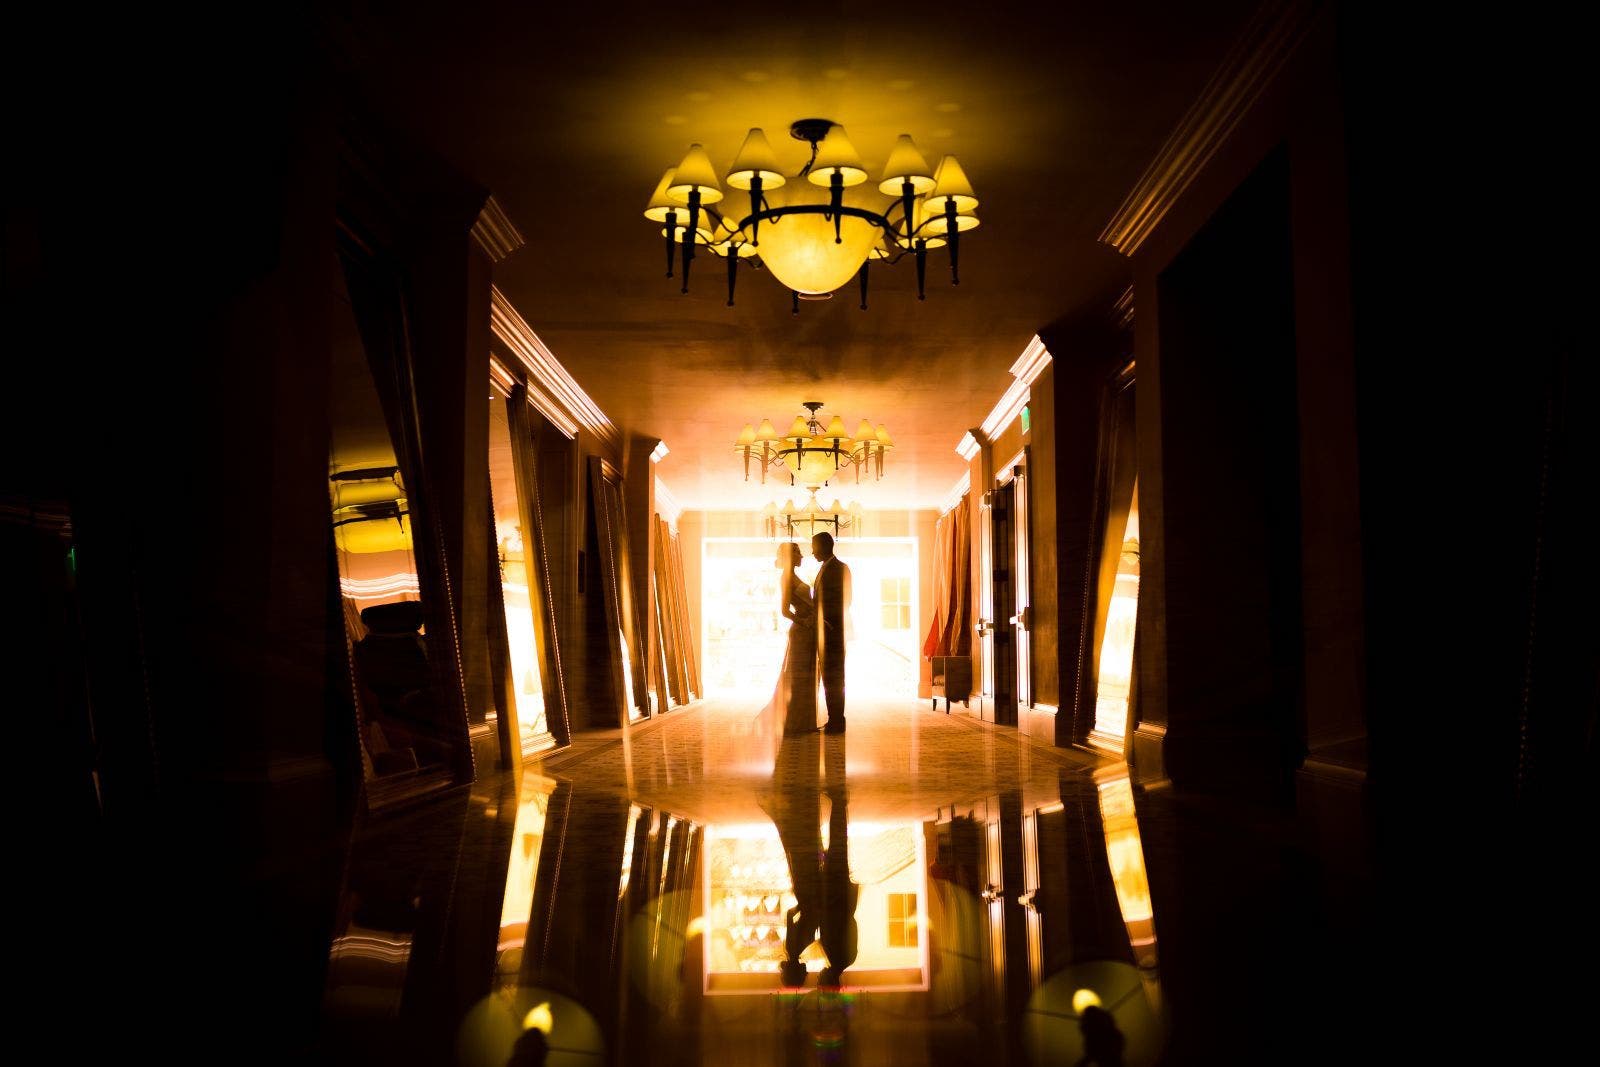
Window Silhouette
Windows offer a perfect backdrop for backlit silhouettes. Typically, when shooting in front of a window, photographers expose for the subject and blow out the details in the background. Window silhouettes require the opposite approach, for the most part. How dark you make the exposure, however, depends on your preference.
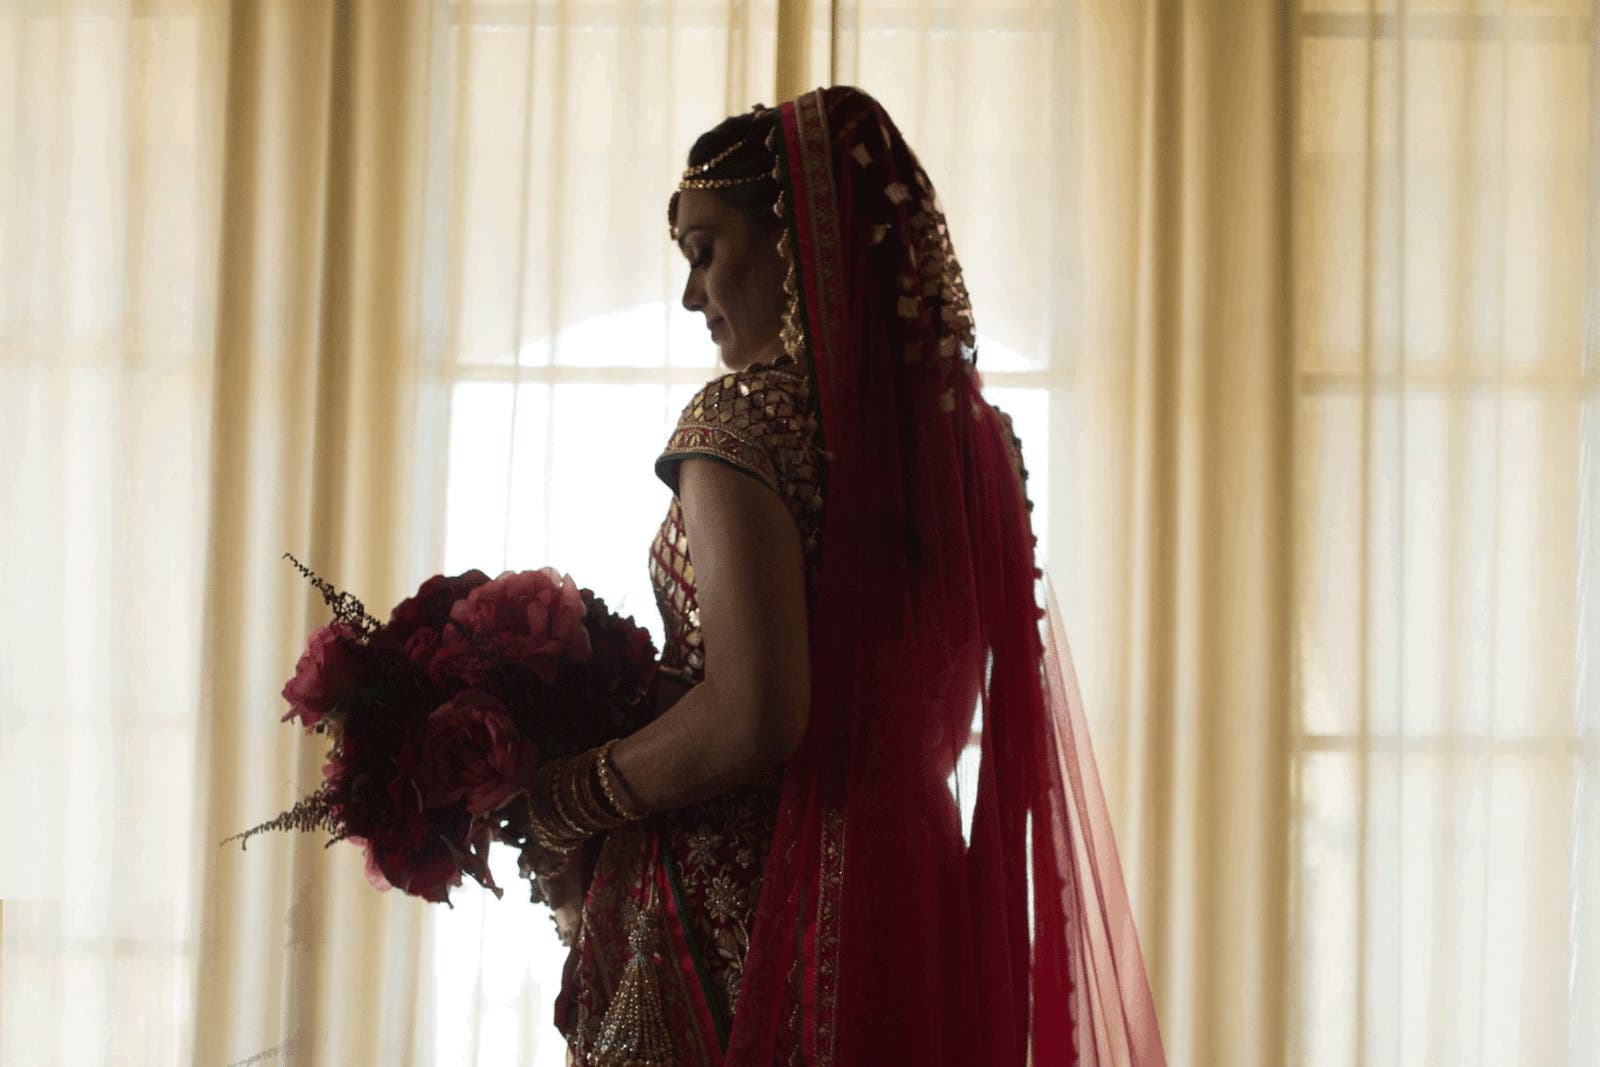
In the example above, I added flash to retain a bit of the detail in the subject, an approach I’ll discuss more in tip 3 below. Here are the details for using flash to create a silhouette window portrait.
Here is my approach for photographing dark silhouettes with natural light or flash:
- Distance from light source for brightness
- Angle for light pattern
- Sheers to soften light
- Curtains = strip box
- Added light needs control (grid/snoot)
- Open/fill shadows if needed
- Separated mixed lighting
- Window tint/green shift
Exposure goals for dark silhouettes:
- Maximum dynamic range
- Bias: preserve shadows
- Temperature: 5500-6000K
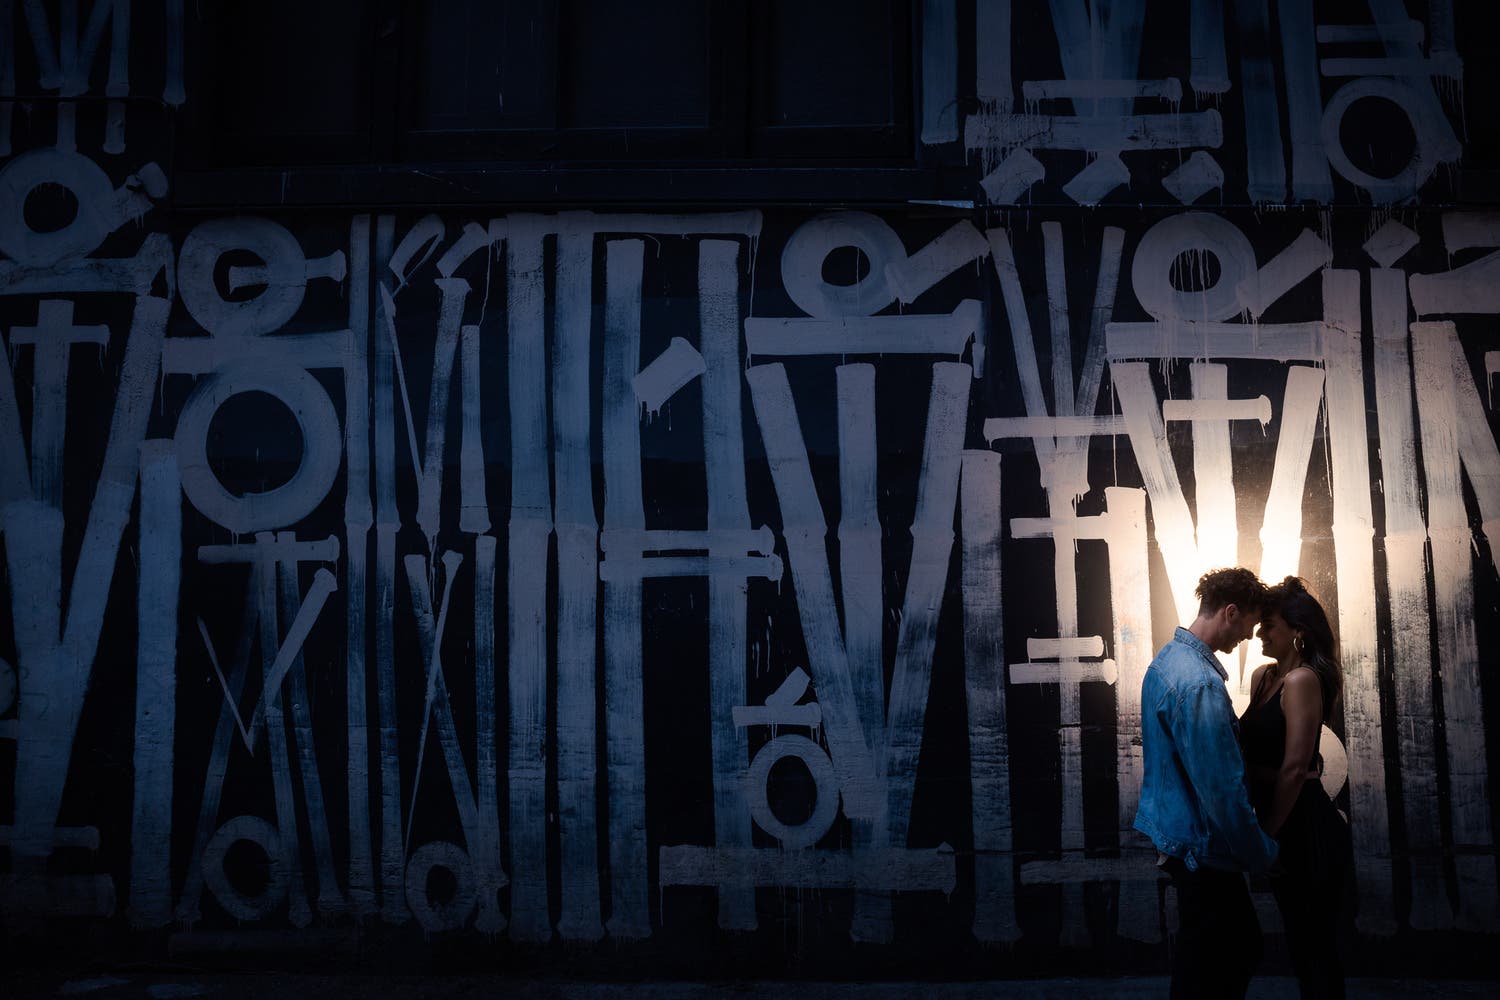
Flash Silhouette
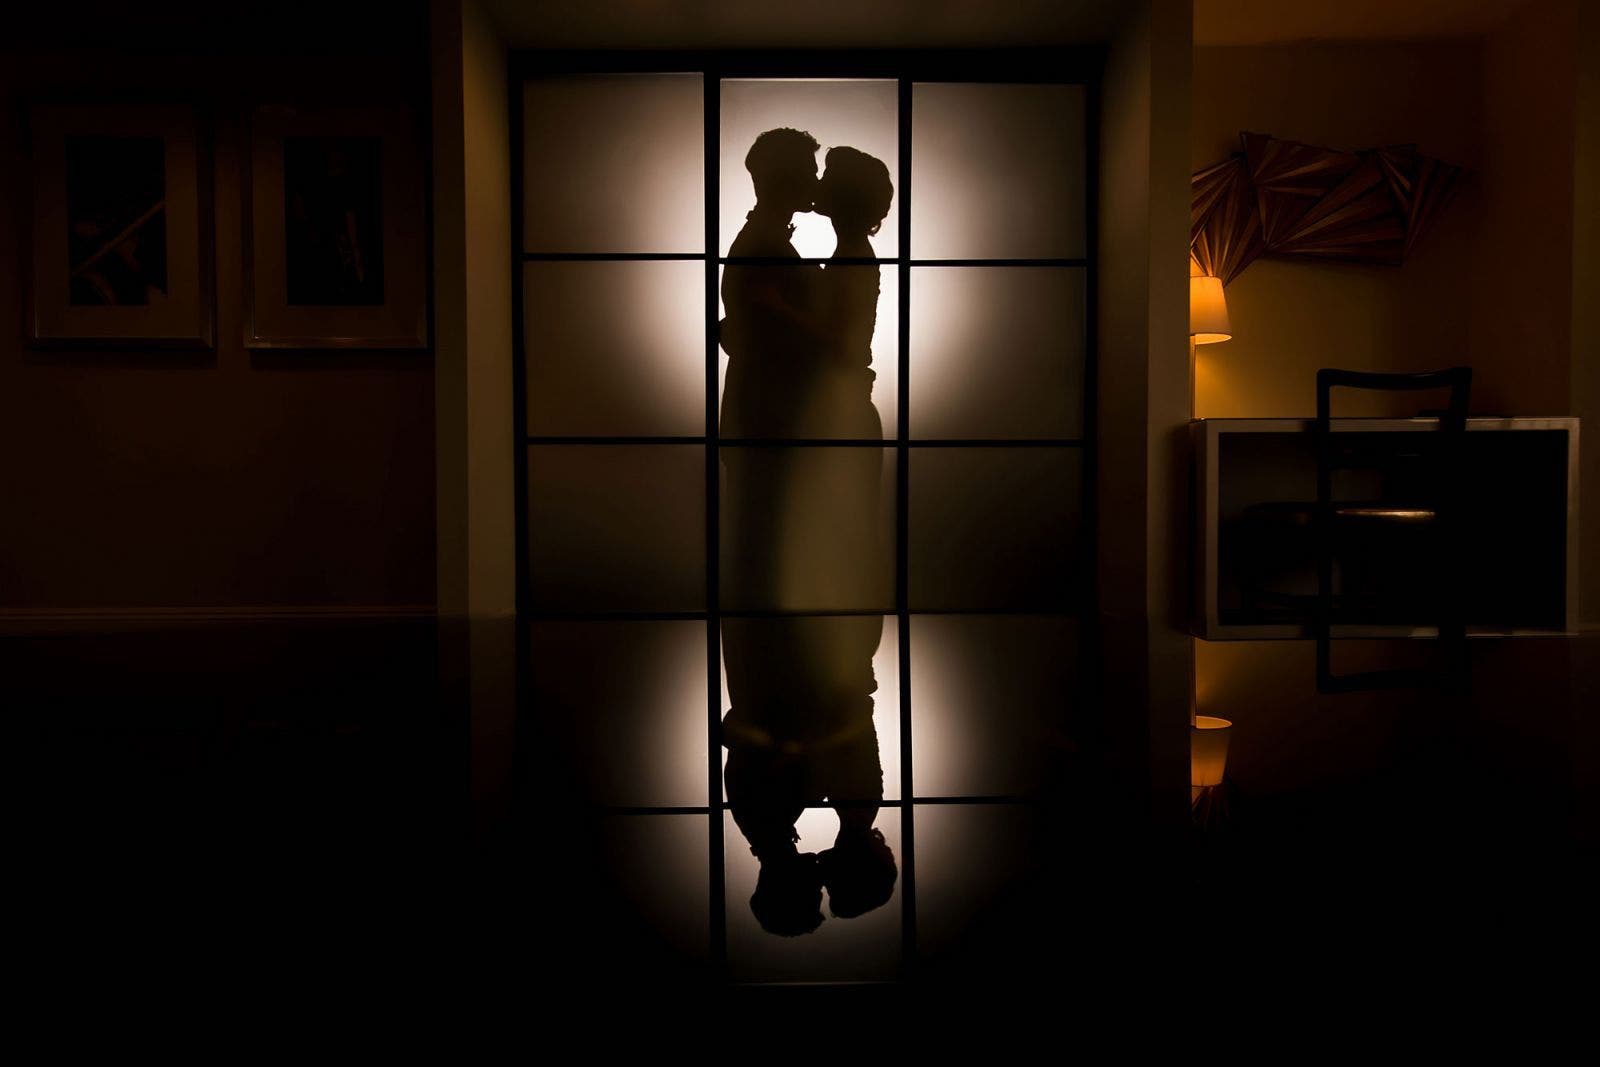
Photographers typically look for ways to add light to a scene in an effort to make a room brighter. When using a flash indoors for silhouette photography, however, we must do the opposite. We need to imagine how a scene will look without light.
Here are some quick steps for taking an environmental silhouette portrait indoors using a flash. For this portrait, the flash cast a shadow onto a semi-opaque door inside the hotel room. You can follow the same steps when backlighting the wall behind your couple as well:
- Set the ambient exposure (lean more into the shadows)
- Adjust white balance for effect
- Add flash
- Adjust flash exposure & zoom
- Adjust flash position to further control shadow size
- After making these adjustments, focus on posing and composition.
You’ll notice that when adding flash we can direct the flash towards the camera, which tends to reveal more details on your subject(s), or we can point the light away from our subject if they’re standing in front of a large enough surface (like a wall).

Check out the video above from Gavin Hoey on Adorama TV for tips using different modifiers to create a one-light silhouette. Gavin samples a variety of modifiers, from a reflector to a grid and snoot, to see which works best for his purposes. As an added bonus, you’ll get some helpful post-production tips, too, which we’ll also touch on below.
2. Mind the Details
If you don’t mind the details when placing and/or posing your subject, the object or person you’re photographing may not appear as originally intended in silhouette form. For example, stray hair in a close-up shot of a female model may look like an unruly beard when silhouetted. Loose clothing may further obscure your subject’s shape as well. If you want to recognize the people you’re transforming into silhouettes, turn them to the side for a profile shot. If you’re photographing more than one person, be sure to separate them enough to leave their shape or outline clearly defined. We’re already minimizing the details in our frame, so the details we keep need to count. Mind the details.
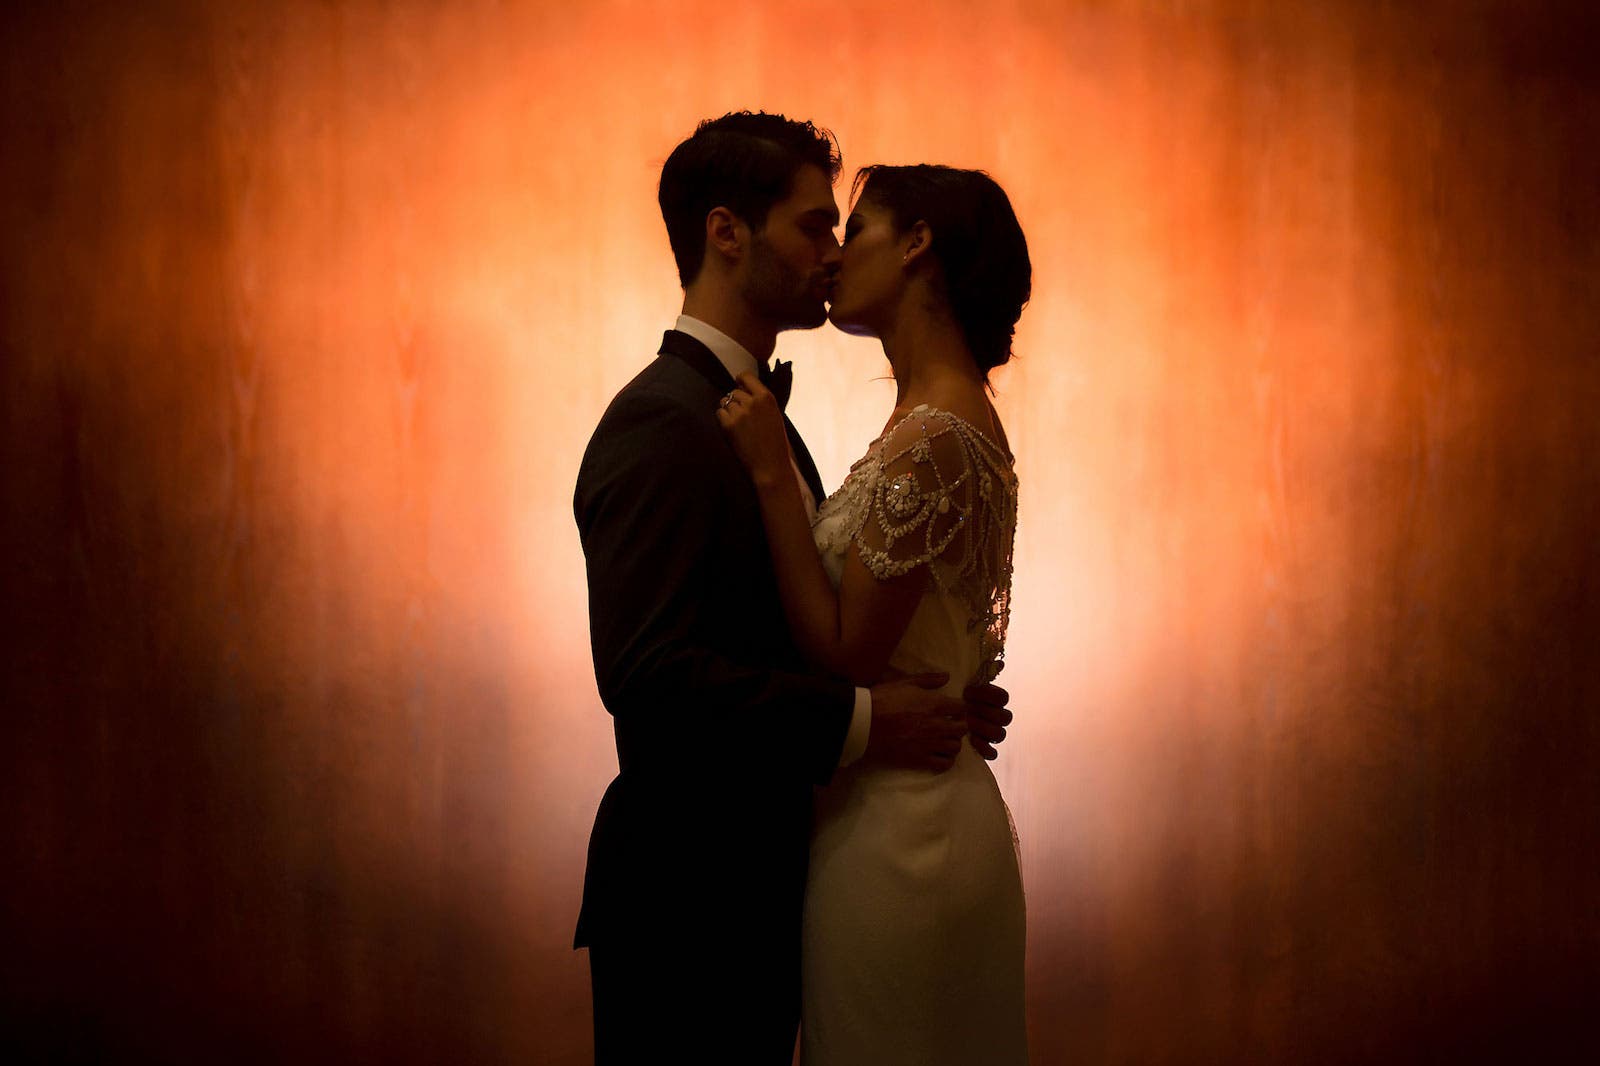
3. Bump the Shadows for Effect

Speaking of details, not all silhouettes have to be pitch black. There are occasions in which it’s preferable to include a bit more detail and preserve shadow detail for a moody silhouette. We do this regularly for couples portraits during weddings. This style of silhouette photography, especially when used with couples, can provide more interest than a straight black silhouette. When editing these images in post, however, don’t reverse course and darken and diminish the shadow detail.
4. Use the Camera You Have with You
To be clear, gear does matter to some extent when photographing silhouettes, but not in terms of whether you should use a smartphone, DSLR, or Mirrorless camera. Basically, so long as your camera allows you to manually adjust the exposure, you can use it to create a silhouette photo. For smartphone photographers, look into various apps that specialize in silhouette photography.
Ideal Camera Settings for Silhouette Photography
Here’s a quick overview for adjusting your exposure settings, followed by a brief explanation for choosing these settings:
- ISO: 100
- Aperture: f/8 – f/11
- Shutter Speed: Varies
When dialing in the exposure settings for your silhouette photo, the first thing to do is drop the ISO, ideally to ISO 100 to minimize image noise. From there, I recommend narrowing the aperture to somewhere between f/8 and f/11. We don’t really need to worry about creating a shallow depth of field because our goals hinge more on keeping the outline of our subject sharp. Finally, adjust the shutter speed accordingly. This last step will vary depending how much available light exists in the scene and whether or not you’re dragging the shutter for effect. Remember, dim light usually works better, so you’re not going to want too slow of a shutter speed.
Again, if you’re using a smartphone to capture a silhouette, look into ways you can adjust your exposure settings (like holding and dragging your finger on an iPhone to raise or lower the exposure, or quickly make the adjustments in PRO mode), and check out available apps that specialize in photographing silhouettes.
5. Add a Creative Spin
A basic technique can also benefit when used in conjunction with other creative photography techniques. Silhouette photography, for example, works particularly well when used as part of a reflection shot (above), a double exposure, or as even part of a trickier technique like a whip pan or long exposure portrait.
Whip Pan
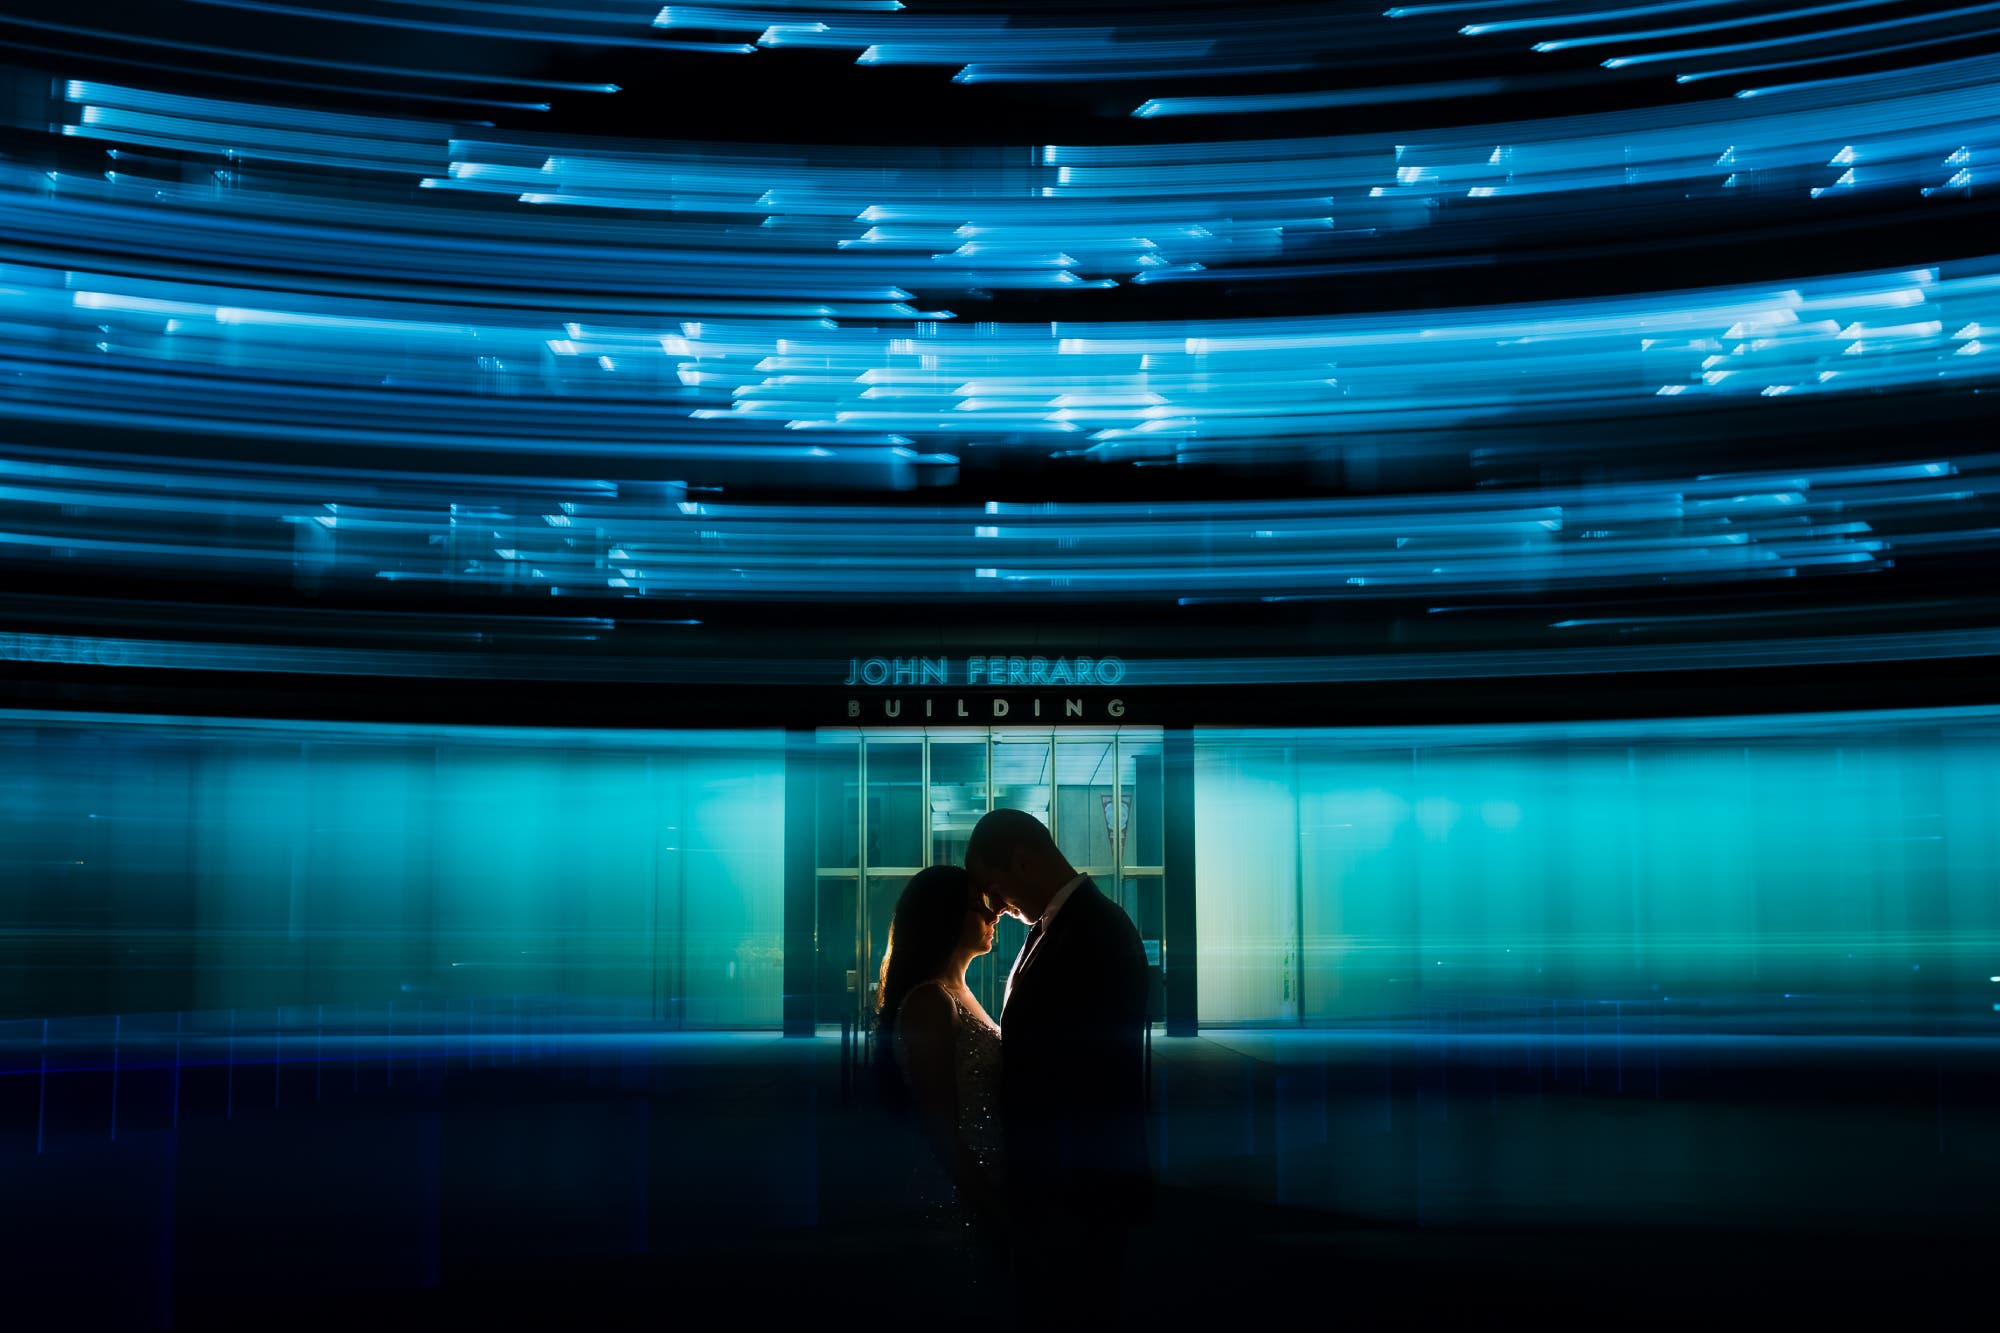
The whip pan ranks as one of my favorite nighttime photography ideas. To take this type of silhouette shot, look for an area where background lights are visible (such as office lights in a building). The closer the lights are to your subjects, the more emphasized the effect will be.
Simplified Directions:
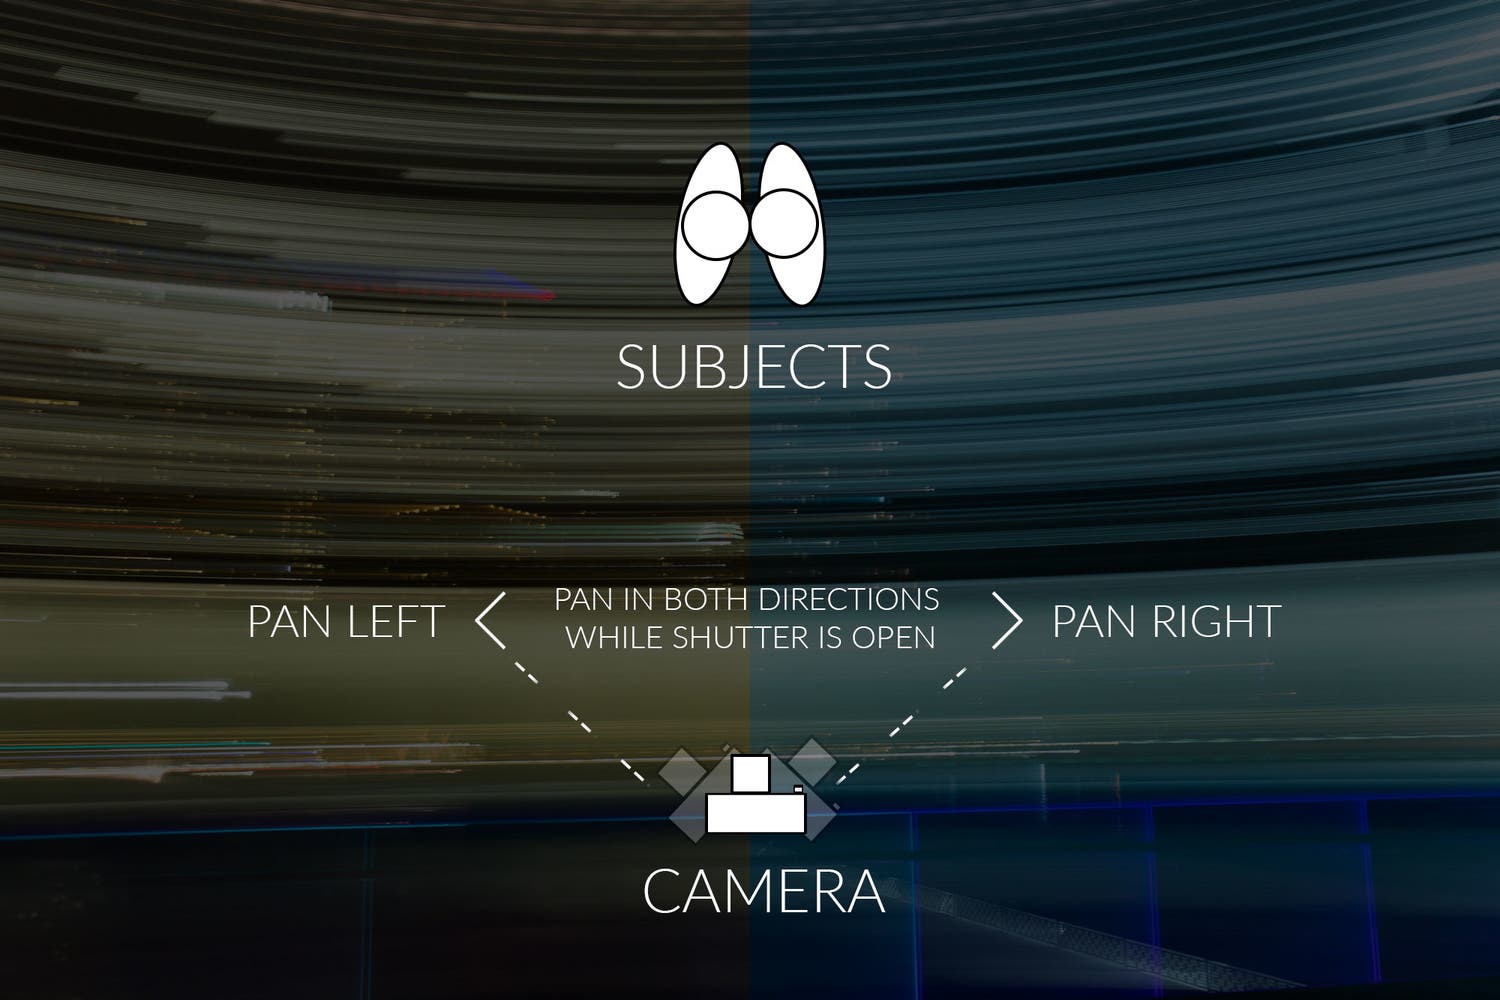
- Set your camera on a tripod and slow your shutter to around 1/2 second
- Instruct your subjects to hold still
- Set your flashes to Rear Curtain Sync to ensure that the subjects are flashed as the shutter closes
- Take a plate shot with your subjects in focus
- Loosen your tripod head and press the shutter, then quickly pan to the left and right to capture streaks of light
- Blend the plate shot with the motion shots to create a composite in post
Double Exposure
There’s more than one way to create a double exposure, and they don’t all involve silhouettes. Check out this article on the blog for more in-depth instructions on how to create a double exposure image that incorporates silhouette-like shapes.
6. Accentuate Silhouette Photography during Post-Production
Once we’ve imported our silhouette photo into Lightroom (or whichever photo editing software you prefer to use), we can complete our vision. Silhouettes require plenty of contrast, so most of the steps we’ll follow in post will amplify the contrast in our image to further accentuate our silhouette.
In addition to bumping up the contrast slider, we can deepen the blacks and drop the shadows to taste. Next, use adjustment brushes to fine tune areas in the image that may require further dodging and burning.
Conclusion
I hope you found these six silhouette photography ideas and tips helpful. While we continue to grow as photographers, we should also remember that we can still count on basic techniques to capture incredible images, for the benefit of both our clients and our portfolio. Check out this article here on the blog for more strategies for photographing silhouettes.