How to use reversal rings and a wide-angle lens to get stunning super-close-ups of snow flakes.
We had just enough snow this year for a white Christmas in our corner of the Adirondacks. Then a meltdown around New Years took us back to bare ground and dry grass. Only a couple of days later we had a really cold night. Looking out the window in the morning, I saw the lightest and softest flakes of snow falling gently to the ground. They covered the grass and ground like a fluffy layer of goose down. This is what I was waiting for. In this article, which I wrote especially for the Adorama Learning Center, I’ll show you how to use reversal rings and wide-angle lenses on your DSLR to shoot stunning super-macro closeups showing the beautiful details of snowflakes.
Editor’s note: All items described in this article are available at Adorama.

My set-up: I used a wide-angle lens with manual focus and aperture rings attached to the camera via a reversal ring. Note how the lens mount is facing towards the subject—be careful with that!
I’d been itching to experiment with photographing close-ups of snowflakes for some time, but got sidetracked all too often by various project deadlines. However, my current project was writing a Landscape Photographer’s Field Guide, and I wanted to show some different options for close-up and macro photography. While I’ve been using wide-angle lenses for many years in the usual mode for shooting landscapes, I decided it was time to try looking through them backwards. Since wide-angle lenses take a large landscape area and focus that on a small area in the camera, reversing them hones in on a small subject area, and spreads that over a larger area on the sensor.

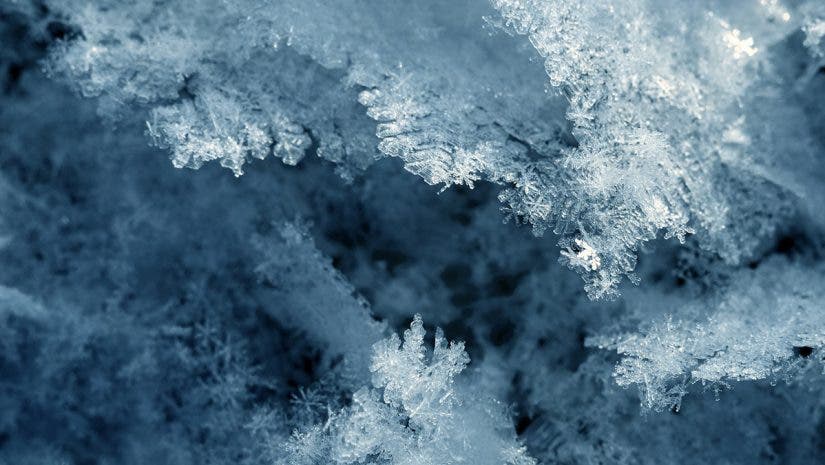
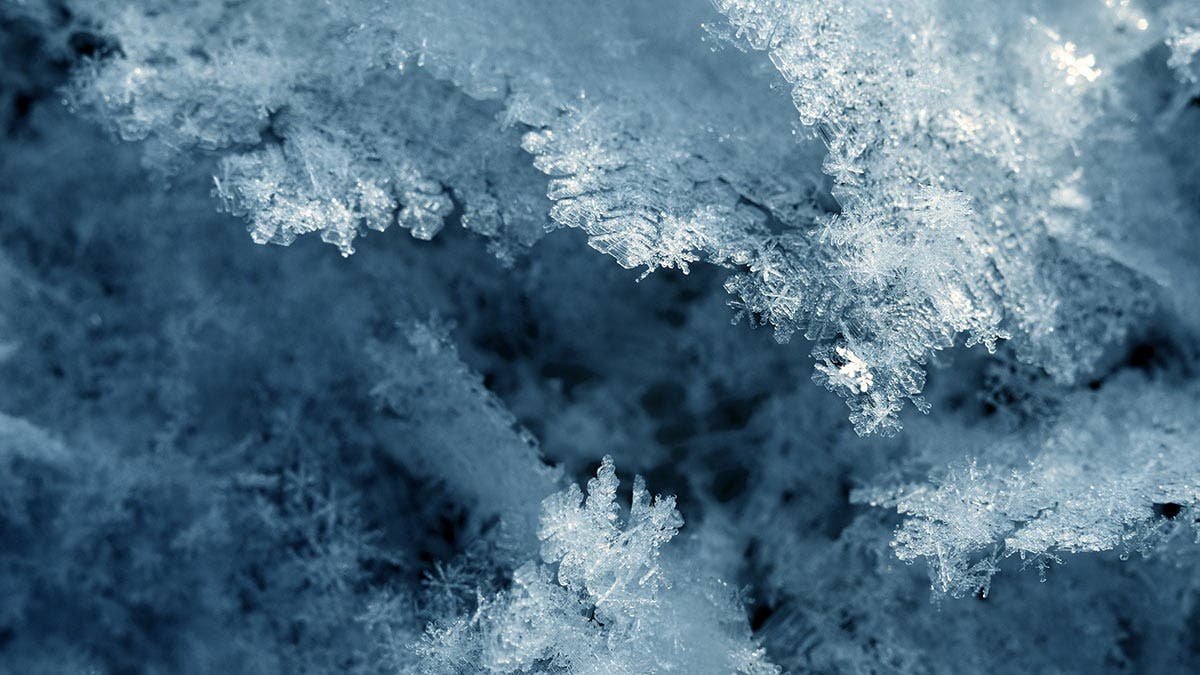
Stunning: I was able to get incredibly close to my subject and photograph snowflakes in incredible detail.
A Fortune of Reversal
I dug deep into my camera bags and found the Nikon BR-2A reversing adapter (available at Adorama) I’d bought some years ago, which can be used on my Nikon D300S. This reversing adapter has a Nikon lens mount on one side, with 52mm threads on the other for screwing the filter threads of a lens onto the adapter, so the lens is mounted in reverse on the camera. Various adapters are available for Canon, as well as other brands.
Reversing any lens shorter than a 60 mm focal length turns it into a macro lens. In order to make aperture and focus adjustments while the lens is reversed, it’s best to choose a lens that has both a manual focus adjustment as well as an aperture ring. While it’s possible to hold the aperture pin to stop down the aperture with newer automatic lenses, at this magnification the slightest camera or subject motion shows up in the final photo.
I still have a number of prime lenses from my film days that work fine with the adapter. My 24, 28, 35, and 50 mm lenses, all have 52mm filter threads. I found each has a different degree of macro capability, with the shortest focal length having the greatest magnification. I also took a look through my 35-70mm f/2.8 zoom backwards, and found it becomes a macro zoom with the reversing adapter and a Nikon BR-5, 52mm female to 62mm male step up ring, available at Adorama. I thought I’d also take a look through my 105 mm macro lens backwards to see what a longer focal length would do, and it simply doesn’t produce a useable image. One issue to remember with a reversed lens is the inside element is exposed when photographing, so be extra careful!

Close-up Diopters
I have also experimented with close-up diopters to see how much magnification I can get with my Nikon 105mm f/2.8D macro, which already has 1:1 life-size magnification (greater on an APS sensor). By adding a couple of close-up diopters (+4 and a +1), the magnification was almost exactly the same as with a reversed 24 mm lens—a field of view of about 1/4″ high x 3/8″ wide with my Nikon APS sensor. Note—when adding more than one close-up diopter, it’s best to put the greatest magnification on first, and stack others on top of it.

Setting up
I like to work with the camera mounted on a tripod that features an articulating center column. That makes it easier to set the camera up, adjusting it so the subject’s plane of focus is parallel to the camera’s sensor. Once the camera and lens are set up, the next step is finding a subject. At normal macro magnification of 1:1, it’s not too difficult to see subjects, but with the extra magnification of a reversed 24 mm lens, it can be helpful to use a magnifying glass!
An important factor to remember for composition is that as the magnification increases, the depth of field decreases. With the 24 mm lens at f 22, the depth of field is only about the thickness of a dime. Depth of field could possibly be increased by ‘stacking’ images that have different planes of focus, but since there is such minimal focus adjustment with a reversed lens, the camera might have to be moved slightly to shoot additional images, making that idea somewhat impractical.
Also, there is no data connection between the camera and lens with the lens reversed, so the exposure must be done with the camera in Manual exposure mode. The aperture is adjusted on the lens, and the shutter speed and ISO are adjusted on the camera to achieve a balanced exposure. Depending on the subject matter, you can also dial in exposure compensation and work with bracketing as well. A fill flash can be helpful to balance the lighting as well as add highlights, especially with such a small subject area. While you can get into fancy ringlights, reflectors, and additional lighting enhancements, just working with a built-in flash can have some nice results. Since there is no TTL lens connection for distance, experiment with varying amounts of flash under / overexposure compensation to get the best results.

I often find that macro shots are one of the more difficult set-ups to do, and the closer you are to the subject, the more difficult it becomes to get things just right! Tolerances are so small at this magnification that subjects have to be completely still. And, unless the exposure is at least 1/125 second or shorter, the vibration from the mirror swinging up causes blur from camera motion. Work with the mirror lock-up feature or exposure delay mode (Nikon) to be sure the camera is completely still during the exposure.
Even the slightest change in camera or subject position can change composition and the focus point considerably. Composing is much more challenging because the camera angle is so critical for getting the subject sharply focused. Lighting is especially critical on close-ups for providing color balance and definition to the subject when working so close to the camera.

The Joys of Landscapes in Reverse
Viewing the landscape in reverse opens all kinds of opportunities! Take a close look at insects, flowers, leaves, eyes, water droplets, icicles, and any other interesting details and textures. Snowflakes are especially fun to see up close, and they come in all shapes and sizes. Cold air aloft helps for forming nice snow crystals, and then it just a matter of looking for a good (cold) background. While snowflakes show up better when isolated against a darker background of leaves, needles, or grasses, popping a bit a fill flash can really help set them off nicely.
There are even lots of options for experimenting up close in the house. Flowers, plant leaves, water drops on a faucet, cloth textures, or frost on a window pane all make good macro subjects. Pop up the flash, and experiment with the intensity. Adjust the aperture to see whether the photo is better with it wide open or stopped down.
If working with a macro lens, check the view with the depth of field preview button to see how much is in focus. Remember you are looking through the lens with the aperture at the setting being used, so it will be darker and tougher to see when working with small apertures. If you wait a moment and let your eye become accustomed to the darker view, it will be easier to see the details.
It’s all about playing and trying things you may have never considered doing with a wide angle lens. In addition to shooting great landscapes, with just a couple of different adapters, there’s a whole range of close-up options that can be created with a 24mm prime lens, available at Adorama—from extreme macros like these to wide angle close-ups—but those are for another story.


