
Photographers use a variety of means to draw attention to their subjects. We can place our subjects in the crosshairs of a rule-of-thirds grid, position them in the brightest part of the frame, or isolate them against a sea of negative space. One of my favorite compositional tools for directing my viewers’ focus involves using a shallow depth of field. Few techniques work as well to separate the subject from the rest of the frame. In this article, we’ll take a closer look at shallow depth of field and consider a number of factors for using it in our photography.
What is Depth of Field?
In somewhat simple terms, depth of field describes the distance in an image, nearest to farthest from the lens, in which objects appear acceptably sharp. We typically measure depth of field in one of two ways: shallow vs. deep.
Shallow Depth of Field

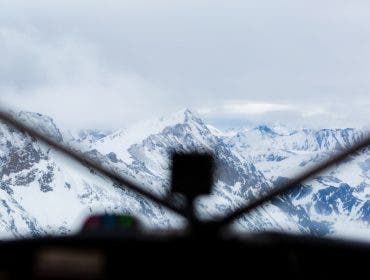
Images with a shallow depth of field feature a significant amount of out-of-focus area within the frame. The foreground and background of photos with a shallow depth of field tend to fall quickly (and often dramatically) out of focus, and the bit of detail left in focus helps create a sense of depth between the viewer and the subject. Shallow depth of field minimizes distractions in a scene by blurring the majority of the elements in an image. For this reason, it has proven a powerful tool for concealing unwanted elements and directing the viewer’s focus to the intended subject.
What is Bokeh?

When discussing shallow depth of field, we must also consider bokeh. Bokeh describes the quality or characteristic of the out-of-focus part of the image that falls outside of the photo’s depth of field. As both photographers and admirers of photos, we generally prefer smooth and pleasant bokeh, as opposed to jagged and distracting bokeh.
You can learn more about creating a bokeh quality here: 5 Tips for Capturing Bokeh
Deep Depth of Field
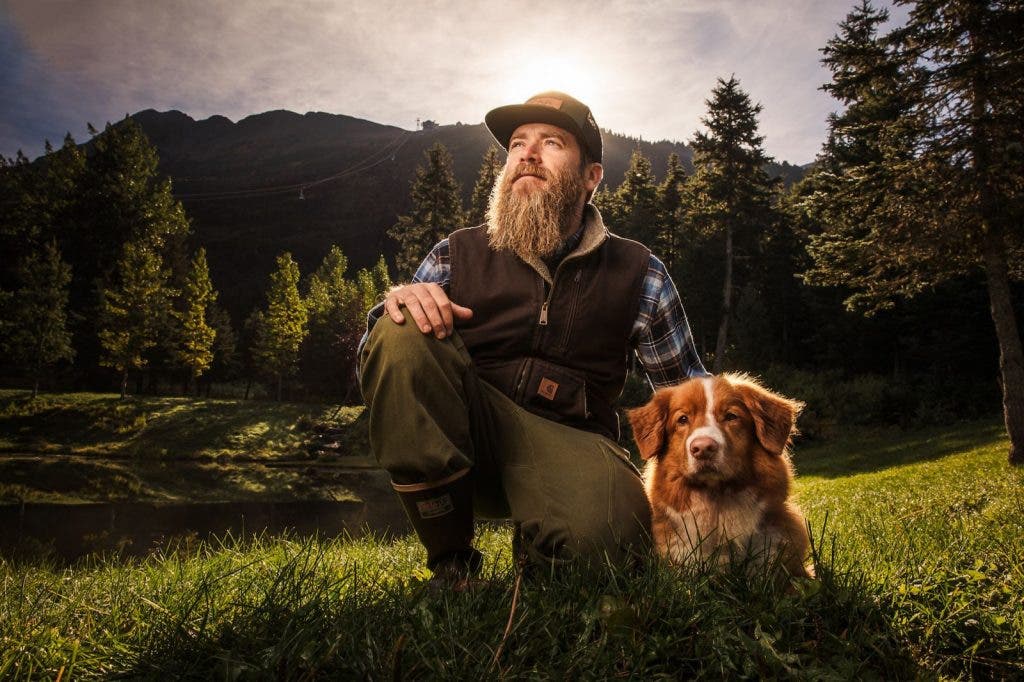
Images with a deep depth of field, on the other hand, retain much more detail in the overall scene and will sometimes keep nearly every element in focus. Photographers might opt to use a deeper depth of field when shooting scenes with ideal backgrounds or capturing multiple subjects placed across a wider focal plane, among other scenarios.
How Do I Control Depth of Field?
A number of factors go into controlling the depth of field in our photos. Some of these factors include the lens’ aperture, the size of the image sensor, focal length, and more. We’ll explore these and other considerations below.
Factors to Consider for Using a Shallow Depth of Field in Photography
Let’s get started!
1. Aperture
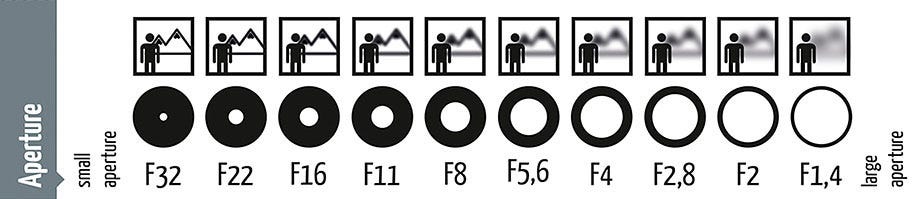
We often associate aperture with controlling the depth of field in our photos. Just in case you’re new to photography, aperture refers to the opening of a lens, which is used to control the amount of light that reaches the sensor or film.
In addition to allowing more light to reach the sensor, wider apertures (f/1.2-f/4) also leave less area in focus. This is one of the reasons portrait photographers love reaching for prime lenses with wide apertures. A wide-open aperture offers one of the fastest means for capturing shallow depth of field. It’s worth noting, however, that you don’t need a wide aperture lens to get a shallow depth of field. See the tips below on focal length and distances for more information on that.
Landscape and real estate/architecture photographers often shoot with smaller apertures (f/11-f/22) to retain a deep depth of field and leave more of the image in focus. The smaller aperture focuses the light very sharply for a greater depth both in front of and behind the actual focus distance.
2. Sensor Size and Shallow Depth of Field
When it comes to image sensors and controlling the depth of field, size matters. This holds true for both digital and film cameras. You can break it down with this simple equation:
- Larger sensor = shallower depth of field (DOF)
The sensor size in relation to the aperture and focal length you’re using will affect how shallow your depth of field can be. Shooting with a wide aperture in the range of f/1.2 to f/4 with a full-frame (35mm) sensor will yield a shallower depth of field than if you were to use the same aperture and focal length on a crop (APS-C) or Micro 4/3 sensor. The difference becomes more apparent when trying to capture a shallow depth of field with a typical point-n-shoot camera. The sensors are typically too small to create that desired depth.
I’d like to reiterate, however, that other factors come into play when using a shallow depth of field in photography.
3. Focal Length
While you can capture a shallow depth of field with both wide angle and telephoto lenses, it’s worth noting that the focal length of your lens will still impact your depth of field. In fact, focal length plays a key role in determining how in or out of focus the scene around our subjects will be.
Short Focal Length vs. Long Focal Length in Relation to Depth of Field

Shorter focal lengths (wide angle lenses), such as a 14mm lens with an f/2.8 aperture, create a deeper depth of field. For this reason, photographers who specialize in architecture or real estate photography tend to favor shorter focal lengths.

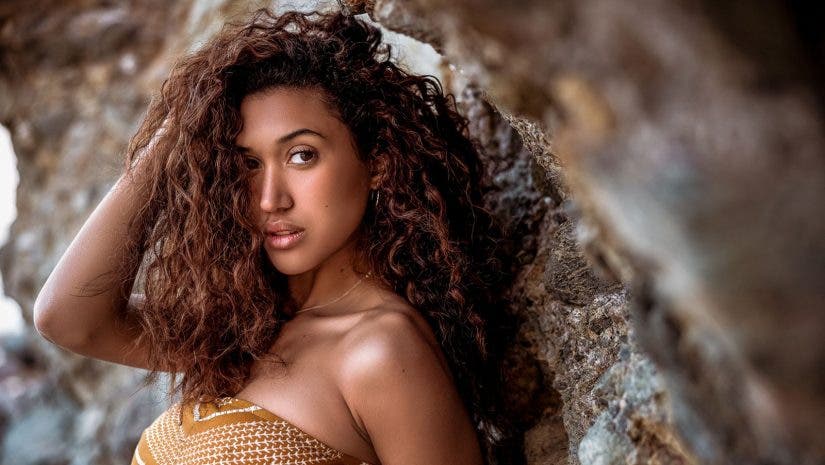
Longer focal lengths, on the other hand, such as a 100mm f/2.8 lens, make it easier to separate your subject from the background with a shallow depth of field. Portrait photographers will typically shoot in the 50mm-150mm range, more often using an 85mm focal length for flattering portraits of tack-sharp subjects in front of creamy, bokeh-filled backgrounds.
The reason that focal length affects depth of field has to do with how focal length magnifies the image. Wide-angle lenses use a shorter focal length, resulting in less magnification than you’d get from a telephoto lens. More magnification equals a shallower depth of field. It’s one more reason to remember to choose your lens with intention, which leads to my next point.
Distance Between the Camera and the Subject
Another part of the equation that ties closely to choosing your focal length has to do with distances. The first measure of distance deals with the distance between the camera and the subject. You’ll notice as you move your camera closer to the subject, the more out of focus the background becomes. If you move the camera away from the subject, then the opposite happens, and the scene falls more into focus.
This happens even when we leave our other settings, such as aperture, untouched. Macro photographers take advantage of this fact often to further separate their tiny or close-up subjects from the background.
Distance Between the Subject and the Background
The other measure of distance in relation to creating a shallow depth of field deals with the distance between the subject and the background. So, assuming you keep the distance between the camera and the subject the same while shifting closer or farther away from background elements, you’ll notice that the closer the subject is to the background, the more in focus the background becomes. The opposite is also true.
4. Background & Foreground Elements and Shallow Depth of Field
Speaking of using elements within the frame, we can use background and foreground elements to further exaggerate or diminish our depth of field. The very nature of including these elements already adds depth to the image, but we can use them with intention to make the results more pronounced.

One thing I like to do when capturing portraits is to place the camera close to a wall (or rock, or whatever) and use it to add depth to the image and lead the viewer to my subject.
5. Creative Applications

I mentioned it earlier, but there are occasions in which we can use shallow depth of field as a creative tool to simplify busy backgrounds and conceal unwanted elements. We can also use it to direct our viewers attention and give our 2D images a bit of depth. On the other hand, there are times when we want to deepen our depth of field to keep more detail in the scene. I discuss each of these scenarios and more in the video above.
Brenizer Method of Panoramic Stitching

Using the Brenizer Method can add a surreal look to your imagery, creating an incredibly shallow depth of field in wide angle portraits. If you’ve never heard of the Brenizer Method, it is a composite technique that involves stitching together a sequence of images, each having been captured using a wide aperture. Wedding and portrait photographer Ryan Brenizer popularized the method by capturing unique, dramatic environmental portraits of couples during weddings and engagement sessions.
Maximizing Shallow Depth of Field with Flash

We’ve already talked about using distances to control depth of field. We determined that placing the camera near the subject will help separate the subject from the background, as will moving the subject away from the backdrop. Sometimes, however, our space may be limited, leaving us to find other ways to manipulate the depth of field. In the video above, Gavin Hoey utilizes flash to maximize shallow depth of field in a small home studio space. Using a wide aperture of f/1.2 on a 25mm lens (equivalent to a 50mm on a full frame camera), a textured background, and single off-camera flash in a softbox, Gavin is able to add depth and visual appeal to his portraits.
One-Lens Challenge

In the above video on Adorama’s YouTube channel, I challenged myself to use only a 35mm lens to capture a range of portraits. In addition to incorporating shallow depth of field into my shots, I also explored some other compositional techniques to make the images more visually appealing.
6. Challenges of Shooting with Shallow Depth of Field
The shallower we try to go in terms of depth of field, the more challenges we face for capturing sharp images. In fact, getting sharp images with a super shallow depth of field can prove quite difficult, especially in the beginning. It requires practice, planning, and a basic understanding of depth of field and how your camera and lens works.
Bright and Dim Ambient Light

To illustrate this point, in the video above, Mark Wallace demonstrates how to capture a shallow depth of field on a bright, sunny day, when his highest shutter speed and lowest ISO setting still require a narrow aperture. Mark uses a neutral density filter to resolve the issue and keep a wide aperture for a shallow depth of field. On the opposite side of the spectrum, if the scenario requires a slow shutter speed, say due to dim lighting, you should probably use a tripod and cable release to help minimize camera shake.
Camera and Lens Limitations
Using techniques like focus-recomposing can prove very difficult when trying to nail a focus with a shallow depth of field. Any little movement of the camera can take you off the precise focal plane you dialed in before recomposing. Modern autofocus systems have eliminated the need to do this under most circumstances, but that also depends on which gear you’re using.
Of course, even perfectly stable shots might not render the results you seek if you shoot wide open, as using wide open apertures (especially in the neighborhood of f/1.2) often results in capturing softer images.
Conclusion
I hope you enjoyed this overview of factors to consider when using shallow depth of field in your photography. Learning to use shallow depth of field in your photography won’t come without a fair share of challenges, but the reward is more than worth it if you persist.
On your journey towards mastering shallow depth of field, be sure to give yourself room to fail before you perfect the technique. Eventually, the struggle will fade and your photography will have improved because of it.