We’ve all been there. You take a great photo, get home, and realize a huge shadow is ruining the photo. You don’t have the opportunity to re-shoot the scene, so you have to make do with what you have. Luckily, it isn’t too challenging to remove most shadows in photos. Whether you’re editing on mobile or desktop, this guide will teach you how to remove shadows in photos and how to avoid shadows for next time.
How to Remove a Shadow on Mobile
There are a few different apps that can remove a shadow on your mobile phone. For this example, we’ll be using Lightroom Mobile, which is a free app that allows you to spot heal your image.
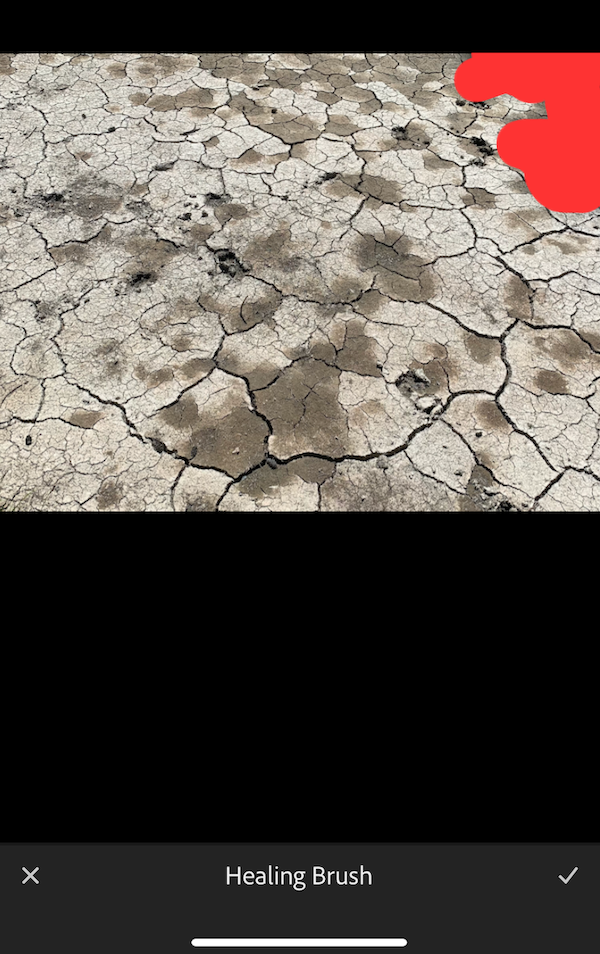
First, you need to upload or import your image. Then, tap on the image and select “Healing” from the bottom menu bar. This will bring up the spot healing options.
Adjust the brush size and hardness according to the shadow you are trying to remove. The hardness of the brush will adjust how feathered the edges of the brush are. For removing most shadows, a hardness of around 20% will suffice. The size of the brush totally depends on the photo you are editing.
Aim to make the size of the brush small, and spend more time drawing over the spots with your finger. If the brush size is too large, you will select areas that don’t need to be replaced. Once you’ve picked the right settings, use your finger to draw over all of the spots in shadow.
Next, Lightroom will automatically sample another area in the image to fill the spot you have just drawn over. You can tap and drag to adjust this spot for a seamless fit.
Please note: This technique will not work for giant shadows that fill more than half of the frame. Lightroom needs enough non-shadow area to sample in order to re-create the spot in shadow.
Once you are done, tap the checkmark in the bottom right corner of the screen and continue with your edit. You can choose to export the photo directly from Lightroom if you do not wish to apply more edits.
This technique will work in many other photo editors for mobile as well. Any mobile editor that allows spot healing should have a way to do this technique, but some apps may work better than others. You can find more options by reading Best Photo Editing Apps for Mobile Devices in 2022.
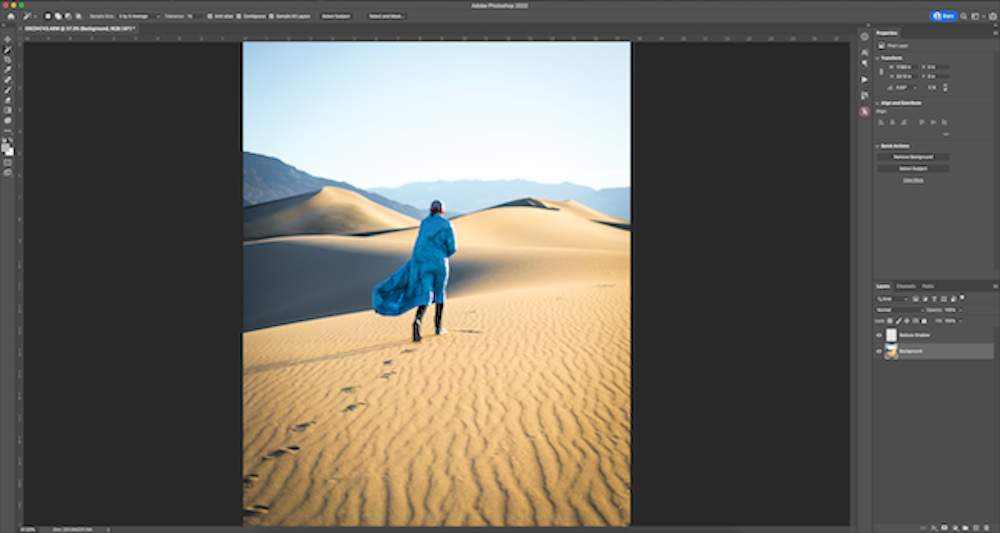
How to Remove a Shadow in Photoshop
Removing a shadow in Photoshop gives you the most control possible. Photoshop makes it easy to remove or modify shadows in photos quickly.
First, create a new blank background layer. This will allow you to edit the photo nondestructively and still be able to go back or modify the original photo. If you need help with this step, check out How to Make a Layer Mask in Photoshop.
Next, grab the Magic Wand tool (W). In the top menu bar, change the tolerance to 15 and click on the shadow in your frame. You should see the shadow is being selected, but not the rest of your frame. If the whole shadow wasn’t selected, press and hold Shift and click on the shadow again. This will increase the selection area. Repeat this until the whole shadow is selected.
Then, go to Modify > Expand and expand the selection by ten pixels. This will make sure that you get the edges of the shadow as well.
Lastly, go to Edit > Content-Aware Fill. This will bring up a new box with options for the Content-Aware Fill. Usually, Photoshop will select the right area of the frame to sample from: if not, you can paint green wherever you’d like to sample the image. If Photoshop has already selected the right area, go ahead and hit OK.
Now, your shadow should be gone. If you still want the shadow to remain, you can use the opacity slider on the layer and reduce the opacity. This will reduce the strength of the shadow, but it will still be visible to see.
For photos with multiple shadows in different areas of the frame, you may need to do this part numerous times to remove all of the shadows. Make a new layer for each new shadow you are trying to remove, so that you can easily go back and edit each shadow individually.
Tips to Help Avoid Shadows by Using Flash
Now that we’ve removed the shadows from your frame, let’s talk about how to avoid those pesky shadows for next time. Having shadows in your portraits may not seem like a big deal, but removing the shadows will really help your subject to shine. Shadows are created with light hitting your subject. Although, if we use more light at the right angle, we can eliminate shadows that may be created by the sun or other light sources. Combine a light with the right angle, and your shadows will be gone for good.
Unfortunately, you won’t be able to get rid of all shadows in your scene. Nearly any way you position the light will result in shadows. However, the easiest way to avoid shadows is to set up the flash in such a way that the shadows are projected down, or to one side that your camera cannot see. Once you know to look for shadows, it is easy to adjust your lighting and change the angle of the camera to keep shadows out of your images. You can find out more about lighting options at The Ultimate Guide to Off-Camera Flash.
Another way to avoid shadows is to have your subject step away from the background. Oftentimes, when using a flash, the subject may project shadows on a wall, or another object behind them. Have the subject step away from anything that may be behind them catching a shadow, or angle your photo so that you can’t see the wall.
If you have the tools, consider adding a second fill light to light up the background of your photo, or to compliment your main flash as a secondary light source to help combat flash. Any spot that is catching light should have minimal to no shadows, so place your second light strategically. Looking to learn more about fill light as an option? Check out What is a Fill Light? And How Can I Use It?