Is the era of the glass special effects filter over?
In my article Special Effects filters: Glass vs. Photoshop, I talked about some wild and clever camera filters for adding special effects to your photographs, and compared them to creating the same effects in Photoshop. Which offered the most efficient and flexible solution? In most cases, it was Photoshop.
Well, I’m back with more special effects filters and Photoshop techniques. Many photographers have considered some of the glass filters essential accessories. Are they still? Has Photoshop rendered these filters obsolete, or is there still some utility left in all that glass? We had Photoshop and Glass filters go seven rounds last time…here are four more rounds.
Round 8: Diffusing the issue
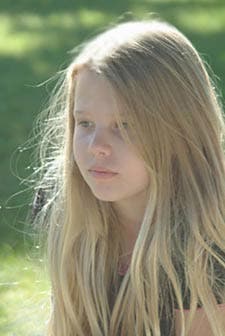
Glass: Glamorous women love them, older women love them, scenic photographers love them. No wonder. Diffusion filters can soften hard edges, lower contrast, mute colors, and add a slight shimmering glow around bright highlights. They are available in different strengths to give you just the effect you want, from a slight softening of an older woman’s wrinkles, to heavy diffusion for a dreamy, romantic landscape.
The names “diffusion filter” (or, simply, “diffuser”) and “soft-focus filter” are often used interchangeably, but to be technically correct, a soft focus filter blends both an out-of- focus and sharply focused image at the same time, while a diffusion filter creates an overall blurring effect.
These filters are designed in several ways. You’ll find some with etched lines, some overlaid with tiny black dots, others covered with what look like tiny lenses, and some with net embedded in the glass. Some diffusers reduce sharpness without loss of contrast. Some reduce mainly contrast. Still others reduce both the contrast and sharpness. And some are designed mainly for halation, or halo-like, effects.
So how do you choose which type to buy? Read the descriptions on the Adorama website. The most practical approach is to look through the filters and observe the effect they give. You may want to buy several of one type in different grades (strengths) to give you control over the amount of diffusion. With some filters, the higher the grade number, the greater the effect; with others, higher grade numbers yield a milder effect.
Soft lighting is best when using diffusers, and backlight and sidelight are especially nice. The softening effect of some– but not all– diffusion filters increases with the focal length of the lens. Generally, you’ll want to use a large aperture, since closing down the lens reduces the effect with some filters, and a small aperture will bring the texture of a net or small dots into focus. Unless you are using very heavy diffusion, you can focus with the filter in place. As for exposure, you can take your through-the-lens meter reading with the diffuser over the lens. Very heavy diffusion, though, may cause the meter to overexpose, but that can actually enhance the effect. A slight overexposure increases softening, and an underexposure decreases it, so you might want to deliberately bracket your exposures by one-half, one, and two stops overexposure to find the result you like best.
A variation of the diffusion filter is one with a clear center area. You can camouflage busy backgrounds, or emphasize one person in a group. The filter will let you diffuse everything but what is in the center of the image. As with all filters that have a clear area in the middle, the size of the clear area and the sharpness of the transition depend on the lens focal length and aperture. A short focal length or a small aperture gives a small center area with a sharply defined edge; a long focal length or a large aperture does the opposite. The best compromise is a focal length of about 50mm and an aperture of f/5.6 or f/8.
Another variation is a colored diffusion filter, which does what the name implies: it adds color as well as diffusion. But you could also create the same effect by using a colored filter along with a diffusion filter.
Other filters you already have can soften the image and serve quite effectively as substitutes for diffusion filters. One that works well is a star filter that has closely spaced grids. Another very good substitute is a moderate-strength fog or mist filter; these produce a highlight flare that has a pleasing halo effect. More about fog filters in a bit.
Photoshop: For an all-over diffusion: Go to Layer> Duplicate Layer. On the duplicate layer, choose Filter > Blur> Gaussian Blur of about 5 pixels. Click OK. Create a brightness/contrast adjustment layer; lower the contrast a little (around -20), and raise the brightness a bit (+20). If you are doing this on a portrait, you may activate the Gaussian Blur layer and use the eraser tool on the eyes to restore sharpness to them.
To add a bit of glow to the highlights, select the highlight area using a feather of about 10 pixels. Put this selection on a new layer (Layer > New > Layer via Copy). Add a Gaussian Blur of about 15 pixels.
For a center sharp diffusion: Make a duplicate layer. Select the elliptical marquee tool with a feather of about 50. Draw a circle on the duplicate layer. Then Select > Inverse. Add a Gaussian Blur of about 30 pixels or to taste (Filter > Blur > Gaussian Blur).
Glass or Photoshop? Photoshop makes it possible to control the amount of diffusion without needing a bagful of filters of different strengths. If you want a clear area surrounded by diffusion, Photoshop lets you place the sharp area in the center or any other place in the photo. Photoshop wins this round.
![]()
![]()
Make your own diffusion filter
Why invest in a diffusion filter when you can make one yourself? Here are five D.I.Y. diffusion filter ideas…
- Blow on your lens and let your breath condense there. Quickly press the shutter release before the condensation evaporates–it works surprisingly well.
- Crumple a piece of cellophane, flatten it out, and hold it in front of your lens or secure it there with a rubber band.
- Take a clear or skylight filter and spray it lightly with hair spray, add dabs of clear nail polish, or a spread a thin layer of petroleum jelly (Vaseline) over it.
- Take a clear or skylight filter and use a fine-point black permanent marker to cover the entire surface with tiny dots.
- Stretch taut a piece of black net or panty hose over your lens. Secure it with a rubber band.
![]()
![]()
Round 9: In a Fog
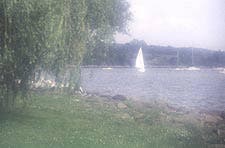
Glass: If you don’t get up early enough to catch the morning fog, you can cheat with a fog filter. Fog filters come in strengths that can envelope your scene in densities ranging from a light fog all the way to pea soup. A realistic scene would be less foggy in the foreground than the background. To achieve this effect, place a graduated fog filter so the dense area starts at the upper part of the scene and gradually fades to clear. If you want some fogginess in the foreground, use two graduated fog filters of different strengths, placing the denser one at the upper part of the lens.
Photoshop: Set the foreground color to white. Create a New Fill Layer > Gradient. Choose white to clear. Check Reverse, which puts the dense part will at the top of the photograph, leaving the lower area clear. Click OK. Adjust the layer opacity depending on how dense you want the fog to be. To add a light layer of fog to the lower area, make another New Fill Layer > Gradient, but leave Reverse unchecked. Click OK. Lower the layer opacity to about 30 percent. This creates a quite realistic fog.
Glass or Photoshop? A toss-up. Both can give comparable results.
Round 10: Multi-Image Prism Filters
Prism filters turn one image into multiple identical images, in various unrealistic patterns. Use one if you want to make a scene look busy, or if you just want to make fancy patterns. One type of prism has sections arranged in pie-shaped wedges, which you can rotate to change the position of the images; the number of sections can go as high as 25. Another type of prism has parallel sections arranged in just one half of the filter; these are sometimes called “repeater” filters, and they give multiple repetitions on part of the image. Some multi-image filters are available with colored sections.
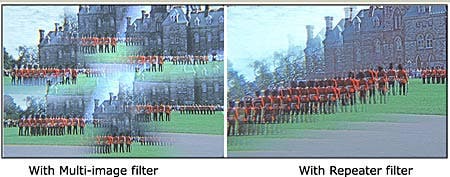
A different type of multi-image filter is one with a center section surrounded by several sections. If you rotate this filter, the central image remains stationary while the others move, allowing you have control over the position of the clones. Try rotating the filter during a half- or one-second exposure. You’ll surround the central image with a whirl of color. Put the camera on a tripod when you do this. And, while the camera and filter are on the tripod, try zooming the lens during the exposure.

Some technical tips: The longer the focal length, the more separated the images will be; the shorter the focal length, the more the images will overlap. Focal lengths of 50mm to 100mm work best, but check what the manufacturer specifies for a particular filter. As for aperture, smaller apertures separate the individual images and produce sharper images with better color saturation. Sounds good. The bad news is that small apertures also cause the edges of the sections to become noticeable. Larger apertures, on the other hand, softly blend the images. The best compromise seems to be an aperture of f/5.6 or f/8 at 50mm.
The subject-to-camera distance is another consideration. The farther the subject is from the camera, the more separated and less distinct the images will be and the more empty space there will be in the picture. Closer is better.
One last thought: Dark backgrounds make the images most distinct, while bright backgrounds tend to wash out the image.
Photoshop: You can make an image with as many sections as you want and in a variety of shapes. Open an image and also open a blank canvas at the same resolution. Use a selection tool to select a wedge-shape or rectangular shaped area of the image; copy and paste it on the blank canvas as many times as you like, positioning and rotating the images as desired. To rotate, go to Edit > Transform > Rotate; grab one of the handles with your cursor and rotate it. When all the sections are in place, crop the image to a rectangular format.
Glass or Photoshop? Glass! It’s easier, faster, and more precise with a filter; it’s more versatile but time-consuming with Photoshop.
Round 11: Motion Slickness
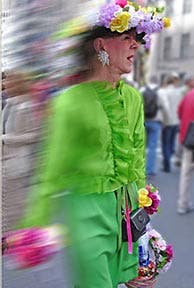
Glass: A “speed filter” is called that because it can leave a trail of streaky lines behind the subject, making it look like it’s really zipping along. You can also use the filter to turn a calm day into a hurricane– at least in the picture. Half the filter is flat, the other curved. It’s the curved part that smears and streaks lines. By rotating the filter, you can make the speed lines go in any direction.
The best subjects to use with this filter are those that contrast well with the background. The background should have lots of detail and color. Almost any lens up to 250mm works well with it. With long lenses, you’ll want to stop down to a small aperture. Your camera won’t be able to focus automatically, so either focus before you put on the filter, or focus manually after the filter is in place.
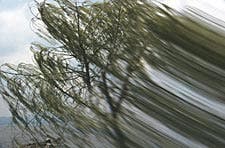
Instead of always placing the speed lines horizontally, try placing them at an angle. Or use the speed lines vertically to add a delicate blur at the top of a row of trees, weeds, or other slender vertical subject. A fun thing to do is to add speed lines to statues and other objects that obviously can’t move.
Photoshop: To put streaks on one side of the subject. Use a selection tool with a feather of about 5 pixels to select an area that slightly overlaps the side of the subject and extends into the background where you want the streaks to be. Copy this selection onto a new layer. On the new layer, choose Filter > Blur > Motion Blur. Set the blur angle to 0 and the distance to any amount you like.
Glass or Photoshop? Photoshop! The image-editing software lets you be more specific as to the area that has streaks and the angle of the streaks, and the effect is a bit more realistic.
And the winner is…
Photoshop, by a sliver this time, winning two rounds to glass filters’ one and a toss-up. Our advice? You can still buy glass filters…but be selective, and definitely have a current copy of Adobe Photoshop if you want to accomplish special effects.© Adorama, Inc.
