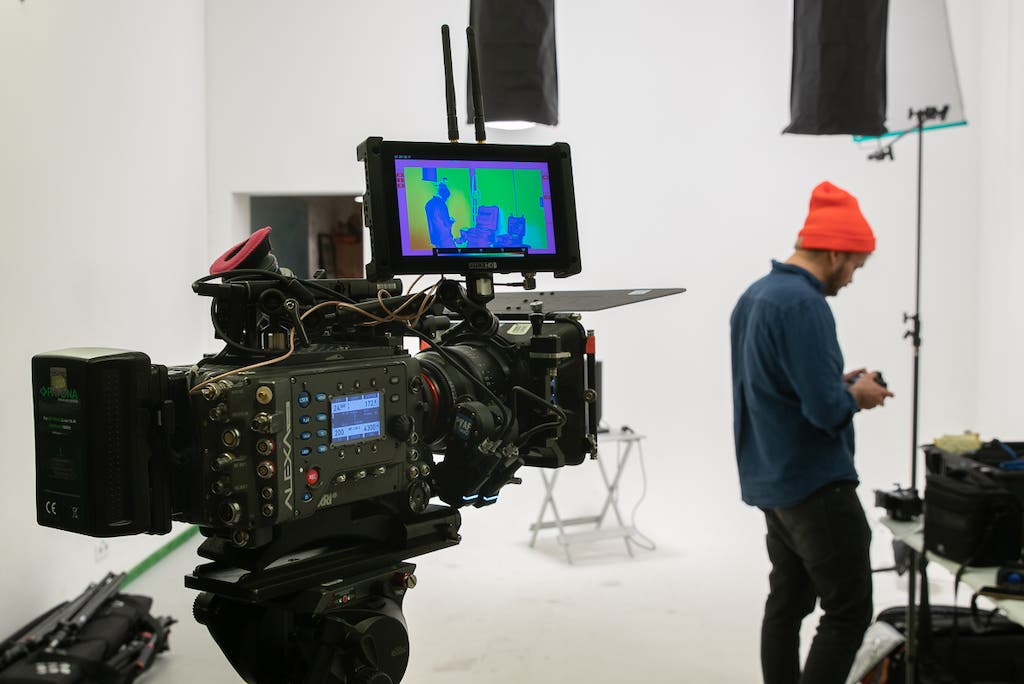
To an outsider, the world of cinema cameras can look impossible to understand. A camera can have multiple pieces of equipment attached to it with cables popping in and out. This article will demystify some of the tools, terminology, and best practices to rig a cinema camera on set. While this cannot substitute for hands-on experience, it will give you an idea of things on set and their functions. I’ll try to explain how to rig a cinema camera as simply as possible. Where the information is too much for the scope of this article, I’ll link to supplemental information.
In the film world, there are an assortment of specialized equipment, ports, cables, and support gear. These make the cinema cameras more suitable for working precisely, allowing collaboration, and operating at maximum efficiency. It can be intimidating when you are first exposed to the gear. Noted in the picture below, there is a sticker of Gary the Snail from SpongeBob on the camera. At the end of the day, this should be a fun and rewarding experience. Try to remember in the stressful moments that this isn’t life or death.
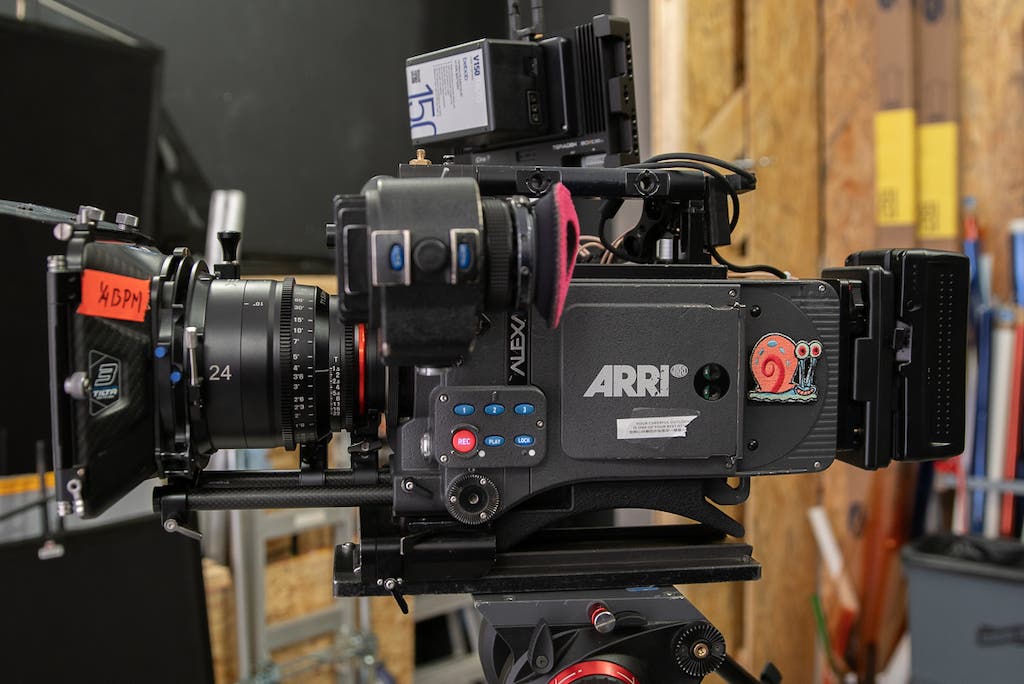
Don’t be too scared
It can seem scary, but think of it this way… How well do you know how to use your computer and its different apps? Setting up a cinema camera is just a different version of that. Once you learn and get some experience, it becomes way less scary. However, like anything technical, mastery takes time. Once you put in the hours and get familiar with how to set up a camera, then it becomes about performing it quickly, solving potential problems before they happen, and coming up with solutions to actual problems when they happen. I will cover the purpose of the different accessories, but I will not get into the details of how to use each piece of equipment.
But be a little scared
You know how I said don’t be too scared? I mean that, but you should always be concerned about the safety of the camera and its accessories. “Concerned” sounds better than “scared.” Cameras and camera gear are generally very expensive, with some cameras costing more than a sports car. A Jaguar F Type costs roughly the same as the Alexa Mini LF, and that is without anything attached!
Cinema cameras
There are many different price points and uses of cinema cameras. I will not cover the differences, but focus on the commonalities. I am also going to steer clear of menus and settings as those are brand-specific and must be learned by using a specific model. While there are several manufacturers, the two top leaders are currently ARRI and RED. If you would like to learn the RED menu and you have an iOS device, you can download the Donna Pro Red Camera Simulator. For the ARRI menu system, you can check out their site here. For this article, I will be using an Alexa Classic and a Sony FS7 MkII.
Lens mounts
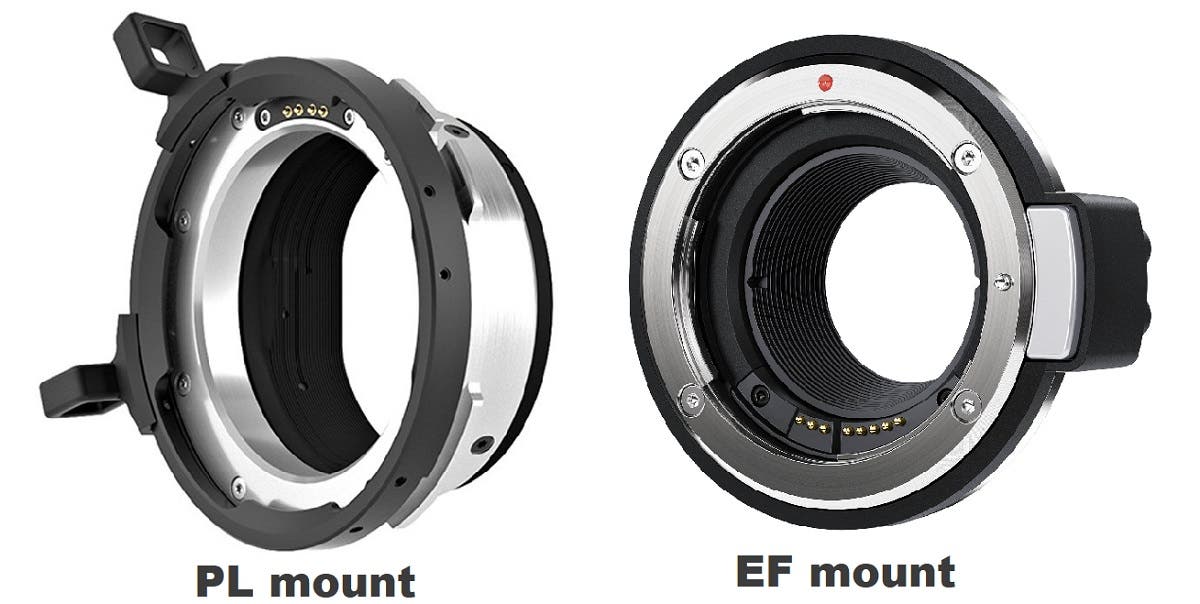
There are a few common lens mounts for cinema cameras. The two most common mounts are the ARRI PL mount and the Canon EF mount. Some cinema cameras also have a Sony E mount, a Nikon F mount, or a micro 4/3 mount. There are other lens mounts, but they are not so common on cinema cameras. The Alexa Classic uses the most common cinema PL mount. The Sony FS7 MkII has Sony’s proprietary E mount, but you can add a Metabones adapter to make it compatible with Canon EF lenses.
The current industry standard for cinema lenses is the PL mount, or positive lock mount. They have been used on cinema cameras going back to the early 1980’s. Most cinema lenses currently in circulation are of the PL variety so it is good to familiarize yourself with this mount. The lens slides into the mount and the front collar. The black part on the front of the PL mount rotates to lock the lens in place. The fit can sometimes be tight, so be very sure that you feel the lens lock into the mount. Always test that the lens is properly seated in the mount and that the collar is fully rotated. You don’t want a $30,000 lens falling to the floor.
The Canon EF mount allows you to use the wide variety of photographic lenses and cinema lenses from both Canon and third-party manufacturers such as Xeen. The lenses rotate within this mount with an audible click to let you know the lens is firmly seated.
Lenses
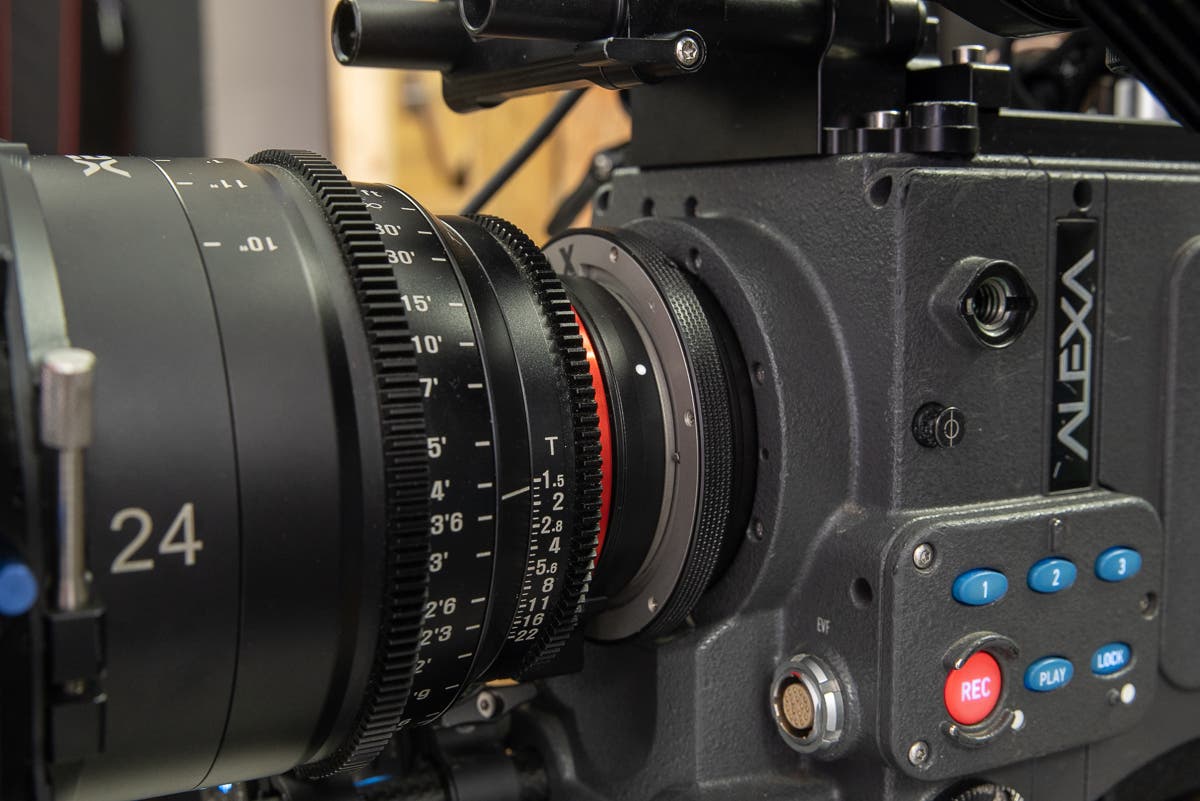
There is a variety of cinema lenses available — from vintage lenses that have no digital information to new lenses that can transmit metadata. There are several benefits to using cinema lenses over photography lenses on a film shoot. Cinema lenses generally have a long barrel rotation from the nearest point to the furthest point with hard stops on each end. They usually have clear distance markings on both sides of the lens. There is a smooth instead of clicked aperture dial. There are threaded gears for attaching manual or wireless gears to control aperture, focus, and zoom functions of the lens.
Almost all cinema lenses must be focused manually, which is the preferred method for most filmmaking. The reason for manually focusing lenses instead of using autofocus is that it allows for more artistic and precise control when shifting focus. The gearing also allows the lens to be more tailored to either the operator who will focus the lens themselves or for the first camera assistant — also known as a focus puller — whose job it is to ensure that the focus is where it needs to be.
Manual and wireless follow focus control
Maintaining focus on a moving subject while using a manually focusing lens requires a lot of practice, precise skill, an extremely well-trained eye. In film, many roles are highly specific. there are only a handful of people on set who have as much responsibility as the person in charge of ensuring that the focus is correct on every shot. There are several tools that aid the focus puller or camera operator to make sure they have the best chance to nail the focus every time. In the last section, I mentioned that cinema lenses have up to three gear rings to help control aperture, zoom, and focus.
The focus gear is by far the most used of the three. In order to shift the focus with millimeter precision and a high level of repeatability operators and 1st ACs (camera assistant) use either a manual or a wireless follow focus. The first picture below shows John using the Tilta 15mm Manual Follow Focus. This allows him to adjust the focus from a comfortable position to the side of the lens without having to rotate the barrel of the lens. This would likely introduce unwanted jitter into the shot. A manual follow focus is generally used by solo camera operators.
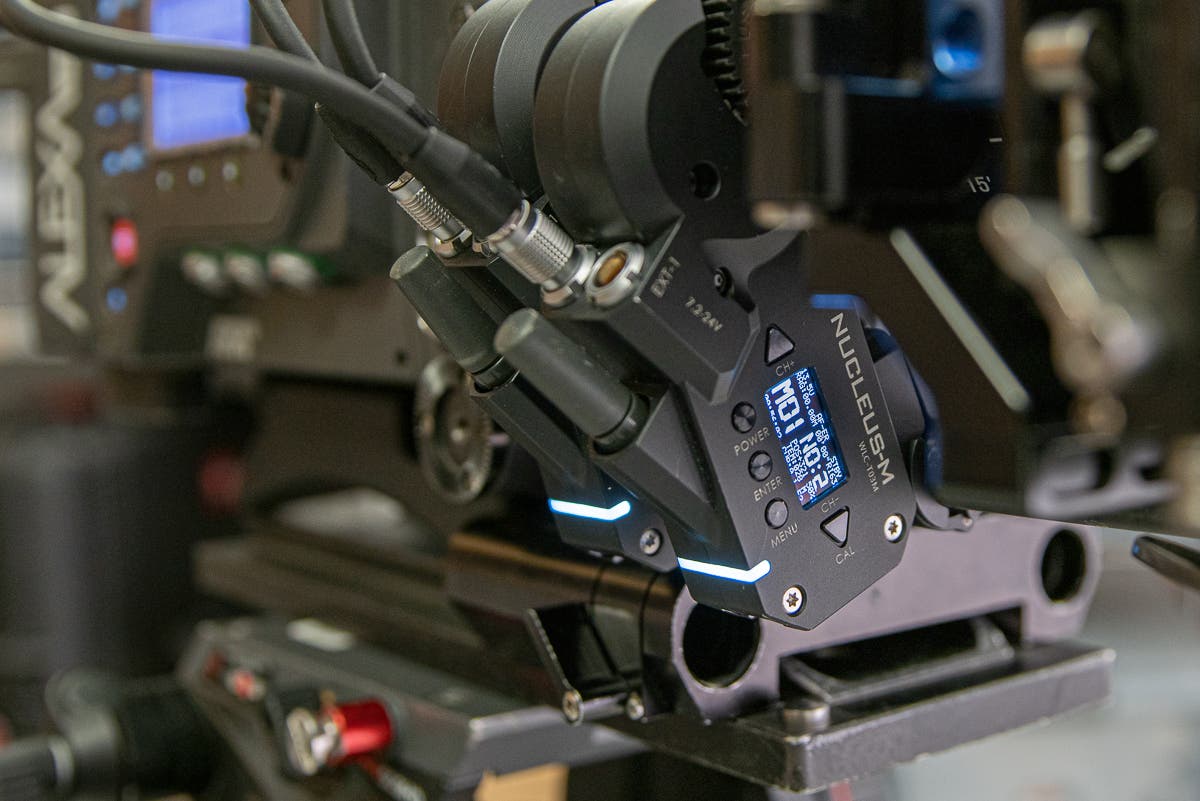
When you have a focus puller on set, you can still use a manual follow focus. Although, it is advisable to use a wireless system which allows them to control the focus remotely without having to be right on top of the camera operator. Wireless follow focus systems used to be extremely expensive. Within the past few years, the technology has come way down in price and the current budget king is the Tilta Nucleus-M wireless follow focus system shown below. Tilta also has the Tilta Nucleus Nano which is incredibly small, light, feature-packed and cheap. It is more suited to focusing lenses with less torque. However, it is definitely worth checking out for lenses with shorter throws like vintage photo lenses that aren’t too stiff.
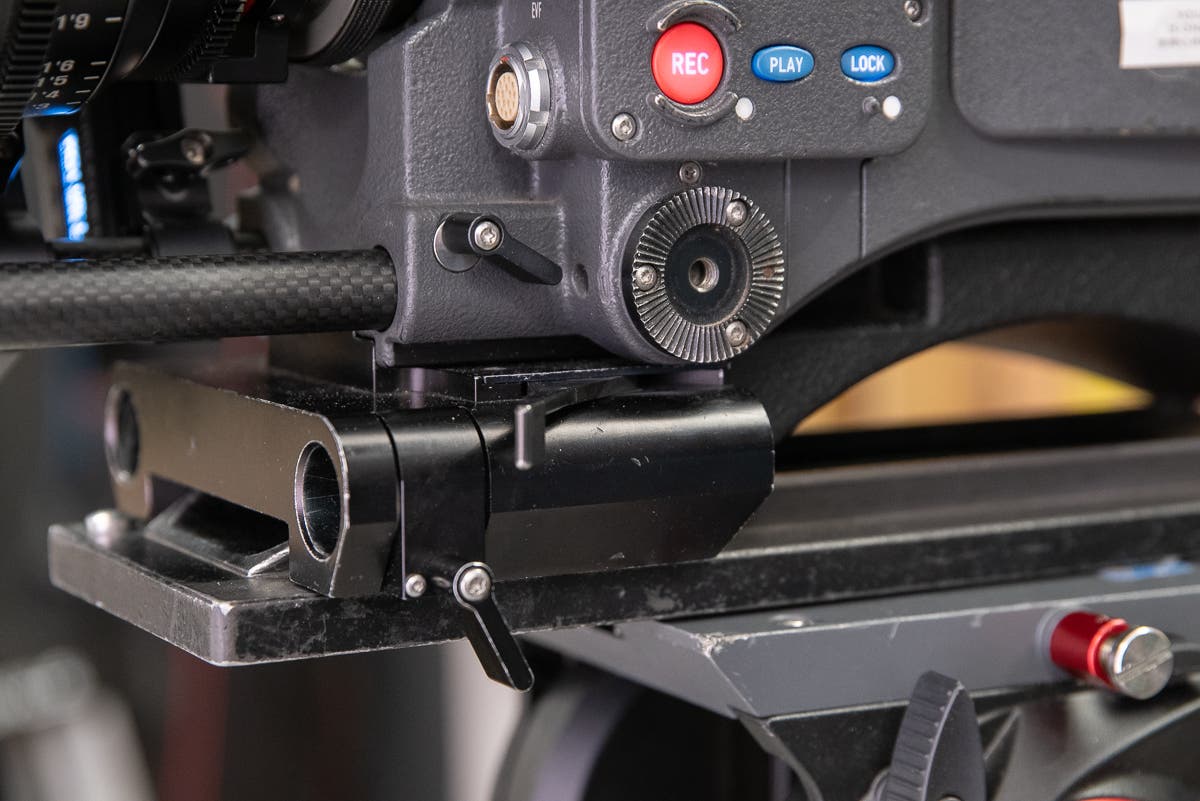
The way you attach the follow focus is by mounting it to either one or two rods, depending on the type. Below you will see a 15mm rod made out of carbon fiber sticking out from the camera. This shows an opening for a larger version of this rod — the 19mm. Most systems run on 15mm rods, but often very high-end gear will run on 19mm rods.
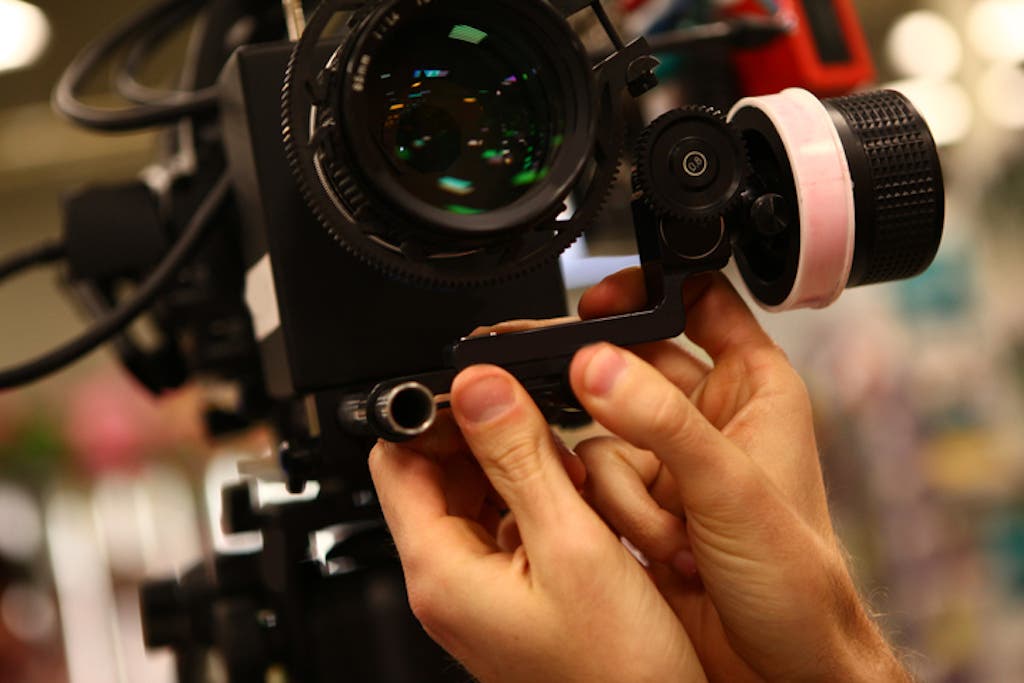
Mount the follow focus to the rod and match the teeth from the gears of the follow focus with those from the focus ring on the lens. Tighten down the attachment point on the rod. For manual follow focus systems, you can then test it by rotating the focus wheel back and forth, ensuring it is turning the focus ring on the lens. For wireless follow focuses, you will need to supply it with power and calibrate it to make sure it knows where the near and far focus are. Once that is accomplished, you are good to go.
Monitoring
Now that you have your focus prepared to be controlled either by the camera operator or by the focus puller, they need a way to determine what precisely is in focus. Squinting at a tiny monitor isn’t going to cut it, especially when you have a very small amount of subject matter in focus — also known as a shallow depth of field. Also, when the image gets blown up to a large screen at your local cinema, or even simply to a normal-sized TV, being slightly out of focus is very noticeable.
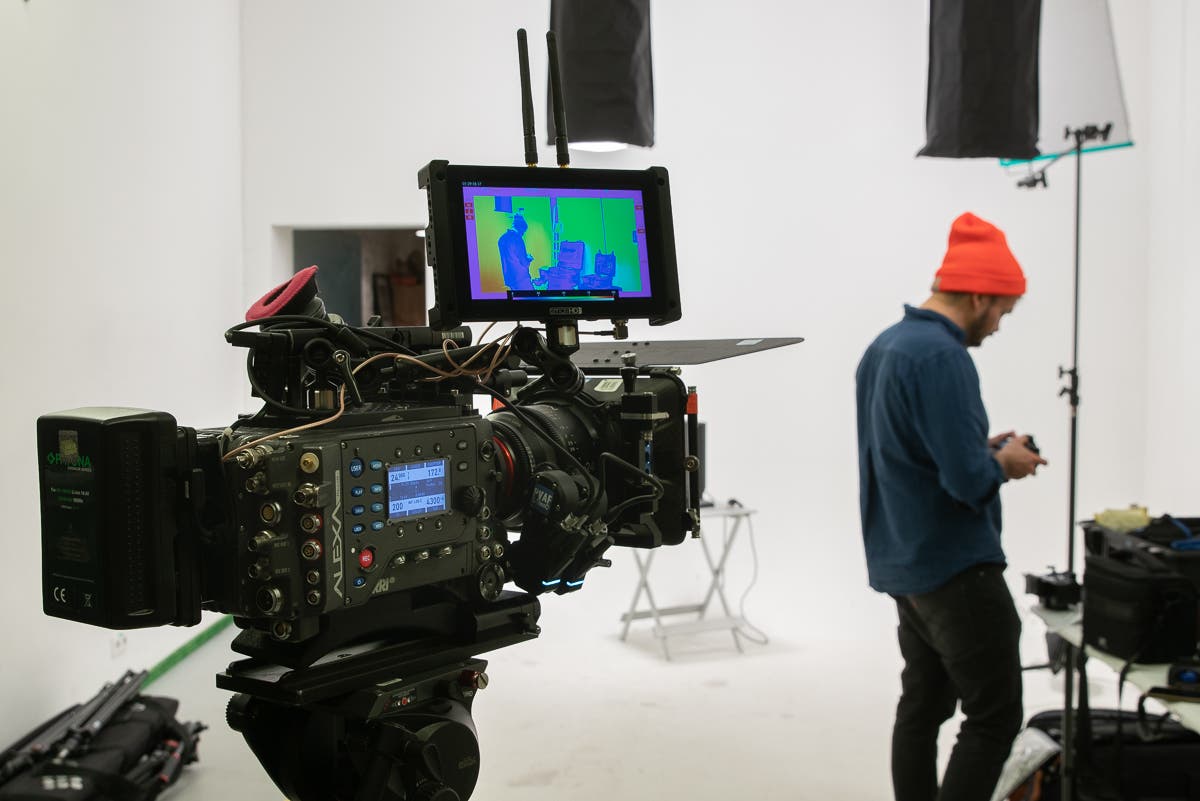
The way to ensure that the image is sharp is to have a very bright, high resolution, and decently sized (at least 5”) monitor to determine what is in focus. There are a couple of different ways to do this. For the camera operator who needs to focus themselves, having a monitor attached to the camera such as the Teradek SmallHD Cine 7 500 Transmitter is ideal. You don’t need anything this fancy but I loved using it.
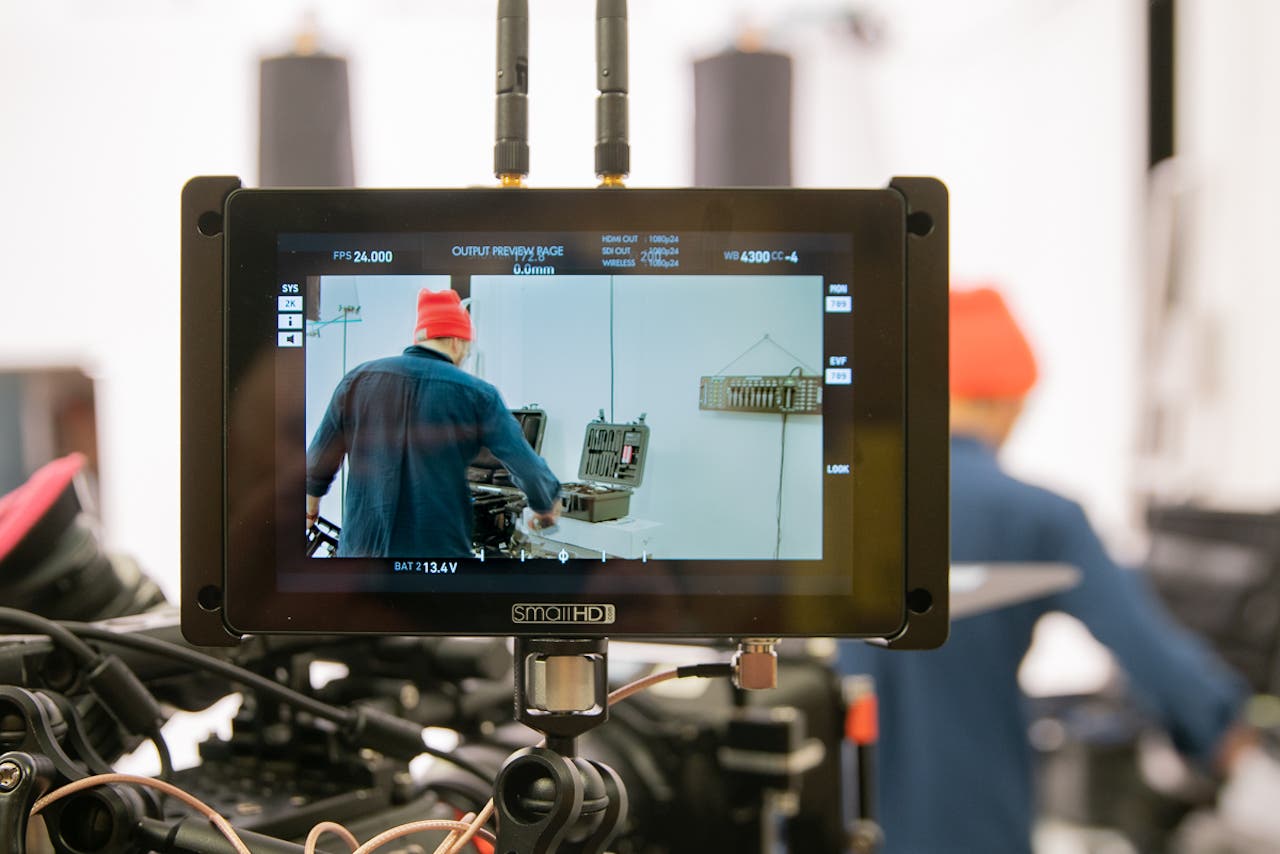
Aside from being a bright, 1920 x 1080, 7” monitor with all the bells and whistles you normally get with a SmallHD monitor, it also includes a built-in wireless transmitter. This means that you save on the amount of gear you have to attach to your camera. The video signal will pass from the camera to the monitor and then the transmitter within the monitor will send the signal to a wireless receiver which can be a maximum of 500 feet away depending on your receiver.
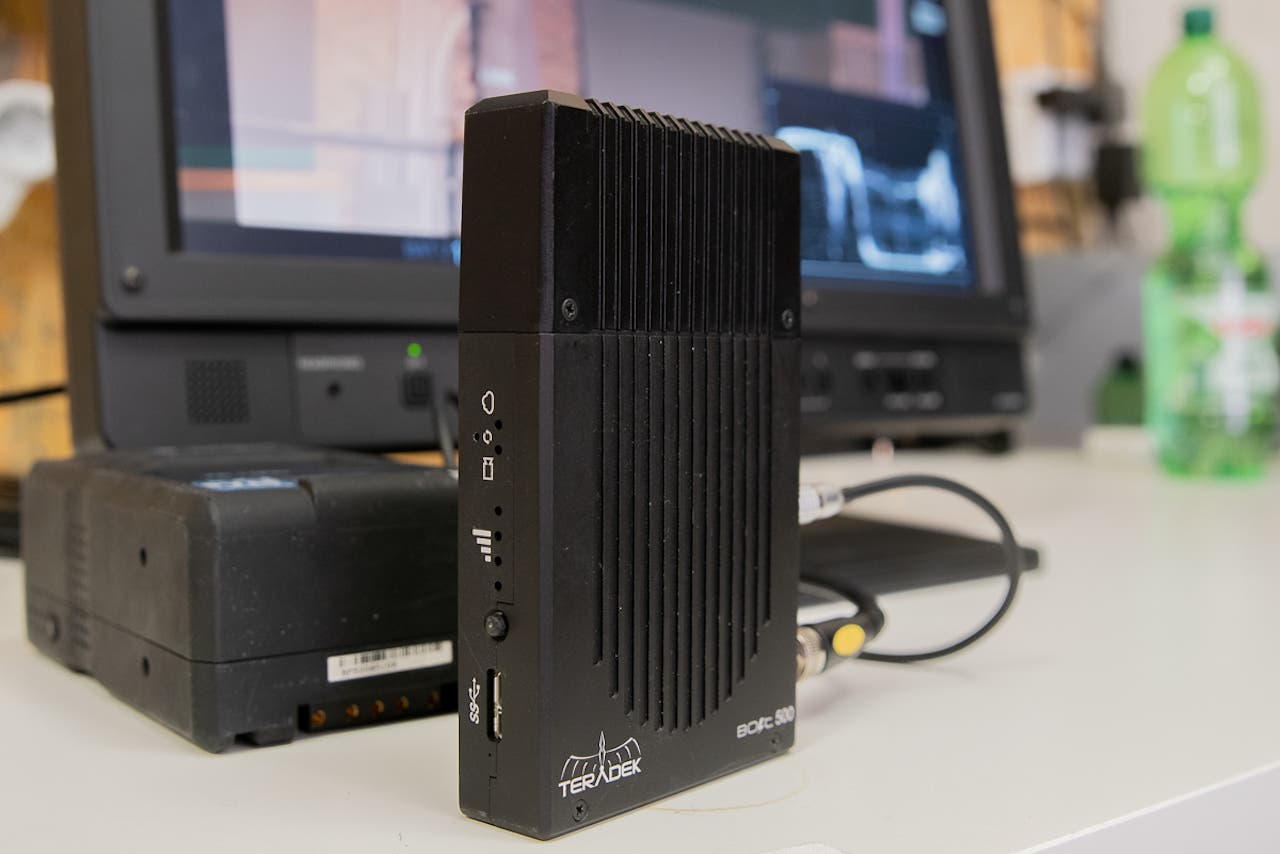
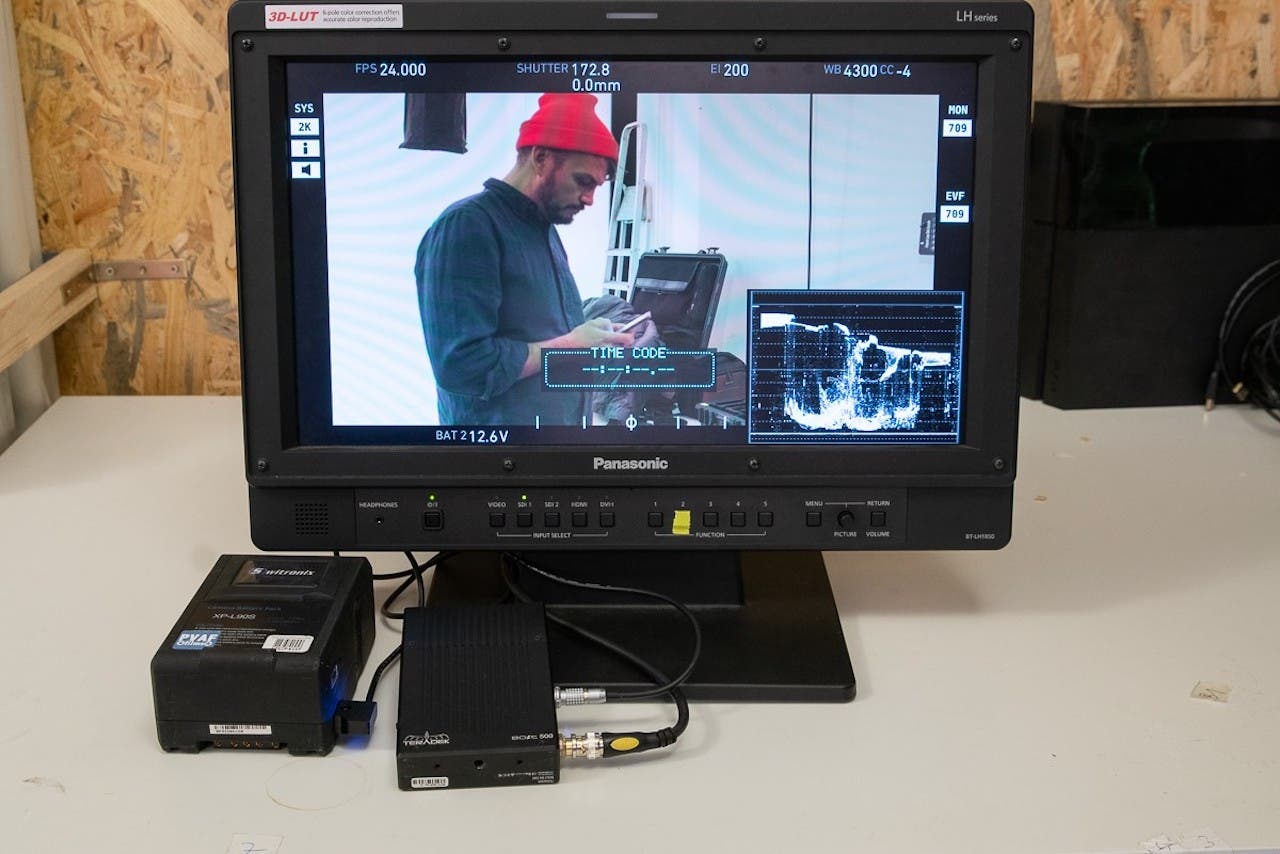
From there, the director can view the image on their larger director’s monitor, or if you have a focus puller they can also receive the image. If you need to transmit your image and don’t have this monitor with a built-in transmitter, you can simply use a separate transmitter to beam your signal to the receiver. Below you can see the receiver is receiving the signal from the antennas atop the SmallHD Cine7 monitor, showing the video signal on the director’s monitor.
Matte boxes and filtration
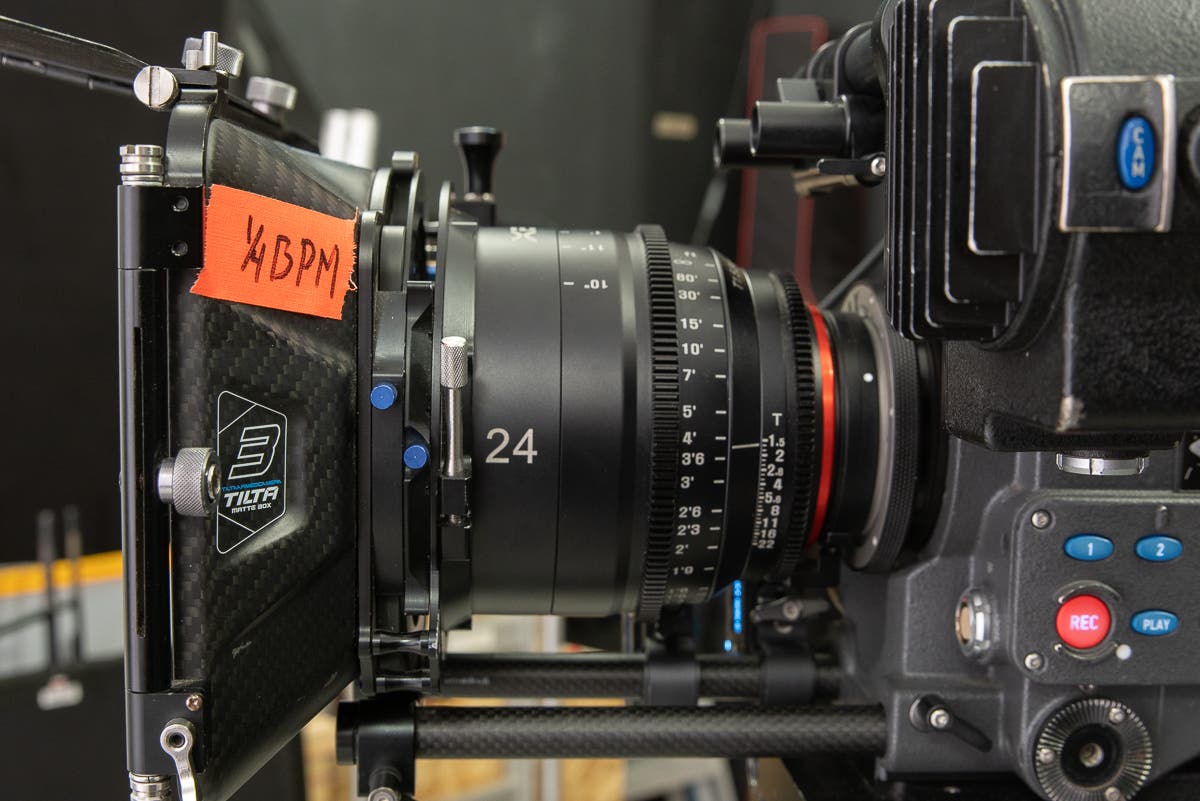
A matte box has two purposes. It is used to block out unwanted light from hitting the front of the lens to reduce lens flares. When you attach flags to the matte box, you can more precisely control how much light and from which direction light hits the front element of your lens. In the picture of the Tilta 4X4 Carbon Fiber Mattebox below, the top flag is attached. Matte boxes can be attached using either the previously mentioned 15mm or 19mm rod system or by clamping it straight to the front of the lens. Check the lenses you will be using and the matte boxes before getting on set to make sure they work together.
The second feature of a matte box is to hold filters in front of the lens. Filters affect the image before capture so you have to be sure that you will not change your mind about the effect. There are a wide variety of filters which are commonly used in matte boxes. The most common are neutral density filters (ND) which reduce the amount of light hitting the lens. They come in different strengths and a set usually consists of 0.3, 0.6, 0.9, and 1.2. Each step up reduces the amount of light by one stop. ND 0.3 cuts the amount of light by one stop, 0.6 reduces it by two stops, and so forth. These filters allow you to maintain a lower aperture with the same shutter speed while at either the lowest ISO or the base ISO.
There are many different filters. I own and often use the Tiffen 4×4 Black Pro Mist 1/4. Sometimes, I also rent it in different strengths depending on my needs. I am a big fan of the way it very subtly removes the digital sharpness. It also blooms the highlights and reduces contrast slightly while not affecting the shadows quite as much. It also reduces blemishes and makes skin look smoother.
When using matte boxes, there are a couple of things to be aware of. Standard procedure on set is to put a piece of tape indicating which filter(s) are in the matte box. This helps remind both the operator and assistants which filters are in the trays. It is also very useful when a filter is only needed for one scene. You have a bright reminder that you should take it out before shooting the next shot. Below you see that the ¼ Black Pro Mist is in one of the trays.
Powering it all
Now that you have everything setup, you need to run power to the camera as well as several accessories. Having to keep track of and change out different batteries for all these component pieces can be a pain. More often than not, the entire system can be powered by one powerful battery. The most common type of high-capacity battery you will run across is a V-mount battery. The second-most common is the Gold mount. There are proponents of both types and each have good reasons. Gold mount batteries are more securely attached by using three pins while v-mount batteries slide in using a v-shaped attachment point.
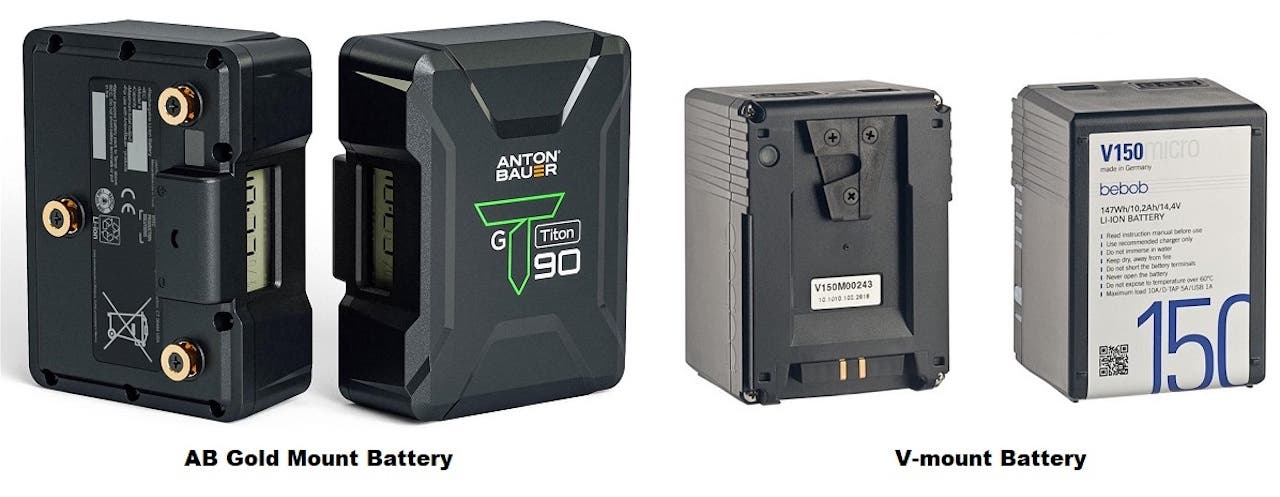
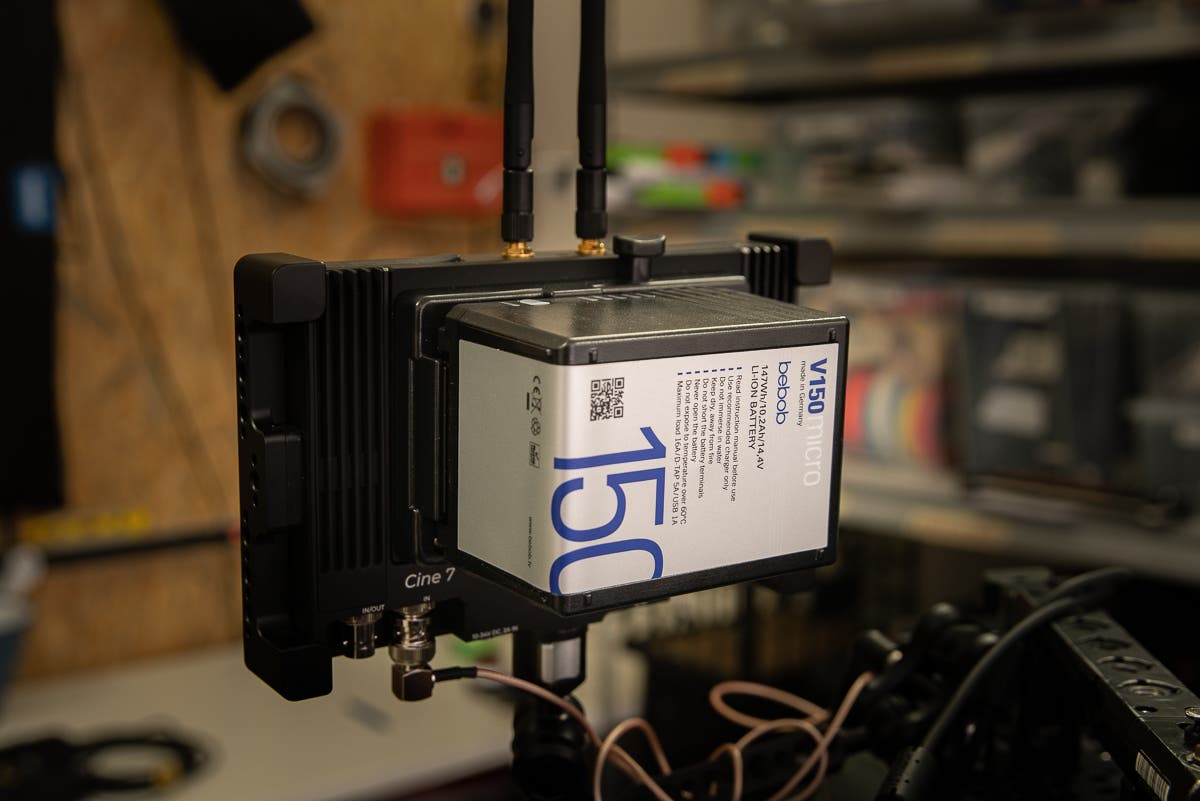
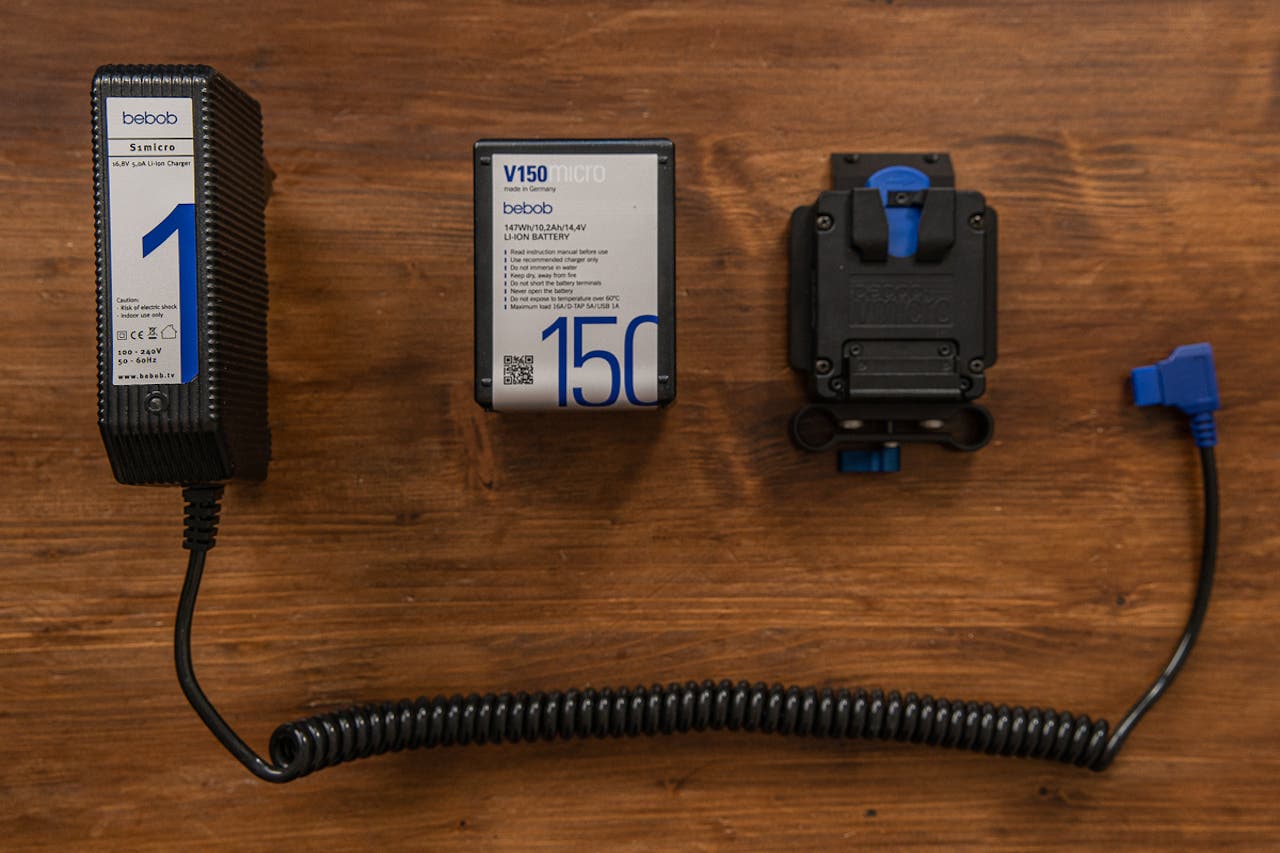
I use v-mount batteries almost exclusively and own the bebob V150MICRO V Mount Battery. This is more compact than many of the alternatives with the same output. The micro line stands out for being compact and having switchable ports allowing you to attach d-tap cables. It can be re-celled, which is great for your wallet and the environment. Also, be very careful when flying with large-capacity batteries and make sure your airline will allow you to take them on. Most airlines are fine with up to 90Wh batteries, but it is always best to check first. You don’t want to have to leave your battery at the airport!
My bebob kit comes with a very small form factor battery adapter plate for 15mm Rods with 2 twist d-tap ports. This allows me to attach it to the back of the camera along the 15mm rail system. The charger is a one channel rapid charger and uses a d-tap plug to charge the battery. It has no fan which is great for keeping the boom operator happy.
Camera supports
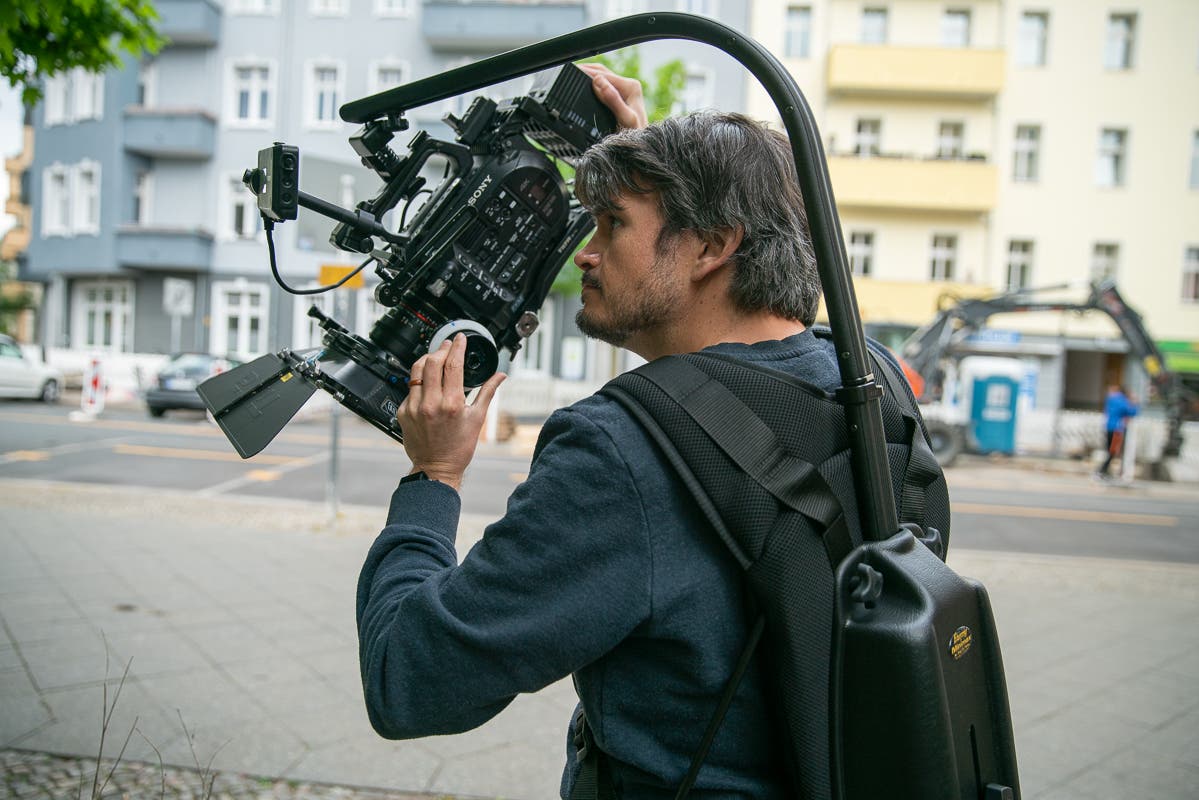
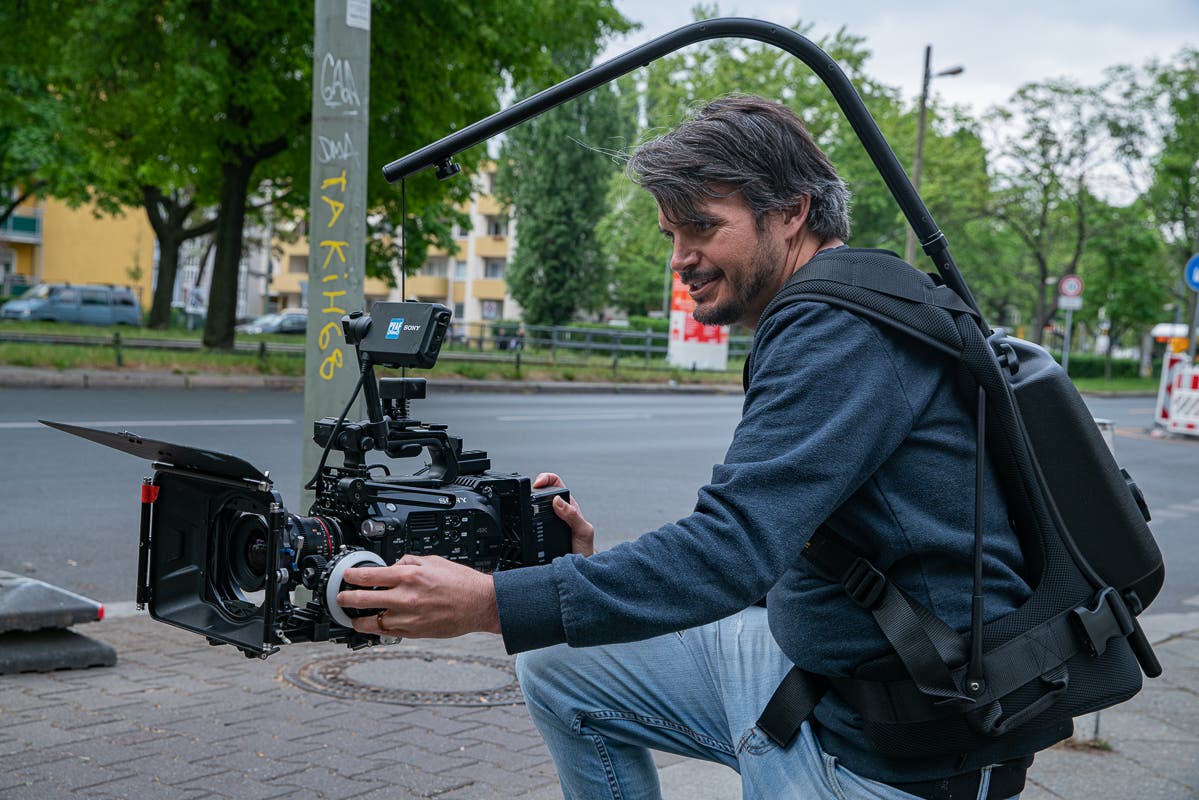
There are many different types of camera support. Aside from tripods, one of the most common is an Easyrig which places most of the weight on your hips. This allows you to handhold the camera for much longer. Shown below is the Easyrig MiniMax Camera Support, which is good for rigs that are up to 15.4lbs (7Kg). This will carry a Sony FS7 with the above mentioned accessories with ease. Although, It would likely not hold the ARRI Alexa Classic as it is too heavy. For weights of up to 38lbs (17.2Kg), the Easyrig Vario 5 is more ideal. However, while it supports the weight on your hips, the Easyrig doesn’t stabilize the camera like a gimbal.
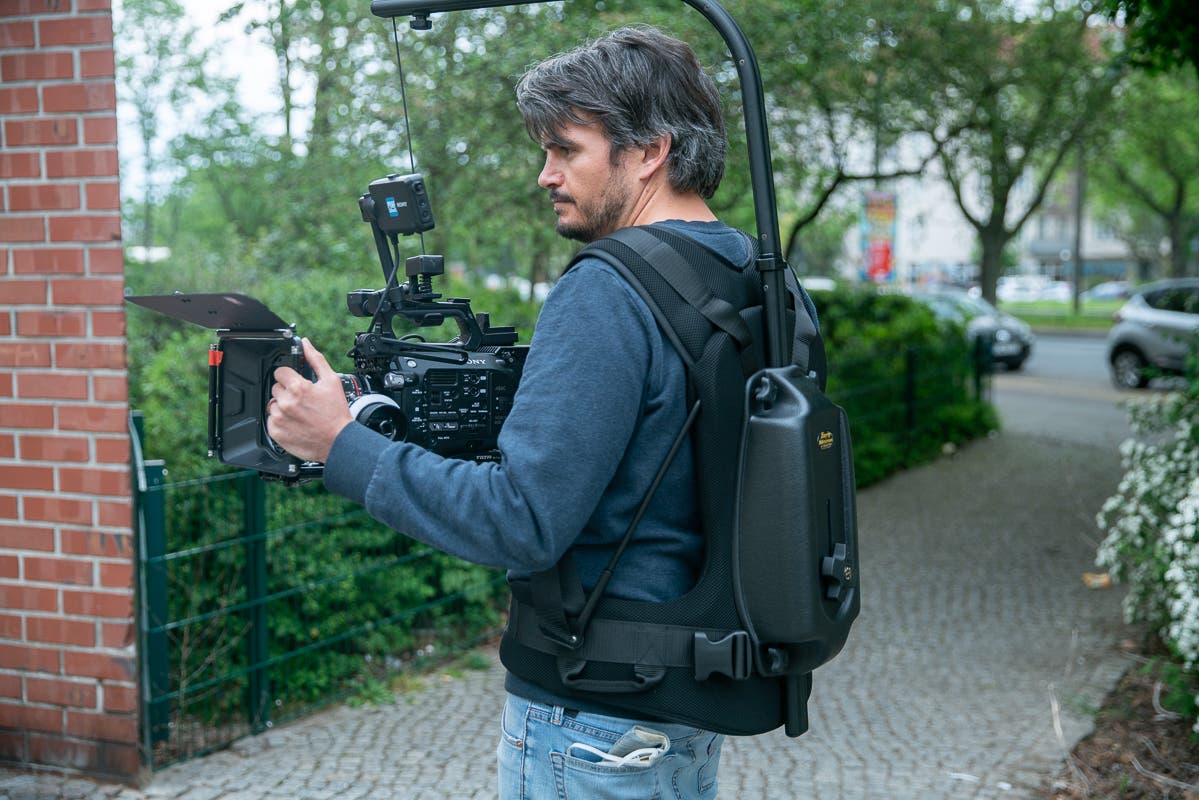
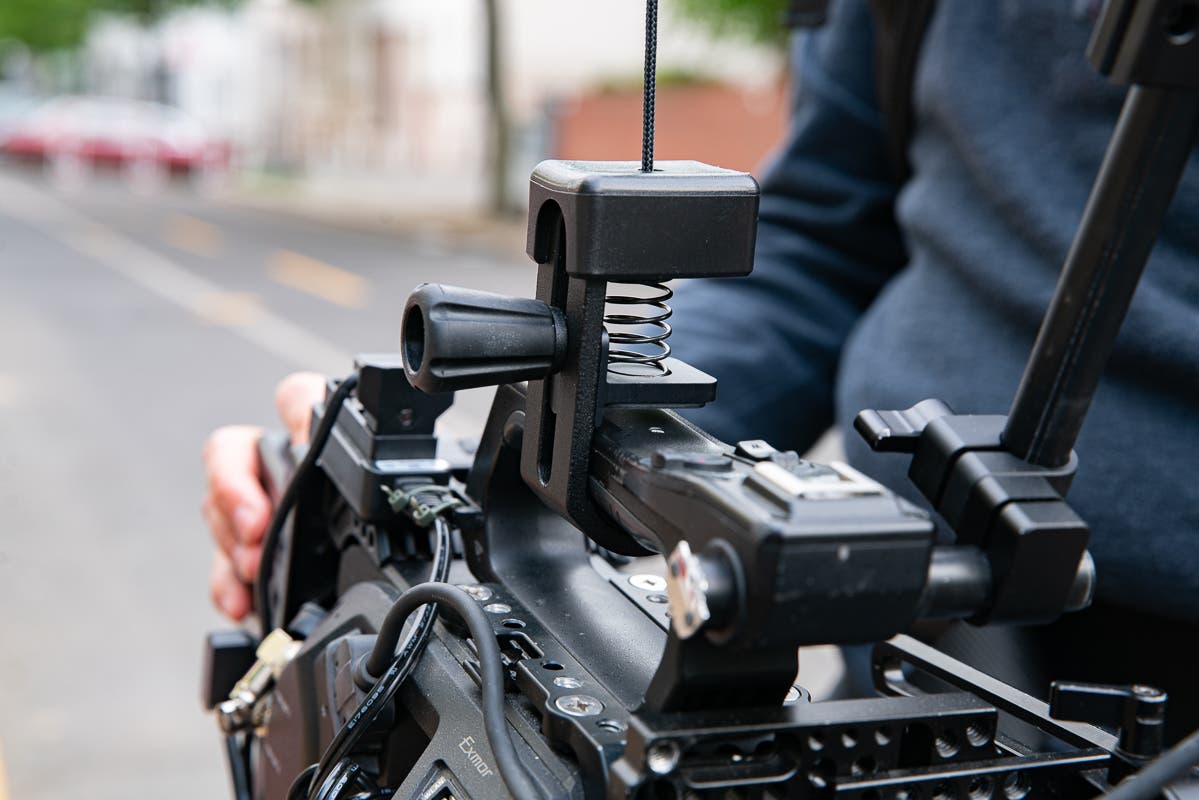
The Easyrig attaches to the camera using the clamp system seen below. There is also a quick release system that makes attaching the Easyrig quick and simple.
This article is by no means an exhaustive list of accessories. Although, these are some of the most common ones you will run into. The best way to learn how to use them, how they work together, and how to set up the camera correctly is by doing it. If you are looking to get hands-on experience, a good place is a camera rental house. In my experience, they are very friendly and will likely give you the opportunity to work with the camera and accessories. If they aren’t very busy, many of the rental associates will happily share their knowledge and show you how to do it.
Another way to gain experience is to start out on the lowest rung of the camera assistant ladder. This would be either a camera department intern or a second assistant camera. If you get the opportunity to perform these roles, pay close attention and ask questions when the opportunity is right (i.e. not while the camera is rolling).
If you love technical things, then working with cinema cameras and its accessories may be the job for you. There is a ton to learn. There are always new innovations to keep up with. The depth of knowledge you can acquire is only limited by your passion.
A big thank you to John McClellan from VanRothe here in Berlin for the help with the cameras as well as modeling for the Easyrig shots.
