If northern lights photography has long topped your bucket list, you’re in luck—2024 promises to be one of the best aurora years in decades. But how do you photograph the northern lights? And where and when should you plan that journey to see them?
You’re in the right place. As a night sky enthusiast, I’ve hunted the northern lights all over the world, from Isle Royale National Park in Michigan to the world’s second-largest ice sheet, the Greenland Ice Cap. In this article, I’ll help you understand where, when, and how to chase auroras. I’ll also include tips on nailing those northern lights photos.
A Spike in Aurora Activity
If you’ve been waiting for a sign to plan your northern lights photography trip, look no further than this year’s boom in aurora activity—and for that, we can thank the sun. Those colorful displays stem from storms on the sun, which flings charged particles into the solar system via solar winds. The more storm activity, the more chance for auroras, and experts predict a flurry of activity in the coming months.
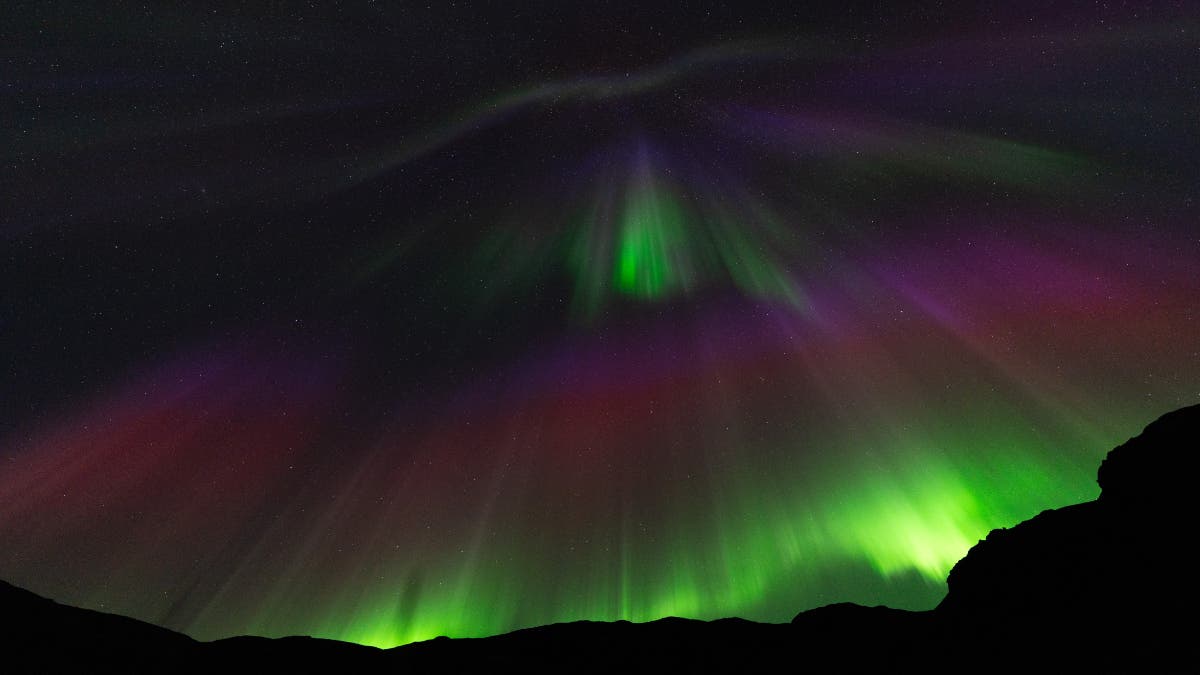
The sun’s “weather” runs through roughly 11-year cycles, known as the solar cycle. During solar minimum, the sun has fewer storms and fewer auroras. Solar maximum sees an uptick in sun storms and a spike in both northern light sightings and intensity. Imagine explosions of aurora color, from green and purple to red and pink, and lights moving in all directions.
Scientists have predicted that this current solar cycle’s peak activity will hit in 2024, from now to October. That said, the year or two just before and after solar maximum is a solid time for aurora hunting, too. With that in mind, let’s talk about locations.
The Best Aurora-Chasing Destinations
Auroras are largely seen within donut-shaped circles above the geomagnetic north and south poles. Typically 65 to 70 degrees north or south of the equator. When aurora activity is particularly strong, like the predictions for 2024, you can often see the auroras further toward the equator. Including in places such as the U.S.-Canada border.
In addition to latitude, looking for aurora-chasing locations with minimal light pollution is important. Artificial light can obscure the swirls of the Northern Lights. Here are some of the best destinations to chase the northern lights.
Iceland
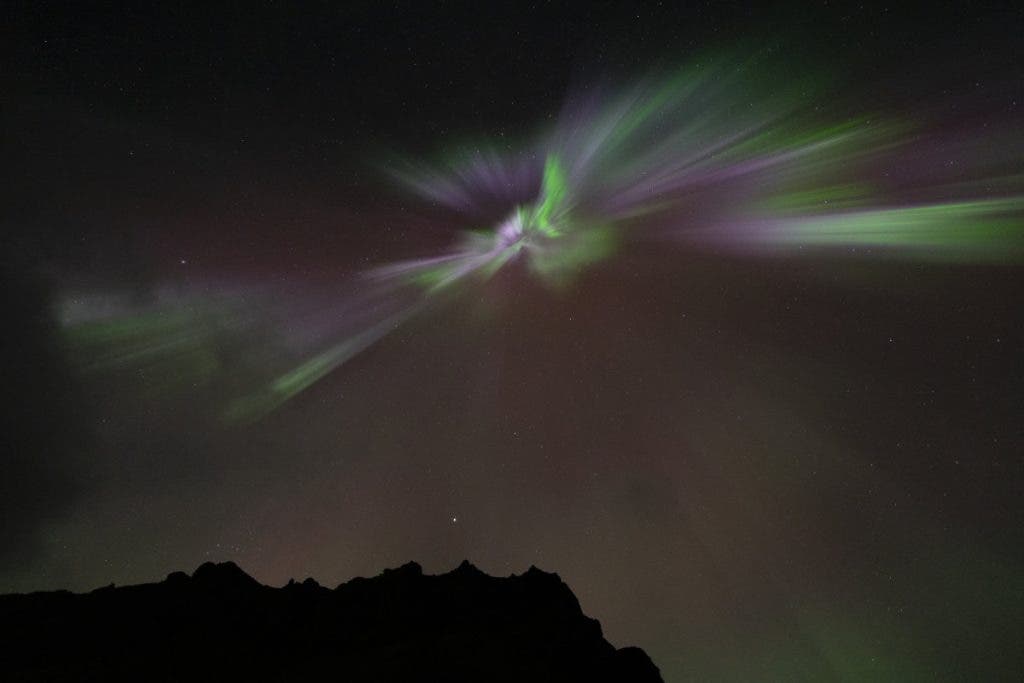
Virtually all of Iceland sits within the auroral oval. That means you won’t go wrong with aurora hunting here, especially since the island enjoys little to no light pollution. I’ve chased these swirls across the country; some of my favorite spots include the wild and craggy Westfjords, where you can stay on the Heydalur Horse Farm and photograph the lights and Iceland’s signature ponies. Or, head south to catch the lights above the dramatic southern-coast sights, such as Seljalandsfoss waterfall. You can see the lights here from roughly mid-September to April.
South Greenland
On a recent trip to South Greenland, I enjoyed a string of more than seven nights of northern lights photography—with some of the best aurora backdrops I could’ve asked for. Think: Farmhouses, mountains, and icefjords, with vibrant ribbons overhead. While Greenland is remote, it’s not as hard to get here as you think. Arrive at South Greenland’s Narsarsuaq Airport via direct flight from Iceland or Copenhagen. The best time to plan your trip is mid to late September; many experiences, such as the region’s can’t-miss farm stays, close come October.
Tromsø, Norway
I’ve chased the lights in spots like Bergen, Norway, but I’ve yet to make it up to Tromsø—although I hope to change that with a trip this year. The northern Norway town of Tromsø lies right within the auroral oval. That means you can enjoy the lights even during less powerful displays. The season here runs from September to early April, and guides throughout the region offer a host of unique aurora adventures: sailing, dogsled trips, and reindeer sled rides, to name a few.
Fairbanks, Alaska
When it comes to aurora hunting in and around Fairbanks—another auroral oval destination with potential lights from fall through spring—it’s tough to beat Borealis Basecamp. These transparent-ceiling igloos let you scout for swirls from your bed and provide an interesting foreground subject to photograph when the lights dance above. If you snooze through the show, Borealis Basecamp offers aurora wake-up calls. Another spot for lights hunting near Fairbanks is Chena Hot Springs, which hosts tours, such as a snow-coach aurora trip, onsite.
Great Lakes, U.S.
You don’t have to jet set far or spend a lot of money to see the lights. Auroras are increasingly visible during solar maximum in northern border destinations like Minnesota and Michigan. I’ve seen the northern lights on three separate trips to Michigan’s Upper Peninsula in the past four years. My go-to spot for aurora hunting here is Fresh Coast Cabins, a collection of cozy accommodations with north-facing views over Lake Superior (which is essential for catching lights in the lower 48 states as they appear closer to the horizon). For Minnesota viewing, try Cook County’s Northern Lights driving route. Since this region enjoys year-round nighttime darkness (unlike the midnight sun, which obscures lights from far-north locales like Alaska in the summer), you can chase lights in the Great Lakes all year.
How to Photograph the Northern Lights
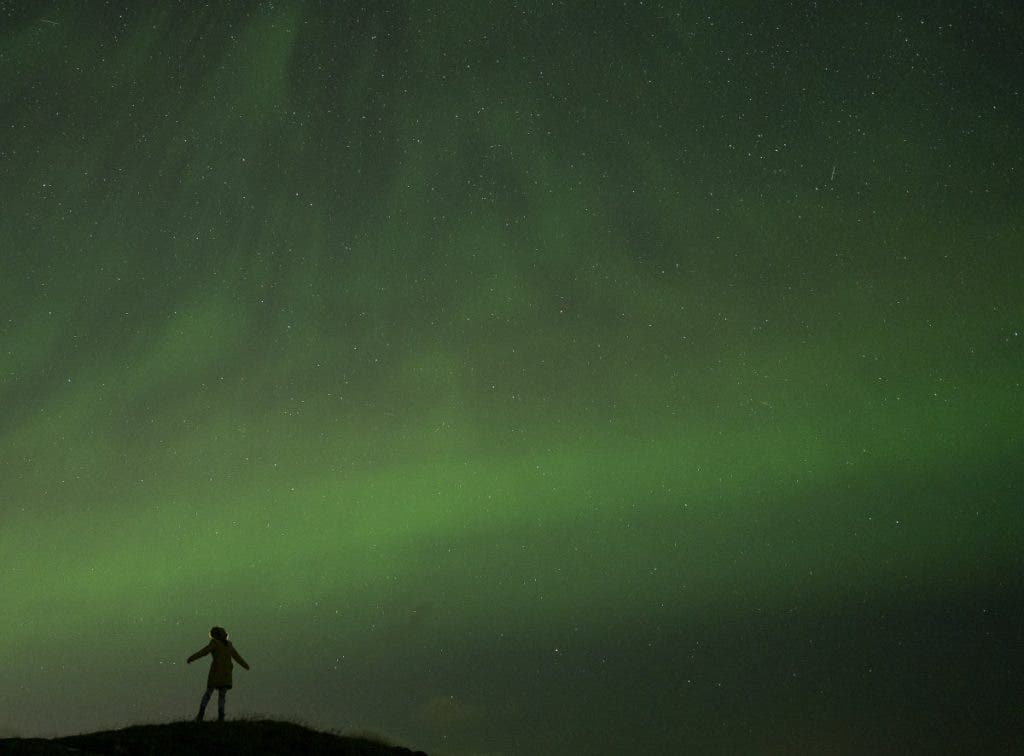
Now that we have your Aurora-hunting destination planned let’s talk about photography. Here are a few pointers to make your Northern Lights photography shine.
Exposure
Given the low light, you’ll need a longer exposure to capture the northern lights. Your exact exposure will largely depend on the aurora activity. Use a longer exposure when the lights are relatively faint or moving slowly. A ten-second shutter speed will capture the colors on display. If they’re moving quickly, as they increasingly are during solar maximum, you will want a quicker shutter; otherwise, the light movement blends together and looks muddled. I typically use a five-to-two-second shutter to capture the movement for strong aurora nights, particularly those where you can clearly see the lights moving with your eyes. That said, play around with it and leverage the real-time feedback to see how it looks.
ISO
The ISO depends on your camera and its low-light capabilities. I use the Sony A7III and Sony A7RIV and typically aim for about ISO 800 to ISO 1000 when possible. However, sometimes, when my shutter is faster, I crank the ISO a bit higher because capturing the ethereal detail and movement is important to me. That’s when I rely on Lightroom and similar tools to help manage noise. You’ll need a higher ISO during new moon nights—the best nights for lights chasing. You can still see the lights when the moon is full, and if the storm is strong, this can work in your favor, as the foreground will be better illuminated.
Aperture
Aperture is another great way to let in light without compromising image quality. I use wide lenses with an aperture of f/1.4 or f/1.8 to let in as much light as possible.
Manual Focusing
Since it’s dark, use manual focus to nail the sharpness—just like you would with most astrophotography projects. I swear by my Sony’s focus-peaking tool, as it helps me finetune exactly what I’m zeroing in on. If you don’t use focus peaking, you can also shine a light on a foreground object, such as a cabin, to ensure it’s tack-sharp before shooting. If you do this, I recommend a red-light flashlight because bright-white lights affect our vision. It takes around 20 to 30 minutes for our eyes to readjust to the darkness—and we need our eyes adjusted to see those swirls.
Interval Timer Shooting
The auroras can move and sway in unusual patterns and shapes. I always use interval timer shooting to let my camera snap away while I sit back and enjoy the show. To do this, I recommend as little time as possible between shots (I usually aim for one second, but this will depend on how much memory you have available—which is why it’s important to invest in large memory cards.) I usually take around 10 test shots and double-check the results before letting my camera shoot in interval mode. I also bring two cameras on my Aurora trips to simultaneously capture different frames and foreground subjects. If you’re into video, don’t forget to turn your interval-timed shots into timelapses, too!
Gear
Photography equipment is critical for nailing your northern lights photography. In addition to my Sony cameras, I use a travel tripod like the MeFoto RoadTrip PRO, a smaller tripod like the Joby Gorillapod for my backup camera, and a variety of wide lenses like the Sony 14mm f/1.8 and the Sony 20mm f/1.8. Try a lens warmer to minimize condensation, pack some backup batteries since the cold can drain them quickly, and don’t forget your personal gear, such as a red-light headlamp and warm-weather clothing, to ensure a safe and cozy shoot.
