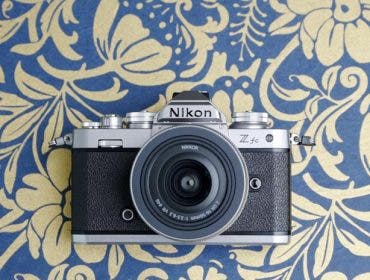
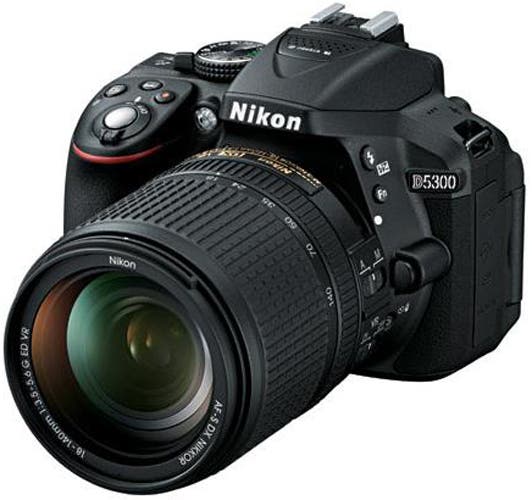
If you’re looking to grow as a photographer but have a limited budget, the Nikon D5300 (shown above with the Nikon 18-140mm long-range kit lens), is a great option. But if you’re reading this, you likely already own this camera and know that. In this Guided Tour, you’ll learn how to set up the camera to work the way you want, and we’ll help you get to know the camera inside and out so you can get the most out of it.
The Nikon D5300, thanks to its 24.1MP DX CMOS sensor, produces big files with image quality that matches or beats most of its competitors. According to DxOMark Labs, the D5300 produced an overall image quality rating of 83, putting it in the top 3 among currently-available APS-sensor DSLRs.
Setting Up The Nikon D5300
When you first start up the camera (make sure to fully charge the battery before you begin), you’ll be prompted to provide date, time and time zone information, then you’re ready to start. If you keep the camera in “Green” or Program modes, operation is point-and-shoot easy. If you want to shoot in S, A or M mode, keep in mind that the thumb dial on the camera upper right back corner controls aperture, shutter speed, and ISO, and works in conjunction with the five-way toggle switch to the right of the LCD monitor.
Using Key Features
Exposure Modes
The heart of the camera is the mode dial. It has the traditional Manual, Aperture-Priority, Shutter-Priority, and Program exposure modes for intermediate and advanced shooters, as well as the green “Auto” mode for beginners. It also has a flash-off mode, A Scene and Effects, and 5 exposure icons.
Scene Modes and Filters
The five exposure icons are, actually, also scene modes (Portrait, Landscape, Baby, Sports, Macro) but presumably are on the dial because they’re the most frequently used options. The Scene mode on the mode dial accesses 12 additional modes (Night Portrait, Night Landscape, Party/Indoor, Beach/Snow, Sunset, Dusk/Dawn, Pet Portrait, Candelight, Blossom, Autumn Colors, and Food) for a grand total of 17 scenes. For each scene mode, the camera selects the best combination of exposure, color balance and intensity and other settings to fit the mode.
The Effects mode applies special effects to images. There are 9 overall—nNight Vision, Color Sketch, Toy Camera Effect, Miniature Effect, Selective Color, Silhouette, High Key, Low Key, and HDR Painting.
More Advanced Options
Access the Info Display by pressing the “I” button, located to the right of the viewfinder. This gives you quick on-screen access to key shooting controls, including HDR (which combines several exposures of the same scene to show greater shadow and highlight detail) with four levels of intensity to choose from, as well as exposure bracketing, D-Lighting (effectively expanding a single image’s dynamic range by boosting shadow and highlight detail). You can also quickly access and change White Balance, ISO, color intensity (SD), focus mode (auto, servo, continuous or manual), AF area mode, metering, exposure compensation, and flash options.
Operating The Flash
If you’re a point-and-shooter using the Green mode, the camera’s built-in flash automatically pops up as needed. Otherwise, press the flash button on the left side of the prism finder housing to pop up and activate the flash. Want to turn the flash off? Choose the flash-off option on the mode dial.
For more advanced users, you can quickly access fill flash (to illuminate backlit subjects), automatic red-eye reduction, or rear-curtain sync. To control flash intensity, press the flash pop-up button and simultaneously press the +/- button to the right of the shutter release. Use the thumb dial to increase intensity up to 1 stop or decrease it down to 3 stops. If you want to drag the shutter (combine a long exposure with flash), turn the mode dial to S or P then twirl the thumb dial; the shutter speed will change in the finder and LCD display. You can use a long exposure with red-eye reduction or rear curtain sync.
All other settings—including customization—can be accessed by pressing the Menu button.
Shooting Movies
Nikon upgraded the camera’s movie recording capabilities to get full HD 1080/60p resolution/frame rates, and the results look spectacular. Use the lever on the right side of the mode dial to activate Live View, then press the red button located next to the shutter release, and you’re making videos. We recommend using the flip-out LCD monitor for a more comfortable hold.
Since the built-in mic will inevitably pick up any internal camera noise such as zoom and focus as well as handling sounds, we highly recommend investing in an external mic. The good news is there’s a mini external mic plug on the left side of the camera. The bad news is there is no headphone plug but this camera is an excellent option for aspiring videographers to get started.
To adjust movie settings, go into the Shooting menu and scroll to Movie Settings, the last item. This brings up five settings that you can change: Frame Size and rate, movie quality, Mic sensitivity settings, wind noise reduction, and manual movie settings.
5 Hacks That Will Make The Camera Your Own
Create custom menus: The My Menu icon (the 6th vertical tab down when you open up Menu) lets you create your own set of favorite menu items that you can get to quickly. Hit Choose tab, then Add Items. Scroll through the Shooting, Retouch, Setup or Playback menus and choose the items you want to get to quickly.
Change the Info Display: The Info Display has a pretty cool default look, dominated by three round graphics showing shutter speed, aperture, and ISO settings. But if you something different, (including changing the color scheme or layout), go into the Setup menu > Info display format. You can toggle between “Classic” (all text) and “Graphic” designs, as well as black, white, or light brown backgrounds.
Customize the Fn Button: By default, the Fn button (in front of the camera, on the left side of the lens mount base) will activate ISO adjustment. You can change that and instead assign the Fn button to change Image Quality/Size, White Balance, Active D-Lighting, HDR Mode, RAW, Auto Bracketing, AF-Area Mode, Viewfinder Grid Display, and Wi-Fi. Added Bonus: You can also change the AE-L/AF-L button to do other exposure and focus tricks, and can assign the shutter button to lock focus only or focus and exposure when pressed halfway down.
Live View or Viewfinder? Most of the time you will want to look through the viewfinder when taking still photos, but there are times when you might want to work with the live view, which displays the live image on the LCD monitor. Just push back the lever on the right side of the Mode Dial labeled Lv. Bonus: Use the + button to enlarge the live image. This is a helpful aid when you’re fine-focusing on a subject.
Specify minimum shutter speed: Sometimes you may forget that auto exposure may not pay attention to your ability to handhold the camera below a certain speed. You can fix that, by telling the camera not to go below that shutter speed. Conservatively assuming Vibration Reduction will add 2 stops of exposure, you can choose the lowest shutter speed of 1/30 sec for a 100mm lens (for example), and the camera will automatically choose the aperture and ISO. In the Camera Menu, turn on ISO Sensitivity. Then you can set the maximum ISO setting (to avoid excessive grain) and the Minimum shutter speed.
Nikon D5300 Facts:
The D5300 boasts a battery life of 600 photos per charge, according to CIPA. That puts it in the upper echelon of DSLRs when it comes to battery life.
The D5300 is the first Nikon DSLR to include built-in Wi-Fi and GPS. Wi-Fi lets you transfer images from your camera to the web via your smart device. It also allows you to remotely control the camera via Nikon’s Wireless Mobile Utility app, which also lets you view cameras that are in the camera on your device. To set up Wi-Fi, first, download the Nikon app. Then, turn on Wi-Fi Network Connection in the Setup menu. Then use Push-Button WPS if you’re using an Android, or View SSID if you’re using an Apple device. The camera will soon appear in your network on your smart device. Select the camera’s SSID or WPS and hopefully, camera and device will shake hands and you’re ready to go.
The D5300 can capture full 1080/60p HD video. Along with its fully articulated 3.2-inch 1.04 million dot LCD monitor, this camera can be used by budding videographers and capture high-quality footage.
You can apply HDR to images. HDR (High Dynamic Range) photos combine three bracketed images into one, choosing the best results for the shadows, highlights and midrange parts of the image. While there’s software that will do it, the Nikon D5300, like most Nikon cameras, can do this in-camera.
You can capture up to 3 exposures in one shot. You don’t have to wait until you open up multiple images in Photoshop to combine them; with the Nikon D5300, you can shoot 2 or 3 photos in sequence and combine them in camera. The LCD displays the previous photos so you can align the elements as you wish.
The D5300 has a built-in intervalometer for time-lapse photography. Scroll to Interval timer shooting, the second to last item in the shooting menu. You can choose to start shooting now or set a future time, and then can set the interval between shots to any time from 1 second to once every 24 hours, for up to 999 shots in the sequence.
