When your take your camera off full auto, you gain creative control over your imgaes. Here’s a look at the most important shooting modes on your DSLR’s main dial.
| Shutter Priority (Tv)Shutter priority—aka Time Value, hence the abbreviation—mode is ideal for photographing subjects in motion, such as sports and action photography. Selecting Tv on the camera’s Mode Dial means an aperture is automatically selected to match the shutter speed chosen by the user. Unlike Program mode, make sure that the available aperture range is sufficient to provide correct exposure at the selected shutter speed. If you don’t, most SLRs will provide some kind of indication and if the selected shutter speed is too fast or too slow for an adequate exposure you’ll have to pick a different shutter speed.Tip: Shutter priority mode gives you control over whether subject motion is sharp or blurred. When using telephoto lenses the old school rule of thumb is to use shutter speeds that are the equivalent of the reciprocal of the lens’s focal length and that’s a good place to begin. When using a 300mm lens, for example, 1/250th sec makes a good starting point.
Tv in action: This photograph of an American LeMans Series racecar was made in Shutter Priority mode with an Canon EOS 20D and Canon EF 500mm f/4L IS USM lens. I was able to hold this heavy lens steady with a shutter speed of 1/320 sec because it was supported by a Bogen-Manfrotto monopod. Aperture was f/10 and an ISO 800 was used because the image was made at dusk as can be seen by the car’s headlights. ©2004 Joe FaraceAperture Priority (Av)In Aperture Priority or Aperture Value mode you set the desired aperture using the main dial and the camera automatically selects an appropriate shutter speed depending on lighting conditions. The main reason for using AV mode is to control depth-of-field that is partially controlled by the selected aperture. Depth of field is also affected by the camera’s distance to the subject and increases as the lens aperture is stopped down (larger f numbers) and decreases as the lens aperture gets larger (smaller f numbers) and the camera to subject distance decreases.
Use Av for depth control: I wanted to extract as much depth-of-field as possible, and shot this view of a colorful block of homes in Old San Juan, Puerto Rico at f/9 in Aperture Priority mode and ISO 200. Since it was a bright day, the Olympus E-3 determined the shutter speed to be 1/1000 sec so I could have probably chosen f/11 or even f/22 and still gotten another easily hand holdable speed. ©2007 Joe FaraceTip: Depth of Field review: One of the basic laws of imaging is that only one part of a three-dimensional object can be truly in focus at the image plane and any areas in front or behind that focus plane will appear more or less in focus. At the point of critical focus, there is a range of acceptable focus that is one-third of the distance in front of that point and two-thirds behind it.
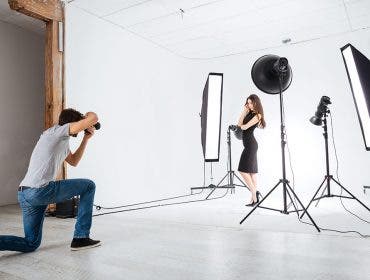
Av + IR is OK: This digital infrared image made with an EOS Digital Rebel Xti that was converted to IR capture by Lifepixel and a Tamron 11-18mm F/4.5-5.6 lens. Exposure was made in Aperture Priority mode to maximize depth-of-field at 1/80 sec at f/16 and ISO 400. © 2006 Joe FaraceManual (M)There are lighting situations that can confuse even the most sophisticated automatic exposure metering system. That’s where Manual mode comes in handy. This mode is for experienced shooters and those who prefer a car with a stick shift than an automatic transmission. Manual exposure can be especially helpful with high subject contrast and strong backlight but also when a specific mood is desired. Consult your manual for the specific controls in the camera that adjust aperture and shutter speed.Tip: Most cameras offer a Bulb mode where the shutter stays open as long as the shutter release is pressed. This allows you to make really long exposures for subjects such as holiday lights, fireworks, or special effects such as images of carnivals and amusement parks. These kinds of time exposures only be made with a sturdy tripod and you should further reduce the risk of camera shake by tripping the shutter with a cable release.Some purists claim manual exposure mode is the only one to use but I only use manual exposure mode when working under extreme lighting conditions, such as nighttime photography or working with studio lights, to maintain maximum control over everything in the scene, which is the only reason you should ever use manual exposure:
|


 Lights? Cameras? Manual! You need to shoot in Manual mode when working with studio lights, such as this portrait of my wife, Mary, made in my makeshift basement studio using three

