If you are only photographing female subjects then you are missing out on a big part of the photographic market. While I specialize in beauty photography — and most often photograph women — much of my commercial work involves male subjects. I’ve photographed professional athletes, executive portraits, commercial advertising campaign, and fashion look books— all with male subjects! There are many ways to creatively photograph men with more editorial and magazine-oriented setups. In this article, however, I want to focus specifically on the lighting options I regularly use for men’s fashion photography.
In general, my paid male photography work tends to fall into one of three categories: headshots, commercial fashion, and athlete/character portraits. Let’s take a look at each of these categories. All three of these setups were captured with my go-to camera and lens combo: the Canon R5 Camera paired with the Canon RF 24-105mm 4.0 Lens. For some headshots, I’ll also grab my Canon RF 70-200mm 2.8 Lens for the flattering compression.
Headshots
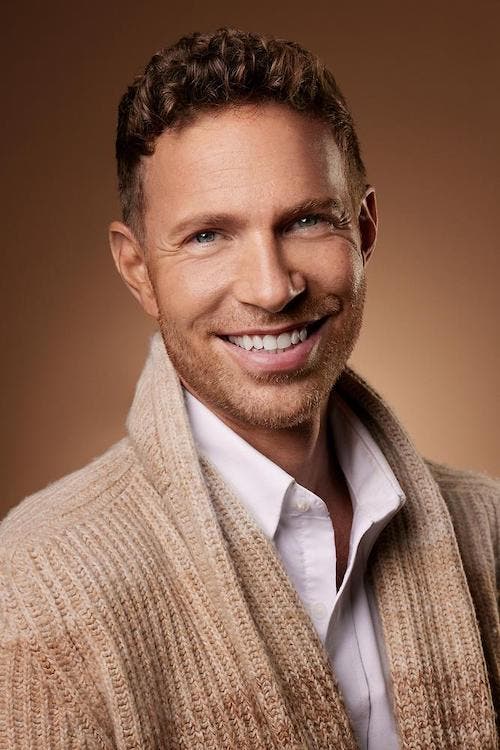
Headshots are the bread-and-butter photography for many businesses. When creating a headshot, you must consider where the images are going be used. Are you fitting their shots with other pre-existing headshots on a website or annual report? Are you matching any brand colors? Will it be used for a square social media profile? Answering these questions help you to decide background color, and composition.
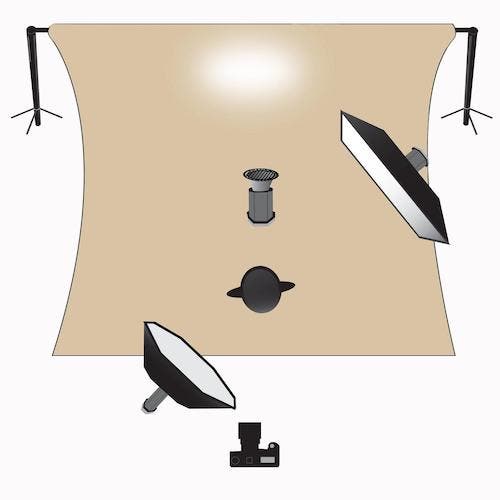
Next, you can decide how many lights you want to introduce into the shoot. I typically set up three different strobes and then create a variety of images varying between these tools.
Main Light: 3-foot Octabox
My preferred main light source is a 3-foot octabox. This creates a soft, flattering quality that is easy to use, even in a small space. Feel free to swap this out for a beauty dish if you want more contrast, or for a larger umbrella for an even softer quality.
Background Light: 20-Degree Grid
I like to give myself the option of a light on the background for a bit of separation behind the head and shoulders. This could be a bare bulb on a floor stand set to a lower power output. I generally prefer a wide grid (like the 20-degree grid used here) to create a subtle glow behind the subject and to control the tonalities of the background.
Rim Light: 1x4ft Strip Softbox
It can be nice to create a bit more separation on the side of the subject’s face and to emphasize the jawline. A 1×4-foot strip softbox is a perfect modifier for this separation. If you are in a smaller space, a 1×3-foot can also work. My strip typically has a grid. The grid helps me control the spill of light and lens flare, particularly when working in smaller spaces.
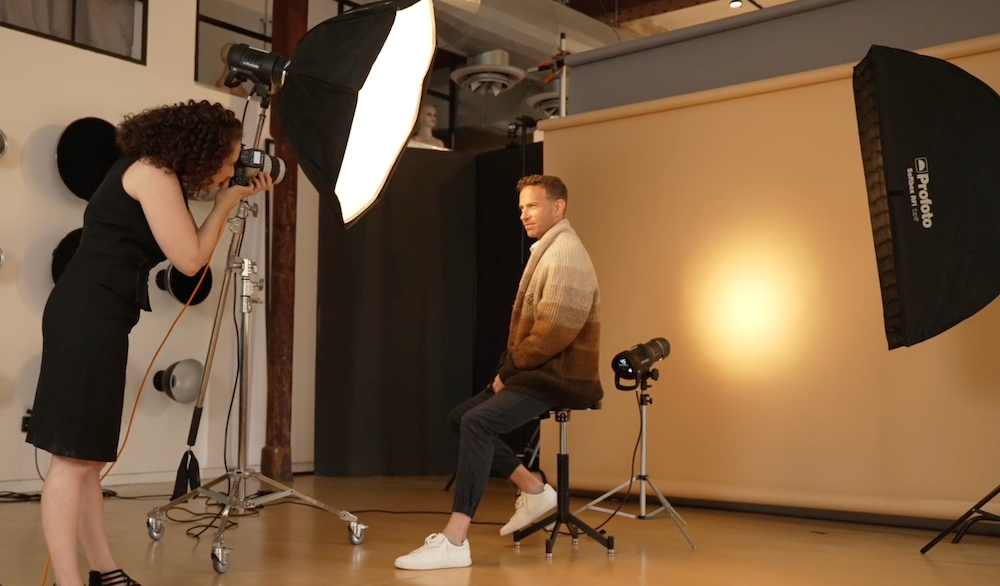
Try varying main light and rim light, main light and background light, or all three together for different results with minimal effort.
Commercial Fashion/Look Book
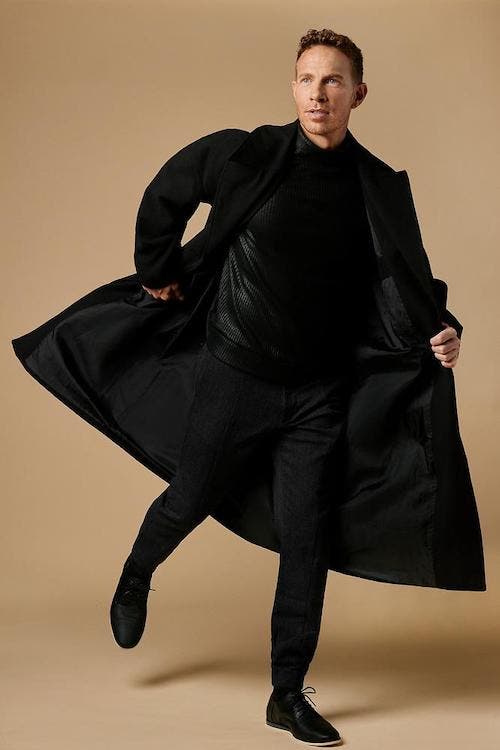
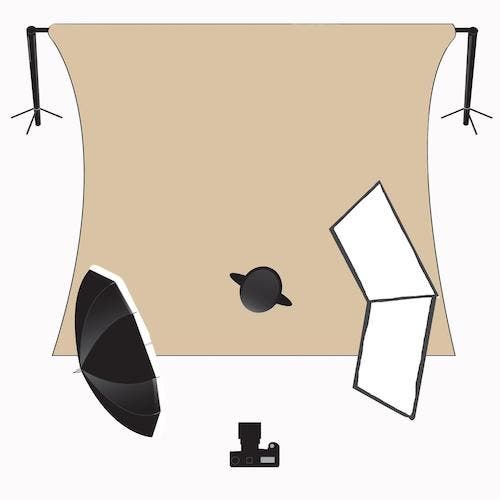
The commercial fashion and look book shots are generally meant to be clean and showcase the subject or clothing. You don’t necessarily need elaborate lighting or creative sets. You typically want to avoid dark shadows that could obscure the texture and color of the clothing.
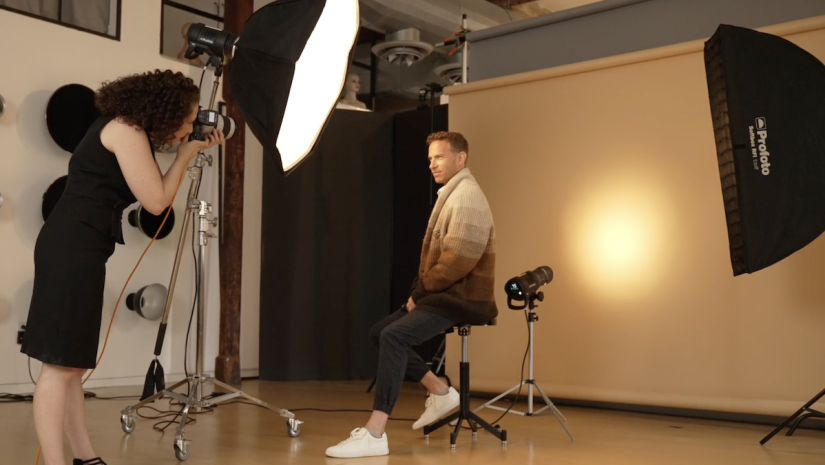
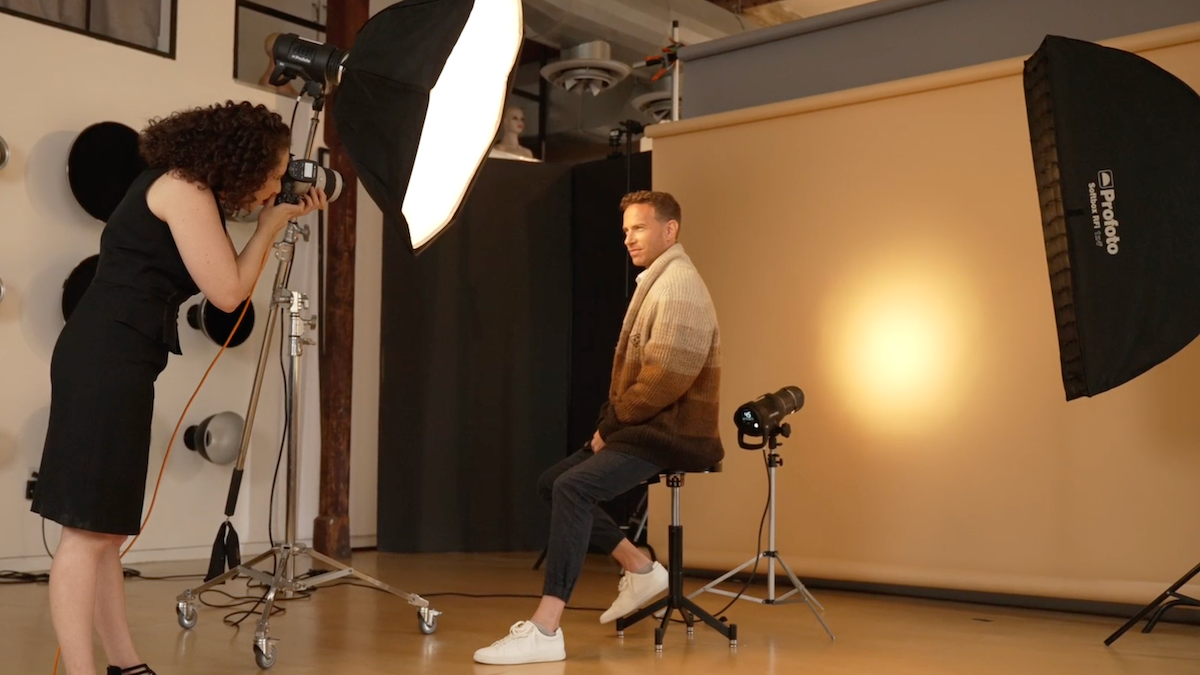
I usually select one or two strobes for a setup like this. My main light tends to be broad and soft, covering most of the scene. My second strobe (when present) controls the amount of fill in the shadows so I can make the shot higher key and with more shadow detail.
For this setup, I use the following tools:
Main Light: Large Umbrella with Diffusion
I used a large umbrella with diffusion to light the scene. The subject was on a Savage Universal Pecan background for a subtle, warm palette. Instead of a large umbrella, you could also choose a 5-foot octabox or other large broad light source. Feather the light to or away from the background to change how bright the background appears. Be careful that your subject is not casting a distracting shadow upon the background. To avoid this, make sure to have a long enough sweep of background so that the subject is more than eight feet away.
Fill Light: White V-Flat
Instead of another strobe, for this set, I used a white V-flat to bounce light back into the shadows. This kept the set relatively simple while still maintaining shadow detail. V-Flat World V-Flats are a great option for this setup, particularly when you need portability or shooting on location. They fold down and can easily fit in a living room, back of a car, or smaller shooting space.
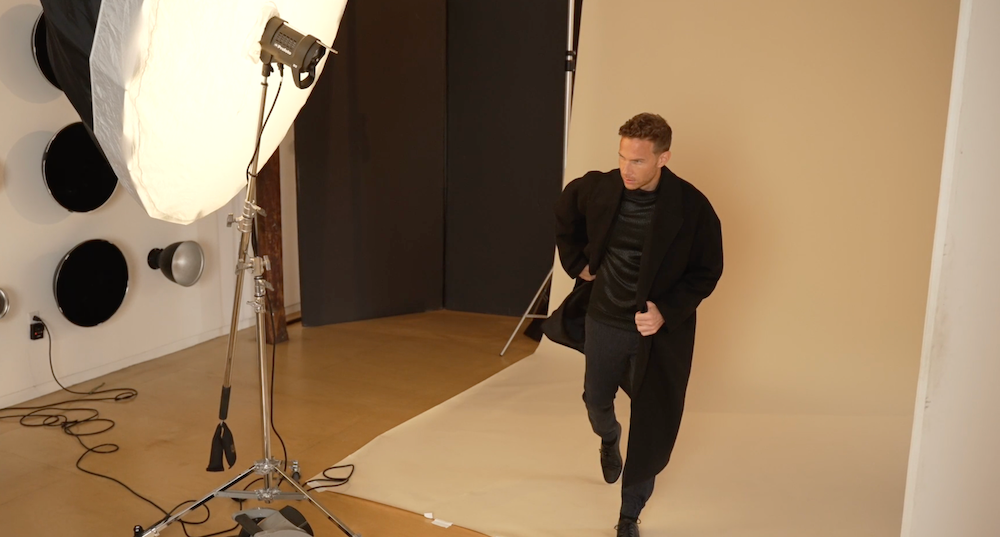
If you need more fill to the shadows — or are lighting multiple people in a scene — a strobe with a soft modifier (another large umbrella) is a better choice for more control.
Athlete / Character Portraits
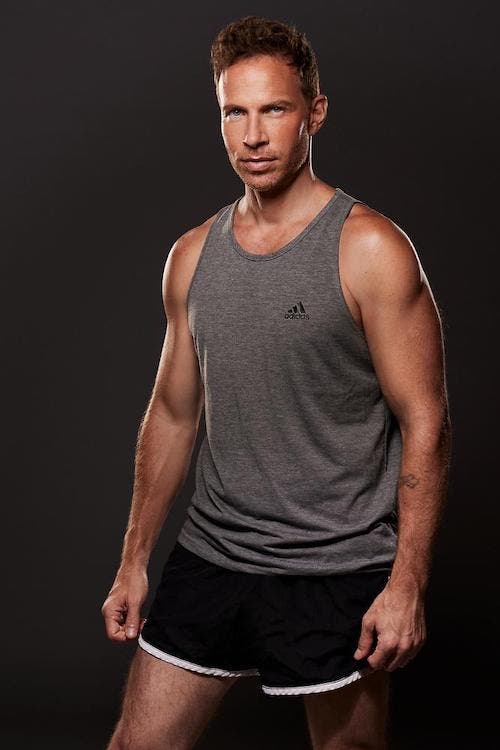
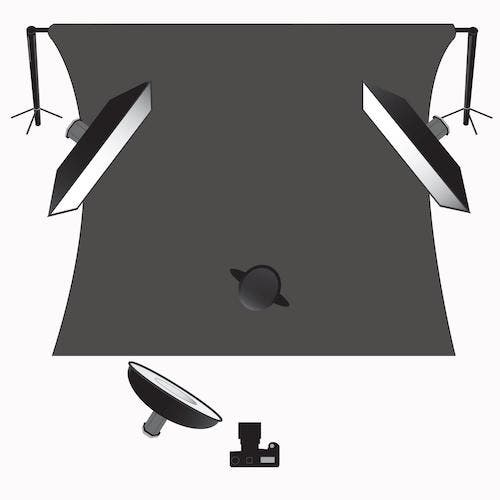
Whether you are shooting a chiseled portrait of an athlete or a powerful-looking character portrait, this setup requires three lights to give it that “pop” and polished result.
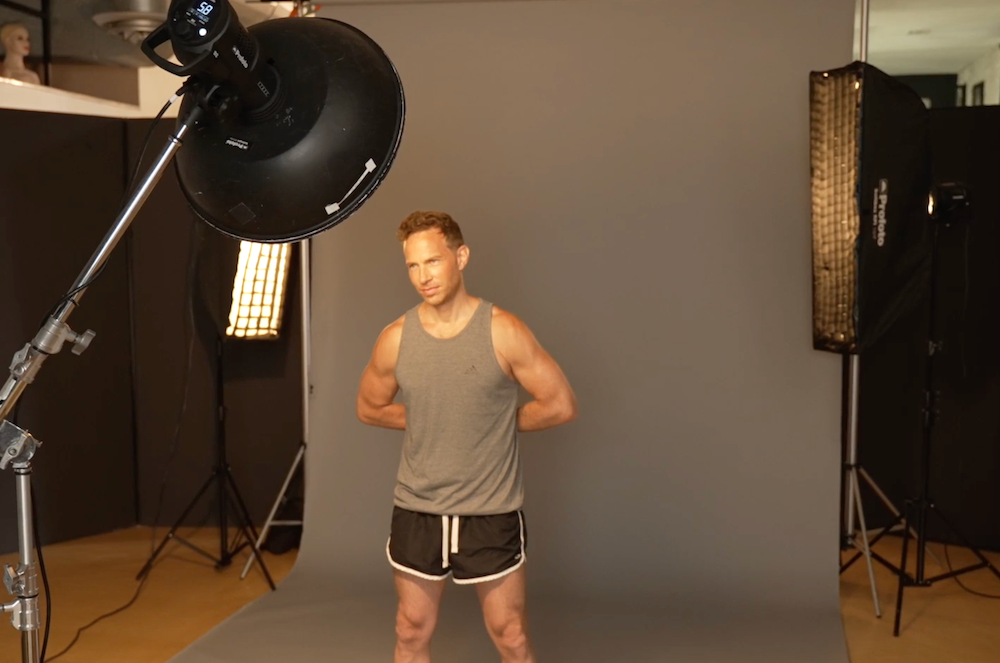
The lighting setup I use here is commonly referred to as three-point lighting. This implies the use of one main light on the subject with two rim lights for separation. For this setup, I used a beauty dish and two strip soft boxes. Let’s take a look.
Main Light: White Beauty Dish (with and without grid)
A beauty dish creates a beautiful and flattering quality of light with a bit more contrast and control than a softbox. Adding a grid can also allow you to really concentrate the light just on the torso of the subject. Here, I had the beauty dish centered and sometimes slightly to the left of the frame when illuminating the athlete. If you want more dramatic results, simply move the main light to the side to introduce more shadows on the face and body.
Rim Lights: Two 1×4-foot Strip Soft Boxes
For this setup, I placed two 1×4-foot strip soft boxes at a back 45 degree angle to the subject. This helped to separate the subject from the dark background and to emphasize the subject’s musculature. This is fantastic for showing off an athlete’s form or to create light that can easily be composited into other scenes. Most movie posters and athlete portraits use some variation of this light. Here, I also used grids of the strip soft boxes to prevent any lens flare.
Swapping Modifiers, Backgrounds
Remember, for any of these setups you can swap out modifiers if you wish to change the quality of light. For example, for the men’s headshot, you can use a beauty dish as a main light if you want a bit more contrast and sculpting.
Your background choice will also make a big difference to the final result. A brown/beige background (Savage Universal Beige or Pecan) is a great choice for bringing out skin tones and creating a welcoming result. A darker background (Savage Universal Thunder Gray) will create lower key and more dramatic results.
You, of course, can make your own stylistic adjustments to these looks. In the end, don’t forget that it is all about your subject’s and client’s needs. You need to reflect the brand, visual goals, and help them look their best.
