Photography serves us in many ways, as both a creative outlet and a unique means of capturing moments in time. One of our greatest honors as photographers is to be invited into other’s lives to document their most important moments. It’s an honor we don’t take lightly. Of the life events we’re lucky enough to capture, few can compete with the start of life itself. Maternity photographers have the awesome opportunity to capture the beauty and wonder of motherhood in anticipation of the baby’s arrival. It’s a unique experience, and photographers have a responsibility to make each photo count. To help you make the most of your next maternity session, I’ve put together 10 maternity picture ideas and tips for better photos.
10 Maternity Picture Ideas and Tips
- Always Think Safety
- Understand Your Client’s Vision
- Dress Accordingly
- Flatter Your Client’s Body Type
- Use Hands to Draw Attention
- Bring in Partner & Siblings
- Get That Golden Hour Glow
- Create Dramatic Dress Portraits
- Tell a Story Worthy of Wall Art
- Finalize Your Vision in Post
Maternity Picture Ideas and Tips – #1: Always Think Safety
On any shoot, safety is a top priority. The safety of your clients amplifies during maternity sessions. Ask up front if your clients have any health conditions that might affect their ability to get through a typical photo shoot. Also, be sure to choose a location that won’t prove difficult or dangerous for the mother to navigate. I also recommend having plenty of water on hand to help keep her hydrated. The last thing you want to do is put your clients (including those still in the womb) at risk.
Tip #2: Understand Your Client’s Vision

Part of the “trick” to capturing amazing photos is understanding that the process begins before the session happens. This is true no matter what type of session you photograph. I always ask my clients to imagine and describe one image that they’d be willing to purchase and hang on the wall in their home. Answering this question helps my clients focus their expectations for the photos, and it gives me a place to start for planning the shoot in regards to location and wardrobe, which brings me to item number three our list of maternity picture ideas.
Tip #3: Dress Accordingly
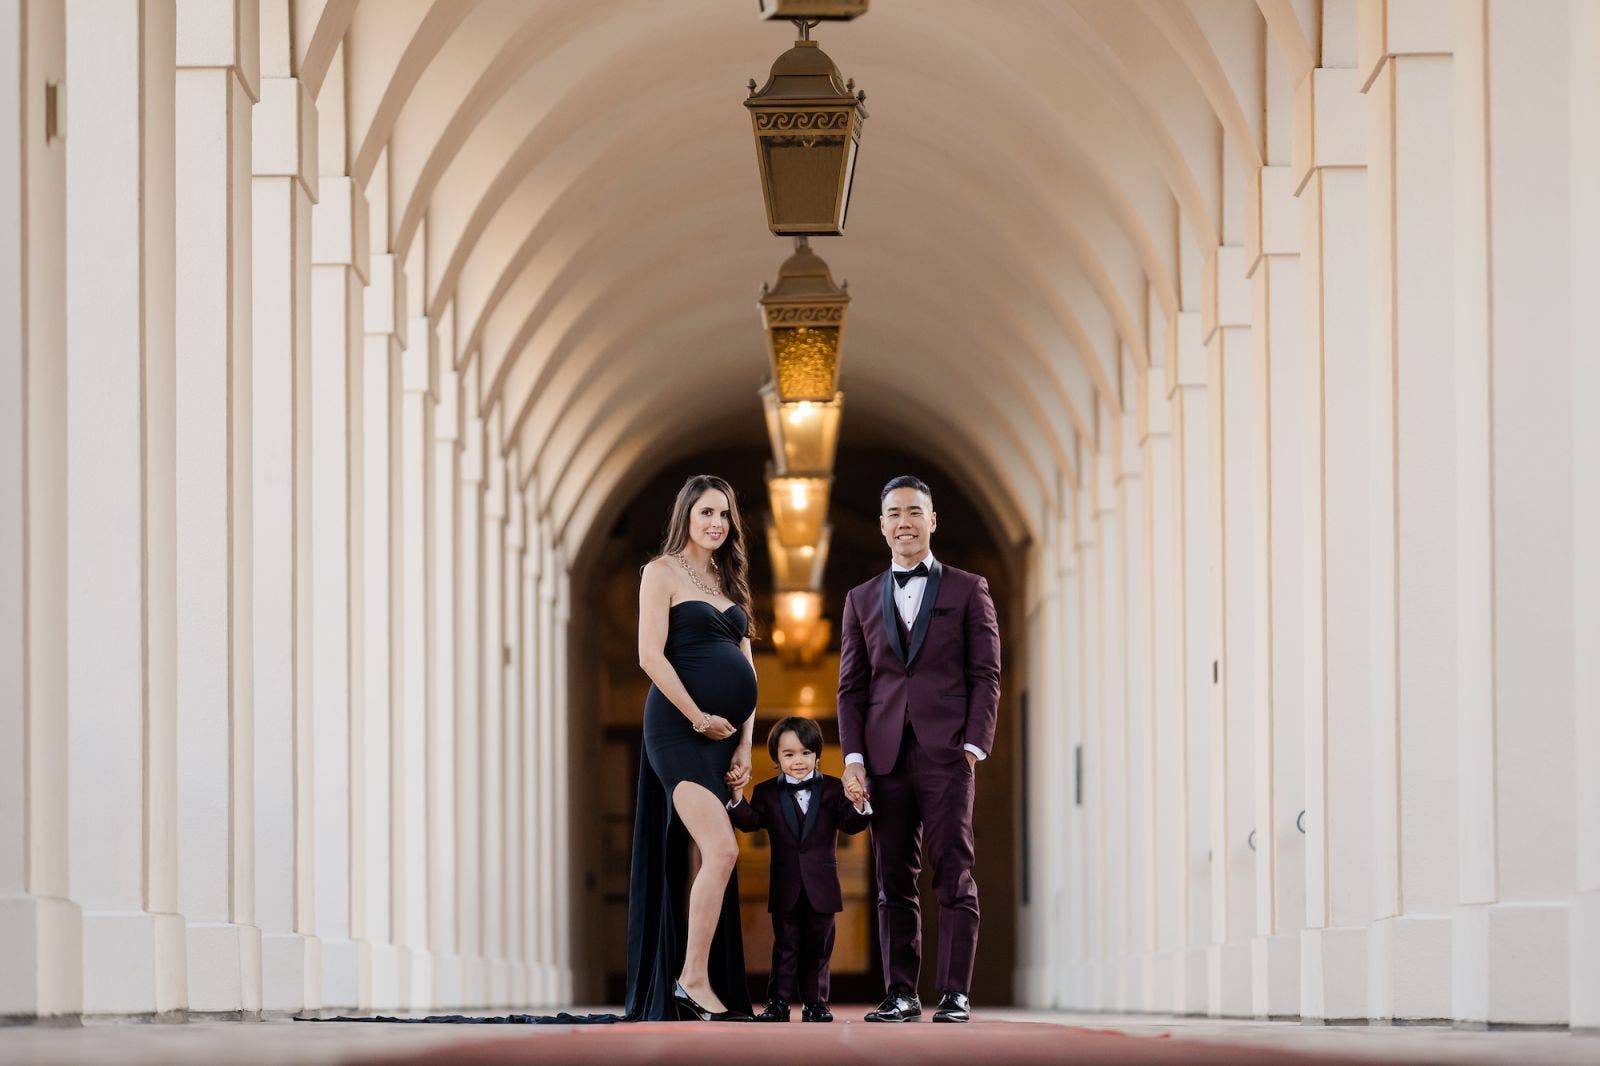
While your attire should balance comfort and a professional appearance, this entry on our list of maternity picture ideas deals more with your clients. Many considerations go into selecting a client’s wardrobe, but one that is easily overlooked involves location. The wardrobe should match the location and style of the shoot. For example, if you’re shooting at a formal location, as illustrated in the image above, then formal attire works perfectly. If you’re shooting at the beach or in a wooded location, then make wardrobe recommendations that fit the occasion. Beach attire does not necessarily mean shorts and a t-shirt, but rather something less fancy than a suit (perhaps jeans and a button up shirt for the dad-to-be if he is present for the photos).
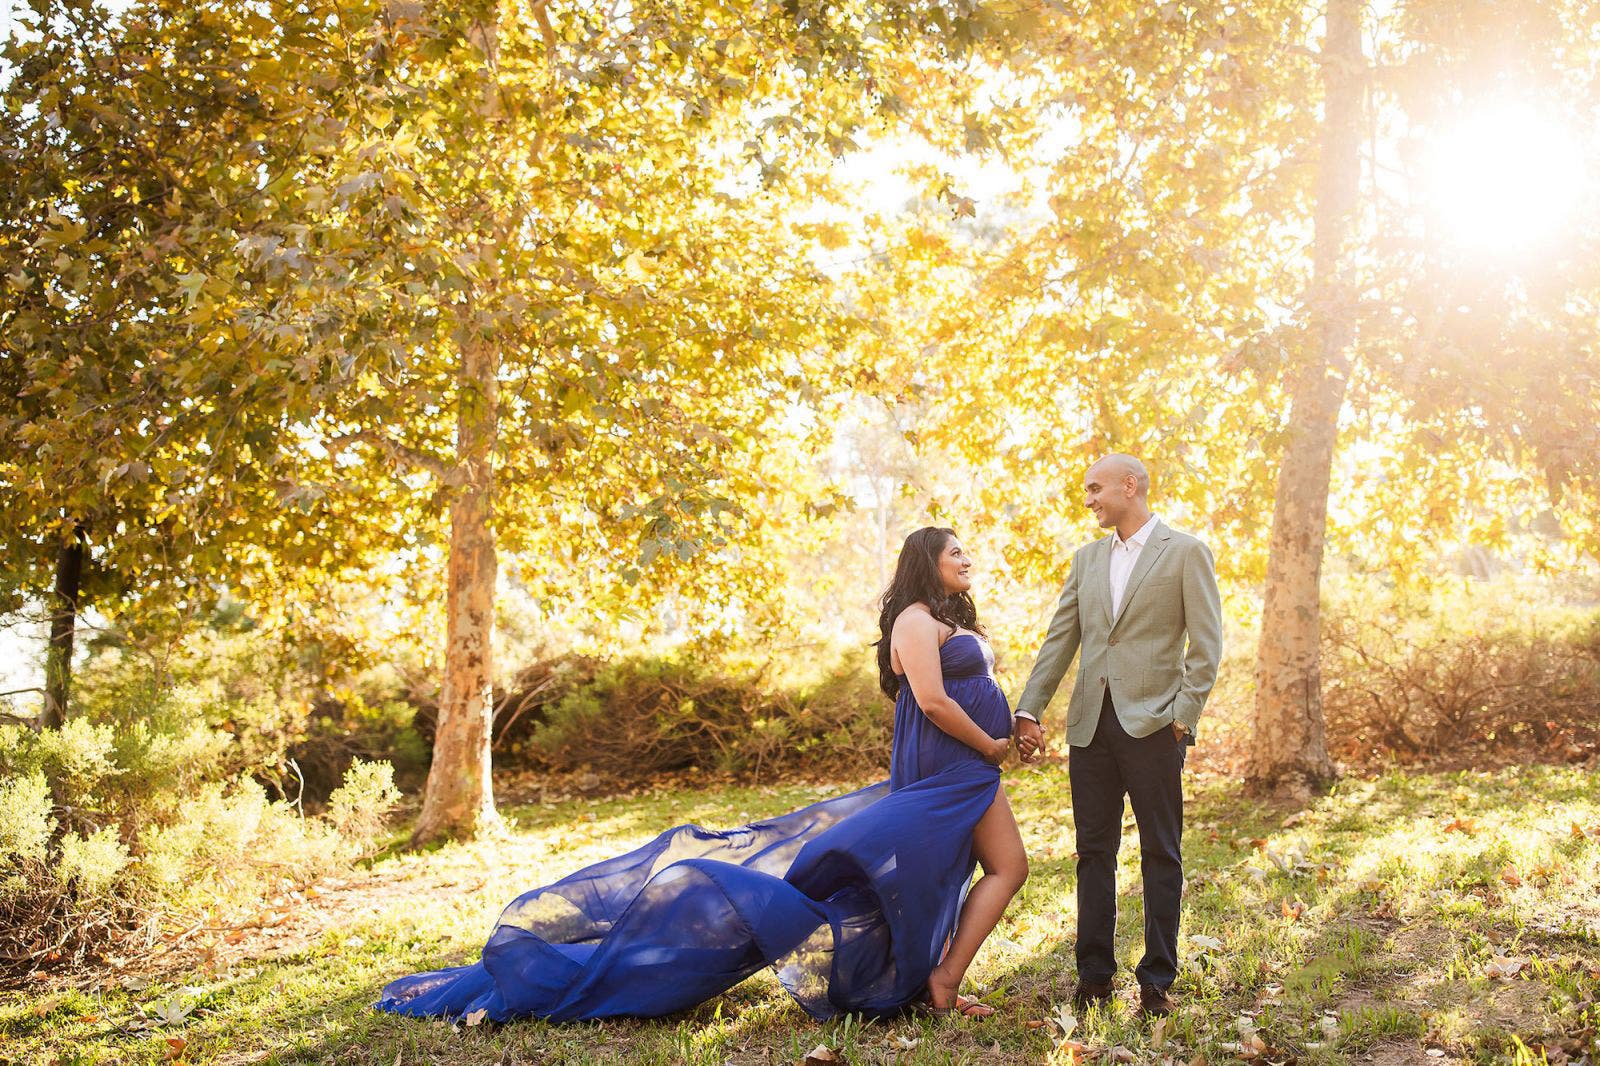
Another important consideration for choosing attire deals with colors. Your clients might first want to consider the colors featured on location and then choose complementary colors that pop and draw them out of the background. They may also want to take a more monochromatic approach and coordinate colors that harmonize with their surroundings.
Maternity Picture Ideas and Tips – #4: Flatter Your Client’s Body Type
Although their baby bumps may look somewhat similar, clients have a variety of body types. What might work for one client may not work for another. The slightest nuance can render an otherwise flattering portrait undeliverable. Check out the video below on Adorama’s YouTube channel for some of my favorite maternity picture ideas and tips.
Basically, we can use our subject’s hips and body angles to accentuate curves and adjust as needed. Rather than facing forward, we can turn our subjects to the side (either toward or away from your main light source) and use the shadows for effect. Note how the subject pictured below has shifted her weight to one side (away from the camera) and swept one of her legs back with the knees close together. All of these points come together to further accentuate the curves we’re aiming to highlight. They create a much more flattering look than the first image in which the subject is directly facing the camera with her feet shoulder width apart.
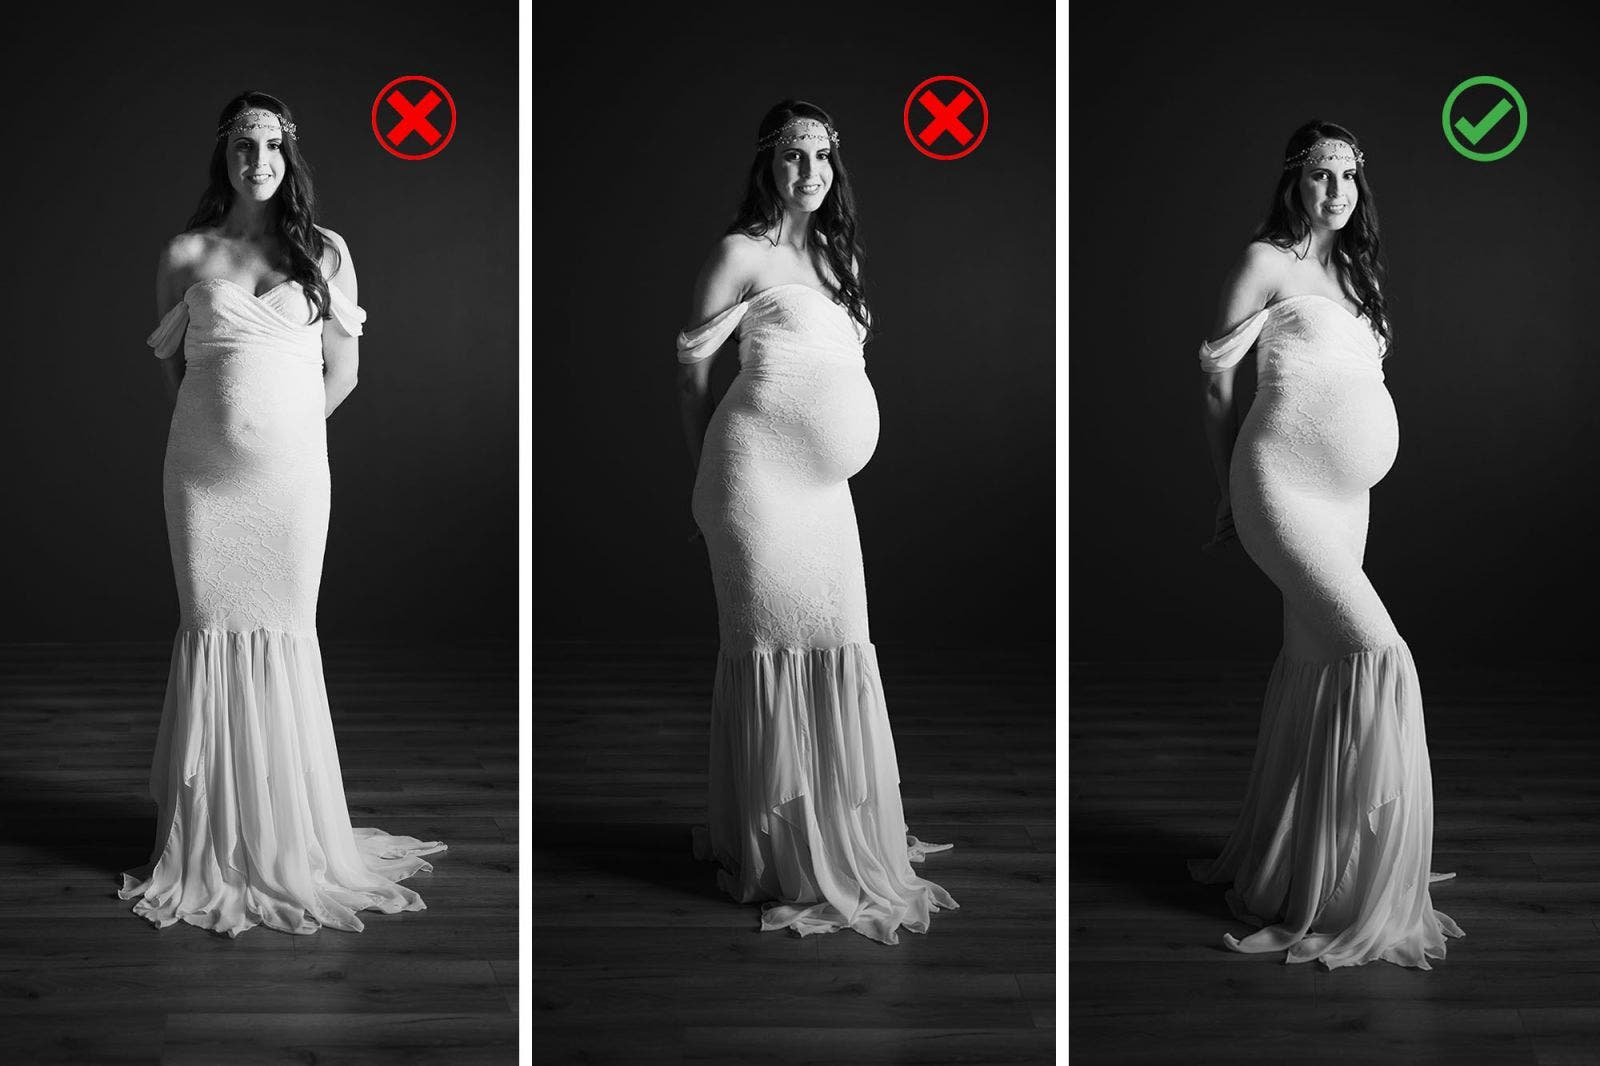
In addition to posing and light direction, lens choice and camera angle also play a crucial role in capturing flattering portraits. We can take a lower angle to elongate our subject’s body and use a wider angle lens for slimming. Be careful not to move in too close, however, or else the lens distortion from a wide angle lens may prove more distracting than helpful.
Tip #5: Use Hands to Draw Attention

You will notice in maternity photos that the subject will often place her hands above or below her belly to draw attention to the baby bump. While we normally make an effort to avoid focusing on this area in our photos, it serves its purpose well in this instance. You do not need to use this hand placement in every photo, but it’s a perfectly acceptable go-to in maternity photography sessions and can be used often throughout the shoot.
Tip #6: Bring in Partner & Siblings
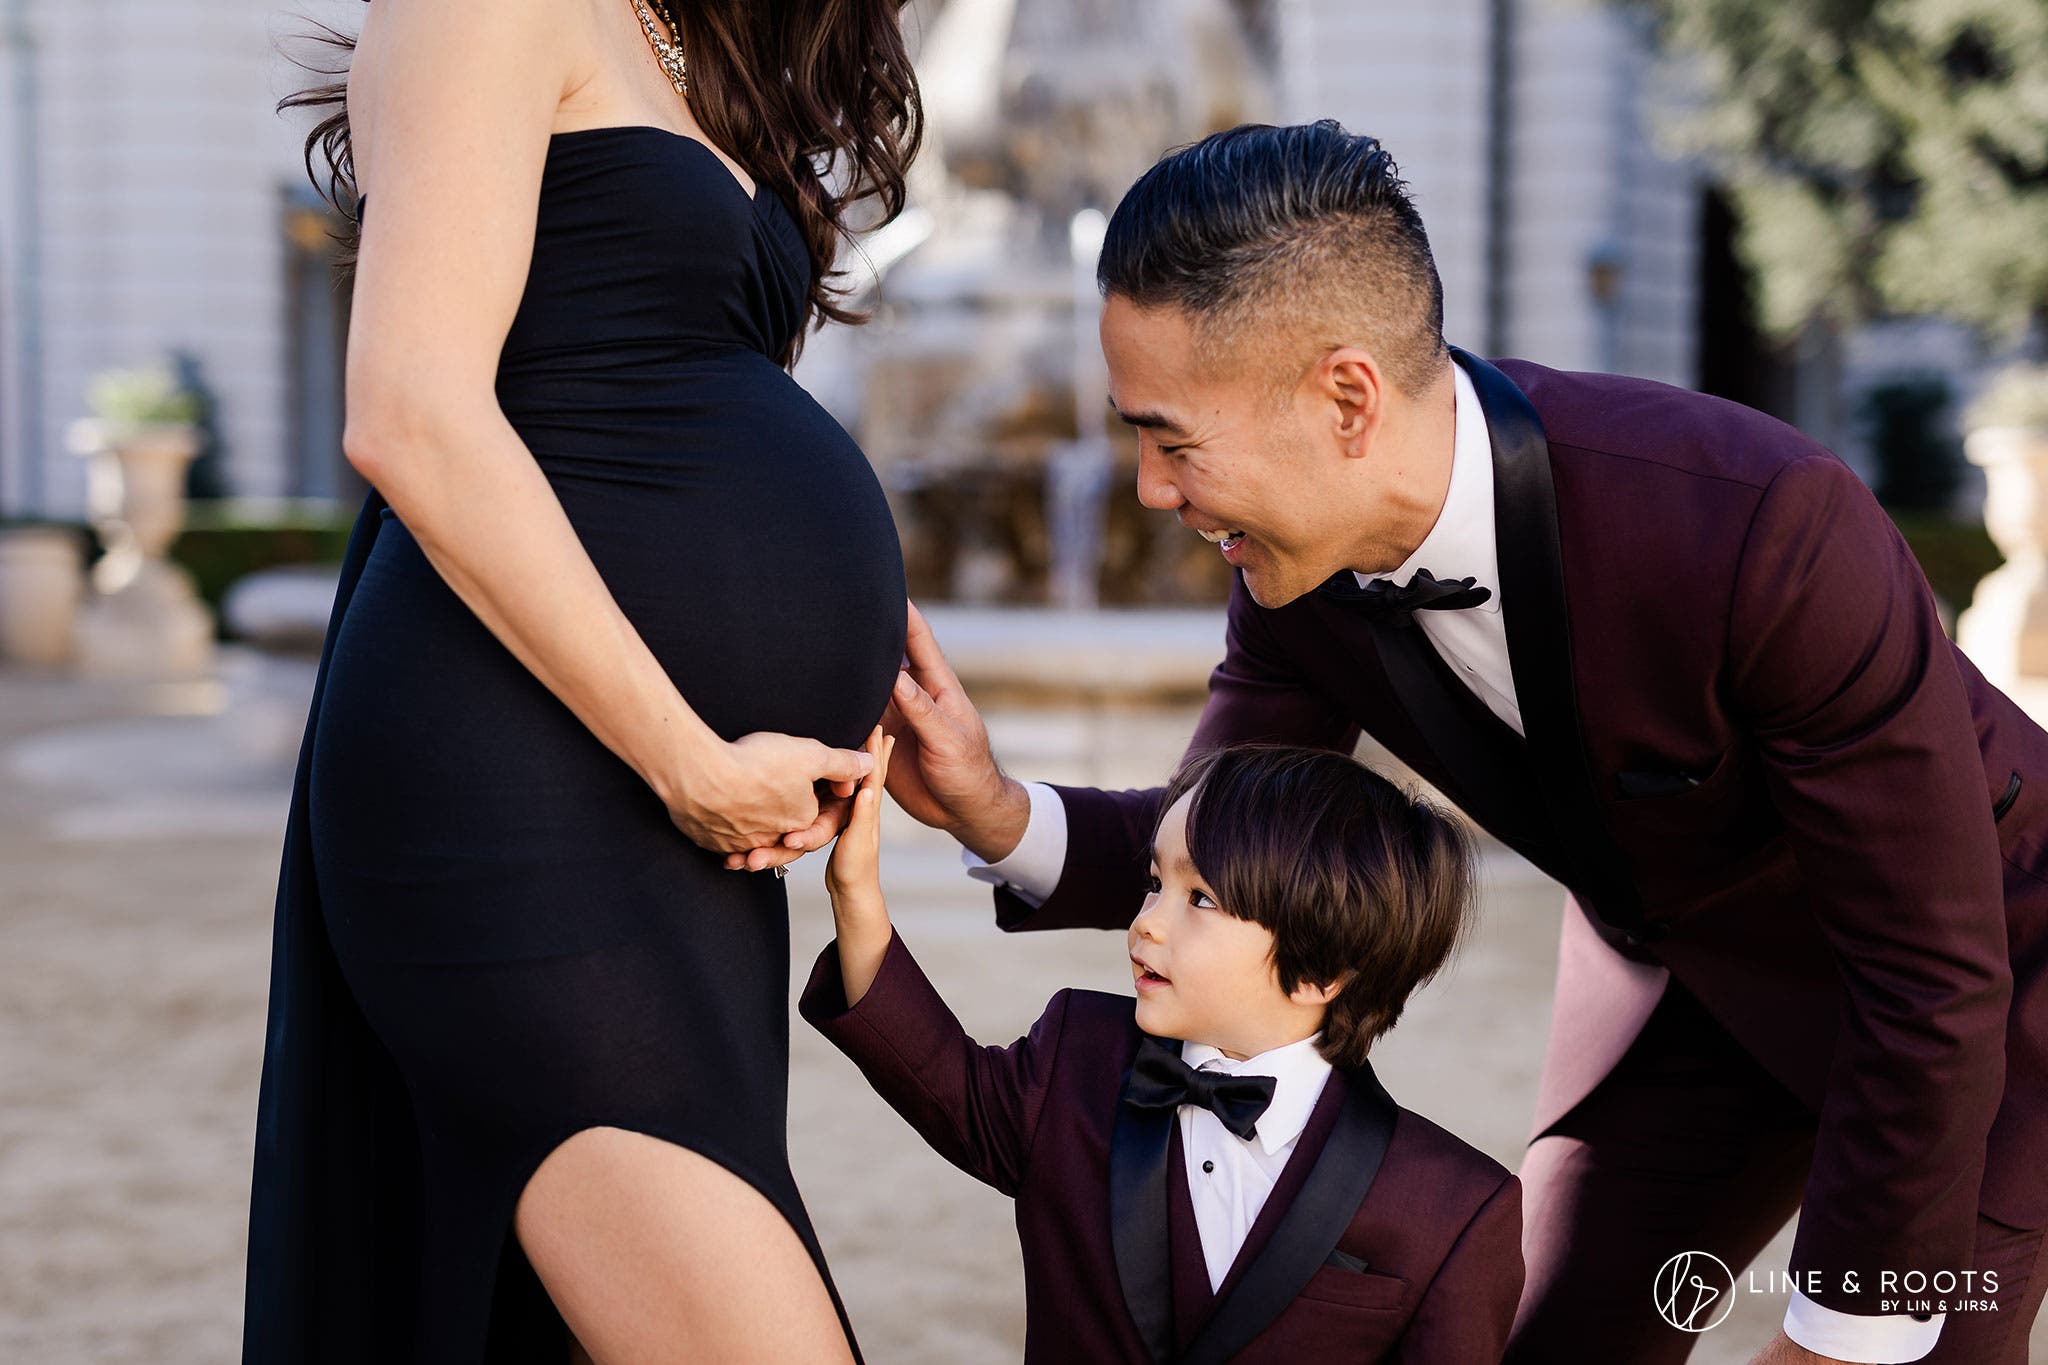
Maternity photo sessions are often a family affair. Be sure to invite in the partner, as well as siblings if the expectant mother already has children. This is one of the maternity picture ideas that creates an opportunity for playful, meaningful photos that the family will share and return to over the years.
Maternity Picture Ideas and Tips – #7: Get That Golden Hour Glow
Everybody loves that golden hour look in portraits that you get during the last hour or so before sunset. This is especially true for maternity sessions. The soft, glowing light amplifies the glory of the moment. In the event you’re unable to capture all the photos you want before the sun sets, however, you can also recreate golden hour yourself. All you need is a decent external camera flash or off-camera flash (and light stand if no assistant is available), a CTO gel, and a little knowhow.

In the image above, I had an assistant stand on a bench in the background and aim the flash at my clients. We added a CTO gel to the flash to match the warmth of the sun and held it high up. You can see it poking through the branches in the trees. You can adjust your aperture and position to the light to enhance or reduce the flare of the light. It may take some practice, but mastering this technique will come in handy and wow your clients every time.
Tip #8: Create Dramatic Dress Portraits
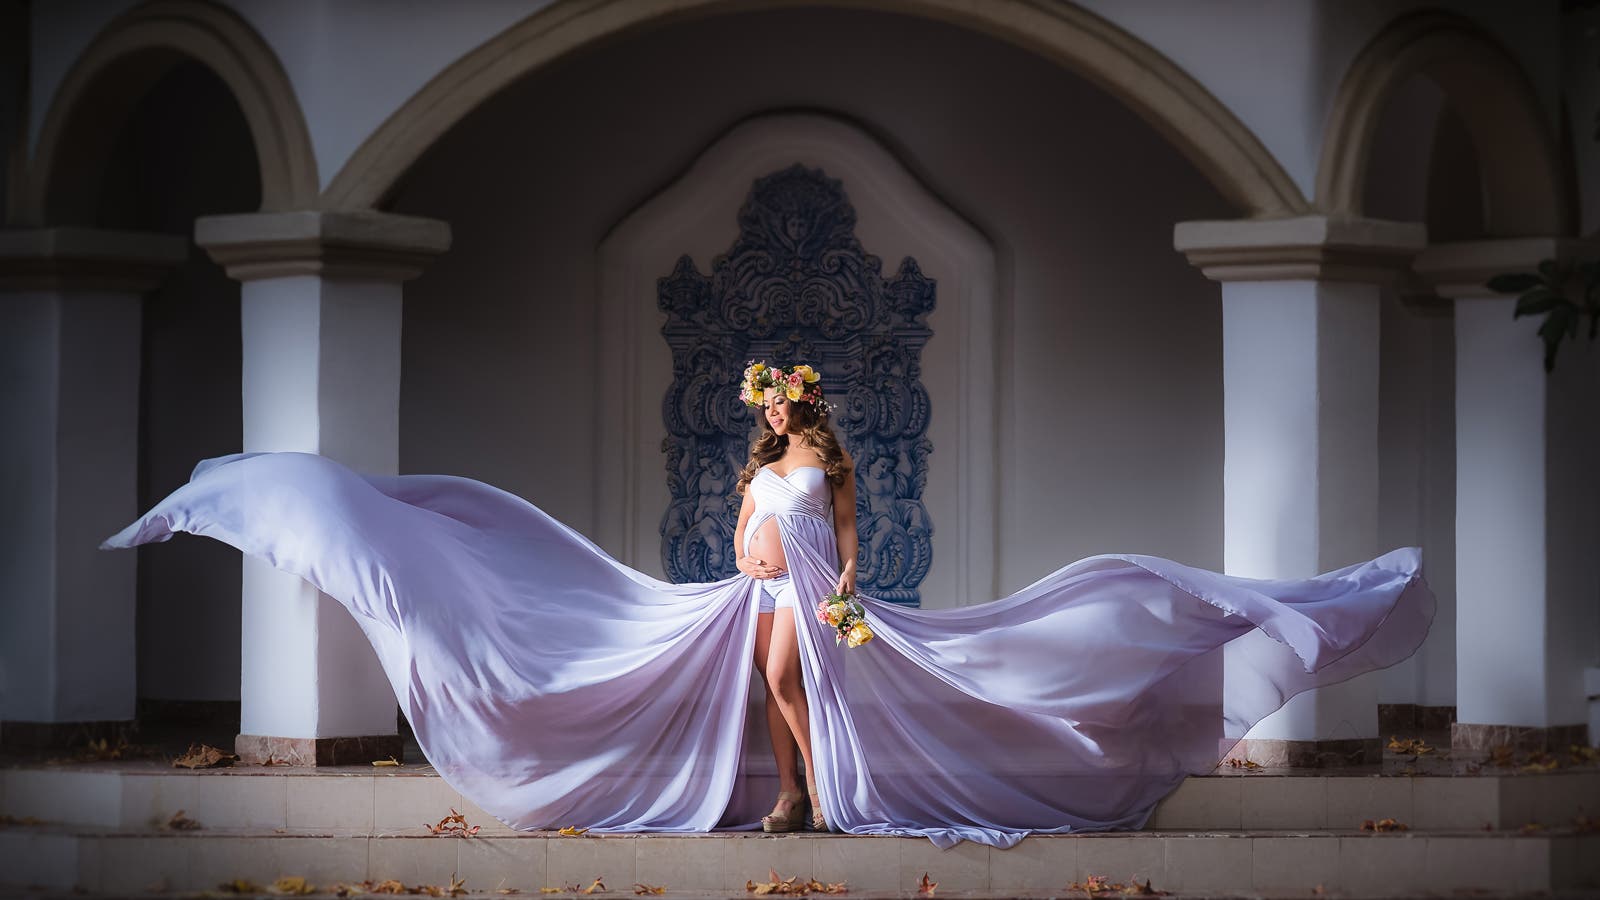
The new mom is the star of the show, and maternity picture ideas like this will emphasize that fact. If she opts for a long flowing maternity dress like those offered from Sew Trendy, you can use the dress to create an epic portrait. I’ve covered my process in the video above, but I’ll highlight the main points below.
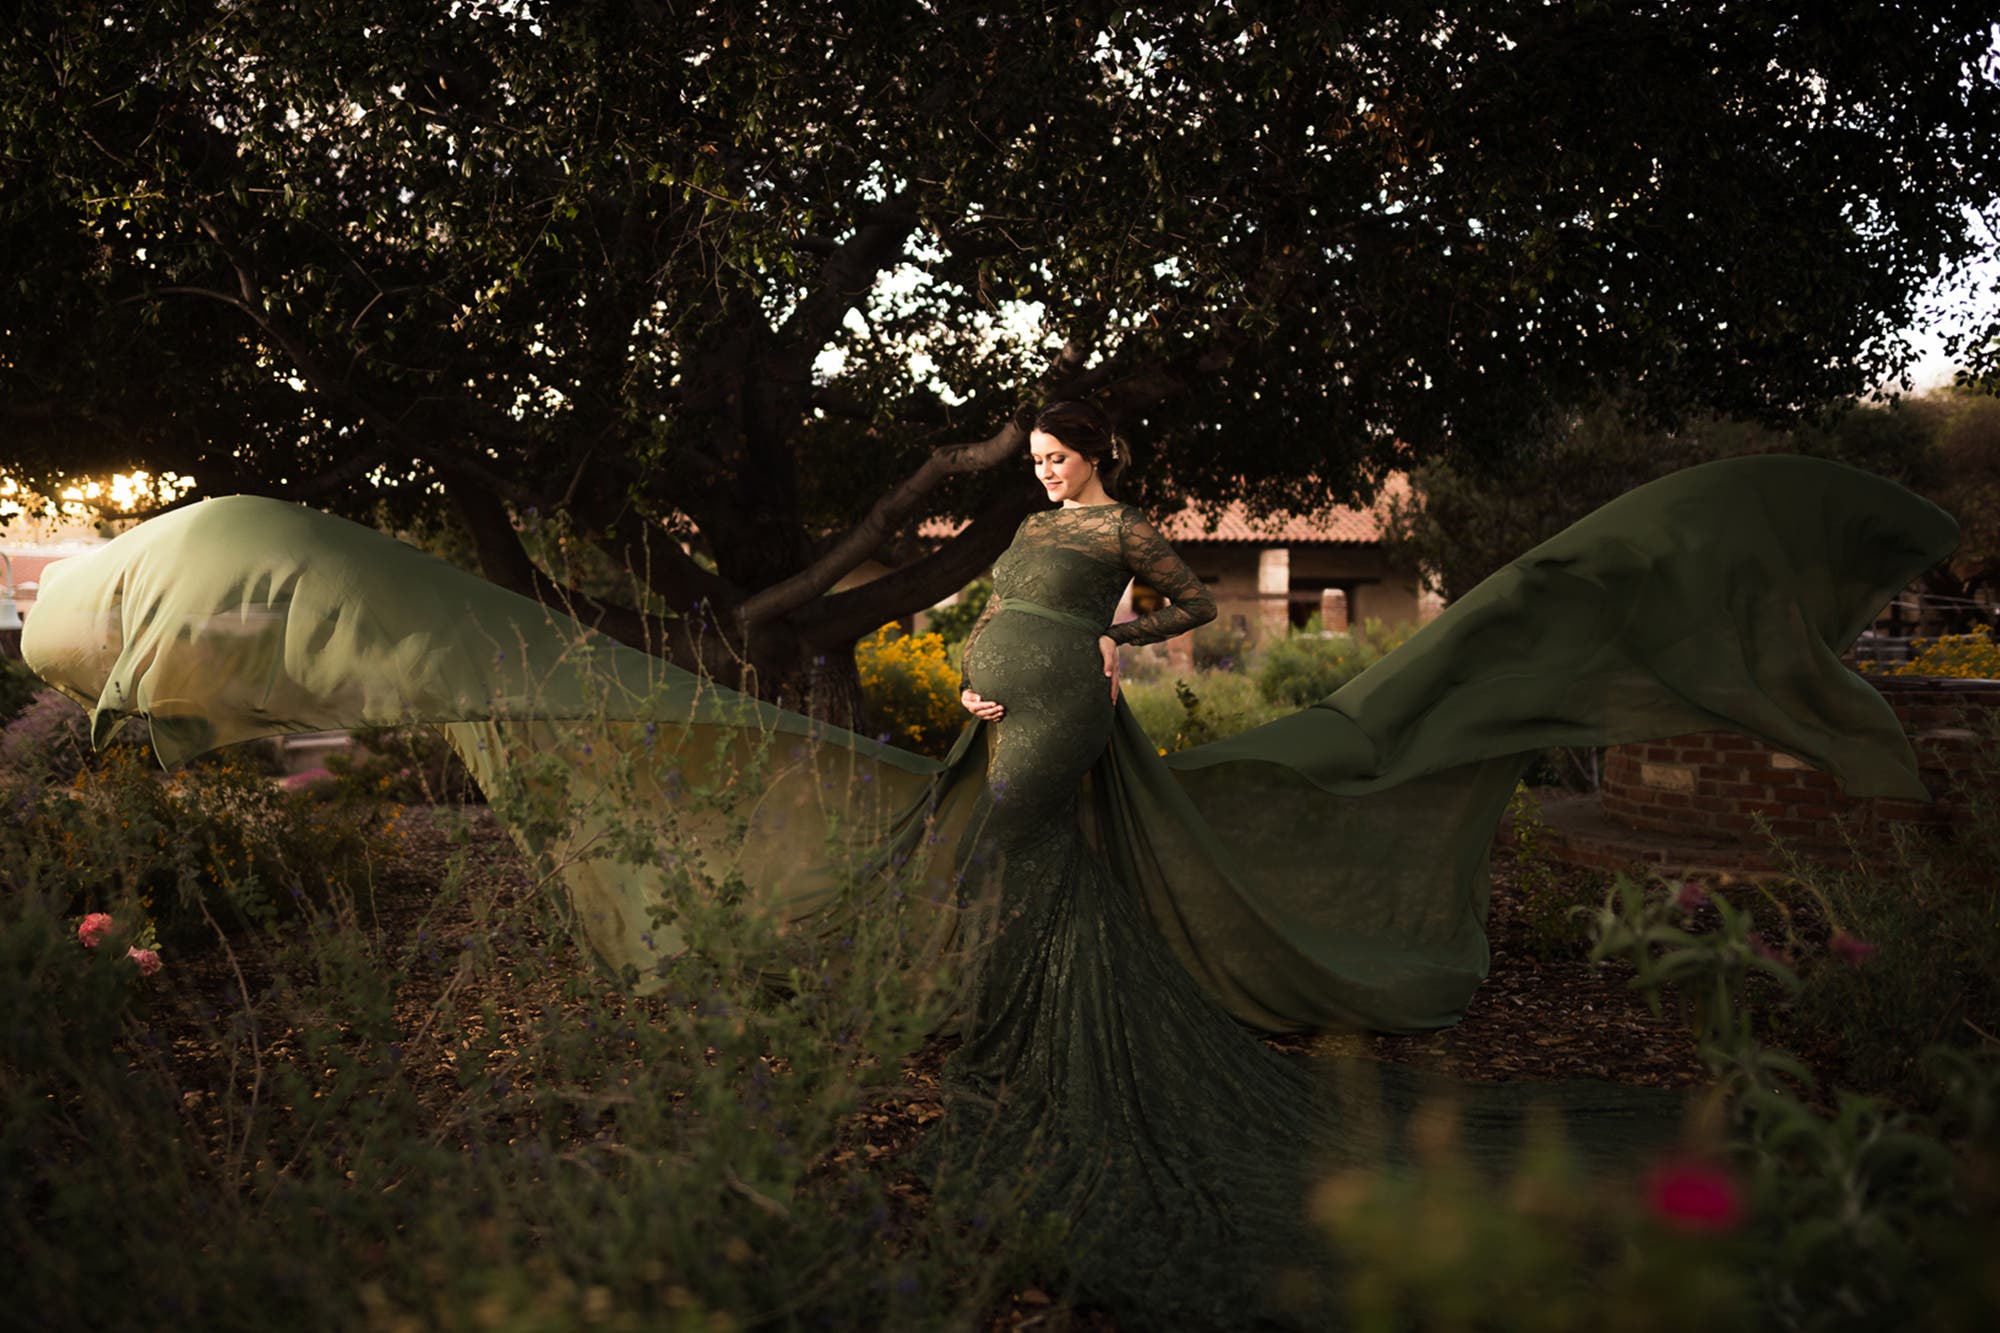
- Use assistants for the toss: If the train of the dress is wide enough, you can use two assistants to stand on each side of the mother-to-be in the middle. At your command, they can toss the train of the dress into the air. If you don’t have assistants, you can also ask family members who are present (or even a lone partner) to help out.
- Create a composite: If the dress does not allow for a single take as illustrated in the video, you can capture one side at a time and create a composite in Photoshop. I highly recommend using a tripod whenever you capture photos that you intend to use for a composite in post.
- Consider the usual components of a great photo: An epic dress toss alone will not make for a great photo. First, compose your shot, likely taking a lower angle to emphasize the dress; place your subject in the brightest part of the frame (if possible). Then, adjust your ambient exposure and add or modify light if needed. And finally, pose your subject and cue her expression to match the mood of the portrait.
Tip #9: Tell a Story Worthy of Wall Art

I consider photographers to be storytellers. In fact, I approach every session with storytelling in mind, whether for maternity, newborn, family, or even engagement shoots. Epic, standalone images will always have their place, and we can pack a lot into a single frame. However, approaching our maternity photography sessions from a storytelling perspective benefits us as much as our clients. They will have more options for framing the photos in an album or on the wall, and we’ll benefit from the sale of those prints.
In order to effectively tell stories with your photos, keep the following things in mind:
- Shoot in wide, medium, and closeup angles: You see it all the time in television and movies. A wide shot opens the story to establish the location, and then we move in closer to find our subjects in the scene. After that, we get closeups and multiple perspectives to focus on the details and guide our attention. This approach works for single subjects as well as groups of two or more.
- Aim for consistency with lighting and editing: In any given session, you might capture a variety of bright and airy or dark and dramatic images, depending on what your clients want. However, for the sake of storytelling, I recommend following the tip above (wide, medium, and closeup) for each lighting setup. Then, when you take the images into post, be sure to edit the sequences with consistency. When it comes to laying out the images in an album or on the wall, try to avoid mixing color and black and white images in a single spread as well.
Maternity Picture Ideas and Tips – #10: Finalize Your Vision in Post
While we do what we can to get it right in-camera, post-production allows us to realize our creative potential as we finalize our images. I use presets based on lighting conditions from Visual Flow to save time, but you can use any brand. You can even create your own. Either way, harness the power of your editing software to enhance your images.
Here are a couple of general editing tips to help enhance your maternity pictures:
- Radial Burn: You can dive deeper into the power of dodging and burning and shooting for the edit, but a simple radial burn around your subject can do wonders for isolating your focal point and directing your viewer’s attention. The trick here is to not over do it and create an overly dramatic vignette. Instead, apply a radial filter around your subject, set the feather to around 80, and then reduce the exposure to somewhere between -0.5 to -1.
- Liquify: In Lightroom, you can use the liquid tool to refine shapes, including the shapes of the dress for a dramatic dress toss like the one featured in tip #8 above.
- Spot Heal: I often use the spot heal tool in Photoshop to remove unwanted or otherwise distracting elements in photos. It can mean the difference between a good and great final image.
Conclusion
I hope you enjoyed these 10 maternity picture ideas and tips for better pictures. There’s no question that these images will capture some of your clients’ most treasured moments. Hopefully, you’re able to make the session fun for your clients while also exercising your creativity and documenting these memories. Maternity photos represent an important part of a family’s journey. From here, of course, you’ll need to prepare for future phases in your clients’ life cycle, including the child’s birth, a newborn session, family photos and so on. If you’re fortunate enough to find yourself taking these gigs, just remember to prep and plan accordingly. Then, use your artistic talents to bring your client’s vision to life.


