While gear often gets the glory, one of the most important elements of capturing incredible portraits is posing. Sure, advanced autofocus systems and fast lenses open up loads of creative opportunities for photographers, but an unflattering pose or expression can render an image undeliverable, no matter how perfectly exposed or tack-sharp it is. In this first article of our posing series, we’ll focus on male model poses.
In photography, we often focus our attention and our training on posing females, but a sound understanding of posing men is critical for any portrait, headshot, family or wedding photographer. One important note before we begin is that we say the term “male poses,” but the concepts taught are actually not exclusive to any gender. Concepts like “portraying a confident stance” and “accentuating a jaw” are often prioritized in male model portraiture. But you can apply these same concepts to posing female models as well depending on the story and the purpose of the photo.
We’ll be covering the following topics in this article:
- Standing Poses for Male Models
- Action Poses for Male Models
- Headshots for Male Models
- Creative Isolation with Lighting for Male Models
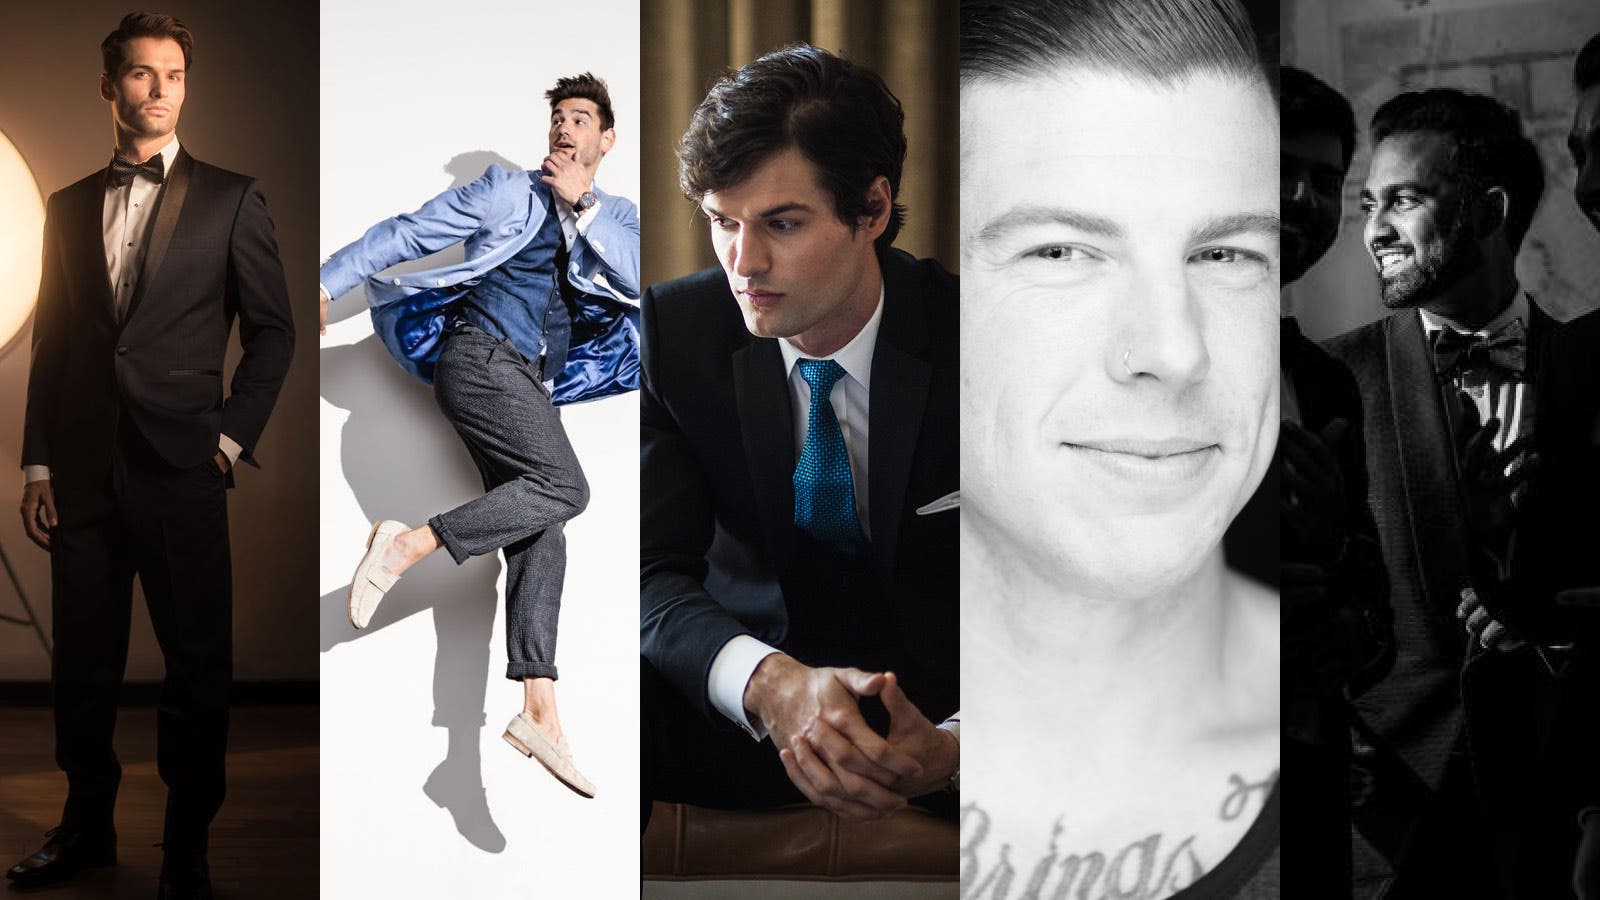
Male Model Pose #1: Standing
The majority of your portraits will likely involve a standing subject, which makes it as good a place to start as any. You may not realize it, but as simple as it seems, standing poses present plenty of opportunities to quickly shift your subject’s status from admirable to awkward.
When it comes to projecting masculinity in a standing pose, here are a couple of things to look out for:
- Shoulder-width stance to expand presence: Make sure your subject’s feet are not too close together (as you can see from the before and after below).
- Straight spine and toes pointed slightly outward to display confidence: Ensure good posture, with the toes slightly pointed outwards.
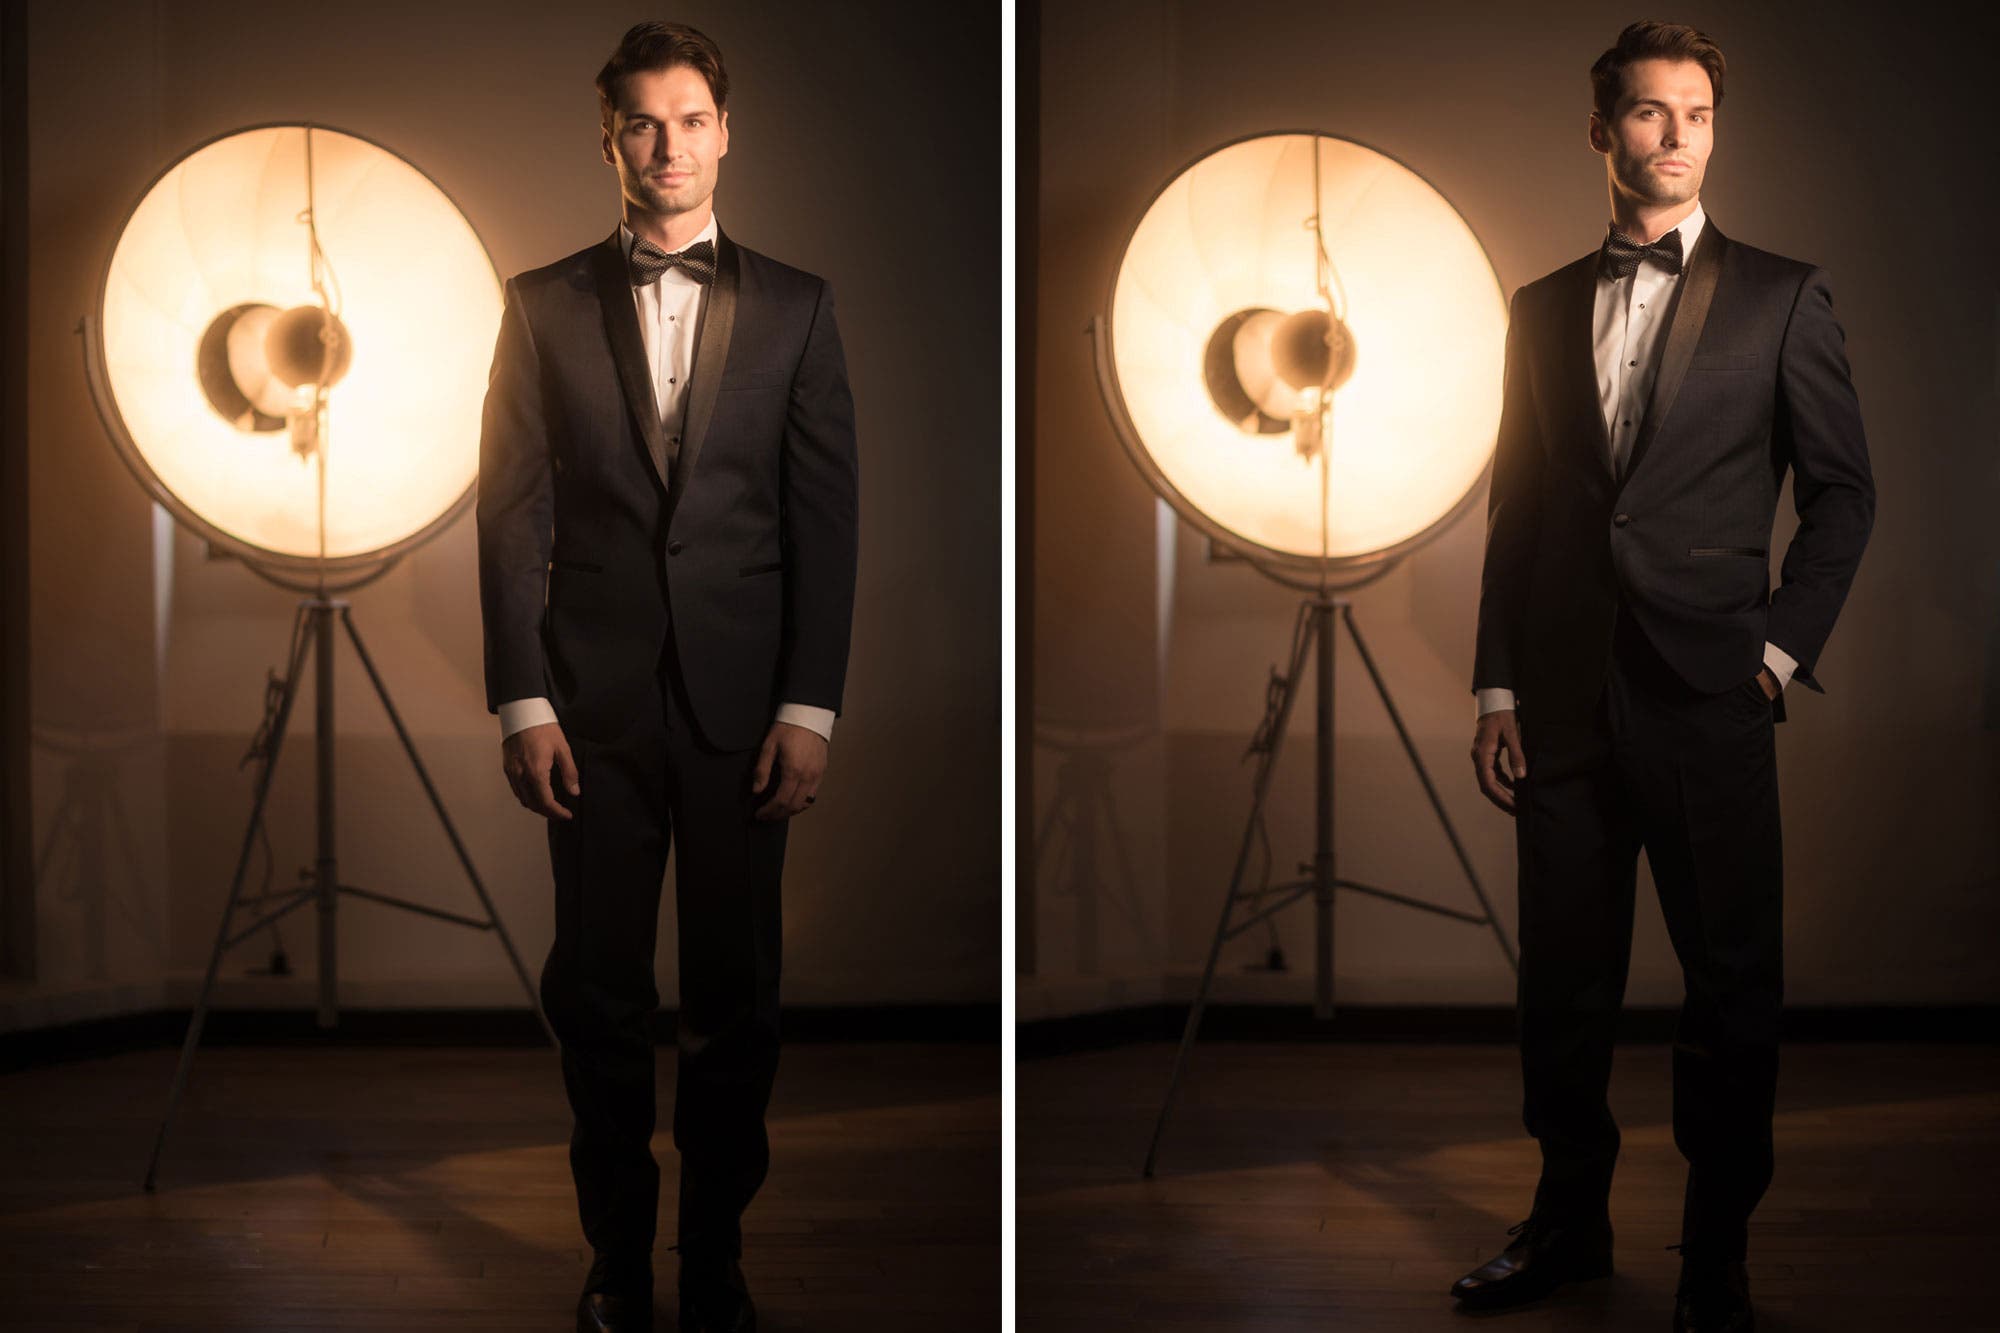
In the images above, notice how the left image looks awkward and the subject looks like he lacks confidence when compared to the photo on the right. Try taking a standing portrait without employing either of the points above and then compare it with an image in which your subject does follow those guidelines; you’ll quickly notice the difference.
The Power of Perspective
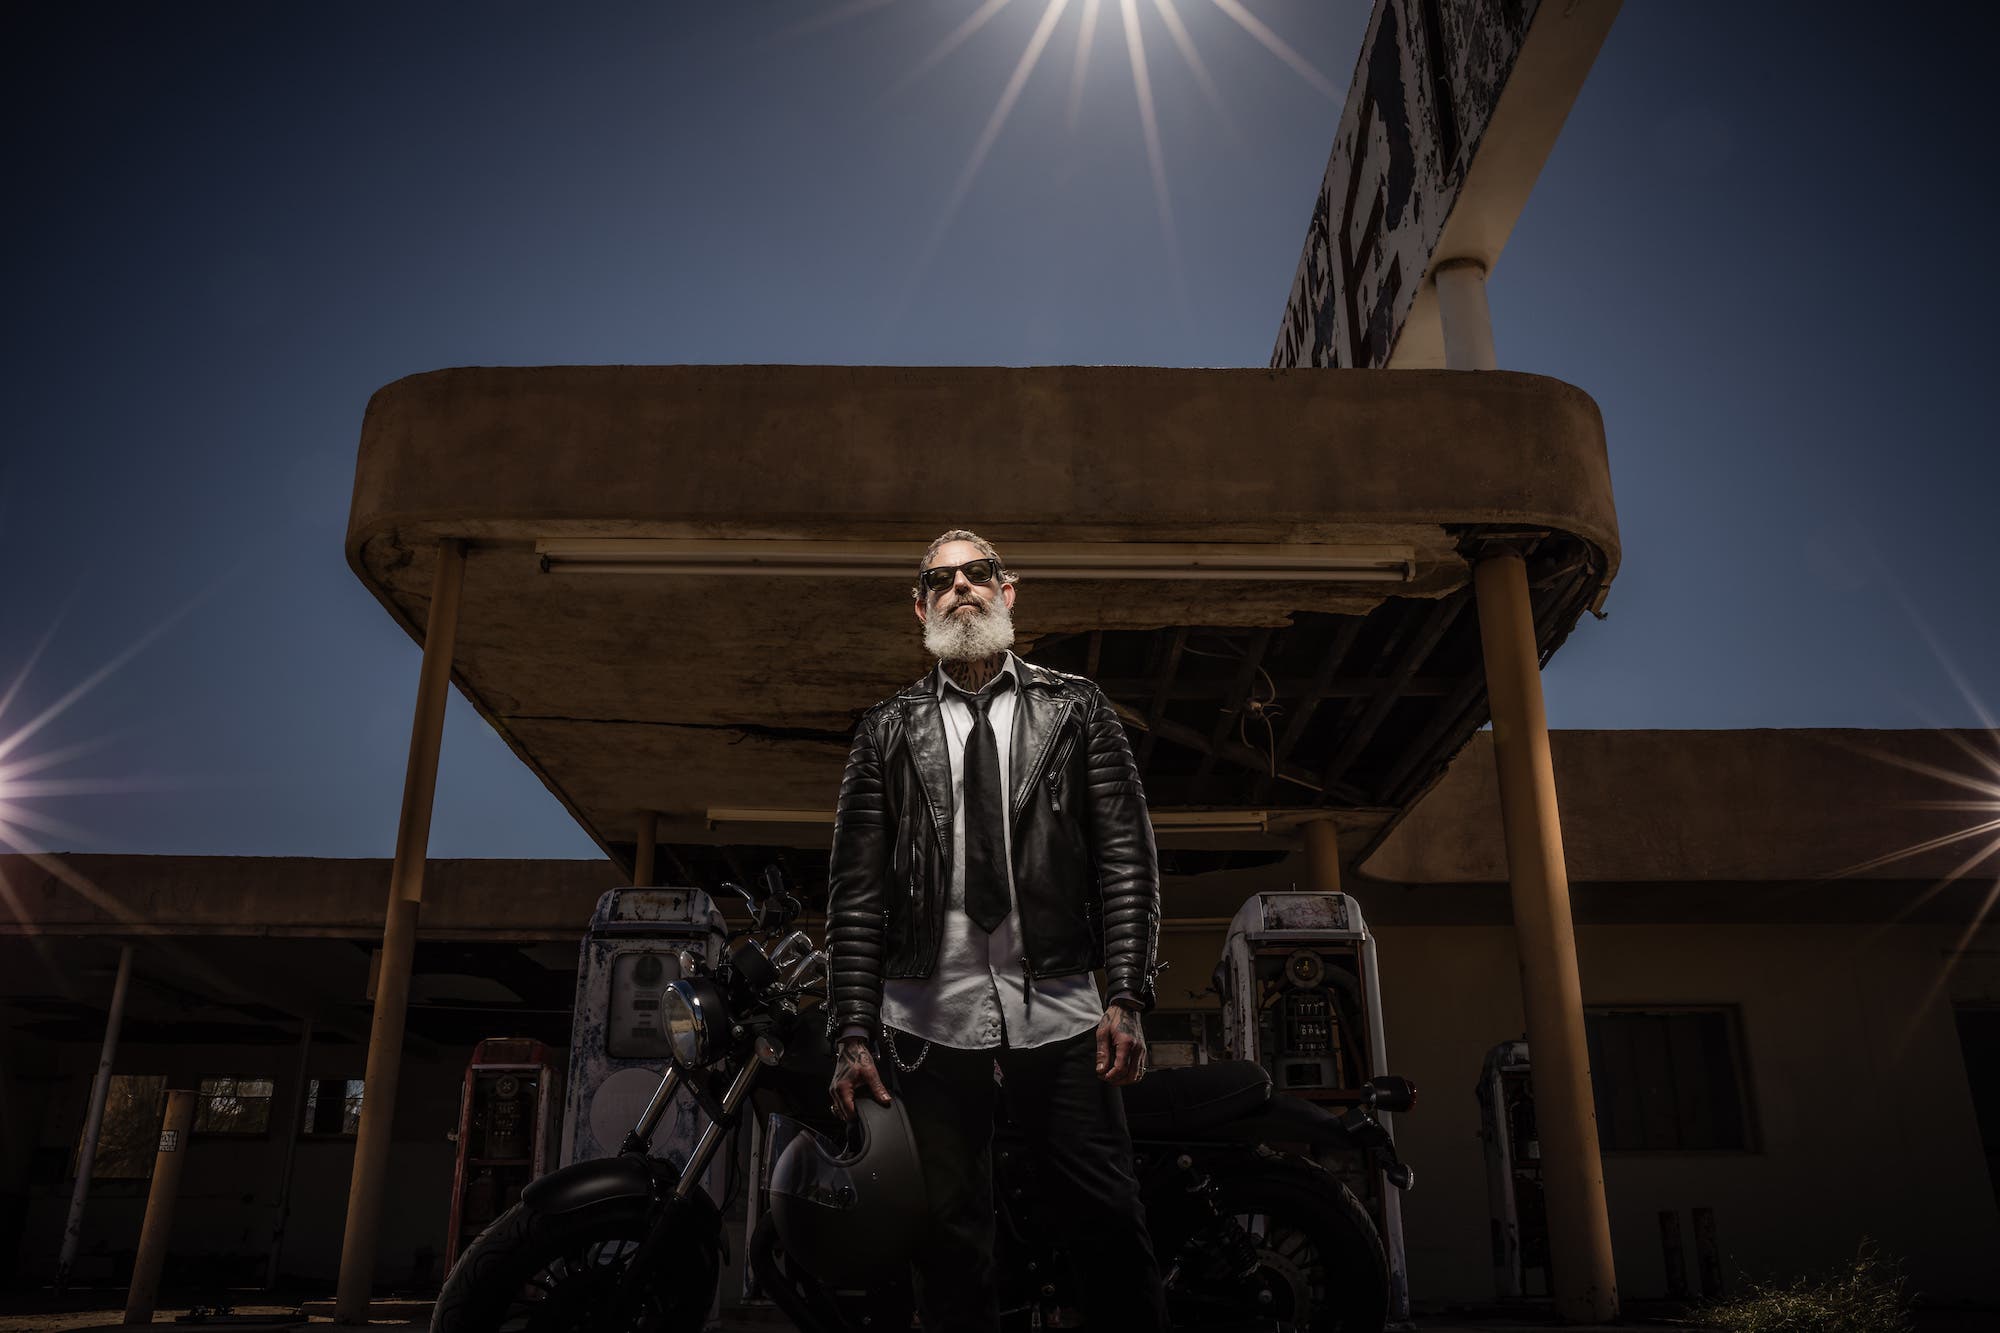
Another important factor to pay attention to for standing male model poses involves perspective. Take advantage of a classic tactic long used to get viewers to literally look up to the subject, and shoot from a mid to low angle to further expand your subject’s presence within the frame. This is one of several instances where lens choice can make a big difference. Try using a wider angle, 15mm or 24mm, to exaggerate the effect. The closer you get to your subject while using a wide angle lens, the more amplified the effect becomes. You’ll often find this perspective used in political ads, movie posters, and even fashion portraits.
Keeping Your Male Poses Natural
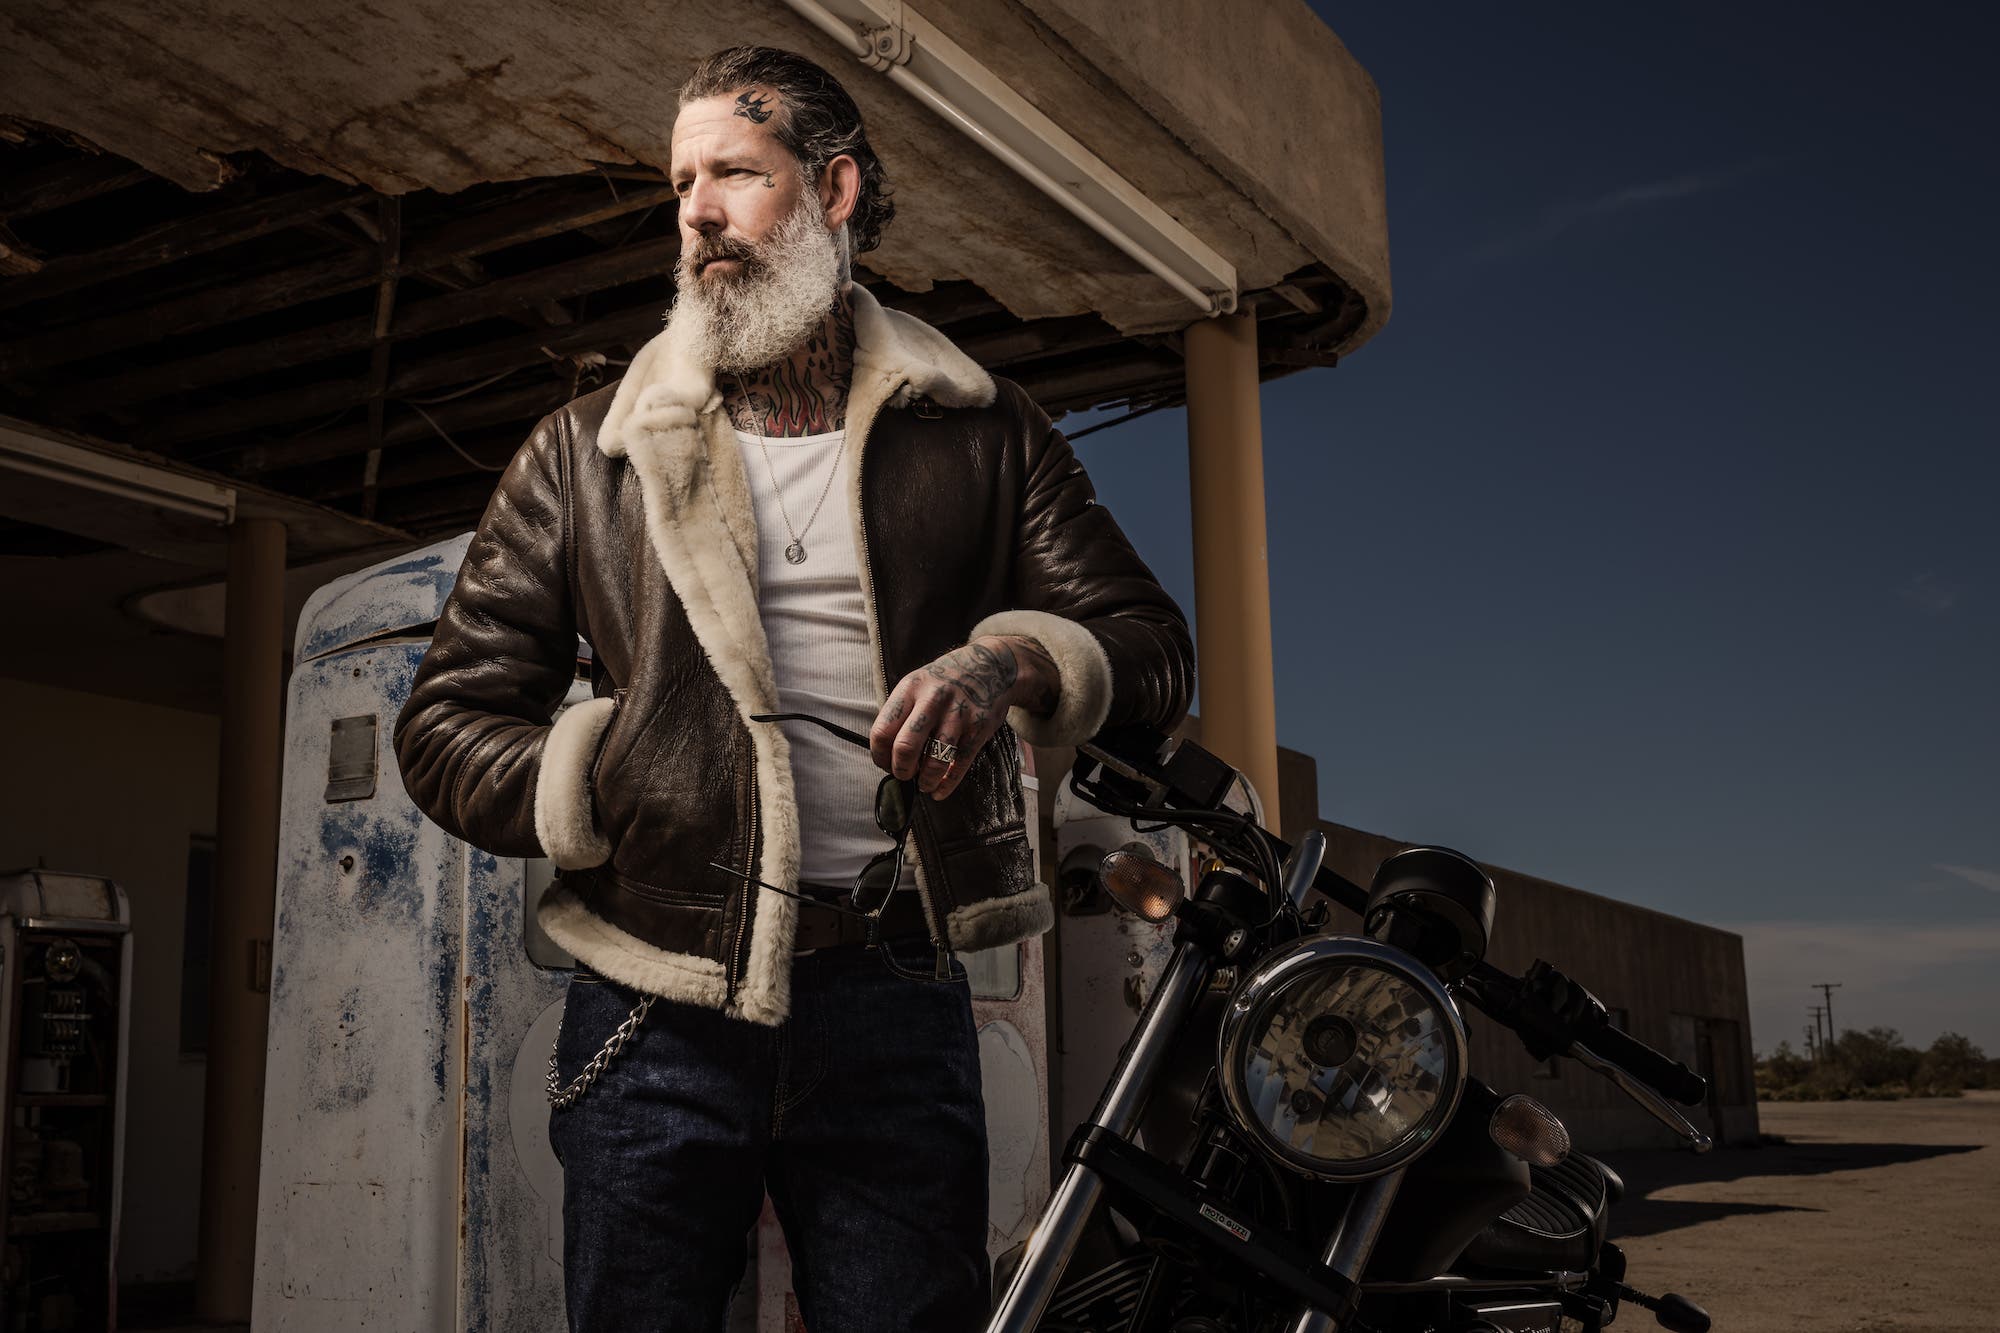
While the goal here is capturing masculine poses, we don’t want our subjects to appear stiff. Ask them to relax their shoulders a bit (not too much) and place one hand in a pocket or give it something to do that makes sense for the scene, such as holding sunglasses (as illustrated above) or some other relevant object.
Storytelling
Although this doesn’t apply exclusively to standing poses, remember to shoot from wide, medium, and closeup angles to add a variety of looks and increase your potential number of deliverable images. It’s amazing how significantly a simple crop can change the look of a single pose. When cropping, whether in-camera or in post, be sure not to crop at the joints (neck, waist, knees, etc.).
Male Model Pose #2: In Action
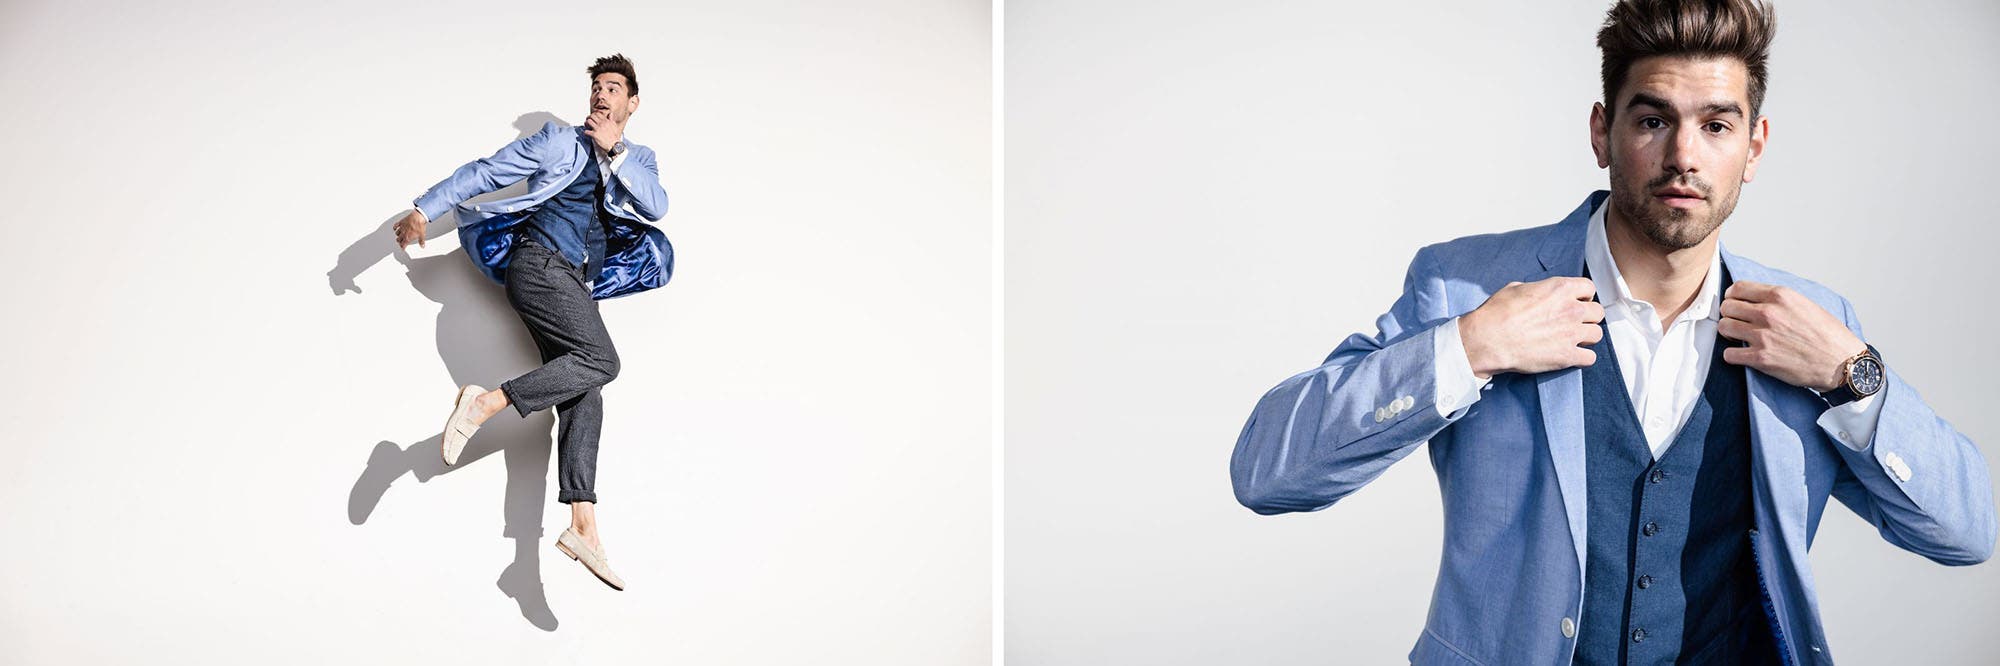
Build on the standing pose and add instant visual appeal when you introduce motion into your portraits. We’re not talking about the kind of motion you get with a moving subject and a slow shutter speed; that can be explored at another time and place. Instead, ask your subject to walk towards the camera or jump in the air. A simple yet effective tactic often used in wedding photography is to ask the groom to pretend that he is adjusting his tie, cufflinks, or watch. It’s an easy way to make a portrait more dynamic while once again adding different looks to the overall set.
Male Model Pose #3: Sitting
Another strong go-to male model pose is sitting. Although sitting adds a sense of vulnerability to a pose, there are still ways to portray masculinity with a seated subject. So long as you focus on expanding your subject’s presence and not diminishing it, you should be okay.
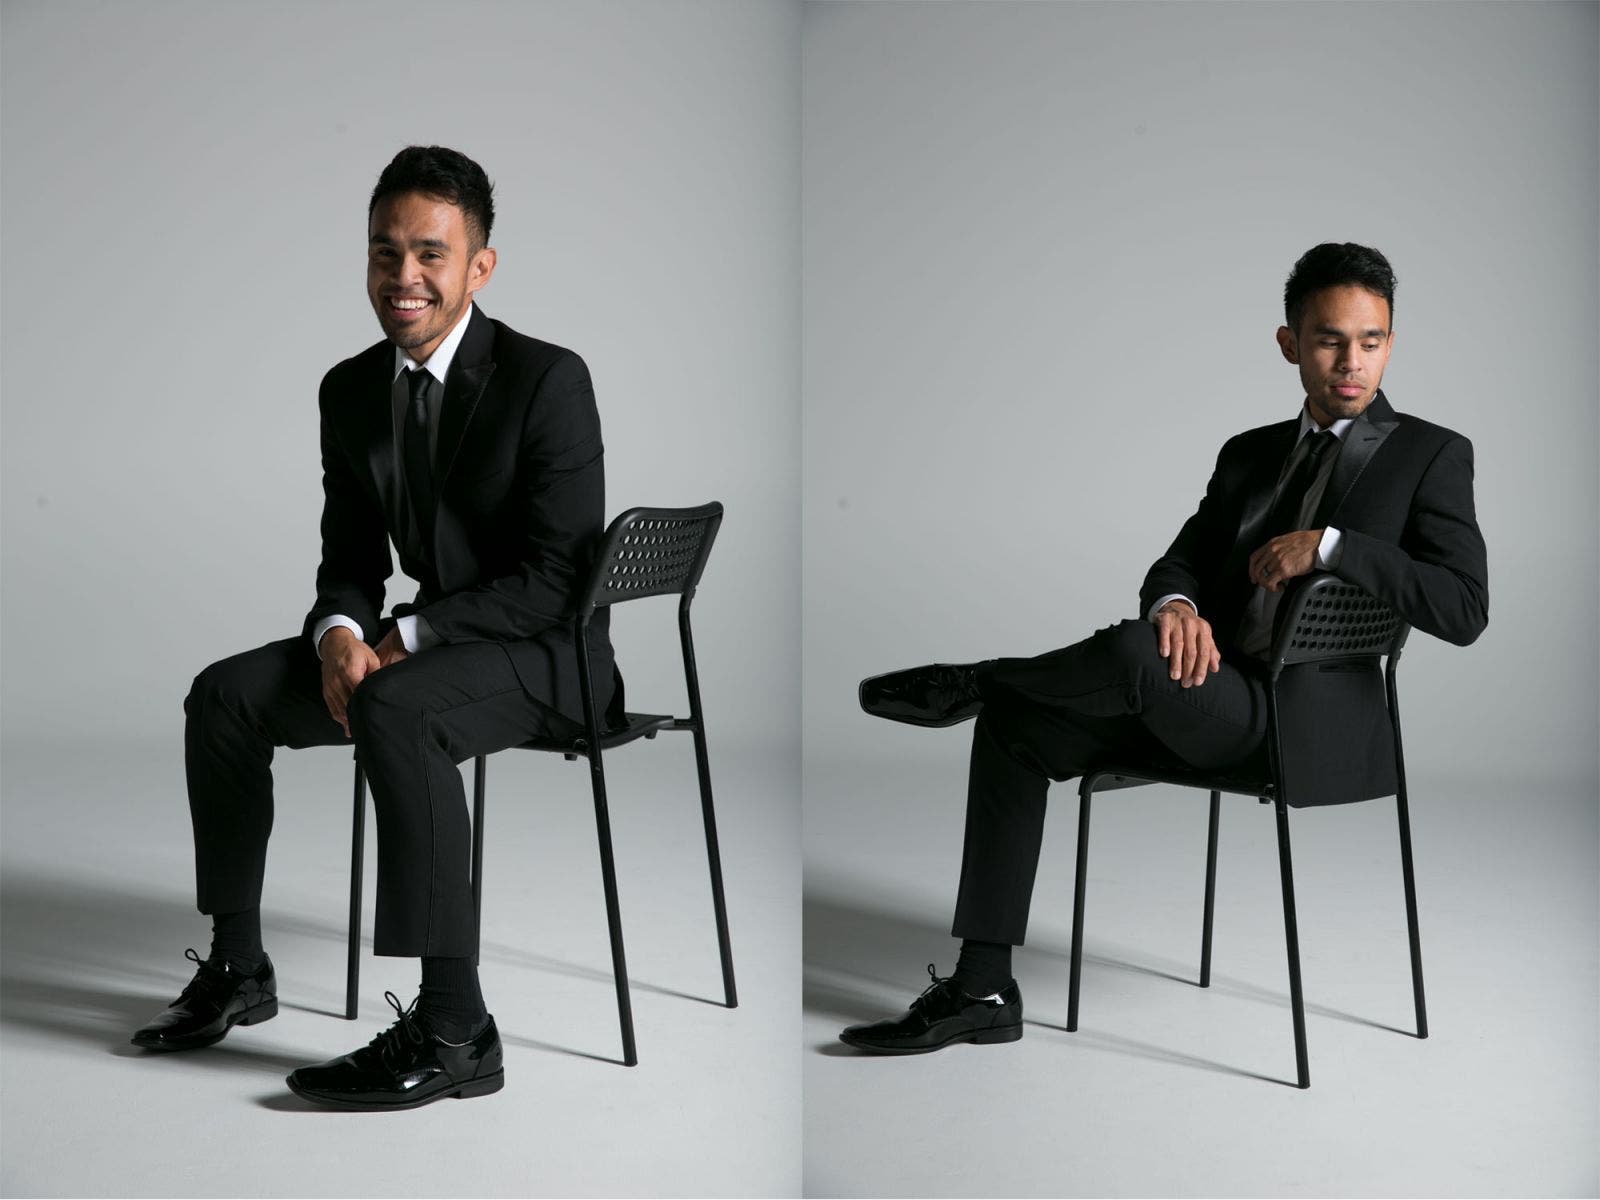
One way to make a seated pose more masculine is to follow some of the basic guidelines introduced for the standing pose. First, keep a close eye on your subject’s posture and ensure that he is sitting with good posture and is not hunched over. Your subject can still lean forward as opposed to having to sit up, but his back should stay relatively straight. Also keep an eye on foot and leg position. If the feet or legs are too close together, it may look like your subject needs to use the restroom. Instead, a wider stance will increase your subject’s presence in the frame and look better overall.
In the photo above, the male model poses in a seated position and uses his arms to create triangles and keep the viewer in the image.
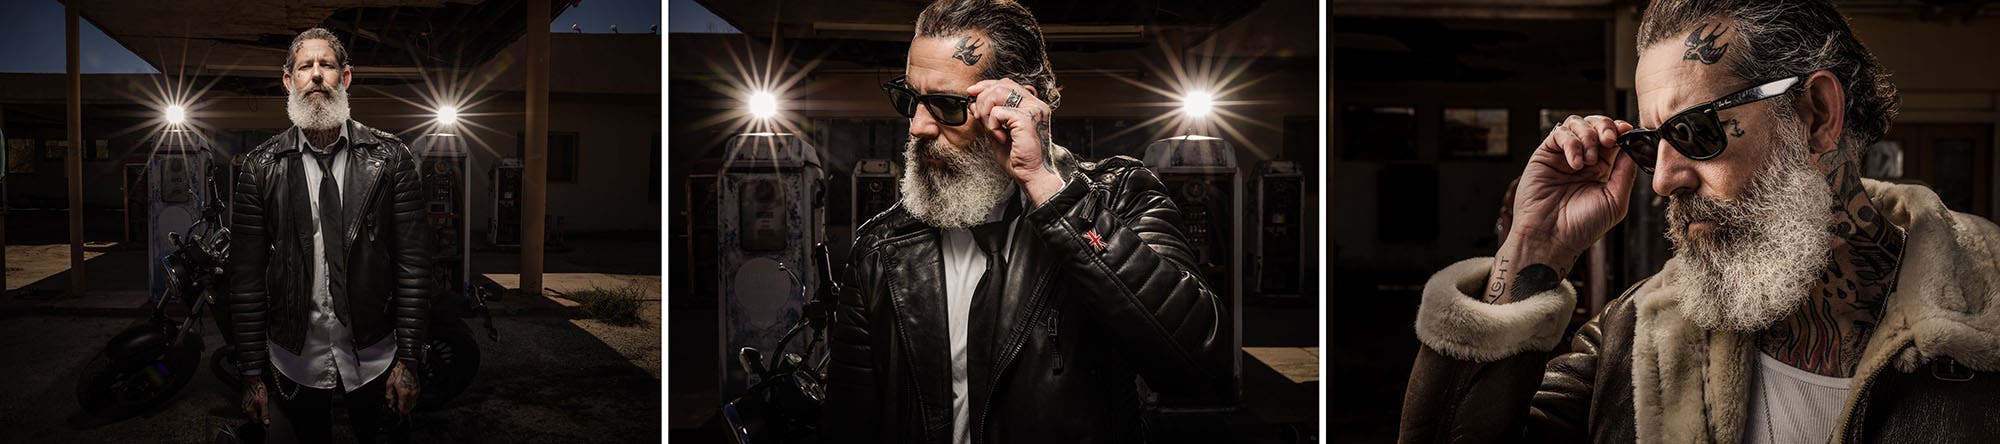
Male Model Pose #4: Up Close for the Headshot
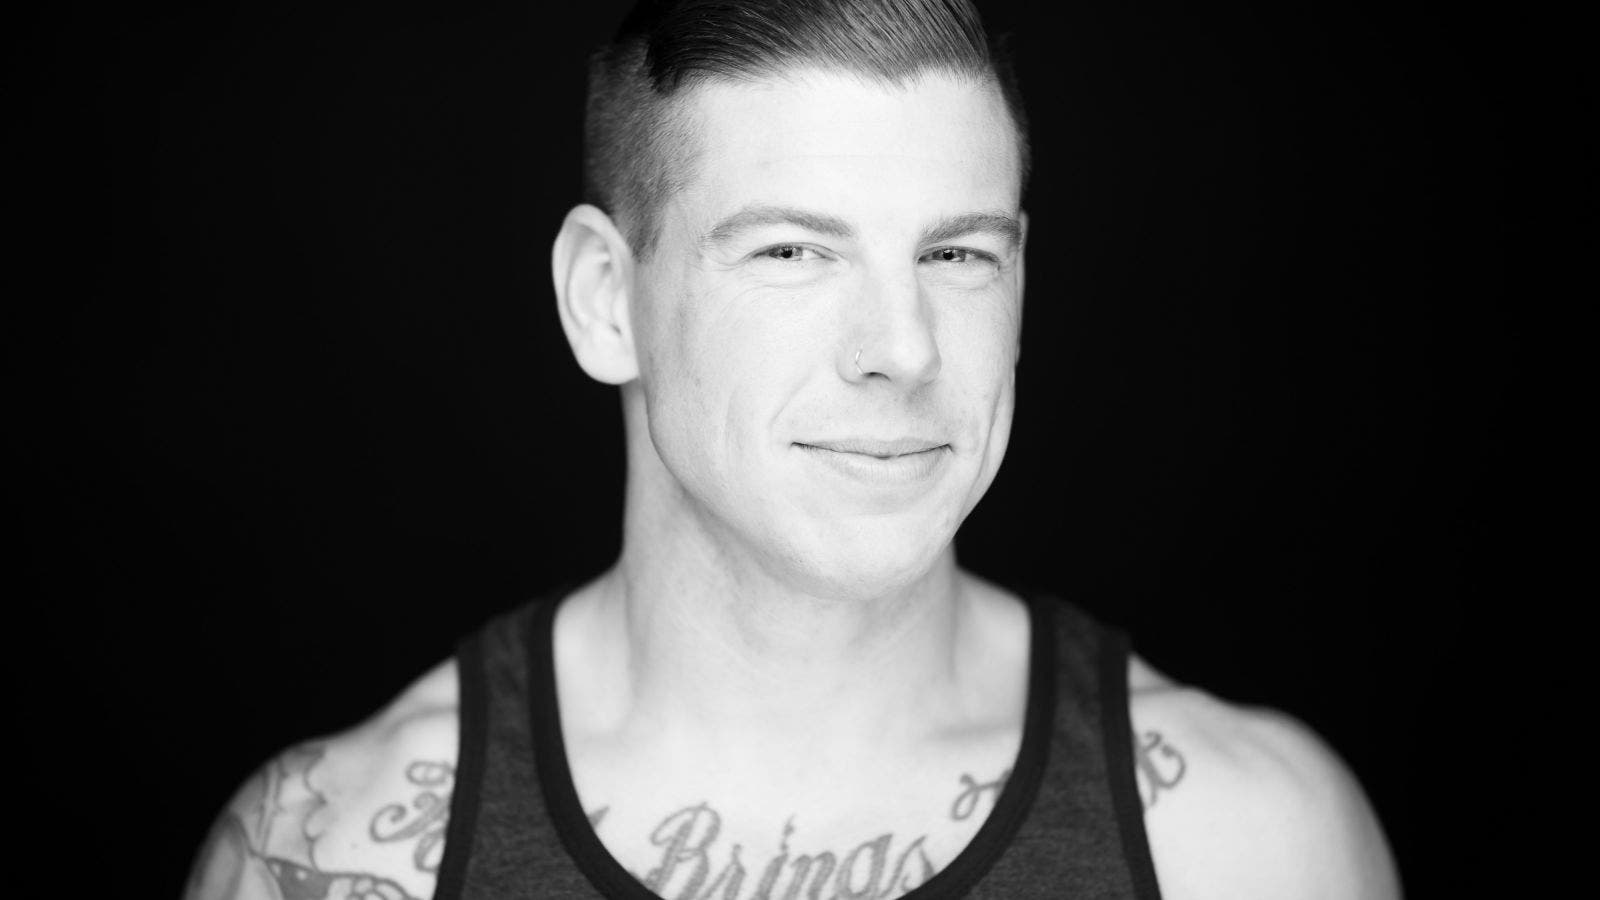
If you’ve ever tried capturing headshots, then you already know a good deal of work goes into getting a perfect shot. Here’s a quick look at the most important factors that will affect the outcome of the final headshot.

- Lighting: There are five basic light patterns that you should be familiar with, and each one looks markedly different from the others. These patterns include flat, butterfly, loop, Rembrandt, and split lighting. When photographing headshots for males, try to use a light pattern and quality that helps accentuate your subject’s jawline. Rembrandt lighting is a good go-to for male headshots. The tilt of the head and angle of the chin in relation to the camera will also affect the appearance of the jawline (and everything else), so pay close attention to how the light is shaping your subject’s features.
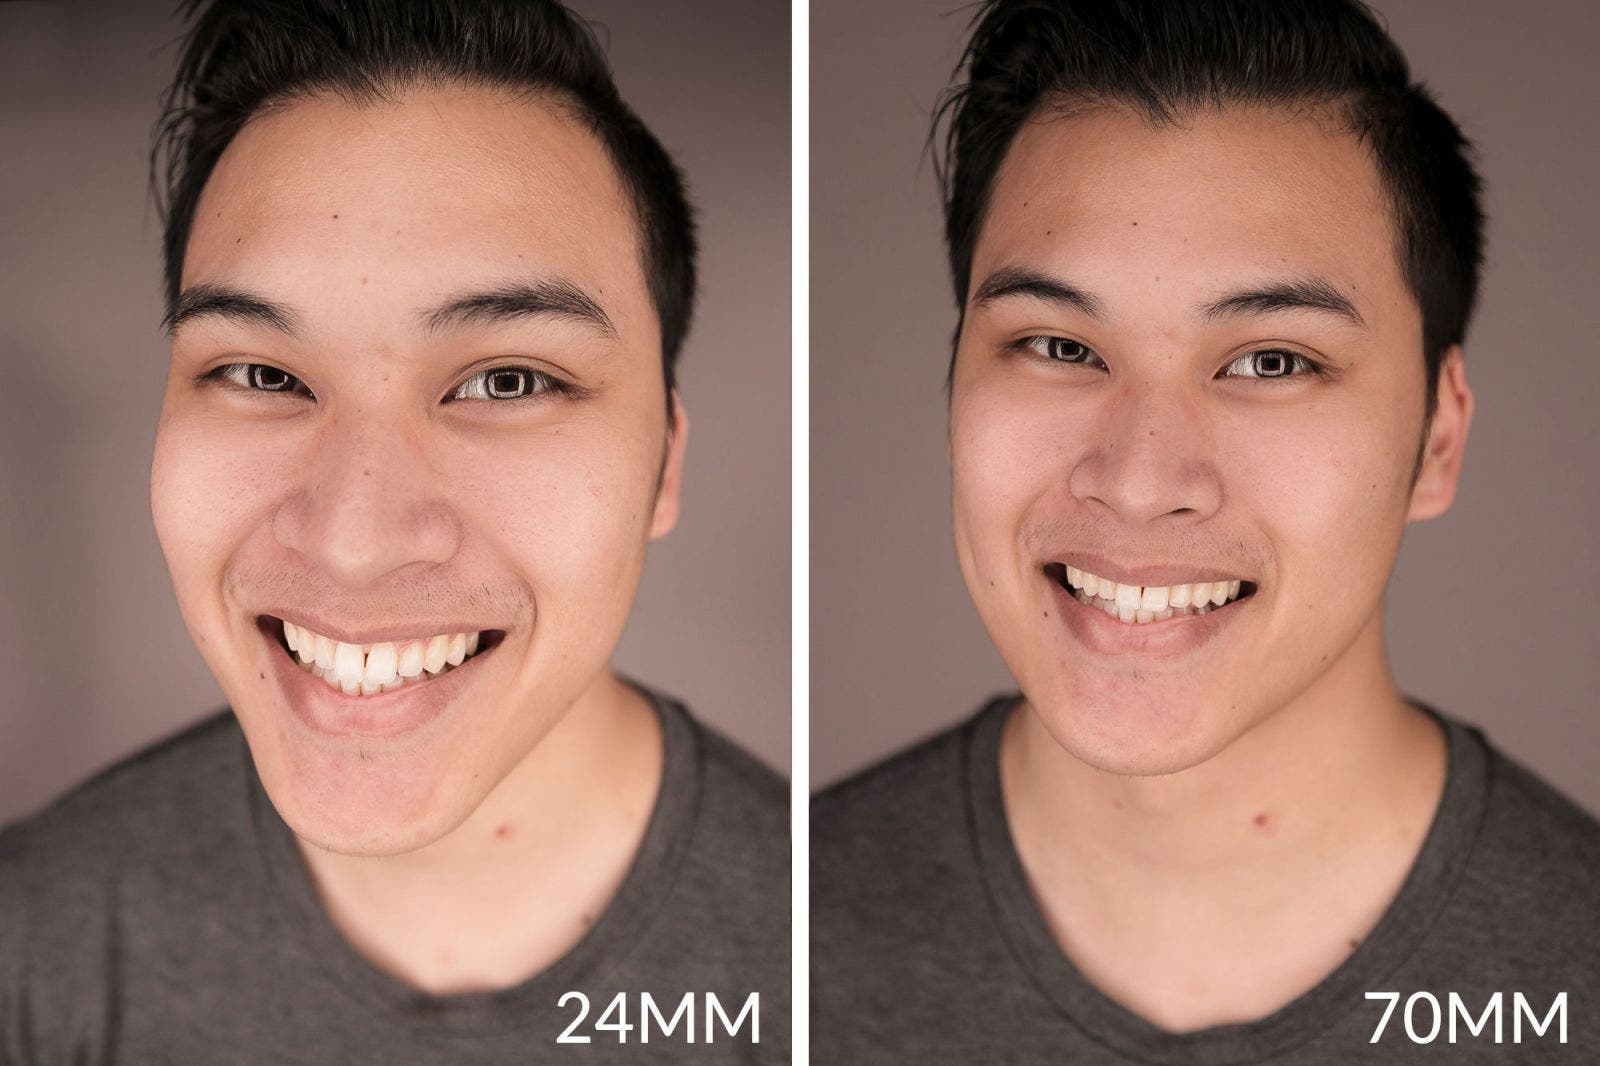
- Focal Length: The effects of compression become amplified in close up portraits like headshots, so you’ll want to use a focal length that compliments your subject’s face. For narrower faces, an 85mm or 100mm focal length will help widen out the face. Adversely, a wider focal length (35mm) will help narrow the face (see examples above).
- Directing for Expression: Communication is important for all types of posing, but it plays an especially key role when it comes to headshots. How you direct your subject will change depending on the look you’re going for, whether it leans more toward a soft smile or a fierce squinch (à la Peter Hurley). The main thing is not to just ask your subject to smile, but rather talk to your subject and focus on thoughts and ideas that will help convey the mood and look you’re after.
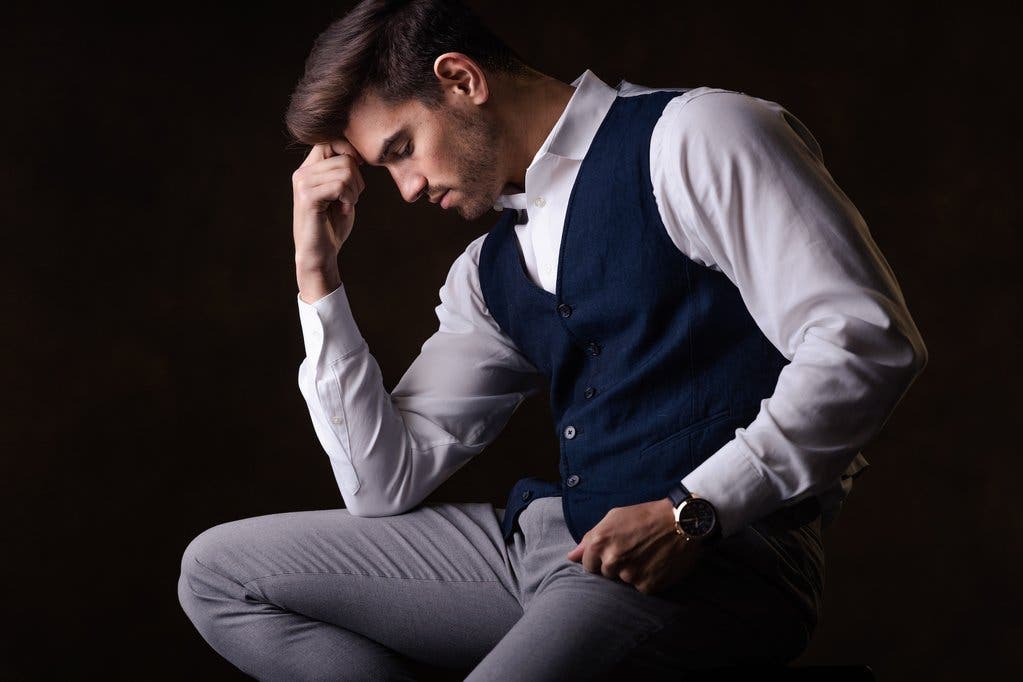
Male Model Pose #5: Standing Out in a Group
Posing does not always have to do exclusively with how our subject is posed. Sometimes, it has more to do with lighting and how we position our subject in relation to the objects around him. Let me explain.
When capturing a group portrait, we typically try to ensure that everyone in the group is equally represented and showcased in the frame. We can switch that expectation up to great effect, however, if we use other subjects as compositional elements within a frame (think foreground elements) to create a more dynamic image and make a hero of our main subject.

As you can see in the example above, which was captured at a wedding, the groom stands out from the crowd of groomsmen. Here are the various elements that have come together to make this an effective “hero” portrait:
- Depth: The use of groomsmen as foreground elements creates depth, and the way they are positioned helps frame the groom. A shallow depth of field, which you can get with a wide open prime lens, also enhances this effect.
- Lighting: Our eyes are naturally drawn to the brightest area in the frame, and the groom clearly stands out in that regard. The sharp contrast of light and dark also adds an editorial vibe to this photo.
There’s nothing wrong with a standard group photo, but it’s hard to deny this technique makes for a more interesting final portrait. “But this tip has more to do with lighting than male model poses,” you might say. This may be true but good photography is all about marrying the technique and the posing with the overall story or purpose. In otherwise, combine the right pose, the right lighting, and the right composition to achieve your vision.
Conclusion
Many photographers, especially those just starting out, try to memorize poses from pinboards only to find themselves frustrated when a pose isn’t working for their subjects the way they hoped it would. At that point, panic typically sets in and the shoot becomes less productive. Luckily, it’s easier than you might think to master posing once you know what to look for. Hopefully, using the tips for the male model poses above, you can walk into your next shoot with a bit more confidence and know that you’re going to get strong, natural looking portraits of your subject without having to rely on memorized poses that you probably no longer remember anyway.