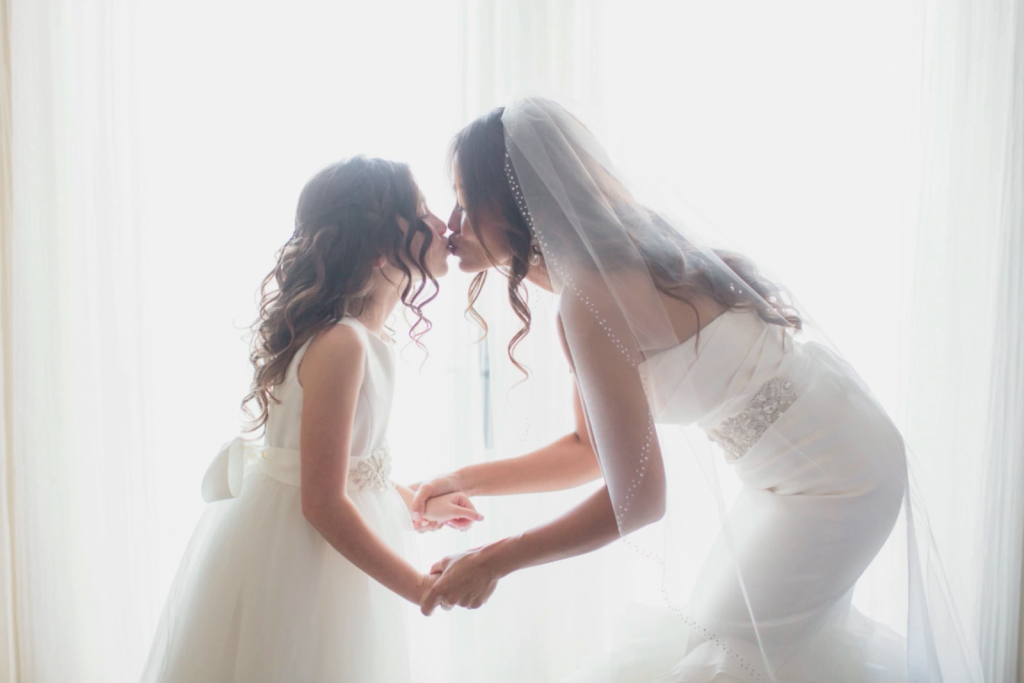
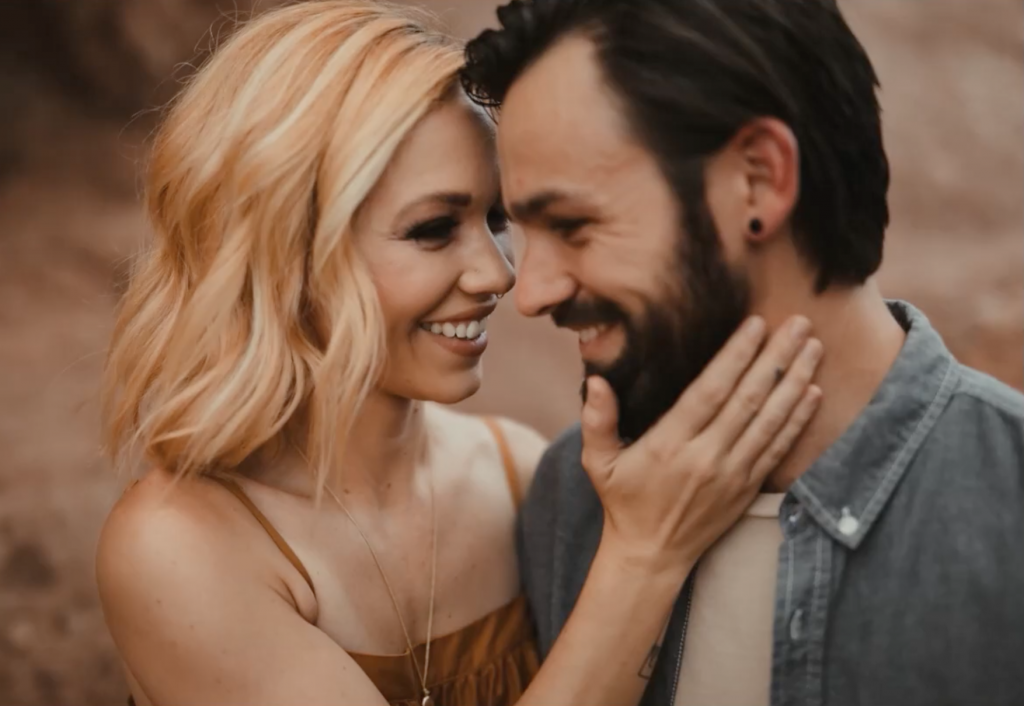
Often described as whimsical and dreamy in appearance, light and airy photography has become a popular go-to for photographers across several genres, including engagement, wedding, newborn, maternity, and family photography. This high-key style takes advantage of soft, bright light, and it has a flattering effect on subjects. People also associate the brightness of light and airy images with happy vibes. This generally complements the content of the photos as well. To help you master this style, I’ve compiled a short list of light and airy photography tips and techniques.
What Is Light and Airy Photography?
In basic terms, light and airy photos use low contrast and flat lighting to soften and minimize shadows. This results in more flattering portraits, especially for close-ups or headshots, as fewer shadows also reveal fewer blemishes. Colors in light and airy photos typically fall on the lighter and more neutral side. Although, bright colors can be used to pop and draw attention to the subject.

While most people associate light and airy pictures with natural light photography, we can also use natural light or flash. We’ll discuss this more when we cover gear and light and airy photography techniques below.
Light and Airy Photography Tips
- Gearing Up
- Choosing a Time & Location
- Setting Exposure
- Using Light Direction
- Editing for the Light and Airy Look
Light and Airy Photography Tips, #1: Gearing Up
When it comes to shooting light and airy photography, you don’t need any specific camera to capture great shots. Film photographers create incredible examples of light and airy shots. Those using smartphones can deliver amazing results as well — especially with a little work in post. That said, using the latest “high-tech” gear can simplify your workflow and give you more flexibility when editing. In fact, I only upgrade gear when my equipment is maxed out in what I want to do with it. If I can do I want more easily with updated features, that’s when I consider making a purchase.
Camera Body & Lens Options
In terms of ideal gear for shooting light and airy photos, I would recommend any newer mirrorless bodies from Canon, Nikon, or Sony. There are other great camera bodies out there from other makers as well. My current favorite setup is a Canon EOS R5 Mirrorless Camera with a Canon RF 28-70mm f/2 L USM Lens. Again, this is ideal but not necessarily affordable for all photographers. For this style of portraiture, use the camera you have on hand — ideally one that allows you to capture RAW files.
Lenses
Perhaps more important than the camera body is the lens. You can use your smartphone camera if that is all you have, but using a prime lens with a wide aperture is ideal. One of the most affordable primes you can get is Canon’s famous “nifty fifty,” or 50mm f/1.8 lens. The reason for using a prime lens is that it will allow you to get tack-sharp shots at wider apertures, which in turn will give you a shallow depth of field and help separate your subject from a softer background. If you don’t have access to a prime lens, however, you can also close the distance between your camera and your subject and increase the distance between your subject and the background. A higher focal length lens (e.g., 50mm, 85mm, 105mm, etc.) will help here, too.
Lighting and Light Modifiers
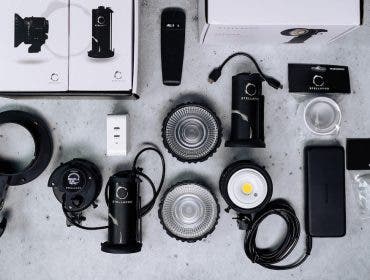
A lot of photographers stick with natural light to capture light and airy photos, which is fine. For the most part, as long as you choose a suitable time and location (and understand how to use light direction to your advantage, all of which we’ll discuss later), natural light will suffice. When working with natural light, a 5-in-1 reflector should provide all you need in terms of modifying the light.
On occasion, however, you might find that the lighting is less than ideal, or you’ll run out of time and the sun will dip below the horizon. In those instances, it helps to take along a bit of flash power to recreate golden hour, or more specifically, golden hour. It helps to have a couple options to cover various scenarios, such as adding a kick of light indoors or recreating the sun, as I mentioned. Here are a couple suggestions.
Shooting Indoors
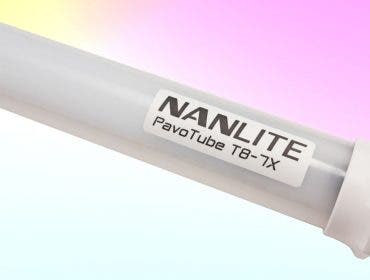
You won’t need to add too much light when shooting indoors. In fact, a basic speedlight with 50-60 watt seconds of power should do. Check out options from Flashpoint, Profoto, or your camera’s brand, depending on your budget. Just bounce the light off the ceiling or walls (assuming they’re white) or use an umbrella or softbox to help soften the light.
Recreating the Sun
Overpowering the sunlight on an outdoor shoot will require a bit more power. For this light and airy photography tip, I recommend picking something with something closer to 500-600 watt seconds of power, which could be a couple Flashpoint eVOLV 200 Pros or an XPLOR 600 Pro, or comparable units from other brands. Be sure to take along a portable-yet-sturdy stand and a reflector as well, to help push more light. If you don’t have an assistant, be sure to place some sandbags or even your camera bag against the light stand to keep it steady.
Tip 2: Choosing a Time & Location
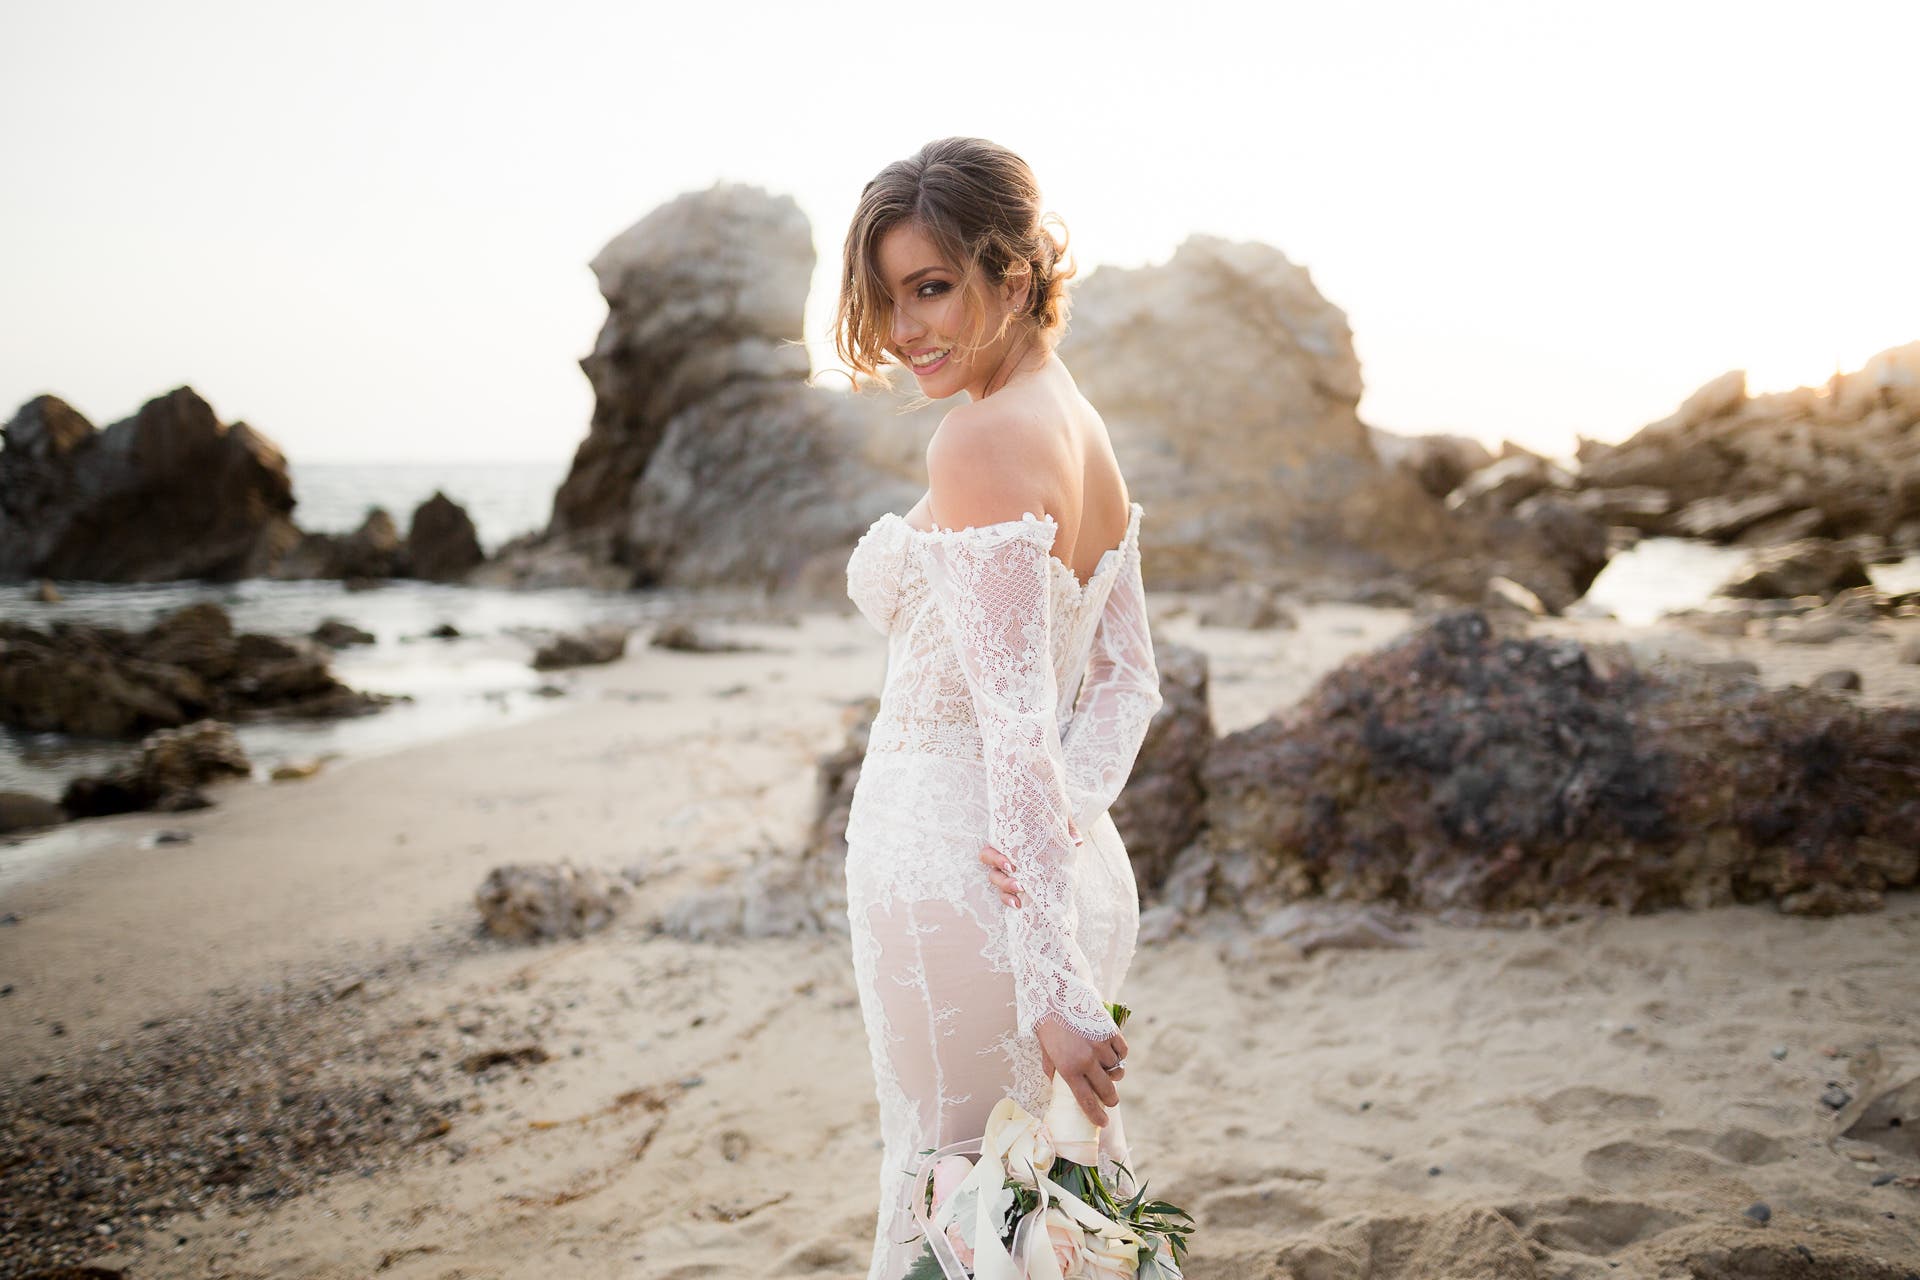
You may have noticed a pattern by now with mentions of shooting around golden hour. Golden hour, which typically lasts for about an hour after sunrise and an hour before sunset, provides a nice soft and warm light source with a low angle that helps reduce harsh shadows associated with the type of “hard light” you’d find around noon. For outdoor shoots, golden hour really is the golden ticket.
In addition to choosing a great time to capture light and airy photos, you’ll also need to choose a suitable location. First, if you’re shooting around golden hour, you may find that the hour ends sooner than expected when shooting around buildings or hilly areas. Wide open spaces or places with large swaths of solid shade – as opposed to dappled lighting, which you’ll want to avoid – will work best. If you’re shooting around buildings, look for light colored walls or open spaces to frame your subject against. And finally, if you’re indoors, look for a nice window to place your subject near.
Light and Airy Photography Tips, #3: Setting Exposure
As the name suggests, these photos will be light and airy, meaning you’re going to lean towards the brighter side when setting your exposure. Light and airy photos are known for being somewhat “blown out,” meaning we lose a bit (or a lot) of detail in the highlights, but we really don’t need to overdo it to get a great shot in this style.
Highlight Alert and Histogram
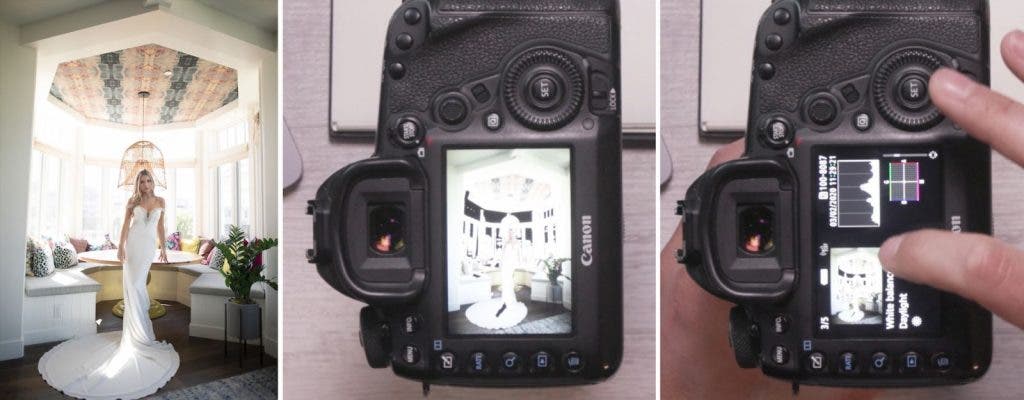
One of the first light and airy photography tips for not blowing out details that you want to keep involves using your highlight alert and histogram. Enabling these features and checking them often will help you capture bright photos that retain an adequate amount of details. The highlight alert will show where you’ve blown out any highlights, and the histogram will let you know when you’ve blown out or clipped any shadows or highlights as well. When used in tandem, these two features can mean the difference between a keeper and an undeliverable image.
Aperture, Shutter Speed, and ISO
I’ve already mentioned using a prime lens for using a wider aperture, which means we’re going to want to shoot as close to wide open as possible, and then adjust our other settings accordingly. There’s no fixed formula as lighting conditions vary, but with aperture set as our priority, we can then set our shutter speed to freeze motion (or not) and keep our ISO low.
White Balance
You can always dial in white balance during post, and in fact your editing style may require a color shift, but it’s best to get it right in-camera whenever possible. Light and airy photos tend to be bright white with a neutral tone and lean toward the warmer side. Check out this guide for a more in-depth look at understanding white balance and getting it “right” for your shot.
Tip 4: Using Light Direction
Understanding light direction is one of the most important things we can learn as photographers, whether we’re shooting light and airy or dark and moody portraits. For natural light sessions, for example, placing the sun directly behind our subjects or directly behind the camera (facing the subjects) can make a drastic difference, but both methods can be used for creating light and airy photos. Or, if the sun is directly overhead, we can still capture light and airy photos when we place our subjects in the shade. Allow me to demonstrate.
Natural Light
With your subject’s back to the sun (or main light source), you’ll likely need to bump your exposure to adequately expose for your subject’s skin. This will automatically create a brightly lit picture. Again, to ensure you don’t go too far with blowing out your highlights, refer to your highlight alert and histogram.
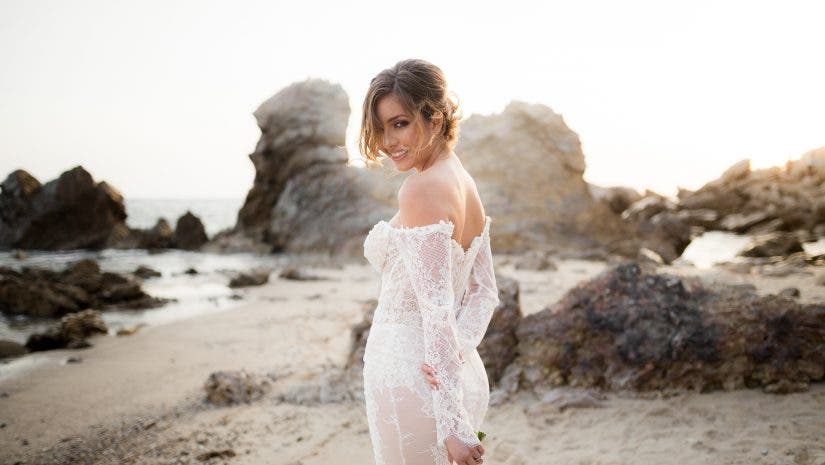
With the sun directly behind us, golden hour and the subjects made capturing this bright and airy photo a breeze. Compared to other light and airy photography tips featured here, this technique works best for candid poses when the subject is not facing the sun. Otherwise, you might capture a lot of squinty portraits.

When shooting your subjects in the shade, it’s important to watch out for (and avoid) dappled lighting, unless you’re intentionally using it for effect. Solid, even shade generally works best. Next, find an angle that places your subjects against a brighter background, ideally with the sun to their backs, dial in your settings as mentioned above, and capture some great pics.
Flash
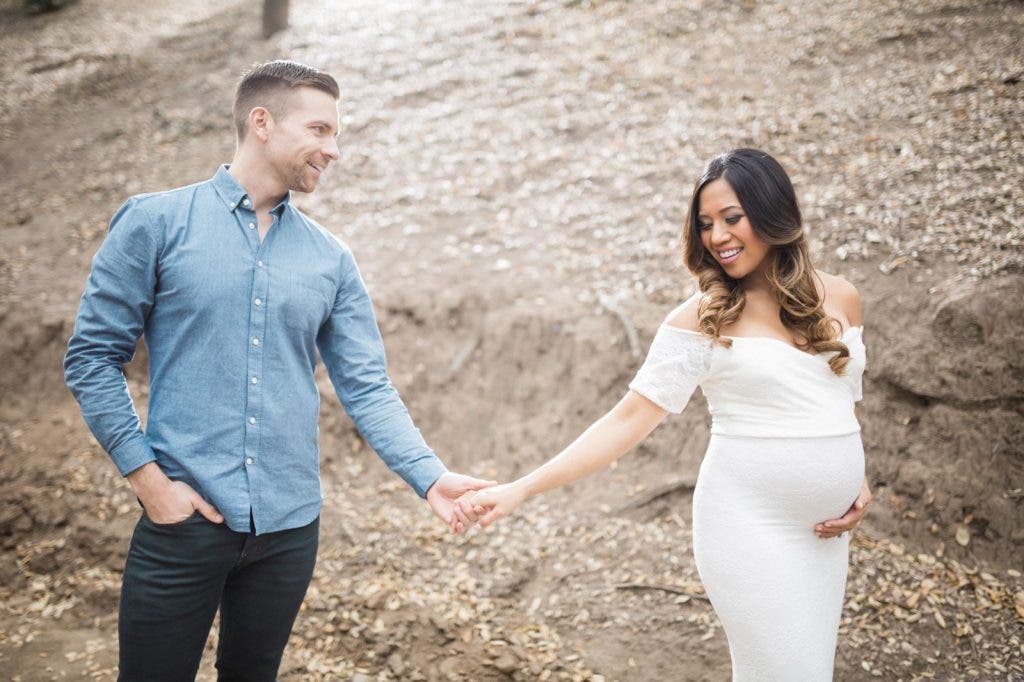
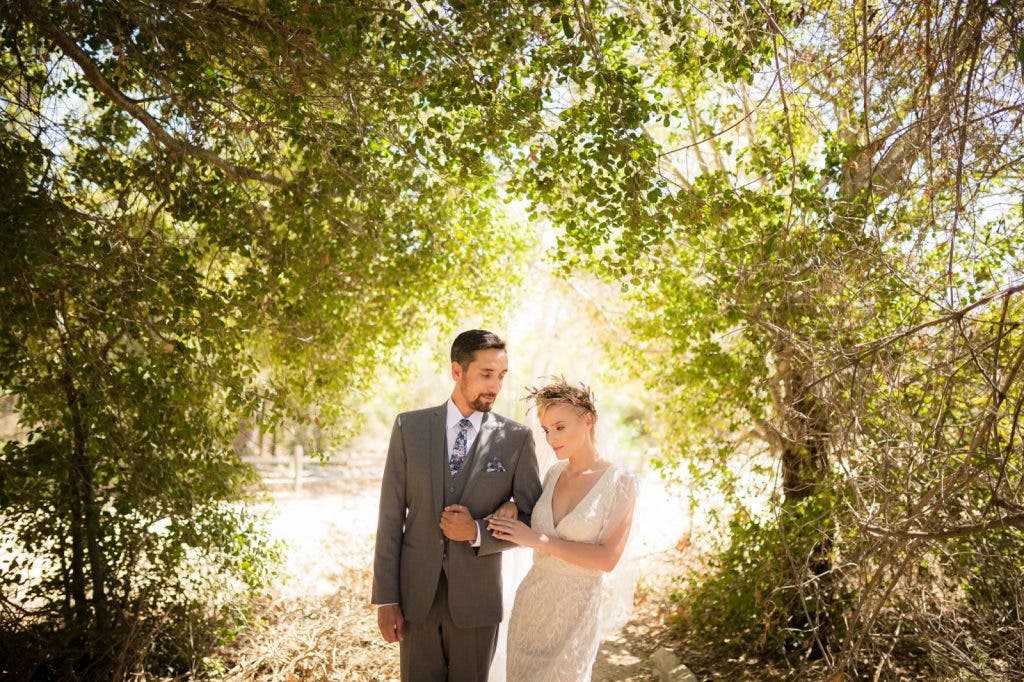
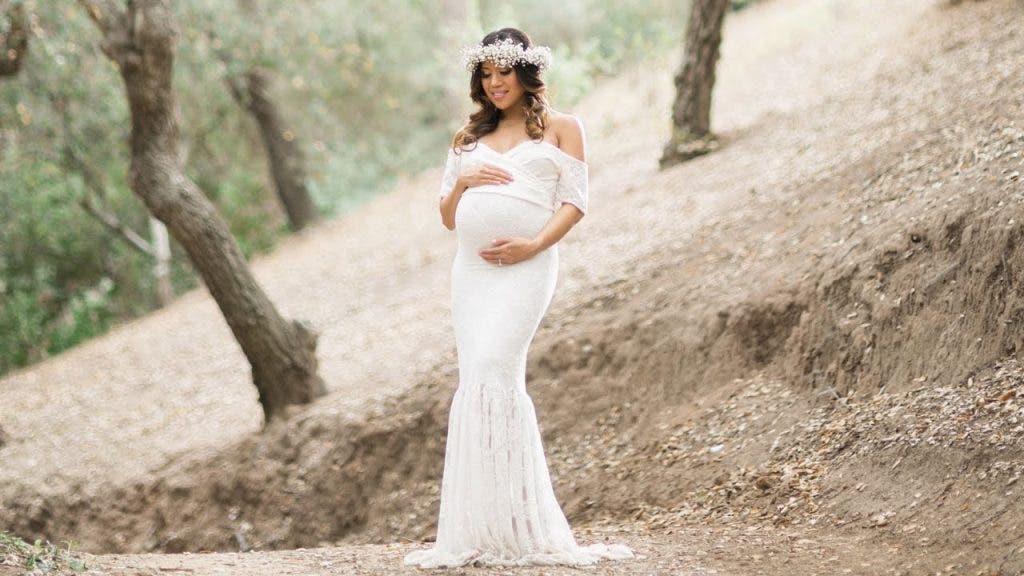
In the session featured above, we had been shooting a series of maternity portraits with the sun peeking through the trees, and it created a nice rim light on the subjects. After about 20 minutes, however, the sun disappeared behind the hill.
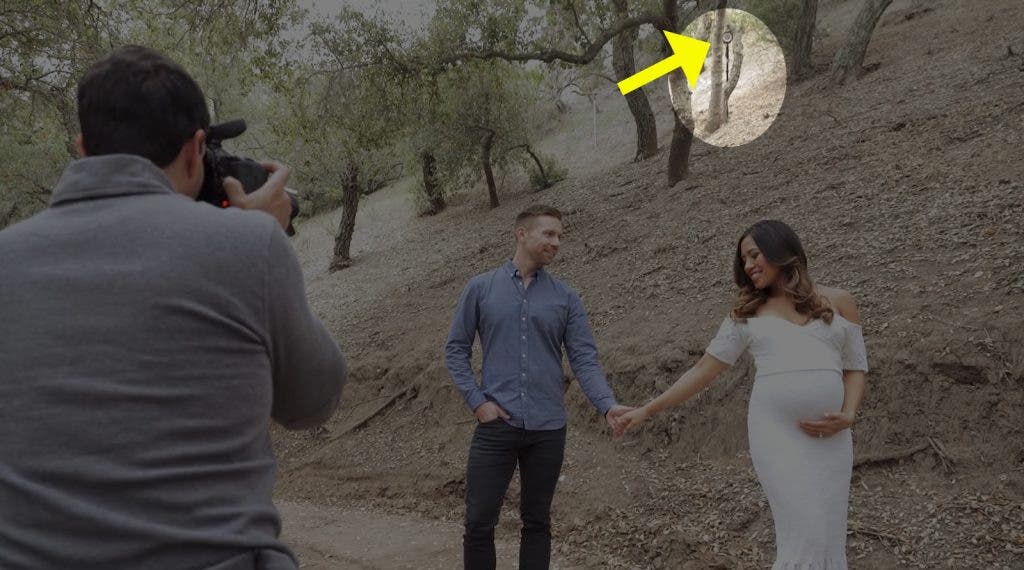
I set up a Profoto B1 on a light stand and placed it about 30 feet behind the couple. I didn’t have a reflector to spread light across the scene, so I used a ring mount from a softbox. It wasn’t ideal, but it got the job done.
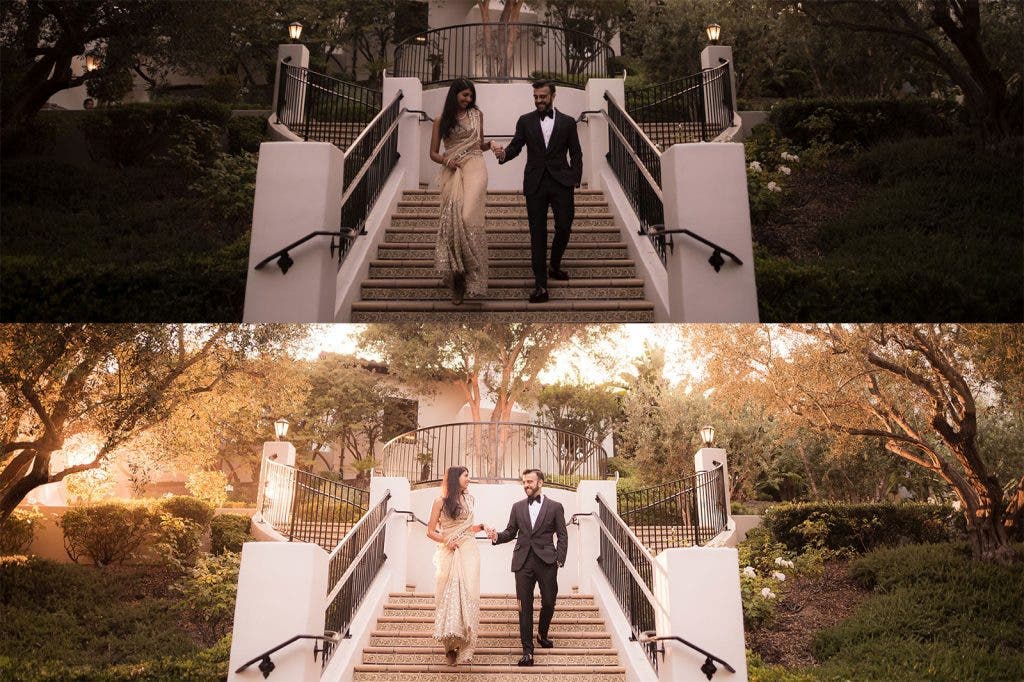
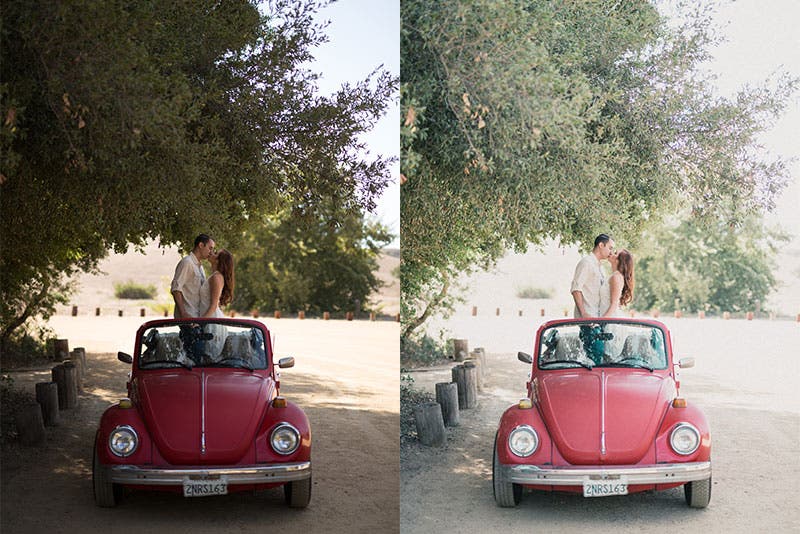
In another example above, we used a similar technique. Here, you can clearly see what a difference the the added light made (with a bump in exposure in post). It still looks like a naturally lit light and airy photo.
Light and Airy Photography Tips, #5: Editing for the Light and Airy Look
The easiest way to edit light and airy photos is to get it close to right in-camera. Then, you can apply a suitable preset. Many light and airy photos share a similar color scheme with pastel color grading, but it’s not a must. The same is true for adding a filmic grain. You can get great shots with or without it.
And now for the post-production step of our light and airy photography tips. Editing plays a major role in creating this style of photography. Remember what we said at the top about low contrast and such. With powerful editing software like Lightroom, you can fine-tune your image and prep it for print or digital consumption.
Creating Your Own Light and Airy Preset
If you don’t have any presets, you can always make your own. But first, you’ll need to know which adjustments to focus on.
Tips for Making Your Own Presets
- White Balance: Lean toward a warmer white balance (5000K+).
- Highlights: If the image is underexposed, you can bump the exposure and the highlights. In case the highlights were blown out in-camera, back the highlights off and see which details you can recover. You might begin to notice posterization when adjusting your highlights and exposure. To fix this, use the tone curve to flatten the highlights a bit and lower the contrast. See the Tone Curve suggestion below.
- Contrast & Shadows: We want to minimize the contrast and shadows, but just like the highlights, the amount we’ll need to adjust these sliders will vary based on how we captured the image.
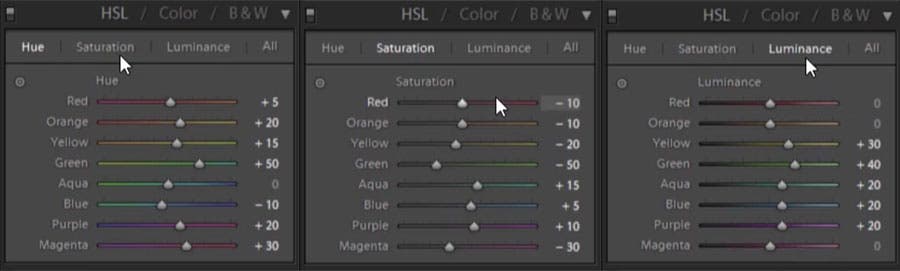
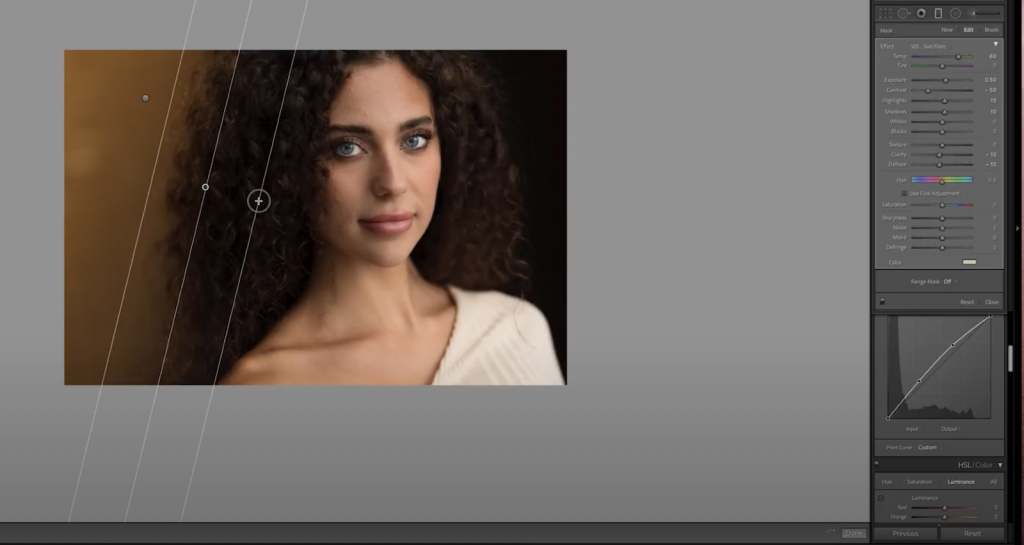
- Colors: Many light and airy photos use a pastel color scheme, similar to old film styles like Fuji 400h or Ilford HP5. Adjust your HSL (Hue, Saturation, Luminance) settings to get the look you’re going for. In the image below, you’ll see a basic pastel color adjustment used in the before/after above. I pulled the greens to teal hues, reduced the saturation in the greens, and brightened up most of the colors, with the exception of the reds.
- Tone Curve: First, create a subtle S-curve. Then, lower the highlight point to flatten the highlights and raise the black point to fade the blacks.
- Profile Correction/Radial Filter: To eliminate vignetting, apply a profile correction or inverted Radial Filter to brighten the edges.
- Lens Flare Brush: A subtle lens flare effect can make a notable, positive difference in light and airy photos. If you don’t have a lens flare brush, refer to the image below for an example provided by Vanessa Joy. Dial in those settings and save the new brush.
Save Your Preset
Experiment with various photos of your own, focusing on the adjustments mentioned above. Then, save out your presets when you find a look you like. A single preset may not work across all of your light and airy photos as lighting conditions vary. However, each new preset you create should go a ways toward editing the session you created it for.
Conclusion
I hope you enjoyed these light and airy photography tips. If you know what to look for, you can easily create light and airy photos in any setting. Post-production can play a significant role in the outcome of your light and airy photos. In fact, you can make a so-so image great with the right edit. Check out this video from Vanessa Joy on Adorama TV for tips on how to shoot (and edit) both light and airy photos and dark and moody photos in the same location!