
Like a special ingredient that makes all the difference in your favorite dish, lens flare can add a dash of flavor to your photos and take them from so-so to incredible. Lens flare is the term used to describe non-image forming light that “leaks” in through your lens, reflects off of various lens elements, and then hits your sensor to create a flare in your photograph. Many photographers use a lens hood and filters to try and minimize lens flare, but the effect can actually be used to enhance our photos. With basic tools and a bit of creative inspiration, we can capture lens flare using the sun or with artificial means and instantly enhance our imagery. Below, we’re going to share seven lens flare tips for creative photos that you can use today!
Lens Flare Tips for Creative Photos
- Use the Sun for Natural Lens Flare
- Watch Your Angles
- Adjust Your Aperture
- Create a Ring of Fire
- Re-Create the Sun with Flash
- Capture a Lens Flare at Night
- Finalize the Lens Flare in Post
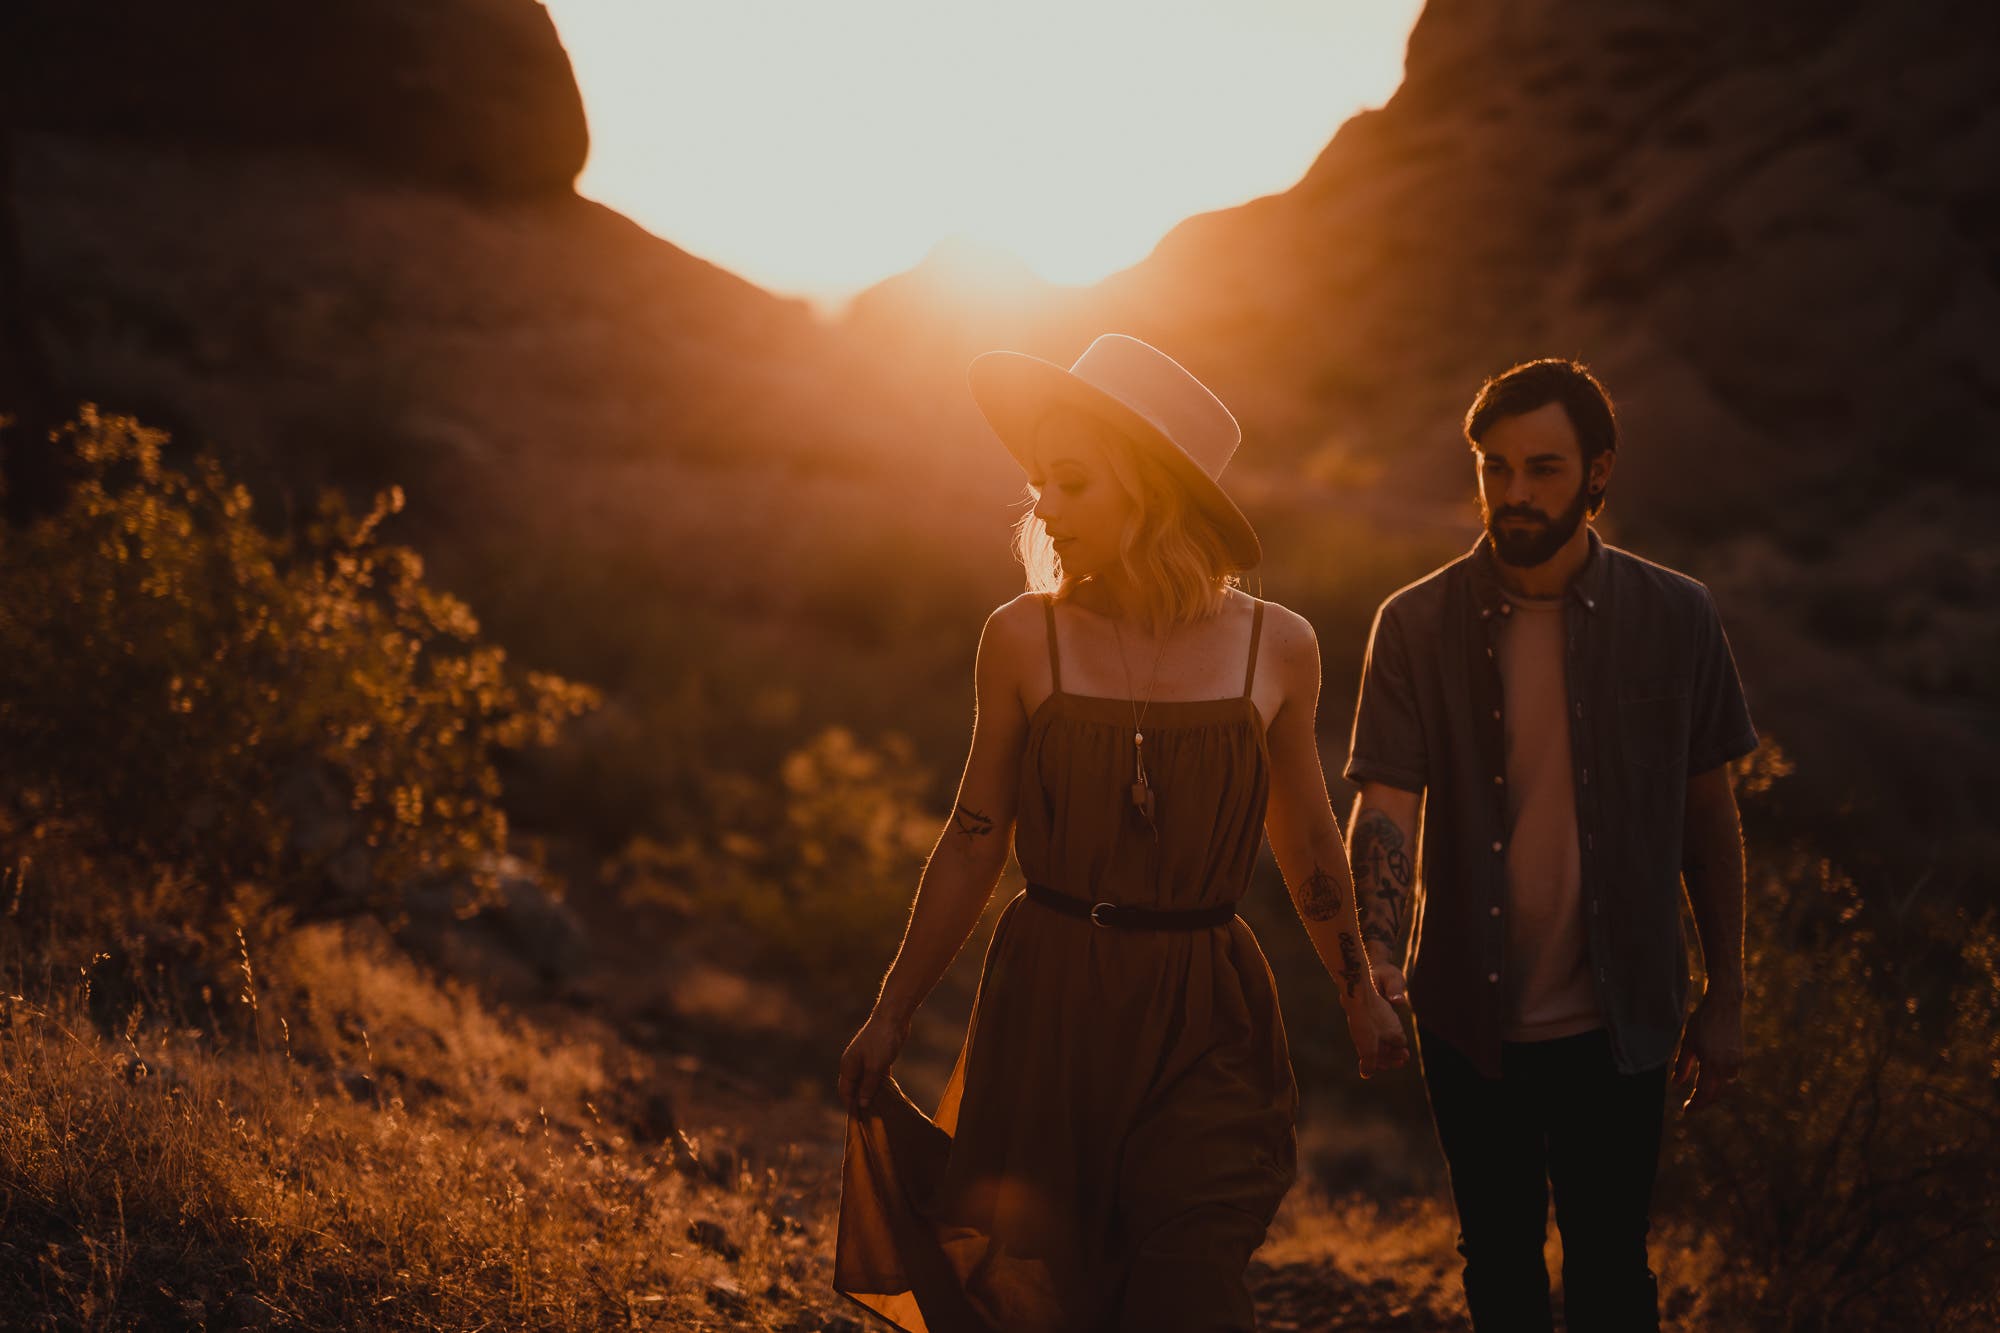
1. Use the Sun for Natural Lens Flare

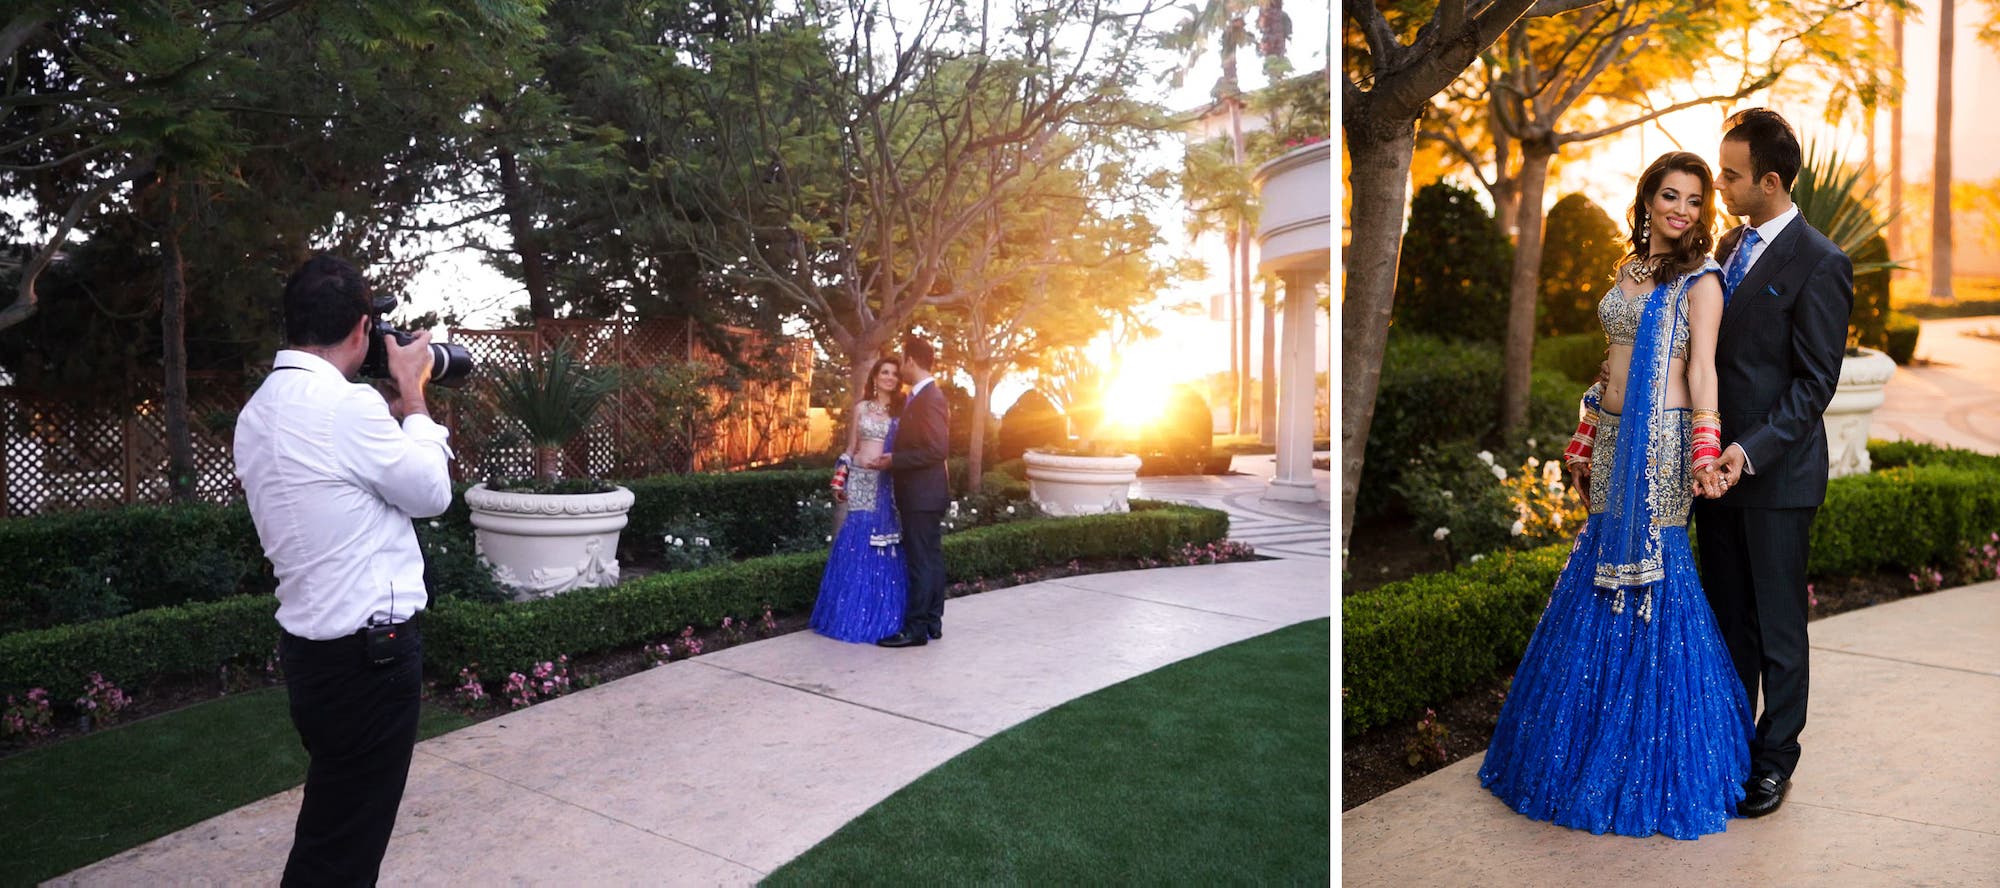
Let’s start with a good ol’ fashioned, natural light source to kick off our list of lens flare tips for creative photos. The sun makes for an obvious choice for creating lens flare in-camera. So long as you schedule your shoot accordingly and the weather conditions cooperate, you can use the sun to generate this creative effect. I recommend using a specialized app like Sun Surveyor to schedule your shoot around golden hour and ensure your best chances of shooting in ideal conditions for capturing lens flare. Of course, if the sun doesn’t come out, you can use tip #5 below to re-create your own lens flare.
Lens Flare Tips for Focusing
Assuming the sun does come out, you’re going to shoot almost directly into it. You will typically want to backlight your subjects and keep the sun above and behind them. Because such a bright light source is aimed directly at your lens, you may need to try a couple different techniques to lock in tack sharp focus on your subjects. If your autofocus is not cooperating, switch to live view (if you have it) and use manual focus and try to lock in focus that way. In the event this doesn’t work for you, consider focusing elsewhere on the same plane, locking focus, and recomposing your shot. One of these two methods should get you where you need to be. Results will vary, of course, depending on the camera and lens you’re using.
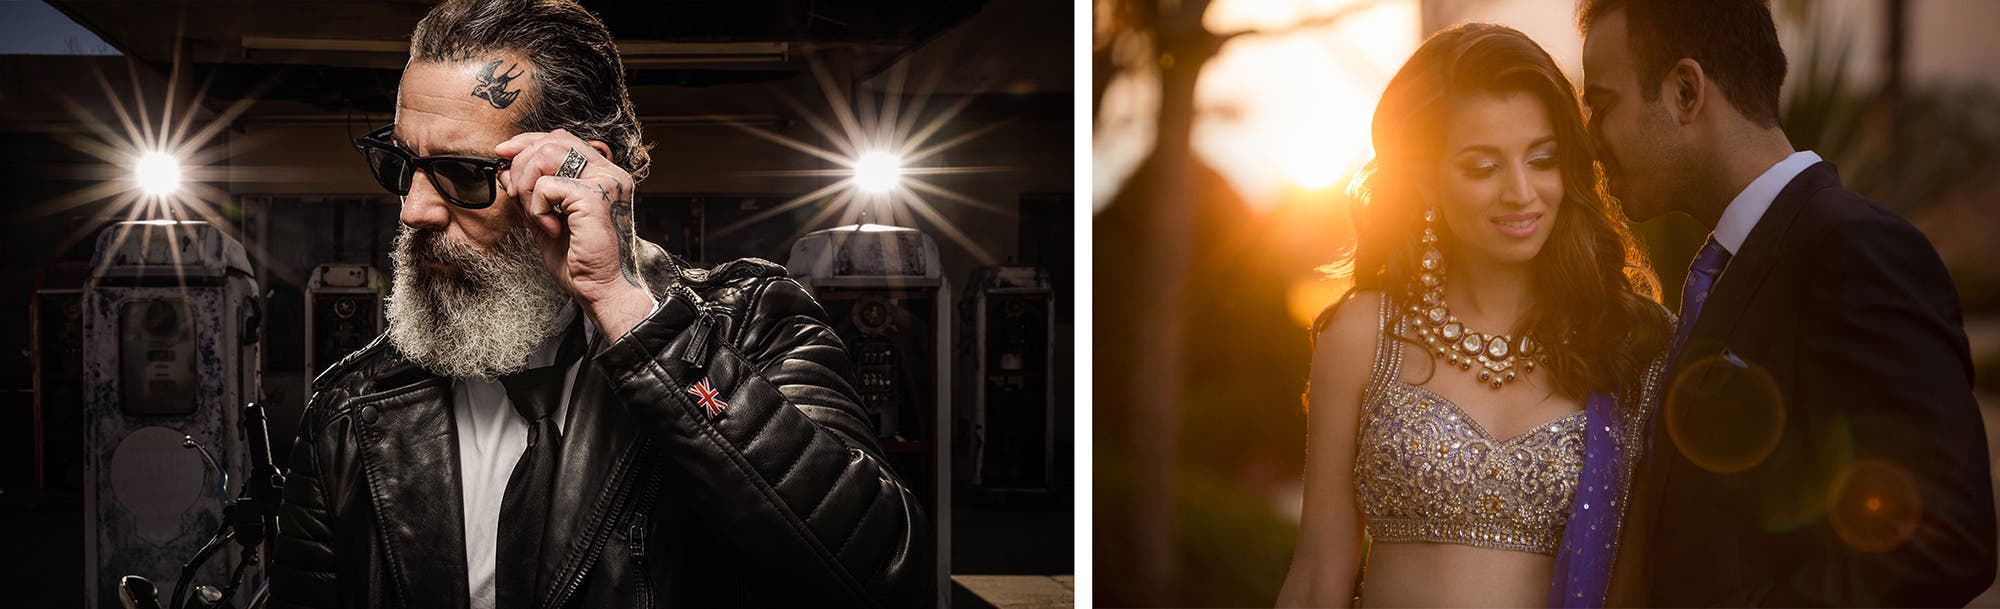
2. Watch Your Angles
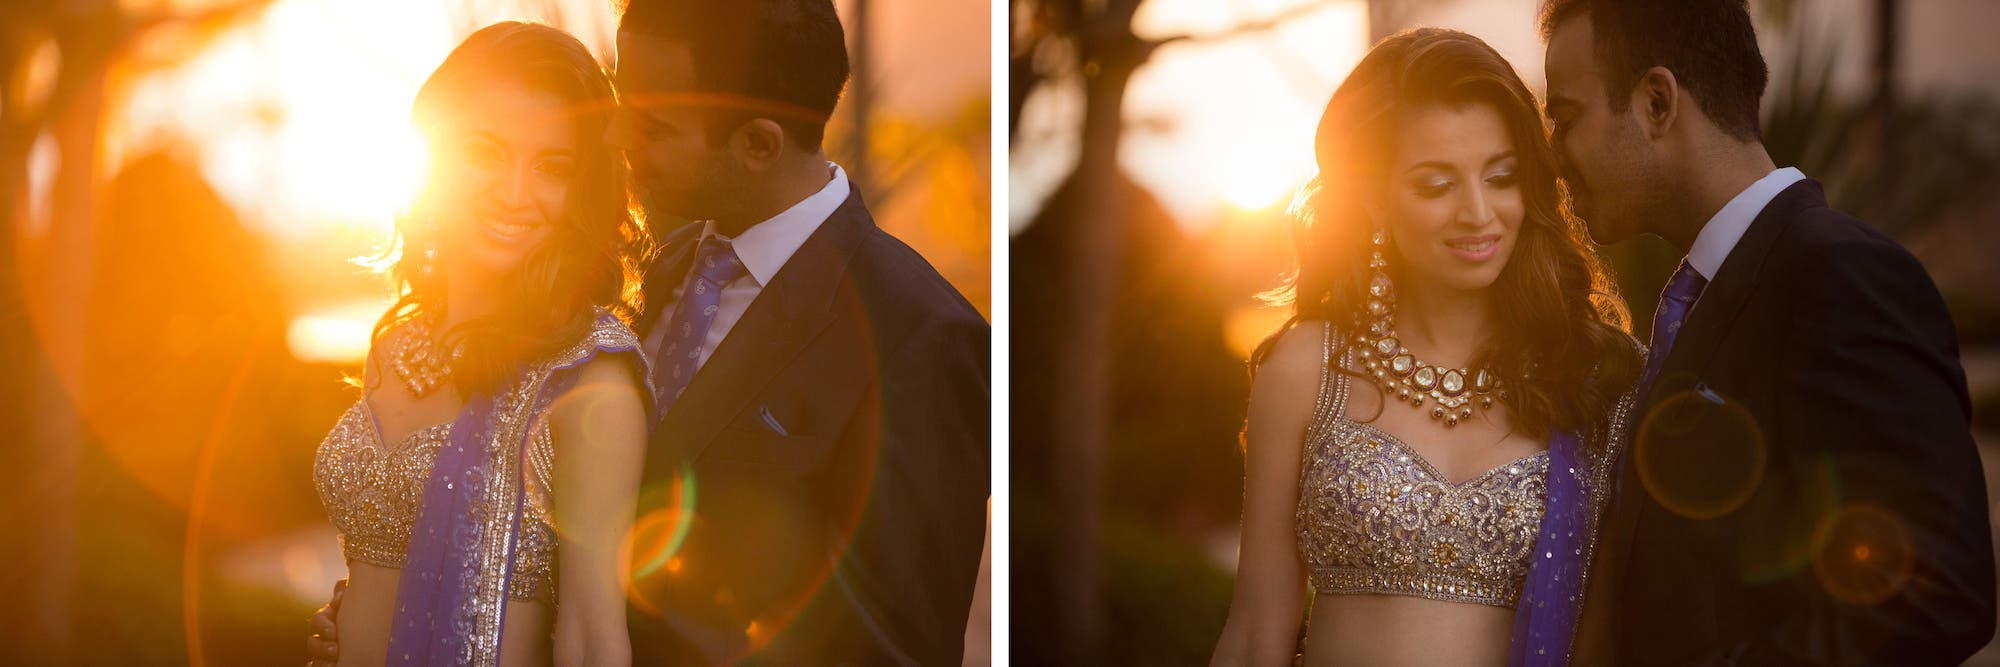
It’s easy to get carried away and bathe your subjects in a blooming lens flare, but if you’re not careful, your photo may look too bright or washed out. It’s important to partially block the light entering the lens, enough to maintain contrast and avoid completely washing out the details. Try to avoid turning the flare into a distraction, which can happen, for example, when you place it over your subject’s faces. Experiment with different angles until you get just enough of this dramatic effect without causing overexposure in other areas of your image. I also recommend taking several shots to ensure you get some quality keepers in the set.
3. Adjust Your Aperture
Not all lens flares look the same. If you adjust your aperture, you can change the size and shape of the lens flare you’re capturing. I mentioned a “blooming lens flare” in the tip above. This happens when you shoot with wider apertures. You can capture beautiful, cinematic lens flare portraits this way, but you can achieve different looks just by switching up your aperture settings. A narrower aperture, for instance, will result in more of a starburst effect with rays shooting out from the center of the light source.
4. Create a Ring of Fire
The Ring of Fire isn’t just a great Johnny Cash song. It’s also a term used for photos that use a special tool to create a dramatic lens flare. What is the tool? More often than not, photographers use something like a ¾” to 1″ tube with a 1″ diameter, which you can pick up at your local hardware store.
Ring of Fire Lens Flare Tip
To achieve this look, place the copper (or metal) tube in front of your lens, between your lens and the light source, and move your camera around until you get the perfect flare. If your camera has a live view feature, use it, especially when trying this trick.
Here’s a video I made on how to use a DIY flare ring for Adorama’s YouTube channel:

Lens Choice
For ring of fire shots, I’ve found that wide aperture prime lenses in the 35mm to 50mm focal length range work best. Lenses come with different coatings that will affect how well it works for capturing lens flares. For instance, new lenses usually feature more advanced lens coatings that work to prevent lens flare. As a result, you might be better off trying this effect on an older lens. Give it a go with what you have, however, before going out to buy new gear.
5. Re-Create the Sun with Flash
Although we typically associate lens flare in photos with certain times of day, like golden hour, this dramatic effect is actually quite versatile and can be used anytime, anywhere. All we need is a little bit (or about 200 watt seconds or more) of off-camera flash power.
The most important part of re-creating the sun with flash is to match the existing light direction (where the sun actually is or would be in the sky) and covering enough of the background to make it look convincing. This means you might need to shoot tighter frames to eliminate bits of the environment that you are unable to light with your off-camera flash. In addition, place the flash far enough away from your subjects to backlight the elements that do make it into the frame. This is why I said you’ll probably need something like a Flashpoint eVOLV 200 or Profoto b10 to create adequate lighting. I also recommend placing a CTO (color temperature orange) gel over the flash to mimic the warm color of the sun.
I talk more about this technique in this article on golden hour photography. Check it out for more tips and inspiration.
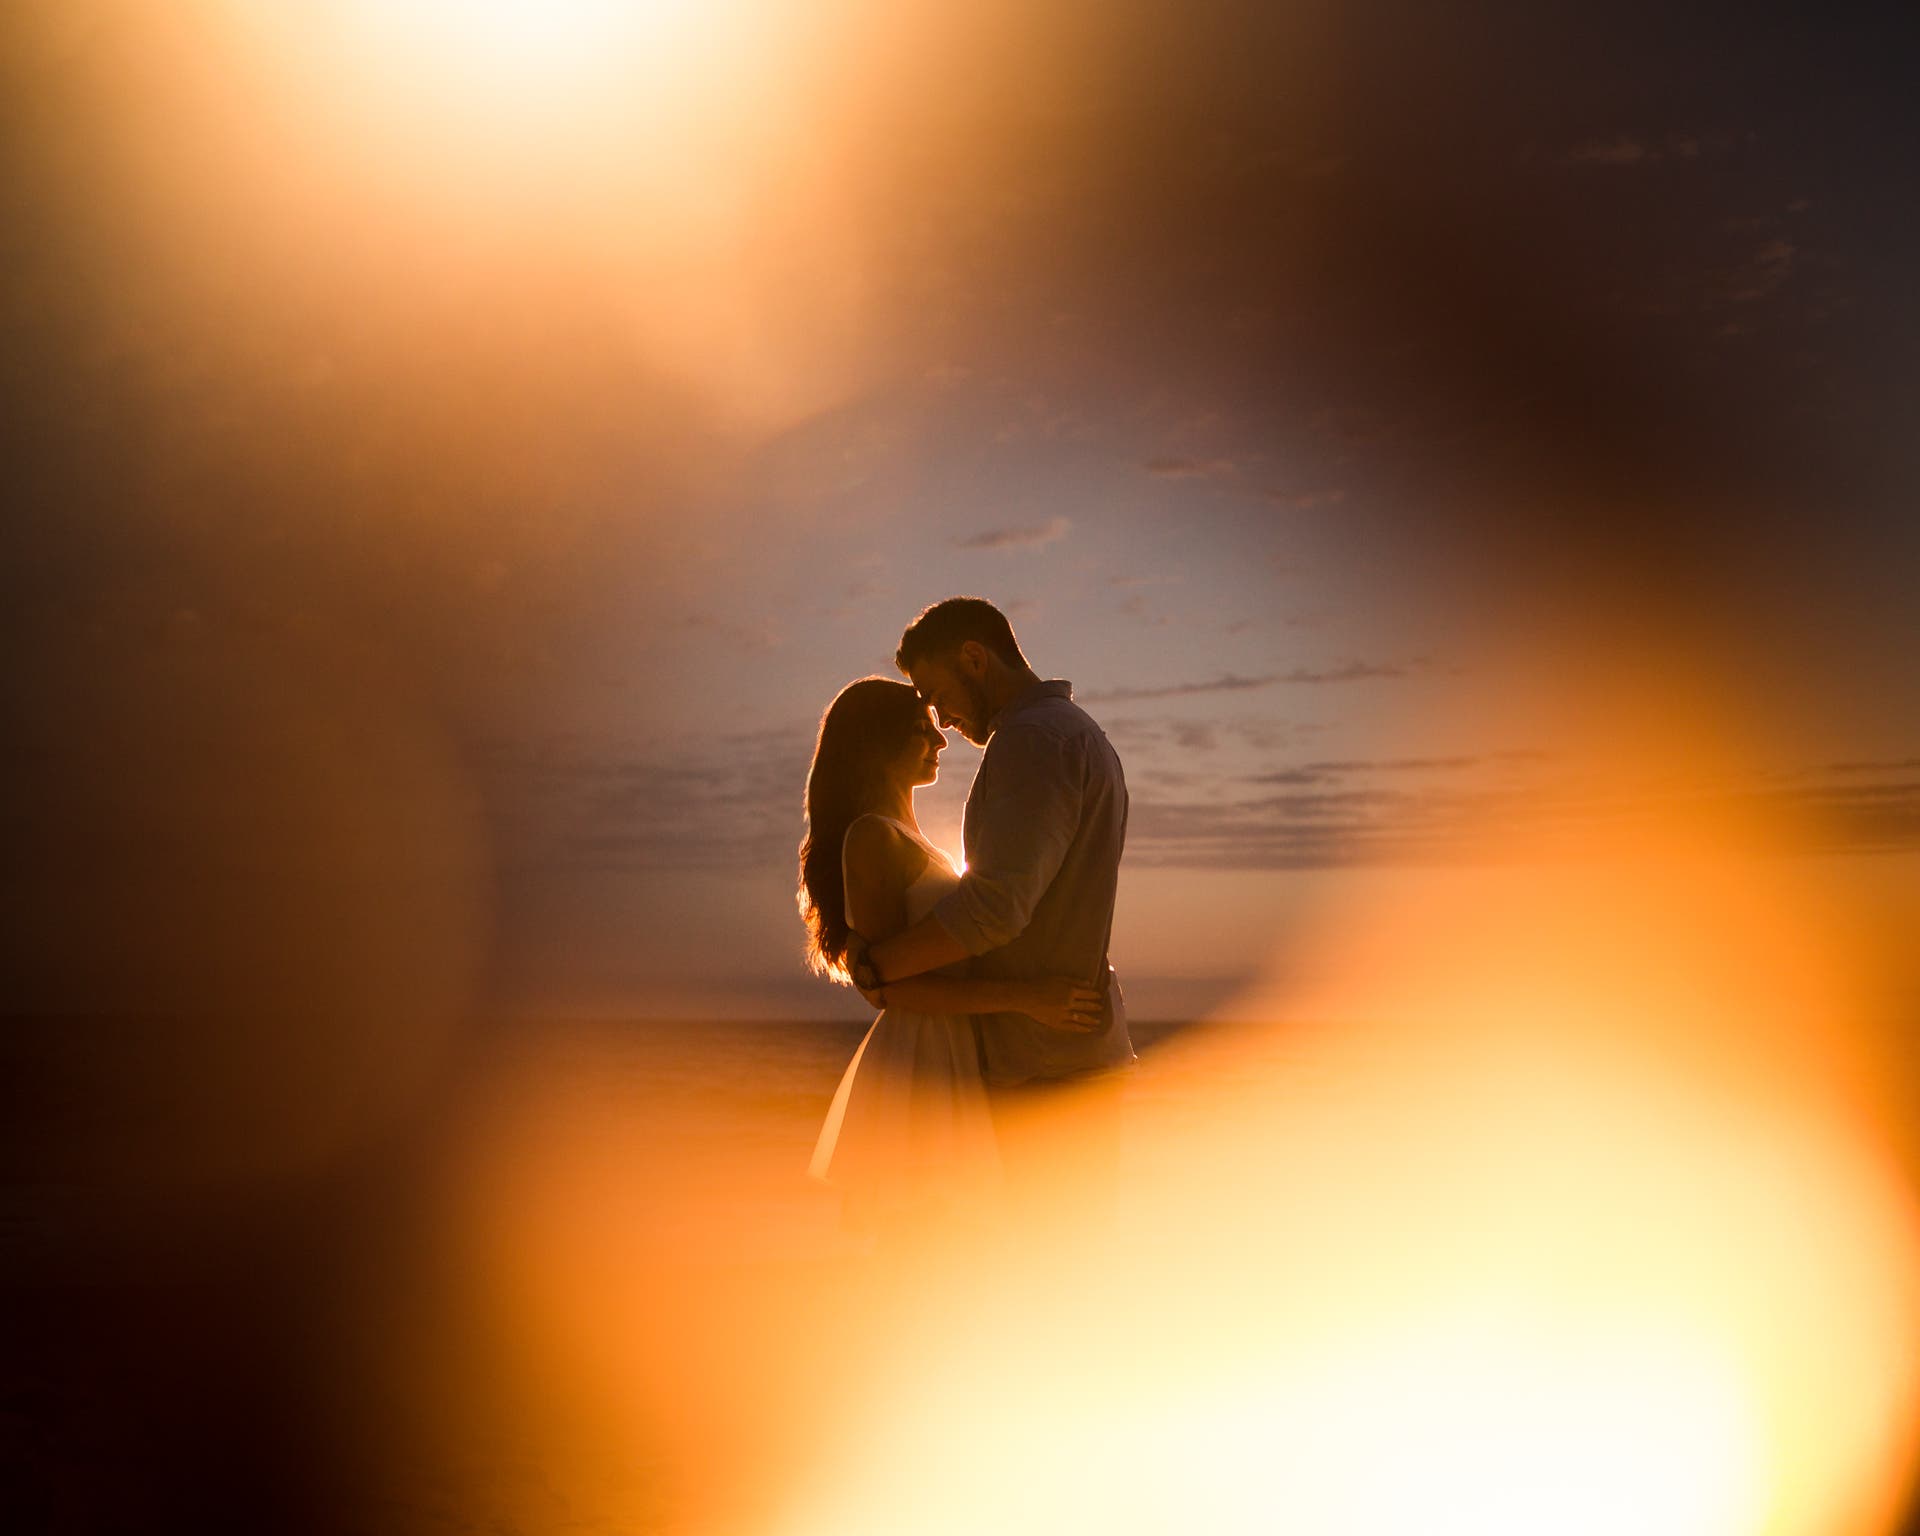
6. Capture a Lens Flare at Night
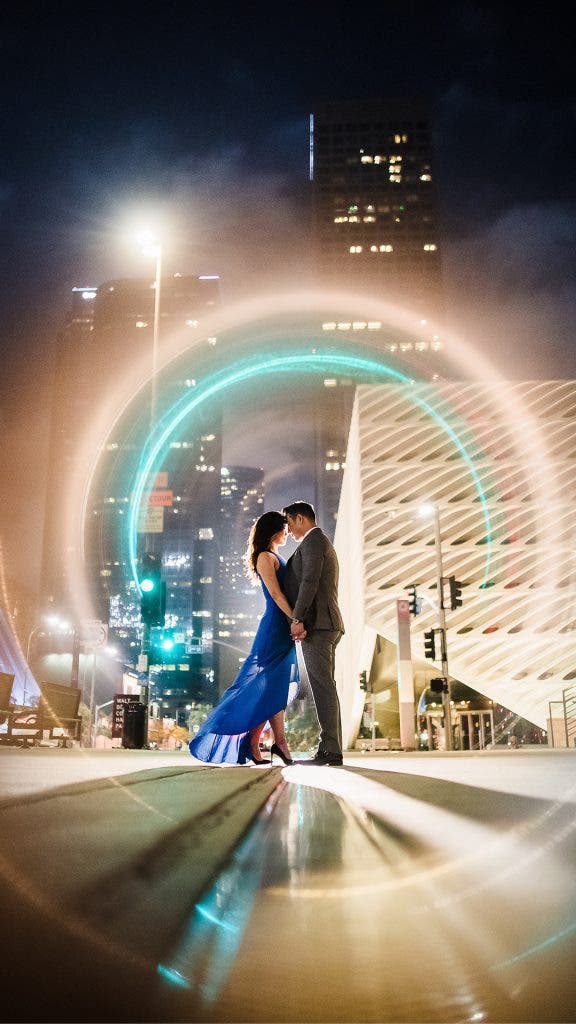
We’ve talked about capturing lens flares during daylight hours, but what about at night? Night time lens flare effects are a little different, and it’s worth playing around to find the perfect effect. Even though the sun is down, you can still use available light in your scene and/or off-camera flash to create lens flares after dark. We’re not out to re-create the sun, however. Instead, we’re going to use the flare to create a unique nighttime portrait.
Location and Basic Exposure Settings
I recommend finding a location with street lights and buildings, if possible, to make the most of this technique. When shooting at night, you’re likely going to push your camera’s low light capabilities in order to get a decent exposure. For the image above, I used the following settings: 1/100th of a second, f/1.4, and ISO 3200.
Light Placement
Again, for the image above, I used a Profoto B10 with a gel and grid, and I placed it about 10-20 ft. behind the couple. With the bright exposure settings I already mentioned, I didn’t need much flash power. I dialed in a lower flash power, which also helps minimize recycle time between shots. Finally, I placed the copper tube over the lens, found my angle, and captured the shot.
7. Finalize the Lens Flare in Post
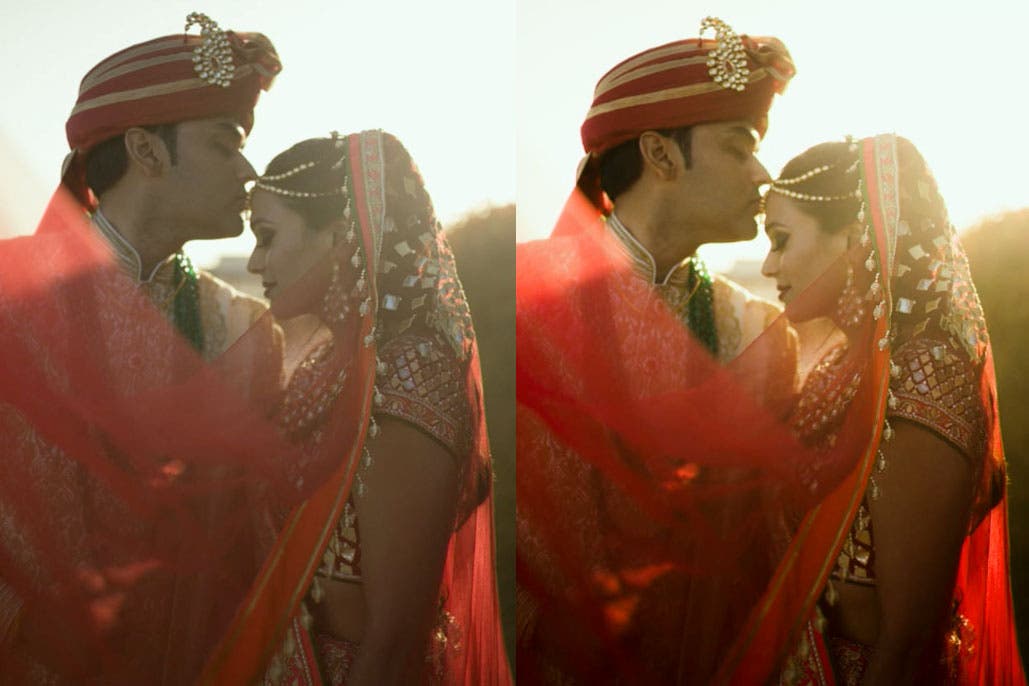
Now that we’ve covered how to capture lens flare effectively in-camera using natural and artificial light sources, let’s take a look refining (or even creating) this effect during post-production. Using editing software like Lightroom and Photoshop, we can make quick work of enhancing our lens flare and getting the look we want.
Here’s a look at the main tweaks we’re going to make in post. Each of us has a different idea as to what looks right. As a result, I won’t give specific settings, but if you make the following adjustments in general, you should be good:
- Increase the contrast and clarity to enhance details that may have been washed out.
- Deepen the blacks to add more contrast.
- Adjust color temperature and or hues to make the colors more vivid (and possibly warmer).
- Add a radial burn (usually set to -.50) around our subjects to enhance the natural vignette that already occurs in light flare photos.
Creating a Lens Flare in Post
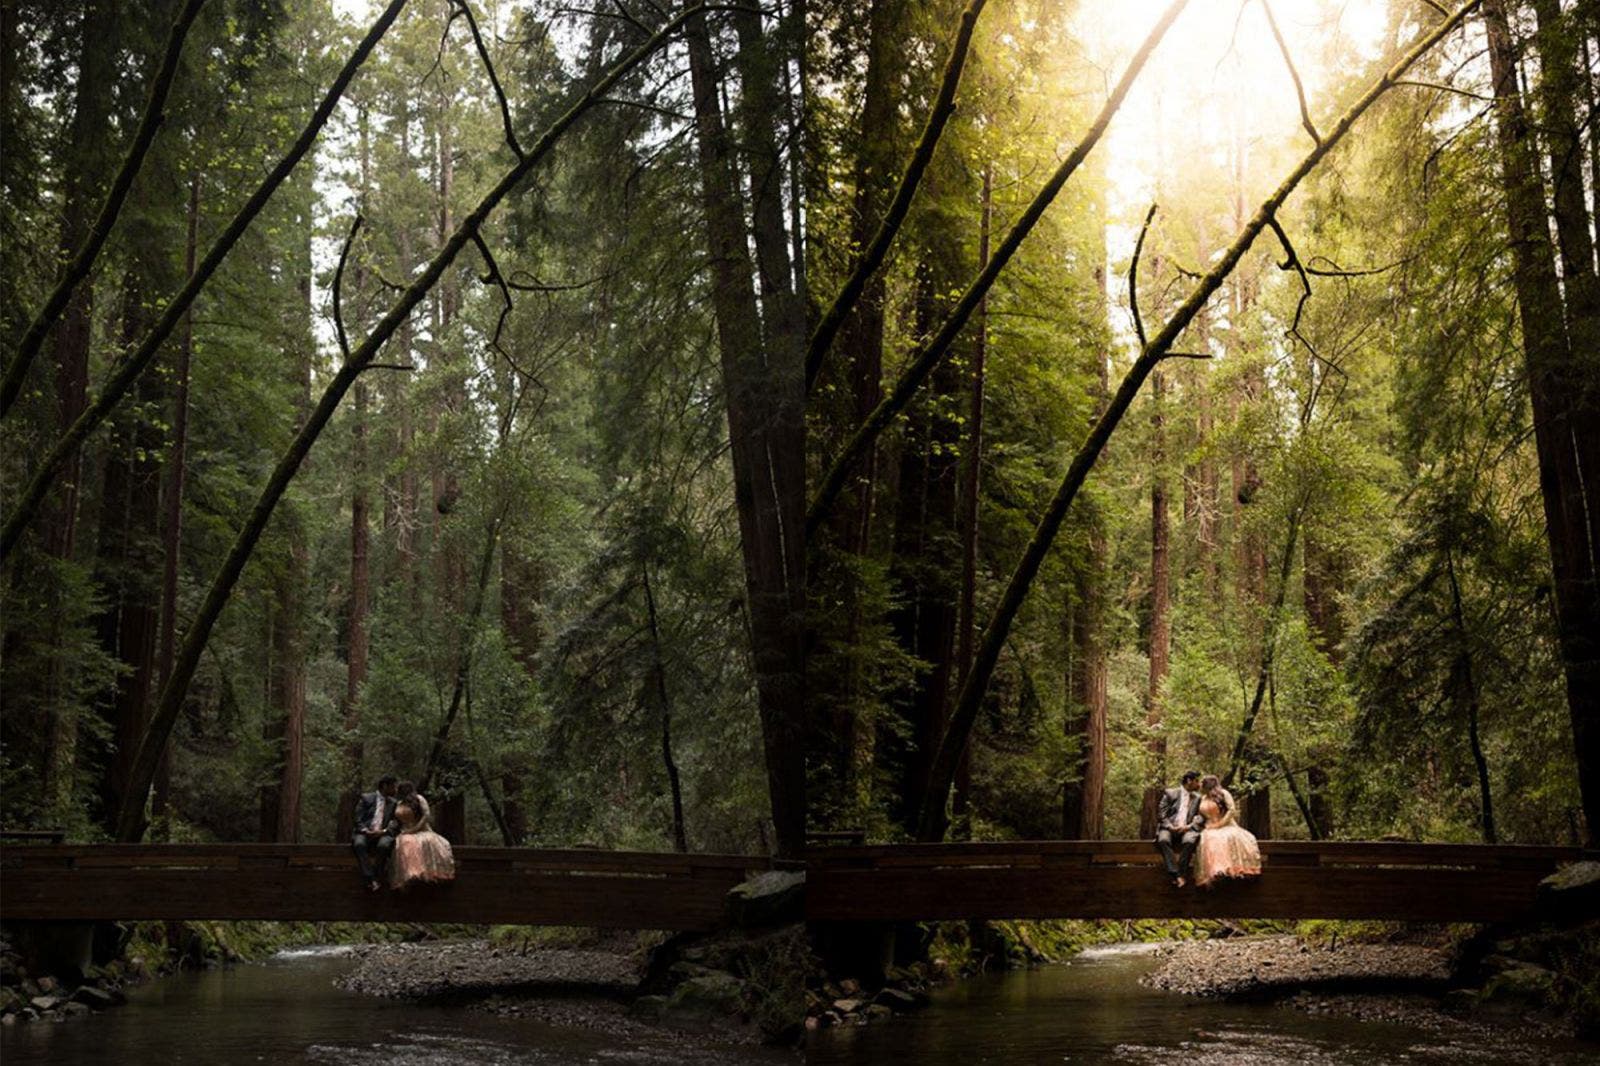
I should also mention that if you were unable to capture a lens flare in-camera, whether using natural or artificial light, you can always add it in post. My favorite way to do this is to use a custom brush in Lightroom. See the screenshots below for the Sun Flare brush settings I’ve set up. You can adjust the size, warmth, and opacity settings to match your taste.
Lens Flare Brush Settings
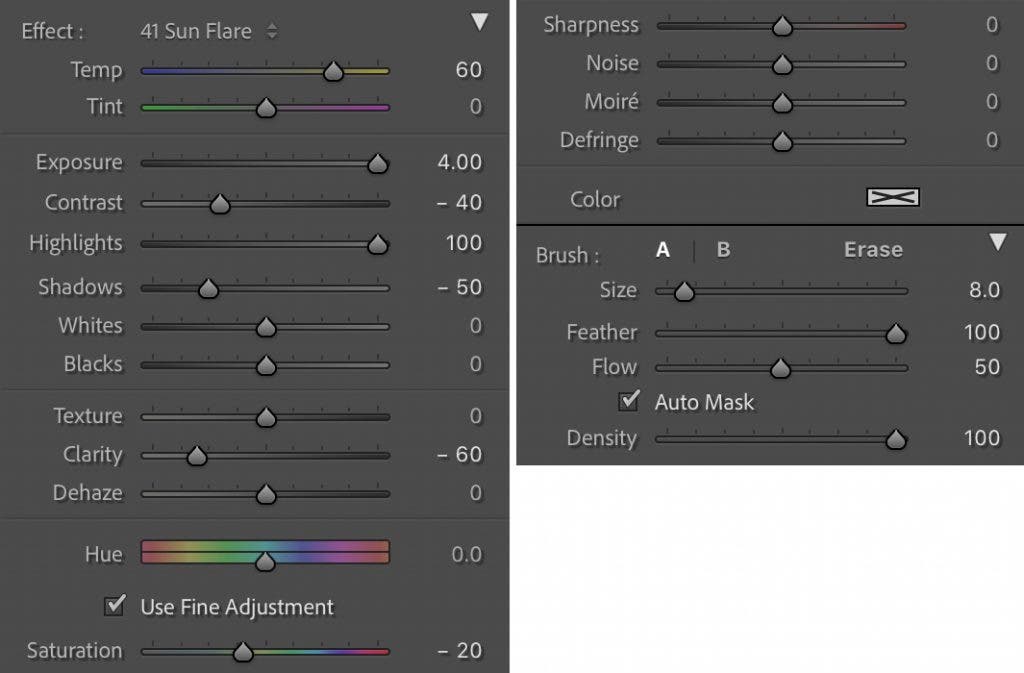
The key to pulling this off is to strategically place the brush and match the existing light direction in the scene. It helps if the scene is at least backlit to create a more convincing effect.
Conclusion
I hope you enjoyed these 7 lens flare tips for creative photos. Incredible photography requires a solid foundation of quality composition, posing, and lighting, but adding a creative touch like a lens flare can take your photos to the next level. When you decide to capture some lens flare shots, do so with intention for creative purposes, and don’t overdo it. That’s advice I’d give for using any single creative effect. You can find more tips for getting creative with lens flare in this video from Gavin Hoey on Adorama TV.