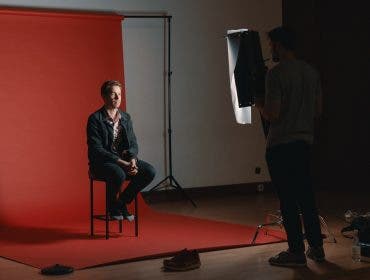

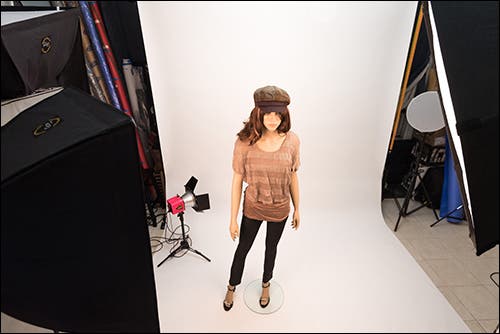
Light is a requirement in photography. Heck, without light, you have no photograph. There are many different ways to light a subject as you shoot in a studio and as you begin to work with lighting patterns and light setups, you will find that there are many different lighting uses for photography strobes in a studio. Let’s jump into some of the main types of uses when shooting any type of people images in the studio.
What is a Key Light?
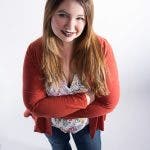
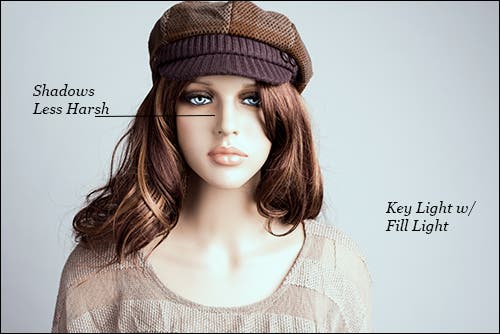
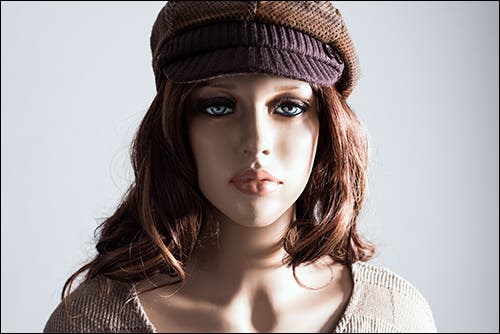
A key light can be better described as your main source of light on a set. It should also be the light with the highest intensity of all of the lights being used. Your key light will be what shapes your subject in the image and should fall on your subject’s face no matter the position your subject is posed. It can be positioned to the side, at an angle above or below or straight on your subject depending on the desired result you are looking to achieve.
Positioning Your Key Light
You will want your key light to be close to your subject, but just far enough out of the frame of your image. A good starting point is usually to the right of the camera at a 45-degree angle, but it really depends on the result you are aiming to achieve. Just remember, the key light should light your subject’s face, so it may need to be repositioned throughout a shoot depending on a desired pose.
What is a Fill Light?
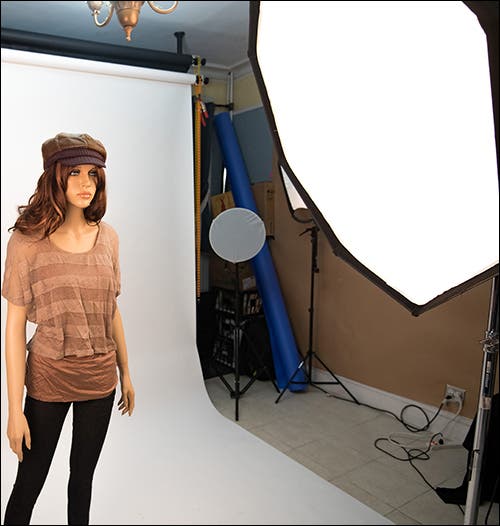
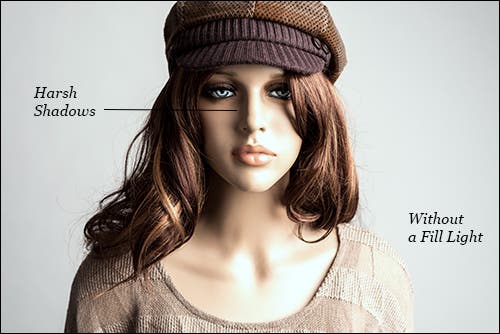
A fill light is a light source used to fill in shadows caused by other lights (mainly a key light), but without creating harsh shadows of its own. This is why your fill light should always be diffused. You have several options for a fill light source depending on your budget, the size of your space and the key light modifier you are using.
Fill Light Sources
- Reflectors. This type of modifier is an inexpensive and convenient way of creating another light source. You can use a reflector as an additional light source by bouncing light from another light onto your subject. One of the perks to using a reflector as your fill light is that it does not take up the space that a strobe on a lightstand would – precious space that is needed in a home studio. The downside to using a reflector as a fill light is that they cannot be used with anything that directs light only onto your subject, such as grids and honeycombs, as those leave no light spill to hit your reflector.
- Another Strobe. While more expensive and a not-so-portable option, using photography strobes for a fill light does have its benefits. Since it doesn’t require another light hitting it to make it a light source, a strobe can be placed anywhere on the set when used for fill. The amount of light desired for fill can be adjusted and said light can be diffused with a variety of modifier choices.
- Walls/Ceilings. Your walls and ceilings can act as a large reflector of light bounced from your key or other light source onto your subject. Since it’s such a large light source, the light will be very soft and produce less harsh shadows.
- Your Clothing. If you wear lighter colored clothing, the lighter surface color can also become reflective, not much, but it can be noticed.
Positioning Your Fill Light
If you choose to use a reflector as your fill light, it must be placed opposite of a light source, usually the key light. If you choose to use photography strobes as a fill light, depending on the modifier used, you can place it just about anywhere based on preference to fill in unwanted shadows in your image.
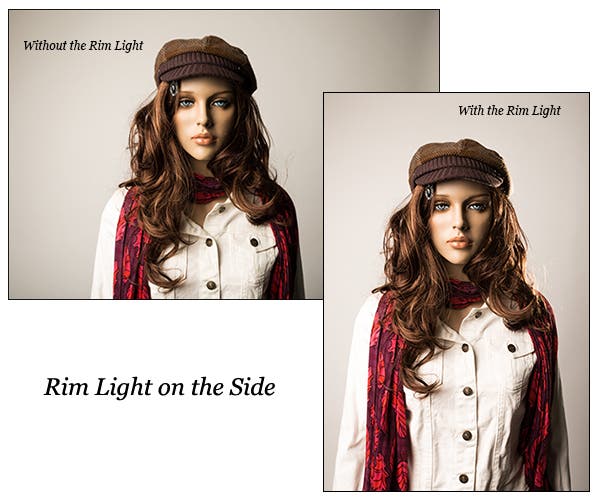
What is a Rim Light?
A rim light is a light source placed behind your subject to cast light on the back of your subject, allowing for some spill to leak around parts of their body, creating a “rim” of light or “lighted outline” around their body. This is typically used to separate a subject from a background of the similar color to what the subject is wearing, to separate multiple subjects when they are all wearing similar colors and to give depth to your image.
Positioning Your Rim Light
A rim light should be positioned behind your subject, but can be positioned in a few different ways partly depending on the length of the subject that you are desiring to include.
Behind and to the Side of Your Subject
If you are shooting anything other than waist up, without having to take out your light stand in post-production, it’s usually good to position your rim light at a 45 degree angle behind your subject and raise and tilt it at a height that will cast light where you need the separation, without the light hitting the front of your subject. This will create a subtle rim around at least the side of your subject.

Directly Behind Your Subject

For waist-up portraits and headshots, where your subject’s body and head can block the strobe, try placing the light directly behind your subject and you will get an evenly lit outline of light on both sides of your subject’s hair and body, depending on angle of placement.
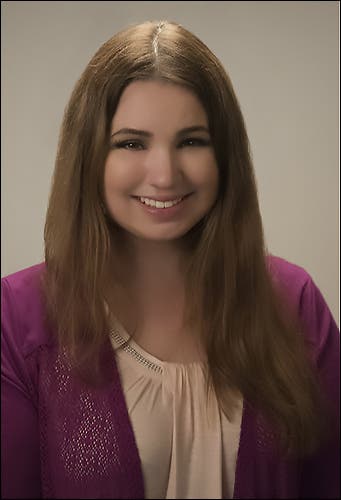
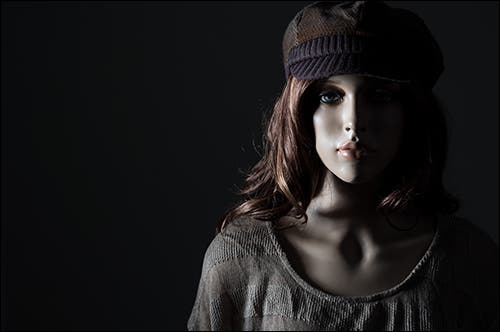
Below is a nice soft result using a 16” beauty dish with a sock diffuser to cover the light.
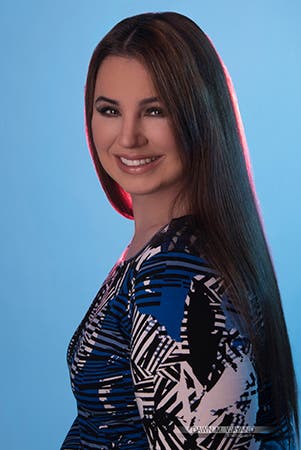
Rim light can be seen even more pronounced in a recent self-portrait I shot below where I had a red gel on a set of barndoors placed behind my head.
Great (and fun!) Modifiers to Use for Rim Lights
You can use several different modifiers for rim lights, depending on where you place them and how much area you want to cover.
- Small Strobe Reflectors. Unlike a portable reflector, these are hard metal reflectors that actually attach to the strobe, the type you get usually depends on your light make and model. A good example of these are the Flashpoint Standard Reflector which works with, you guessed it – photography strobes.
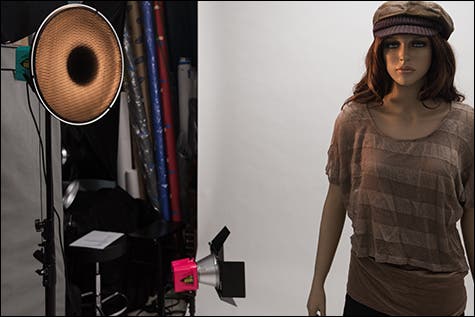
- Beauty Dish. Beauty dishes come in a few sizes. If you have a smaller beauty dish, like the one I have at 16 inches in diameter, it can fit behind the body of a person when positioned below the neck or it can work well at the side with a grid on it.
- Snoot. A really great tool for rim lights when you only want to put a rim on a particular area of a person without spill is a snoot. Add a grid to the snoot, which sometimes comes together in a set with the snoot, for more direction control.
- Barndoors. Barndoors are one of the best light shapers, literally! With four flaps that each individually move 180 degrees from their start position, there are many combinations of ways to shape the light.
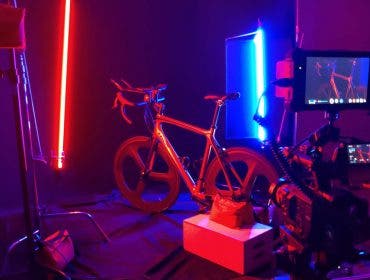
- Gels. Some of the modifiers above already come with gels, but if they don’t and you want to play with gels, or even if they do and you want more color options, you can buy sheets individually for about $6.50 each, or do what I did and buy the Rosco Color Effects Pack which comes with 15 different colored 20×24-inch sheets of gel that you can use as a full sheet or cut up to clip onto smaller modifiers. They are reusable (as long as you are careful not to tear them…)
What is a Hair Light?
A hair light is also a light used for separation, but one that is positioned to only light the top of a subject’s head to create depth in an image.
Positioning Your Hair Light
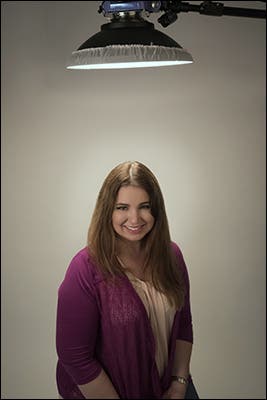
A hair light should be positioned directly above and slightly behind your subject’s head to put a nice light on the top of the hair. It should not spill onto your subject’s face.
Recommended Equipment
- Boom Stand. Since a light has to be placed hanging over your subject’s head, this is one of those times a good sturdy boom stand comes in handy. I use the the Manfrotto Boom Stand 420, which you can find at Adorama. It works wonderfully as a lightstand but easily converts to a boom stand.
What is a Side Light?
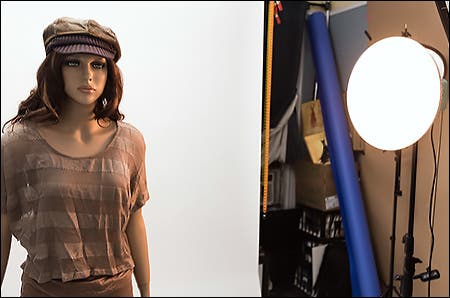
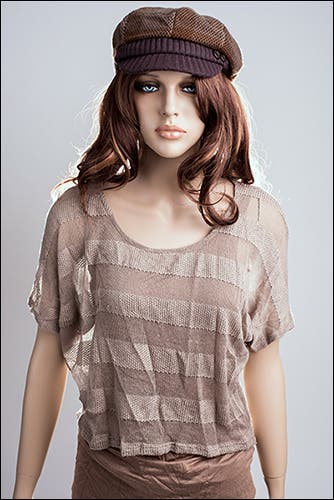
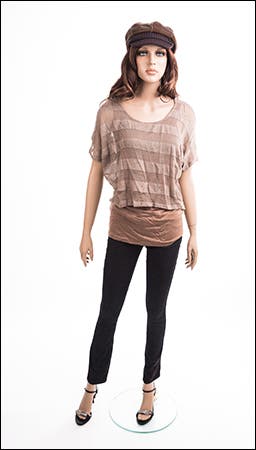
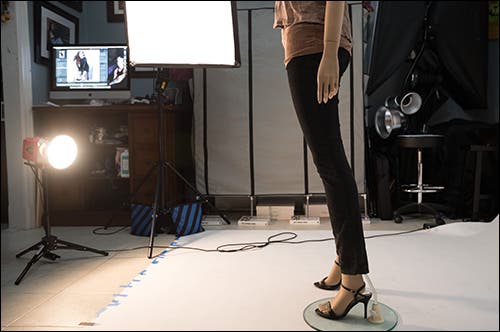
Side lights add drama to a portrait as the light sweeps across the face, it works like a gradient and gets darker the further across the face it goes. As it does this, it can reveal every imperfection of the skin as it goes from light to dark, which is why: unless a woman has porcelain skin (like the mannequin below), it is not flattering for women when going for a beauty shot. In those cases, you want as much light as possible. While it can be used for terrific dramatic portraits of any gender, side lighting (also known as “split lighting”) is especially amazing for shooting male portraits as it enhances character of the face.
Position Your Side Light
A side light can be positioned on either side of your subject, but must be lined up with their body to create the half dark, half light effect. The more you move the light toward in front of your subject, the less shadow on the opposite side of the face.
Throwing a grid onto a beauty dish, snoot or reflector helps direct the light exactly where you want it to go with much less spill.
What is a Background Light?
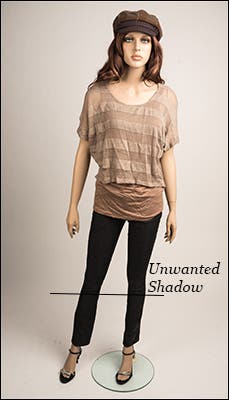
Background lights illuminate a background and help eliminate unwanted shadow, which is extremely helpful when you do not have the space to bring your model forward 6-12 feet from the seamless.
How Many Lights Do You Need?
For an evenly lit background, you can get away with one light to light a background when positioning the background light directly behind your subject. The problem with this is that while your subject can block most of what’s behind him/her, you will have to get rid of your light stand legs in post or shoot only thigh-up.
Positioning Your Background Lights
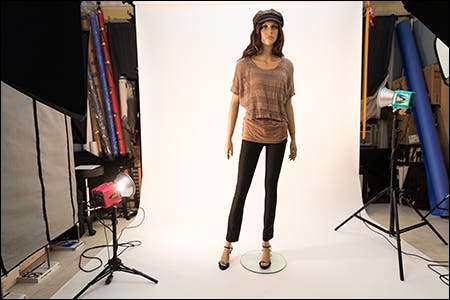
It can be optimal, if you can spare the extra money, to invest in a second background light if you want even lighting on your subject while taking a full length shot. I usually place one a little higher than the other to cover both the lower and upper halves behind my subject, which works great on white seamless. On colored seamless, it can make for an interesting background design.
I find it best to position them slightly behind and to the right and left of your subject so that you do not have any stray light hitting your subject.
What is a Floor Light?
Floor lights are great to use when you need to illuminate the entire body, including the feet/shoes. Due to light falloff and your lights usually being positioned waist-level and higher, the floor can usually go dark by the time the light gets to the ground. This is where 4- and 5-light setups start to come into play.
Positioning Your Floor Lights
If you have background lights, you can position your lights anywhere in front of your subject where they illuminate the area needed to be it. If you are limited on background lights or are not using any at all, it’s better to place the floor lights head-on with your subject to cast the least amount of shadow.
Photography strobes: How to choose the best one for your shoot
Photography strobes don’t just come in all shapes and sizes; each style of light brings a unique type of illumination to set. This includes:
- A hair light, which beams a focused source of light onto the subject’s hair, is ideal for portraits or commercial work. The hair light creates a dreamy halo glow, and helps separate the subject from the background.
- A rim light is another option for photography strobes. With the rim light, you’ll place it behind the model or subject and use it to shine a light on their back. Like backlighting, a rim light creates a gorgeous illuminated outline that creatively helps your subject stand out.
- If you’re looking for photography strobes that even out the scene’s shadows, particularly those created by other light sources, try a fill light. As the name alludes, a fill light fills in the shadows from other lights (often key lights) with a soft, diffused glow. Where you place your fill light depends on the scene and shadows; it may take some practice shots to determine the best strobe location.
- A background light is essential for making the backdrop more even. It helps you fix those unwanted and distracting background shadows. Simply place the background-light photography strobes behind the model or subject if they’re able to disguise it, or, if budget allows, use two and place them behind and on either side of the subject for an even illumination.
Photography Strobes: What Else You Need to Know
Every image needs light to be an photograph. Start with a key light and decide on if you want to add fill or if you want to keep it dramatic. Need to see a background? Do you want one or two lights? Looking to add separation between your subject and its background? Do you want to add a hair light and/or a rim light? Need to illuminate the shoes? These are all decisions in studio lighting can be a fun process to explore, one done best by building each light in as needed instead of putting out all the lights you think you need in all at once. You may find inspiration and other creative lighting ideas to work into your shoot in the process of building each light into your set.