
It’s impressive what portable studio lighting can do for your photography. Regardless of your preferred photographic genre, this article will show why, when, and how to use a portable studio lighting kit. We will guide you through the right lighting equipment and answer the main questions about setting up and using portable photography lighting.
What Is Portable Studio Lighting?
Portable studio lighting refers to compact and lightweight light sources that can easily be moved from one location to another. Furthermore, they work equally well inside a photo studio, in an unknown indoor location, and outdoors. Photographers use portable studio lighting to complement natural light, block it, or simulate it when it isn’t available.
Challenges Behind Not Using Studio Lighting
One can, of course, get around without using studio lighting, but only at the cost of time. Or by compromising the composition and aesthetics of the photos. For example, in locations with diverse landscapes and varying light conditions, such as the wilderness of the US scenery, one can easily come across challenges such as:
- Inconsistent lighting conditions due to changing weather or time of the day that modify the aesthetics of your photo series
- Harsh shadows or direct sunlight due to shooting at times of the day you can’t control, which can lead to lens flare.
- No control over the direction or angle of light due to the topology of the land
- Variations in color temperature due to a passing cloud or short golden hours
Add a client’s requirements or a creative director’s brief and you really are up for a challenge in the absence of portable studio lighting.
Why Use Portable Studio Lighting Outdoors?
Overcome Natural Light Limitations through Portable Studio Lighting
There are many scenarios in which you give up taking a photo because of natural light limitations. The subject is amazing, or you come across a wonderful moment, but the light is just not right. But with a portable lighting kit for photography in your bag, you can overcome some of these limitations.
Shooting in Overcast Conditions
Artificial light sources can brighten up subjects and create contrast in dull, overcast conditions where natural light may be flat and uninspiring. There is no need to give up a photo session just because of overcast weather.
Combating Backlighting
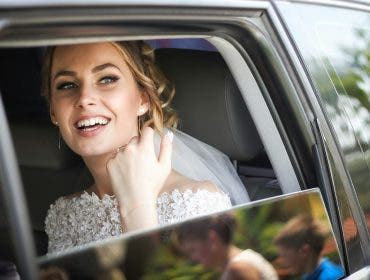
When the sun is behind your subject, portable lighting can help fill in the front, ensuring your subject isn’t lost in shadow. It’s the ideal lighting setup for portraits on the beach at sunset, for example.

Take Control Over Lighting Conditions using Portable Studio Lighting
Natural light is indeed beautiful but also unpredictable. As much as you pay attention to weather forecasts and carefully research a location, how much sunlight you have during a photoshoot is always a variable. Portable studio lighting allows you to complement natural light in a manner that fits your artistic purpose.
Consistent Lighting
Portable studio lighting provides a stable photo setup that allows you to maintain consistent lighting throughout a shoot, regardless of changing weather or time of day. Whether you shoot portraits, fashion editorials, or macro shots, this consistency shows in your portfolio and denotes professionalism and an established artistic voice.
Customizable Light Intensity
When using artificial light sources, you can adjust the brightness, color temperature, and direction of light to match the mood or style of the shoot, something natural light alone can’t always provide.
Portable Studio Lighting Enhances Image Quality
When there isn’t enough natural light available, you have to compromise on camera settings or settle for less-than-perfect image quality. Even when sunlight’s intensity is good enough, you may not benefit from the light direction you need or the light quality you need. Portable studio lighting provides the light intensity you need to shoot sharp, clear, color-accurate photos.
Reducing Harsh Shadows
As you can’t always control the direction of sunlight, portable lights help you fill in or soften harsh shadows created by direct sunlight, ensuring more flattering portraits or detailed shots. However, with an artificial light source such as a fill light or a backlight, you can harmonize the scene.
Highlighting Subject Details
You can also use portable lighting to emphasize textures, colors, and intricate details that might be lost in natural light either because there isn’t enough natural light (e.g., the subject is in the shade) or the direction and intensity of the natural light aren’t flattering (e.g., shooting at midday on a bright, sunny day).
Portable Studio Lighting Provides Flexibility in Shooting Locations
One of the main benefits of portable lighting is that it allows you to choose shooting locations based on aesthetics rather than available light, whether you’re in a forest, desert, or urban setting. This means that you’re not limited to shooting during the golden hours, and you can extend your sessions into the evening or early morning when natural light is low.
Creating Dramatic Effects using Portable Studio Lights
There are also practical aspects to consider. Portable studio lights broaden your artistic horizon and open endless opportunities for dramatic effects, storytelling, and fine-art photography.
Adding Drama and Depth
You will most likely want to use controlled lighting to create dramatic effects like rim lighting, silhouettes, or high-contrast scenes that stand out. Just place an artificial light source on the side of your subject or behind it or use it to illuminate an interesting background that adds context and enhances the story.
Crafting Unique Lighting Setups
Don’t settle for the obvious three-point lighting setup or for adding the extra light you need for certain camera settings. Experiment with different lighting angles, placements, and modifiers to create unique and artistic images that wouldn’t be possible with natural light alone.
Professional Results in Any Environment
As a professional photographer, you don’t always get to choose the environment. However, having a consistent body of work is crucial, which means you can’t leave much to chance.
Consistency Across Different Shoots
Using professional studio lighting ensures you achieve a consistent look and quality across different outdoor shoots, which is crucial for professional work. You get to show your clients that you can adapt to whatever environment without compromising quality and artistry.
Meeting Client Expectations
At the same time, portable lighting ensures that you can deliver high-quality images, regardless of the natural lighting conditions, which is essential for client satisfaction. Imagine you shoot an outdoor wedding that goes long into the evening or a commercial with a strict brief. You can’t leave lighting conditions at the will of nature.
What Are the Types of Portable Studio Lighting?
Here are the types of portable studio lighting that are commonly used in outdoor photography:
Speedlights (Portable Flash Units)
Speedlights are fast, compact, portable, affordable, and easy to mount. They are the go-to of any outdoor photographer, whether a beginner or a professional. Speedlights are external flash units that can be mounted on the camera’s hot shoe or a dedicated light pole but can also stand on any flat surface you have at hand (e.g., a rock, the ground, etc.) You can even synchronize multiple Speedlights to fire at the same time; Speedlights can be fully manual or designed to work with a specific camera brand’s metering system, such as the Profoto A10 On and Off Camera Flash for Nikon Camera.
Strobe Lights
A strobe light is also a discrete light source that produces a short burst of light when triggered. Unlike a Speedlight, they can only be mounted on a light stand, but they are much more versatile in terms of color temperature and intensity adjustments. And you can find some very portable and compact models, ideal for outdoor photography, such as the Godox E300 Mini.
LED Continuous Light Panels
LED continuous lights offer a broad range of brightness and color adjustments. You can place them anywhere around the subject and fine-tune the lighting design to a T. It allows you to see how the subject will be illuminated before pressing the shutter. Choose a small model, such as the Zhiyun MOLUS G200 200W Bi-Color Pocket COB LED Light, for hiking and traveling and a larger one for portraiture and fashion editorials.
Monolights
Monolights are a type of strobe lights that have the flash head and the power supply integrated. This means you can have a powerful battery-powered flash unit for your outdoor photography. The Flashpoint XPLOR 600PRO II TTL R2 600ws 2.4GHz is a monolight featuring 2800K-6000K adjustable color temperature especially designed for outdoor photography.
Hybrid Lights
If you are used to both using continuous LED lights and flash lights. They are the ultimate portable lights for outdoor photography because you only have to bring one unit but get the benefits of both continuous and discrete illuminations. Furthermore, hybrid lights such as Flashpoint FV150 Hybrid R2 offer an intensity range from 0% to 100%, three flash modes, special effects modes, and fast synchronization speeds with any camera.
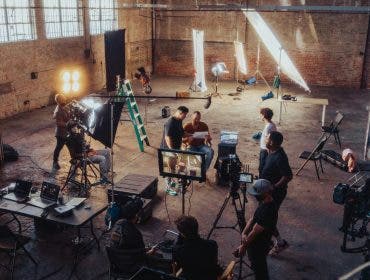
Essential Gear for Outdoor Portable Studio Lighting
What portable studio lights should you pack for an outdoor photo session? Here is a brief list of essential gear that should be considered.
Portable Lighting Kits
If you are a beginner, you are better off with a portable lighting kit that includes the essentials, such as battery-powered strobes, portable softboxes, reflectors, and so on. They offer a complete set of light sources and compatible light modifiers, are designed to be versatile and cover a multitude of photo setups, and are affordable by comparison with purchasing each item individually.
Tripods and Stands
Even though they add considerable weight and take up space, tripods and light stands are crucial for long, stationary outdoor photo sessions. They allow you to set up the light any way you want without worrying about outdoor conditions, such as uneven terrain and wind. You’ll have a stable and cohesive lighting setup for an entire day of shooting.
Power Sources
There are plenty of power options for outdoor shoots, including battery packs and solar chargers, and you’ll need them. A portable power station, like the Anker SOLIX C1000 1800W Portable Power Station allows you to use strobes and studio lights that aren’t portable in themselves. Just hook the power cords into the power station, and you are good to go.
Choose power sources based on how long and remote your photo session is, and then pack a few extra to be sure. Just like with memory cards and camera batteries, you are better safe than sorry.
How to Setup Portable Studio Lighting Outdoors
It’s not enough to carry your portable studio lights around. Here are some pointers to create a smooth workflow when setting up portable studio lighting outdoors.
Choosing the Right Location
If you get to choose the location, you are in luck. But even then, you have to be prepared for whatever situation may appear.
Assessing Natural Light Conditions:
Start by assessing what the location has to offer. Evaluate the sun’s position and advancement in the sky, identify natural reflectors, look for shade opportunities, check the weather forecast, and pay a visit before the photo session (if possible) to evaluate the quality of light.
Background Considerations:
Try to make an idea in advance of what background opportunities you have to avoid distracting elements. If nothing suitable is available, consider bringing an artificial background or finding creative ideas for your compositions.
Setting Up Your Gear
Once you know and have checked the location, turn your attention to your gear. Assess what light modifiers and accessories you may need. For example, shooting on rough terrain may require a sturdy tripod and light stand, while shooting on a crowded street may require a little bit more cable management.
Monitoring Light Changes
Be prepared to adjust your setup as natural light conditions change. Continuously monitor the light and adjust your equipment accordingly. To increase speed and efficiency, prepare a plan for quick adjustments, such as repositioning lights or changing modifiers, to maintain the desired lighting effect as the environment changes.
Conclusion to Portable Studio Lighting
As you can see, using portable studio lighting outdoors has plenty of benefits regardless of your preferred photographic genre and level of expertise. It allows you to take amazing shots in any lighting conditions, create dramatic effects, infuse your photos with mood and atmosphere, and produce a roundabout body of work.
FAQs: Using Portable Studio Lighting
Q1. What is the best lighting for a beginner photographer?
The best lighting for a beginner photographer is a Speedlight. It is versatile, compact, and affordable and allows the beginner to experiment with various lighting designs before settling on more advanced lighting gear.
Q2. How do you shoot outdoors with studio lighting?
Artificial light sources complement natural light. They may illuminate the same area as sunlight or, on the contrary, areas that are left in the shadows by sunlight.
Q3. What is the basic studio lighting?
The basic studio lighting is the three-point lighting setup in which there is one key light (frontally illuminating the subject), one fill light (lateral on the subject), and one backlight. In outdoor photography, one of the three light sources is sunlight and the other two are studio lights or one studio light and one reflector.
Q4. Where should studio lights be placed?
Studio lights can be placed anywhere around the subject, facing the subject or not. Often, in outdoor photography, a studio light is facing the subject when the sunlight acts as a backlight or comes from a side when the sunlight faces the subject. A studio light may also illuminate the background if it is relevant to the visual story or if the photographer wants to add depth.
Q5. How to use reflectors in outdoor photography?
Reflectors may replace a third light source in the three-point lighting setup by reflecting either sunlight or the light coming from an artificial light source. They may also be used to change the direction of light and angle it according to the photographer’s artistic vision.