To some, Pinterest is a tool for idea generation. To others, it’s a great way to procrastinate. But one thing many users don’t realize is that Pinterest is instrumental to growing a brand, blog, or online business.
While the platform was originally designed as an online scrapbook and image aggregator, Pinterest has evolved from just another social media site into a leading visual search platform used by 250 million users per month. Users search everything from how to decorate a wedding reception to how to spend their vacations; they seek inspiring, visual content that’s not likely to surface on Google.
More: The 6 Things You Must Have to Succeed on Social Media
With its search functionality — not to mention niche topics — Pinterest has become a major traffic driver for bloggers. Case in point? When I started taking Pinterest seriously, Pinterest-referred traffic to my road trip-travel blog traffic grew by almost 95 percent.
That’s a lot of traffic, yet this astronomical growth didn’t require much time. These four simple tricks helped me increase my blog traffic through Pinterest with no more than 10 extra minutes per blog post. Implement these steps to grow your Pinterest-referred traffic, too.

1. Have multiple pins per post
It’s hard to know which pins will perform best — sometimes brightly colored vertical pins get shared by the hundreds; other times the top-performing pins are horizontal with muted colors. I create a variety for a/b testing when I publish a blog post. I like to have at least two pins per post that vary in size, color tones, and font. If I notice one pin is getting shared often, I’ll add it to the queue for re-sharing again and again. If another one is underperforming, I’ll typically let it lie and focus my efforts on the proven pins.
Insider tip: You can tell a pin is “taking off” when it gets shared dozens or hundreds of times. This happened with a pin for my blog post about road tripping through Death Valley. It must have really resonated with the audience — I saw a huge uptick in traffic — so I now share the same pin on a new board every few months to keep the momentum going.

2. Design pins on a site like Canva
From header images to Instagram Story layouts, I’ve always been a big fan of Canva. The free design platform’s perks extend well into Pinterest. I use Canva to design each pin, making sure the dimensions are correct, the colors are vibrant, and the font is large enough to read on mobile (where many people use the platform). I also mix up my design style with some full-length image pins and others designed with a mixed photo collage. Like tip one, this variety helps me determine which pins resonate best — and therefore which pins to reshare for optimal Pinterest-referral traffic.
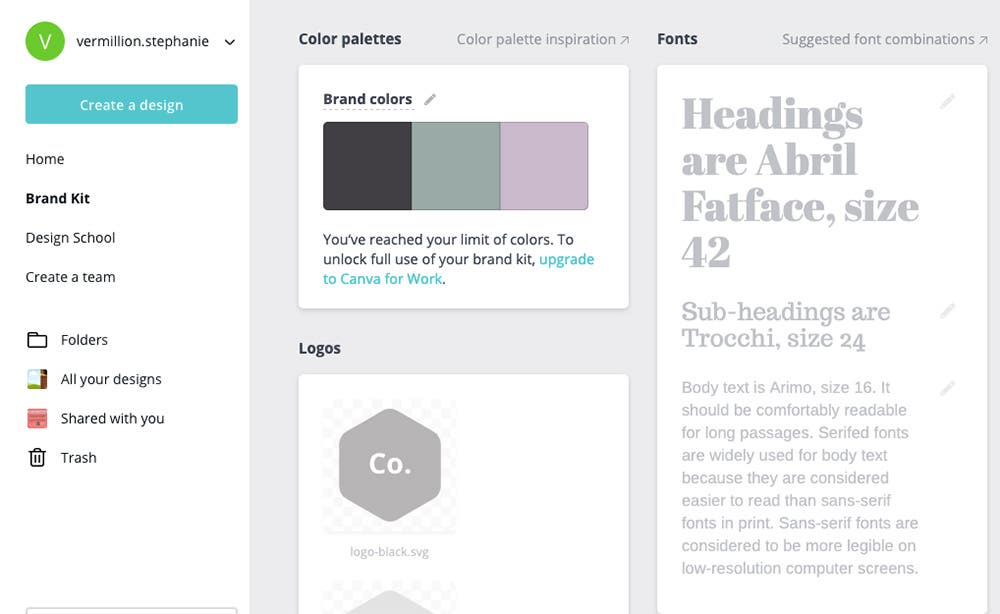
Insider tip: To save time, you can actually set brand guidelines like font and colors in your Canva account. That way you don’t have to constantly import your hex colors! Just go to “brand kit” on the left side to set up your templated style.)

3. Use alt text to index your pins
As a blogger, you likely write alt text — a keyword-rich, one-sentence description summarizing your blog post — for each image, but you should actually do the same for all of your pins, too. This alt text, which is really just the Pinterest captions, helps searchers find your pins; the more descriptive your alt text and caption, the more likely readers are to find your pins (and, of course, your content).
One perk Pinterest has over other search engines is that your keywords don’t have to be next to each other. That means you can write more naturally (given it’s going to show up in the caption section on Pinterest); as in, you don’t have to worry about awkward, keyword-dense descriptions! Even for a blog post about, say, swimming in Hawaii, as long as “swimming” and “Hawaii” are somewhere in the alt text/ caption, Pinterest users will be able to discover your pin if they’re looking for tips on where to swim in Hawaii.
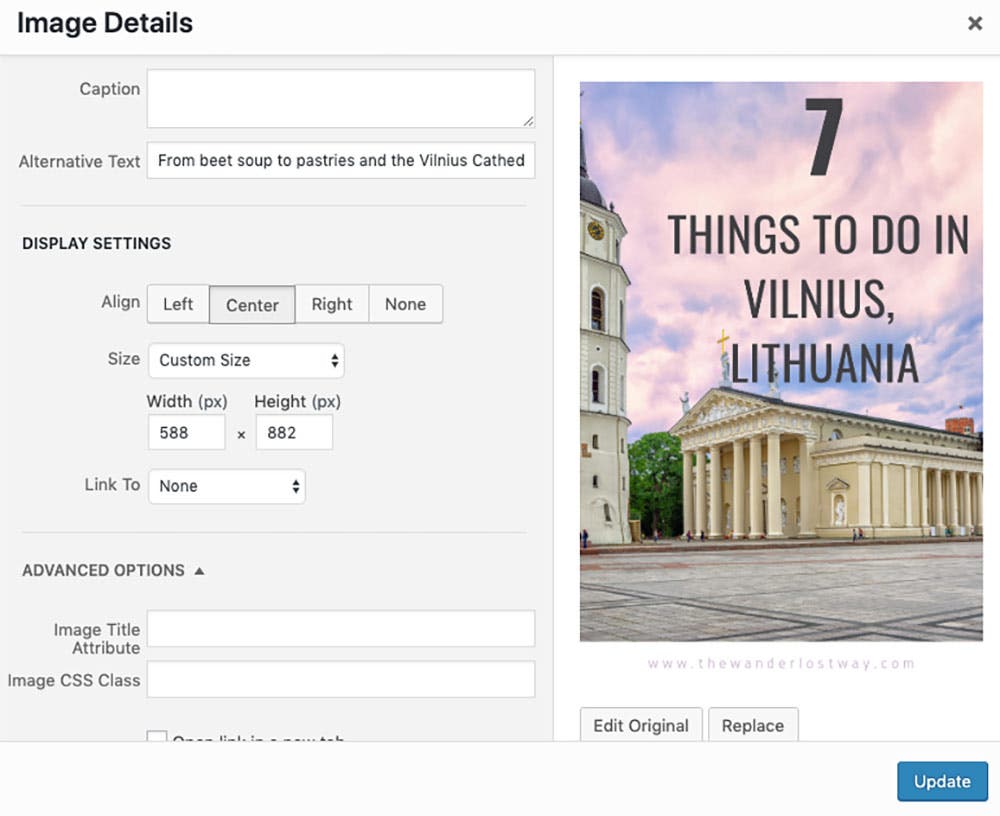
Insider tip: You can automatically add alt text to your pins in WordPress by clicking “edit” on the image, and entering the text in the “alternative text” box. Now, if you use a plugin like Google Chrome’s Pinterest Save Button to publish your pins on Pinterest, it will automatically source the caption from your alt text.
4. Use scheduling tools
As a blogger, you have more than enough to fill your schedule, and adding Pinterest to your plate may seem like another stressor. Fear not: Scheduling tools like Tailwind take the headache (and time commitment!) out of using Pinterest to grow your blog.
You can start the week or even month by scheduling out your pins and then, voila! Your Pinterest basically is almost done for the month. Tailwind does cost $9.99 per month for bloggers, but you can get tools like smart scheduling (where they optimize pin publish times based on your audience’s activity) and measurement to help you make the most out of your Pinterest presence.
As Pinterest users know, engaging pins are entirely dependent on compelling visual images. You can either buy your Pinterest images (Canva offers an inexpensive stock image package) or use your own photos to illustrate your own unique experience. If you’re choosing the latter, here are 10 online camera simulators that can help you take your photography quality up a notch.
Feature image via Pinterest


