If you are looking for a versatile tool to shape studio light, V-Flat boards may be a perfect option. V-Flat boards are versatile tools for shaping and controlling your portrait lighting in the studio.
What are V-Flat Boards?
V-Flat boards are made of lightweight foam boards and are hinged in the center to form a V-shape. They are also typically dual-sided, featuring a white side for reflecting light and a black side for light-blocking.
V-Flats can serve the same purpose as a fill-light in the studio. They are often more advantageous because they don’t need the bigger footprint that a studio fill-light would require. There is no need for additional strobes, light stands, or big modifiers, therefore, you can easily get soft and diffused light using V-Flats.
They are also excellent for reducing the overcrowding of your studio space. They can save you the added cost of buying additional lighting gear for your studio.
This article will demonstrate several examples of how you can use V-Flat boards to enhance your portrait light techniques in the studio. We’ll be looking at a base image without any V-Flat boards. Next, an example of using a V-Flat board to bounce light for fill. Finally, an example of using the black side of a V-Flat board for creative contouring and shadows.
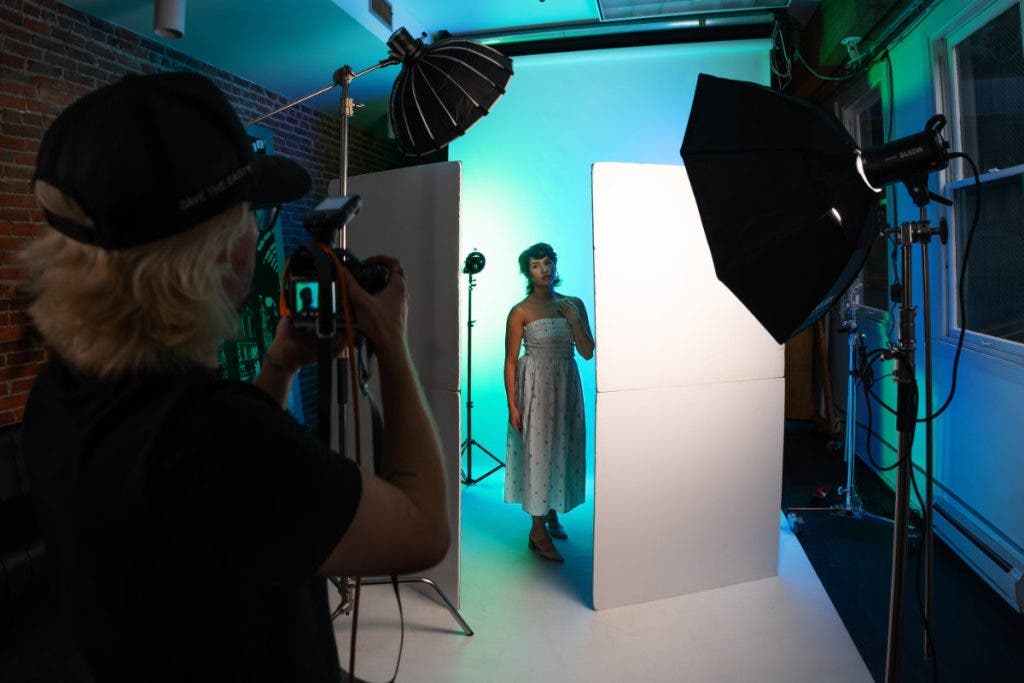
My Studio Lighting Gear
I’ve used foldable V-Flats from V-Flat World to shape studio light in my photography for several years. Made of high-quality foam board, they are easy to transport. They fold down to a compact size, a handy carrying case is included, and are double-sided. With both, a white side for bounce and a black side for flagging and negative fill.
In most cases, I typically like to add continuous RGB lighting into my studio lighting configurations. Continuous RGBWW lighting allows me to have precise control over my background colors. In addition, they give me a creative way to add more flare to my shoots. Most importantly, this is an ideal set-up for hybrid shooting. Basically, I need to shoot video and photos at the same time.
Here is the list of gear that I use to shape studio light using V-Flat boards:
- Sony Alpha 1 Mirrorless Camera
- Sony FE 50mm f/1.2 G Master Lens
- Sony FE 85mm f/1.4 G Master Lens
- Sony FE 135mm F1.8 G Master Lens
- Flashpoint eVOLV 200 Pro TTL Flash Kit
- Flashpoint XPLOR 300 Pro TTL Flash Kit
- Flashpoint Zoom Li-on X R2 TTL On-Camera Round Flash Speedlight For Sony (Godox V1)
- Flashpoint R2 Pro MarkII 2.4GHz Transmitter for Sony
- V-FLAT WORLD Foldable V-Flats, Set of 2, Black/White
- Godox S65T 25.6″ Quick Release Umbrella Softbox
- Glow S2 Round Flash S-type Bowens Mount Bracket for Round Head Flashes (Godox S2)
- Flashpoint 10′ C (Century) Light Stand
- 2x Godox LDX100R RGB LED Light Panels
- Godox SZ300R RGB Zoomable LED Video Light
How I Setup My Studio Lighting With V-Flat Boards
Setting up the lighting configuration for my studio portraiture is a big part of my creative process. During this process, I craft the look and feel of my images. This brings the various elements together in the studio. I make important decisions about how my lighting setup will complement the look and style of my talent and the overall styling of my images.
In order to make my studio sessions more convenient and creative, I always favor using a hybrid lighting setup consisting of a combination of flash and continuous lighting. Combining flash with continuous lighting allows me to envision various creative colors easily while having plenty of power to light my subject with my strobes. It’s an ideal lighting setup for shooting photos and videos as a hybrid shooter.
The specific setup I used for the sample images in this article is as follows:
- 2x Godox RGBWW continuous lights providing the green and blue colors (backdrop)
- 1x Godox daylight balanced continuous modeling light (camera right)
- 1x Flashpoint XPLOR 300 Pro in a 26inch gridded beauty dish as the key-light (camera left)
- 1x Godox V1 flash with a gridded snoot behind my subject as a rim light for separation (camera left)
- 2x V-Flat World boards in various configurations on either side of my subject for bounce, fill, and negative-fill
This arrangement allowed me to see my color choices in real-time, gave me a powerful modeling light to assist in acquiring focus, gave my subject separation from the background, and allowed me to control how my subject was lit with fill-lighting and shadows, thanks to the two V-Flat boards I was using.
Let’s look at the before and after examples of each set and examine how changes to the placement of my V-Flats impacted my light-shaping in the studio. The set includes a base image without any V-flats, a 2nd image using one V-flat for fill, and a third image using the black side of two V-flats for negative fill.
Setup 1 – Rim-Light & Key-Light Only
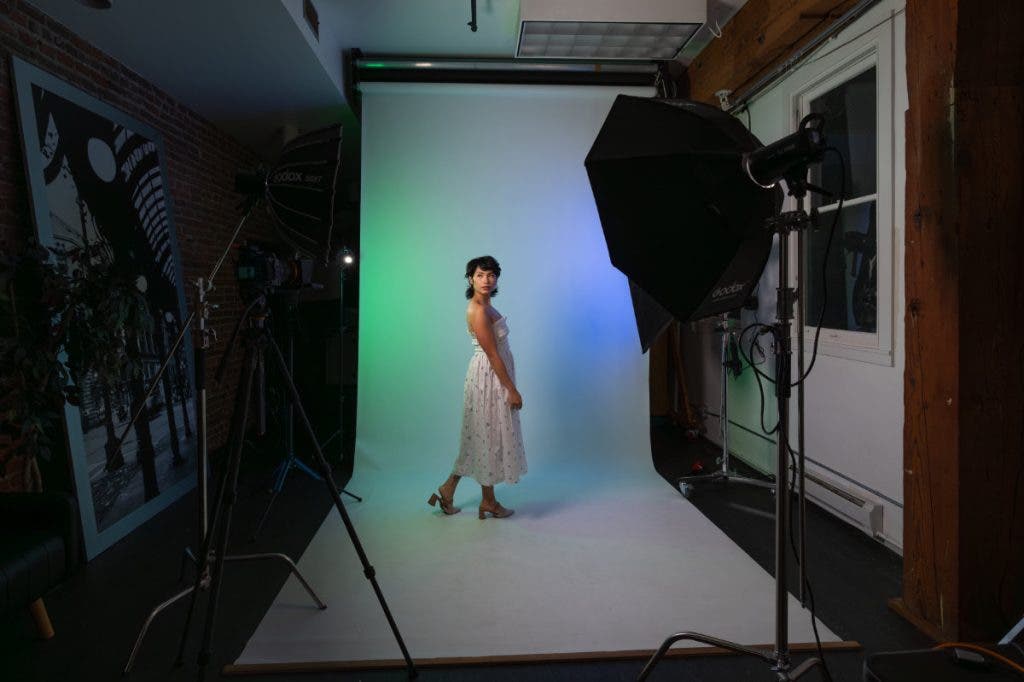
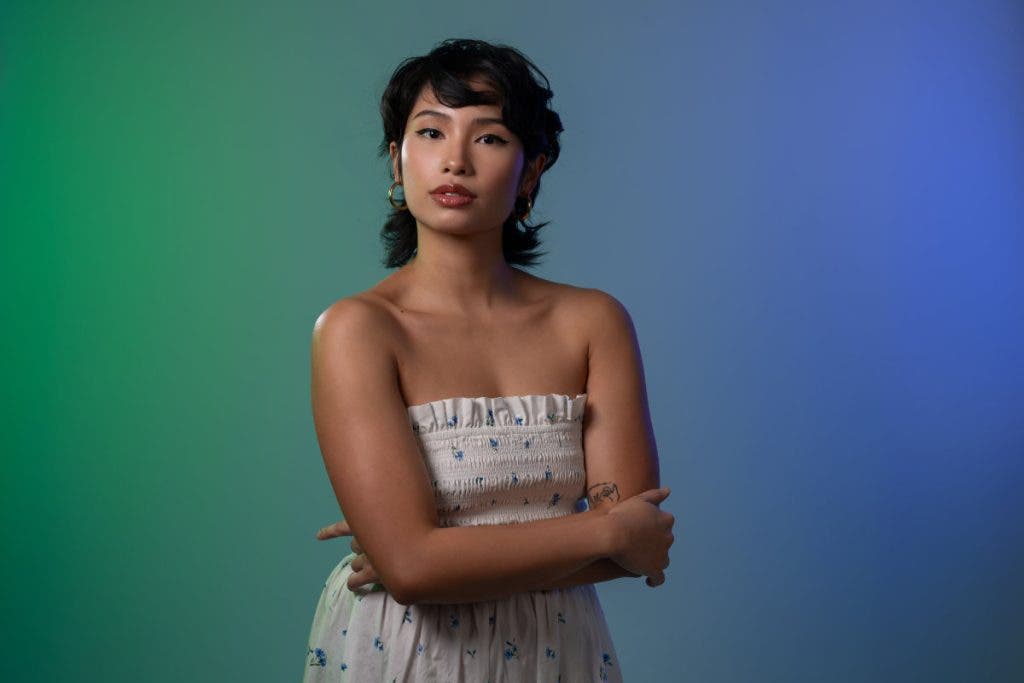
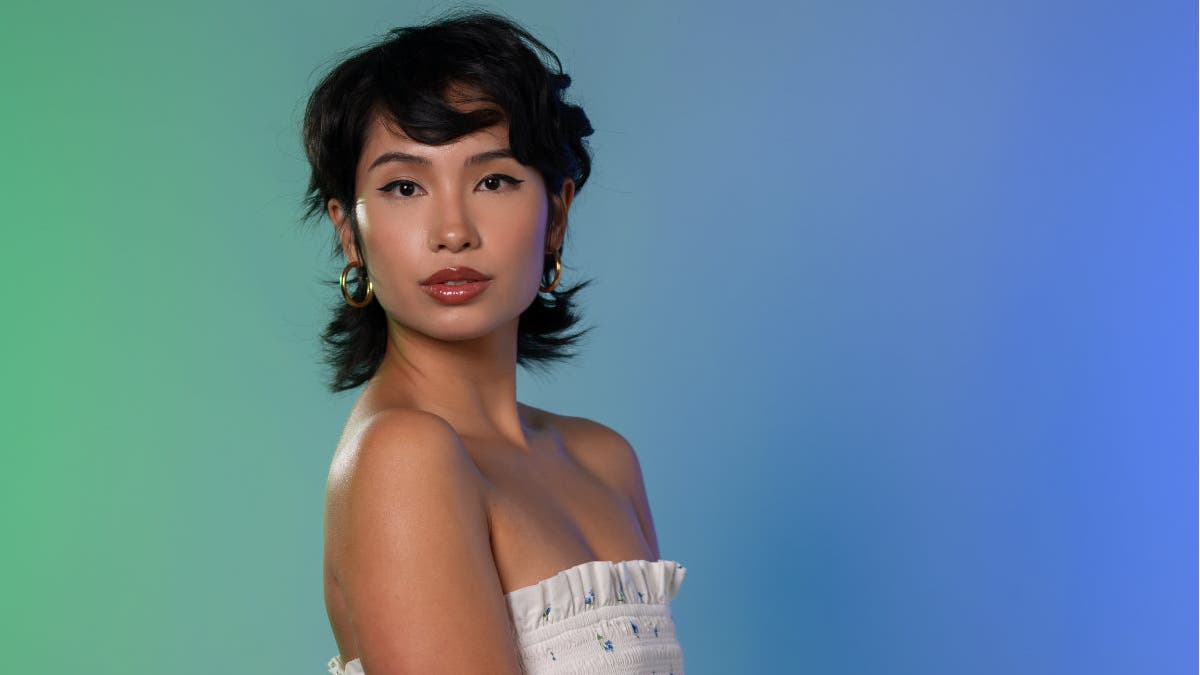
When creating the first image, I used only the XPLOR 300 Pro as the key light and the Godox V1 as the rim light. I used a grid on the 26-inch beauty dish installed on the XPLOR 300 Pro to prevent the light from spilling all over the background, allowing me to retain more color saturation on my backdrop from my RGBWW continuous lights.
Meanwhile, I added the gridded V1 flash with a snoot, focusing my rim light on my subject’s right shoulder for additional separation from the background.
If you look at the resulting image, you can see that my subject has some excellent separation from the background on her right shoulder. At the same time, my gridded beauty dish and XPLOR 300 Pro lit the right side of her face and upper body. The illumination on my subject is entirely from her right side, and there are shadows on the left side of her face and body.
Setup 2 – Rim-Light, Key-Light, White V-Flat (Bounce-Fill)
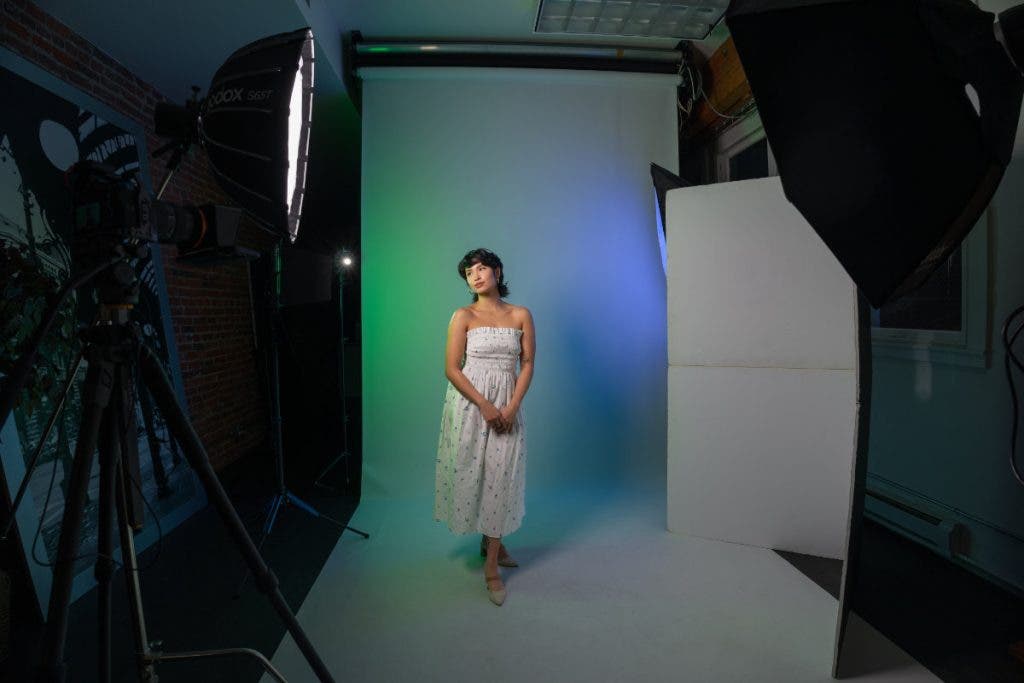

The second image sample is taken with the same setup as the initial image. This time, though, I added a white V-Flat board on the left side of my subject. Adding this V-Flat was to fill in the shadows on the opposite side of my key light. Basically, bouncing some of the light coming from my beauty dish back onto my subject. This technique to shape studio light with V-Flats helps control contrast.
Additionally, the white V-Flat is placed directly across from my XPLOR 300 Pro and acts as a nice source of fill light, eliminating shadows and giving my subject a soft and even exposure on both sides of her face.
Setup 3 – Rim-Light, Key-Light, Black V-Flats (Negative-Fill)
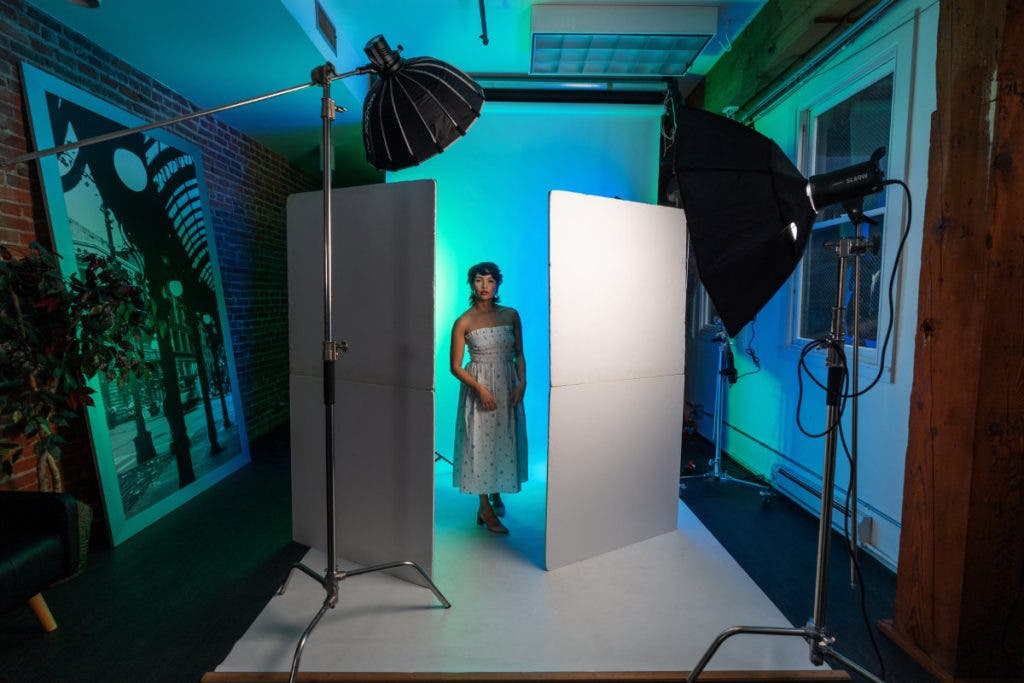
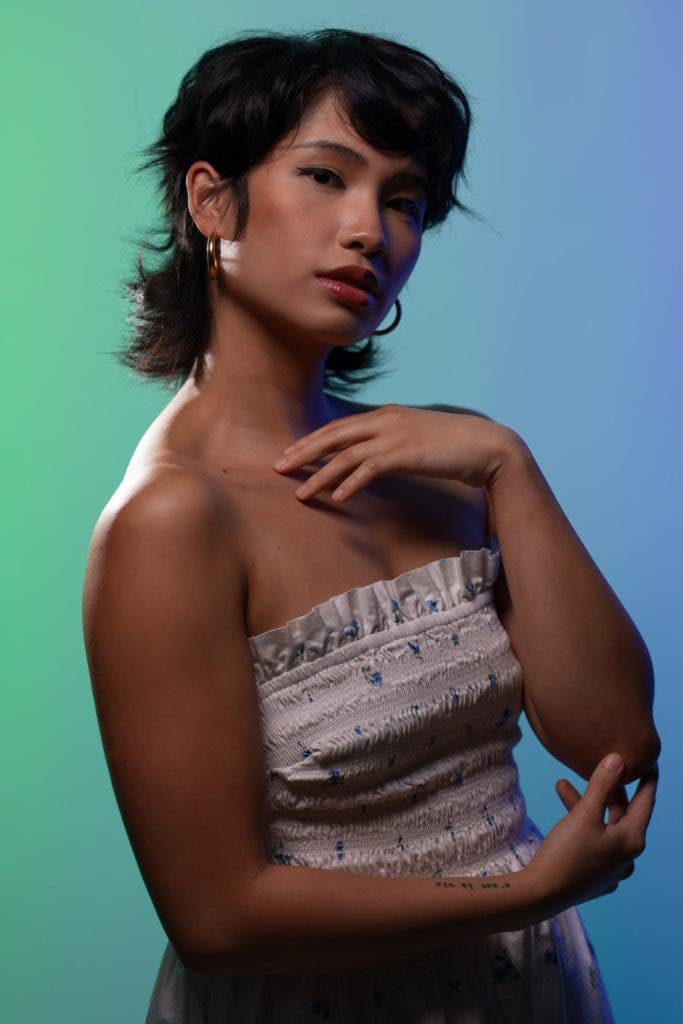
The third and final image in my sample set showcases the contouring effects of using the black side of V-Flat boards for negative fill. By pointing the black sides of my V-Flat boards inwards towards my subject, I minimized any light spill coming from my two flash units. I created a sculpted look to my subject’s body and face. This technique to shape studio light with V-Flats helps increase contrast.
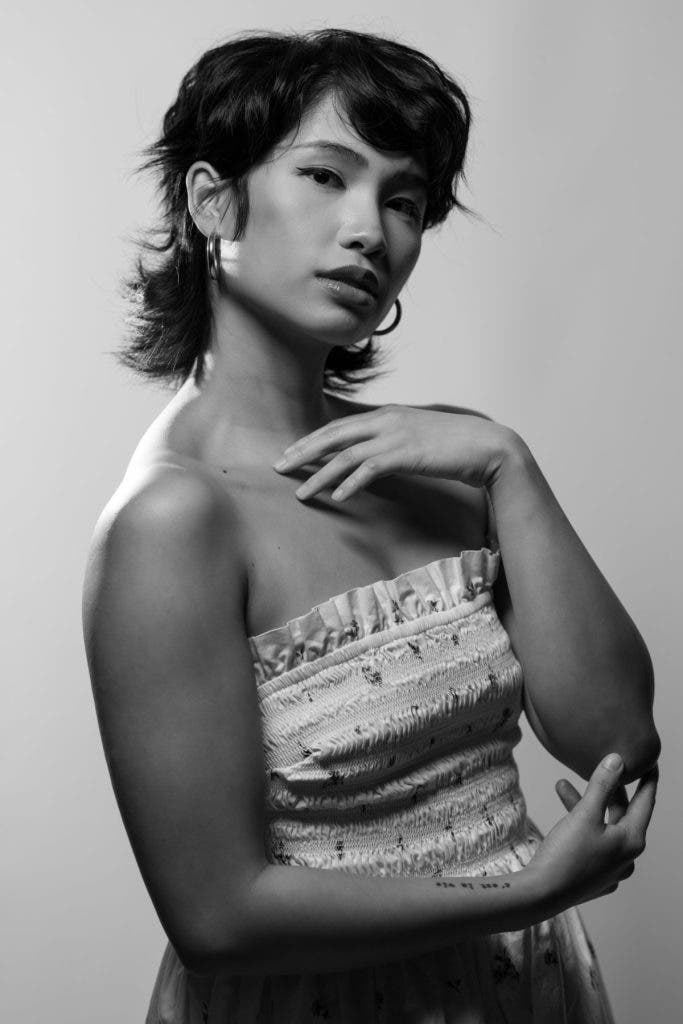
The final image has a dramatic and contrasty look, which intentionally emphasizes the presence of shadows. This technique gives definition to the outline of my subject’s body and facial features and is a great creative light-shaping technique. With this in mind, it also works excellently for black-and-white photography since it creates nice contrast and shadows, which are both very useful for monochromatic tones.
Conclusion
V-Flat boards are essential tools for light-shaping in the studio. Their lightweight construction makes them portable and easy to maneuver, their compact size makes them convenient to use in smaller studio spaces, and their affordable price makes them a great alternative to buying additional lights and modifiers.
Overall, I use them to elevate my creative portrait lighting. Therefore, I always ensure I have V-Flat boards as part of my studio lighting toolkit. They offer amazing versatility for my studio light-shaping techniques and enhance the quality and creativity of my images.
