When the action is moving and you ant to catch it in 3D, a single camera won’t do. Here’s how to create a support for two cameras that you can shoot simultaneously for 3D action photography!

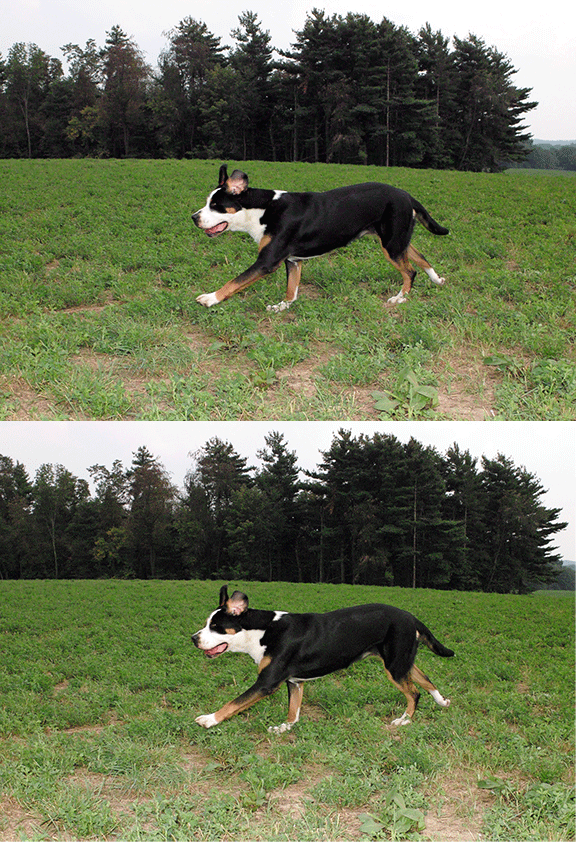
Greater Swiss Mountain Dog running. Photo by David FitzSimmons using the author’s Two-Camera Rig for 3D, outfitted with two Sigma DP1 cameras
Shooting Wiggle 3D images with one camera is really quite simple for stationary subjects: you take a shot, move four inches to the side, and shoot again. Sure, it helps to use a tripod, keep the camera aligned properly, and maintain manual settings as much as possible. But there are situations where the short time it takes between snapping the first image and snapping the second just will not do. Action shots, like the one above, are the best example. For these, simultaneous capture is a must.
The only way to capture Wiggle 3D images of moving subjects is to shoot two pictures simultaneously, and that either calls for a specialized 3D camera, which can get quite pricey, or building a camera rig that holds two identical cameras. The latter is a simple project that involves little more than the cost of the cameras and a trip to the hardware store.
Building a Two-Camera Rig
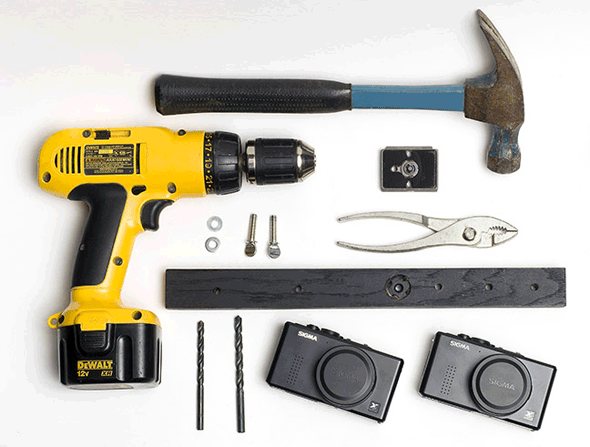
For my rig, I chose two Sigma DP1 cameras. If you already have a suitable point-and-shoot camera, consider finding an identical model on eBay. I decided to mount the two DP1s on a short piece of hardwood. Oak, hickory, ash…nearly any hardwood will do. My red oak board measures 1 ½” wide, ¾” tall, and about 12” long.

Tools and materials for Two-Camera Rig. Photo by David FitzSimmons.
Additional materials from the hardware store include:
• Two 1” long ¼ – 20 thumbscrews,
• Two ½” washers for the thumbscrews,
• One 5/8” long ¼ – 20 T-nut for attaching the bar to a quick-release plate (or a tripod head)
• Black spray paint.
Tools:
• Drill
• 17/64” and 15/64″ bits, and 7/8” spade bit
• hammer.
• Pliers for gently tightening the thumbscrews holding the two camera bodies.
First, align the cameras so the center of the lenses are about 4 inches apart on the center of the board and mark the tripod socket locations. Drill these holes with a 15/64” metal bit. Temporarily mount the cameras, and mark the spot halfway between the shutter release buttons. This is where to drill the hole for the T-nut that receives the tripod screw.
Place it between the two shutter release buttons so that when the shutters are pressed, it doesn’t unbalance the rig. The hole for the T-nut is drilled with a 17/64” metal bit and needs to be countersunk. Use a 7/8” spade bit to drop the T-nut below the surface of the mounting bar (so that the cameras sit firmly on the wooden mounting bar) and to allow the short ¼ – 20 bolt of the quick release plate to reach the threads of the T-nut.
In addition, I drilled a couple 15/64” holes a bit further out on each end of the mounting bar so that I could experiment with camera separation distances. After tapping the T-nut into place, I spray-painted the wooden bar with semi-gloss black paint (you can skip this step, but it makes it look more polished.) Finally, I mounted the cameras with the thumb screws, inserted through washers.
Voila! I had a working two-camera rig. Besides the cameras, the total cost for the rig was less than five dollars.

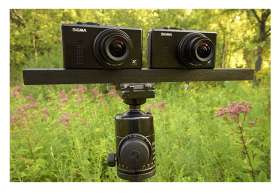
Two-Camera Rig with Sigma DP1 cameras. Malabar Farm State Park, Richland County, Ohio. Photo by David FitzSimmons.
Shooting with a Two-Camera 3D Rig
Taking 3D images with the two-camera rig requires special attention to several techniques. First of all, make sure that the mounting bar is level side-to-side. Tilting front to back is fine, but our eyes are positioned horizontally. So take your 3D photographs with bar aligned horizontally. A bubble level placed in one of the camera’s hot shoes helps with this. If your cameras do not have hot shoes, then carry any kind of level, even a small carpenter’s level, to check the alignment of the bar.
Secondly, make sure that your cameras are in line with each other. That is, the sensors should be aligned on the same plane, with each camera back parallel to the mounting bar. While some Wiggle 3D shooters suggest turning or “toeing-in” the cameras—so that each camera’s lens is pointed directly at the subject—I would advise against this approach for anything other than close-ups.
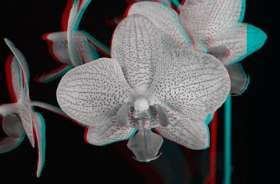
Stereoscopy expert Jon Golden of 3D Concepts says that using a toe-in technique creates a “keystoning effect,” which in anaglyph 3D viewing can cause obvious ghosting. With Wiggle 3D, because only one image is on the screen at any given time, toed-in shots can be more disorienting, with objects nearer the edges seeming to shift excessively.
Thirdly, make sure to shoot with identical—preferably manual—settings on both cameras. Use the same white balance, JPG compression, sharpness, color mode, and exposure settings. If you can manually focus, do so.
Finally, check your images immediately after you shoot. It’s best to “chimp” on the rig, where you can see if you got both images at exactly the same time. Believe me, my fingers have proven just how uncoordinated I can be when trying to press just two buttons at exactly the same time! Sometimes I nail it, but other times I miss. If you miss, it often helps to delete the two files right then and there, saving studio-editing time. Viewing 3D Images Once you have your perfectly-timed shot, the world can be your 3D oyster…or horse race…or child blowing bubbles…or you name it!
All that is left is animating and displaying your images online as Wiggle 3D animated GIFs. These quirky alternating images trick the brain into seeing depth because of the parallax between the two “wiggling” images.
Beyond Wiggle 3D, a variety of more advanced stereoscopic choices exist: specialized prints for use with anaglyph, Pulfrich, or polarized glasses as well as images created for viewing through stereoscope viewers, and the same double-camera rig will work just as well for these 3D systems, too.


