Busy backgrounds can ruin an otherwise great photo. Luckily, Photoshop makes it easy to blur the background on images that need a little extra touch in post processing. Whether you want to add depth to your image, or just add a creative blur to the background, this guide will teach you exactly how to blur the background in Photoshop.
Select Iris Blur
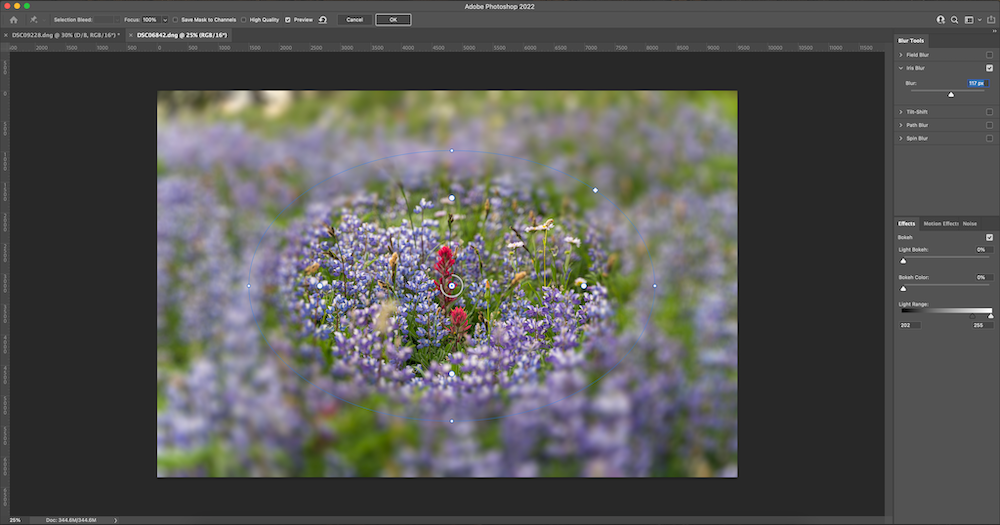
First, open your photo into Photoshop. If your photo loads in as a locked layer, click on the lock in the Layers panel to unlock it. Then, go to Filter > Blur Gallery > Iris Blur. This type of blur works perfectly to choose a focal point in the image, and blur out the background.
Choose Your Focus Area
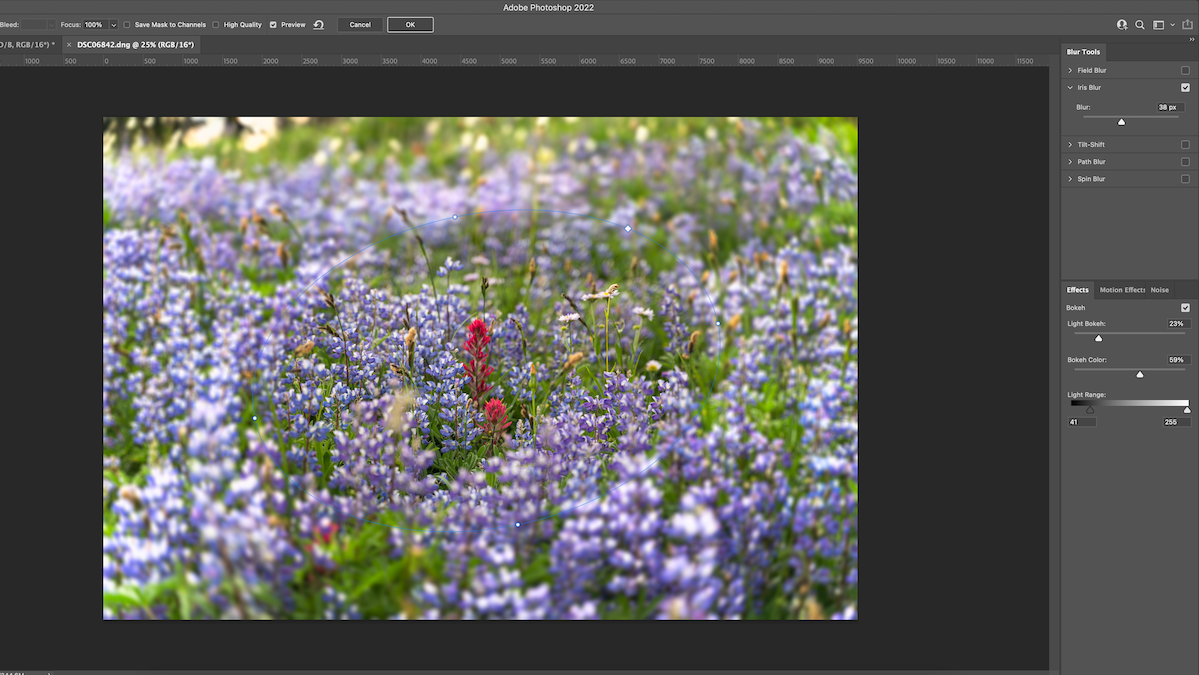
Once the Iris Blur loads, you’ll see a blue ring with multiple dots appear on your image. This ring and the dots can be adjusted to change the blur. The blue ring shows the spot on your image that is in focus. Put the center of the ring right on the subject in your photo. You can move the ring by clicking and dragging.
You can also adjust the blur area and size of the ring by clicking on some of the dots on the outer edge of the circle. The large circular dots inside of the circle adjust the feather. This meaning how soft the edges of the blur will be.
The small circular dots on the perimeter of the circle allow you to rotate the blur circle and adjust the shape and size.
The one large white rectangular dot allows you to adjust the circle to change it to the shape of a rectangle, or anywhere in between. Play around with these adjustments, as there are literally infinite combinations to apply.
Adjust Blur Level
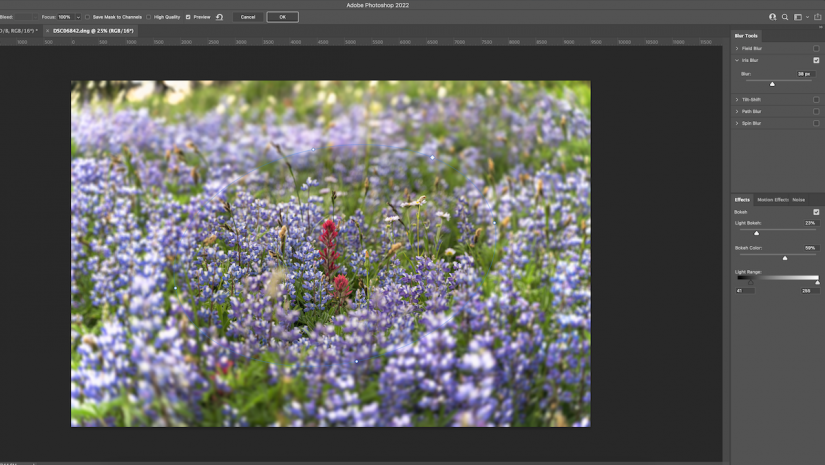
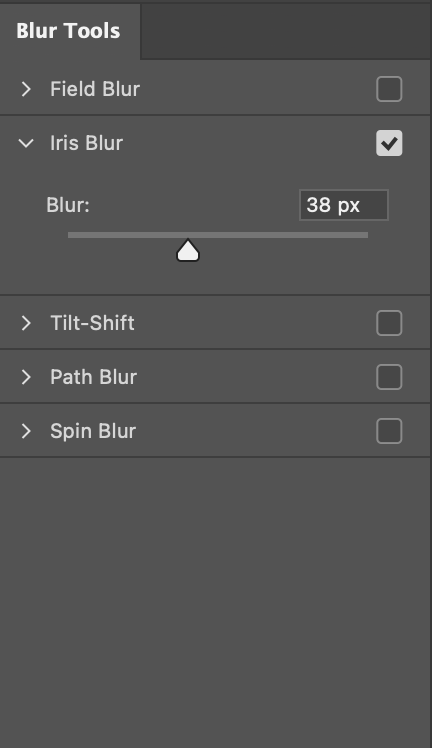
To adjust how blurry the background is, increase the slider on the right side of the screen under Iris Blur. The higher the number in pixels, the more blur your background will have. After you adjust the blur amount, you can always go back and adjust the circle to change the area that is being blurred.
Create Bokeh
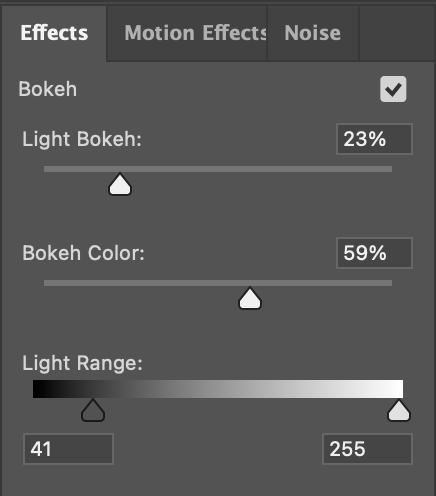
Lastly, you have the option to create bokeh. This can be done on the right side of the screen, under the blur options. Increase the amount of light bokeh to add bokeh into your scene on some of the bright spots. You can also adjust the color of the bokeh to match your scene, rather than just having white bokeh.
If you wish to add even more bokeh, adjust the light range slider on the bottom, which decides what tonal values in your image will receive the bokeh treatment. Try dragging the darker slider to the left to increase the amount of bokeh in your image.
Once you are satisfied, click OK on the top menu bar, and allow the blur to load out!
