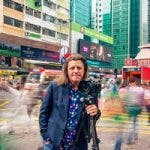
Lighting

How is a Rim Light Used in Cinema and Photography?

Years ago, when I worked as a photo assistant, a great mentor told me that studying cinematography would change my thoughts about photographic lighting. They were right. Rim light was one thing I noticed early on that is used extensively in film, though less often in photography. Similar to a backlight (we will get to that shortly), a rim light can take an average portrait, fashion, or product shot and level it up in a sometimes subtle but always powerful way.

How is a Rim Light Used in Cinema vs. Photography?

As mentioned above, cinematographers commonly use rim light. Its close cousin, the backlight, is more often used by photographers. This has to do with the scrutiny each individual image gets when we compare the media. We frequently see scenes under and overexposed in a film, highlights blown out, and deep dark shadows. These are things photographers have traditionally shied away from. Not all photographers, of course, and those who have learned to use rim light and other high-contrast lighting techniques often stand out in a crowd of their peers.

Defining Rim Lighting

Rim Lighting is when a strong, typically hard light source is aimed at the back side of a subject. This gives the effect of a halo around their form. For this article, the back of our subject is defined as the side facing away from the camera, not literally their back. For instance, you could have a couple looking off into a sunset with their backs to the camera. The sunset light could create a rim light effect. While it is not always necessary, often in cinema, the source of the rim light is obvious, if not in the scene itself.

Photo by MakoMakt

What is the Purpose of a Rim Light?

Photographers and Cinematographers alike use rim light to create a three-dimensional feel in what is, of course, a two-dimensional medium. This helps the viewer feel immersed in the scene and adds a bit of realism. Particularly when the key light is powerful and matches or overpowers the environment. We repeatedly find photographers bringing large softboxes outside and blasting the subject to match or exceed the ambient exposure, resulting in a beautifully dark sky. However, this effect feels very artificial (which might be the point). Suppose we add a powerful rim to such a scene. In that case, we now have a natural feeling scene with the softbox acting as a smooth and even shade while the rim emulates the sun, all with a mighty blue sky as the backdrop.

Rim Light Setup

While a rim light can be set up in many ways, some basics must be remembered. Your source must be far enough away, or multiple sources should be used. This allows the light to cover the entire silhouette evenly. By placing the light further away, we take advantage of the inverse square law. Resulting in an even light across the silhouette. When space is at a premium, using two light sources, one to either side, is a great solution.

What Can I Use as a Rim Light?

One of my favorite things to use when creating a rim is the Profoto Magnum Reflector. This light shaper creates an even, hard, crisp illumination that can be positioned back far enough to give enough coverage for a single source rim light.

For a sporty or glamorous effect, or if I am concerned with losing detail, I often set up my rim using Two Chimera 9×36″ Super Pro X Small Strip Softboxes, one on either side of the subject. This allows for a more diffused light that retains detail in the highlights.

Whether you need a light for cinema or just prefer to work with constant light, you can’t go wrong with a NanLite FL-20G Fresnel Lens for Forza 300 and 500 mounted on a NanLite Forza 500B II Bi-Color LED Video Spotlight. The Fresnel lens is a classic for a reason. Used for decades in the filmmaking industry, the smooth yet punchy feeling of light is perfect for a light that feels like sunshine.

A beauty dish such as the Godox BDR-S55 Silver Beauty Dish is another great option when using a rim light. Like the Magnum reflector, the silver dish creates an excellent hard source. Because a beauty dish is fitted with a deflector, the light on your subject will be even without any hot spots, even when the dish is placed close to your subject. Like the strip boxes, I often use two beauty dishes when creating a rim light.

Photo by Daniel Norton

What About Backlight?

A rim light is a type of backlight. In the same way, a key light is a lighting function, a backlight is a lighting position. Backlights include things like hair lights and simple separation lights. A rim light in the backlight position creates a halo effect around the entire subject. It is most commonly (though not always) a pronounced effect. Some separation lights, for instance, are barely noticeable until you see the image with and without the effect.

Conclusion

When we first learn to master light, we often focus on the key light. Since this is how we shape our subject. Fill light is also common in this early stage of learning to balance out our key light. To bring our lighting to the next level, we need to consider creating a three-dimensional and lifelike scene. Rim light is a great technique to get us there. Remember that your rim light can be more subtle exposure-wise. Still, it must always give the 3D pop. As well as create a silhouette that makes viewers feel they could be in the scene with your subject.

Daniel is a photographer, director, and educator based in NYC. After studying fine art at the University of Massachusetts, He began his career shooting fashion and commercial projects in Miami Beach. In 2003, Daniel Moved to NYC to work with his growing client base and began hosting workshops from his Manhattan studio. Now, Daniel hosts weekly live events and the AdoramaTV series "OnSet with Daniel Norton."
Daniel Norton

Recent Posts

7 Tips for Better Wildlife Photos

Few things are more exciting for a photographer than being in the right place at…

14 hours ago

Shure SM58 Special Edition Black

In 1966, Shure introduced a new microphone standard, the SM58. The SM58 is the favorite…

1 day ago

The Best Gear and Accessories for Film School: 7 Must-Haves

You were born to capture powerful visuals. Moving pictures is your passion. You are a…

1 day ago

Classroom Connect Program: Enjoy Year-Round Discounts

Unlock incredible savings with the Classroom Connect Program, an exclusive discount initiative by Adorama for…

2 days ago

Atomos Shinobi II With Brighter HDR Display and Smaller Footprint

Atomos has been at the forefront of developing cutting-edge monitoring and recording technology for over…

2 days ago

What Is the Golden Ratio in Photography?

The ingredients for good photography are high-end photo gear (i.e., high-performing cameras and lenses and…

4 days ago