If you like to take studio portraits but don’t have thousands of dollars to invest on renting a professional studio, this article is for you. As you will see, you can set up a home photography studio quickly and easily without depleting your photo gear bank account. I’ll show you how using a few behind-the-scenes photos that were taken in my house.
High-Key Portrait/Constant Lights
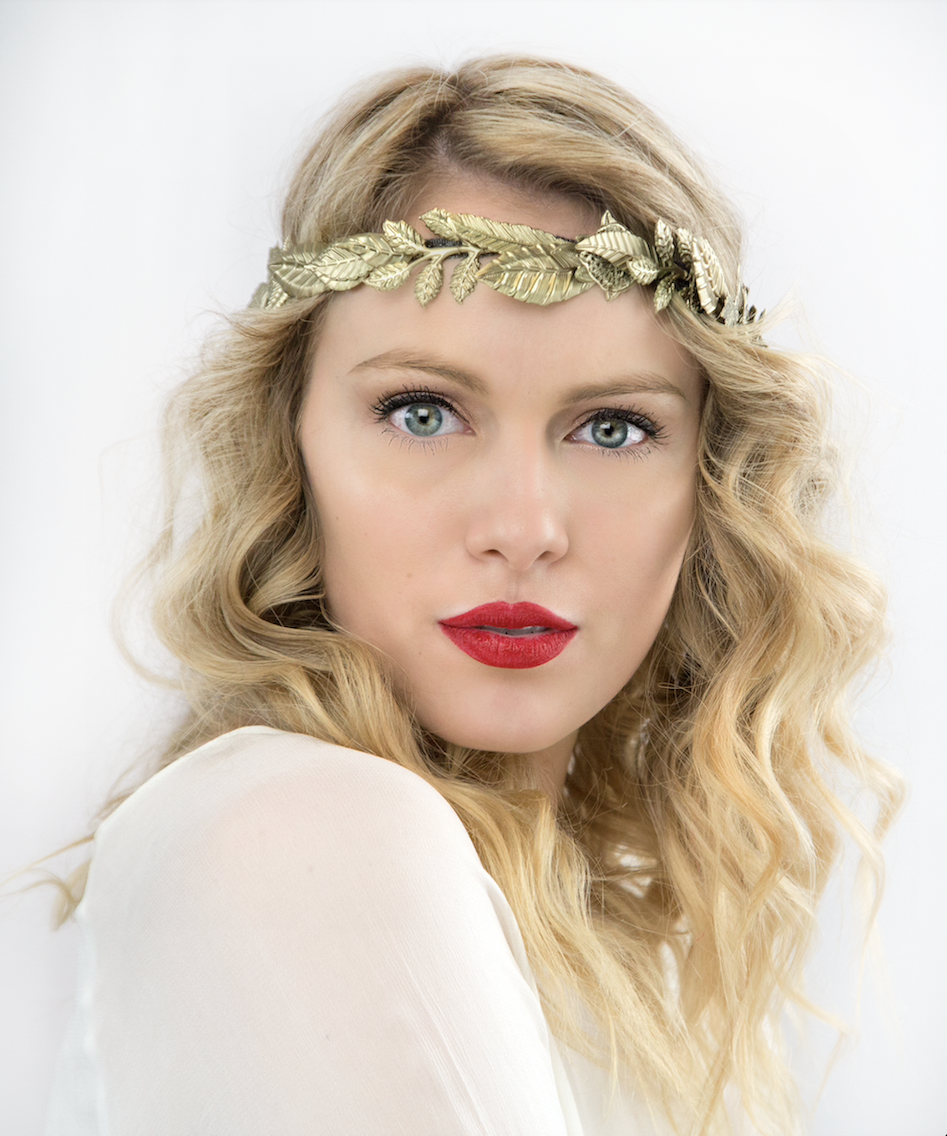
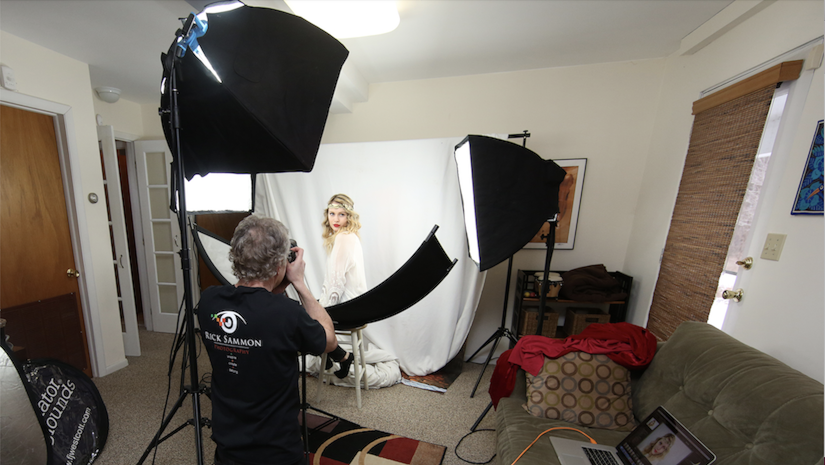
The opening photo for this article shows my set-up for this high-key photograph. It’s basically a shadowless portrait, which was my goal in making this picture.

Here’s my lighting setup for the shot. To eliminate the shadows, I used three Westcott Spider Lights (constant lights) in Westcott Soft Boxes, and also used a Westcott Eye Lighter unit. For the same soft and flattering lighting effect, I’d recommend using the smaller, lighter and more compact Westcott uLite LED 2-Light Collapsible Softbox Kit and adding a third light. The Westcott Eye Lighter, if positioned correctly under the subject’s face, does a great job of filling in the shadows under the eyes. It’s one of my favorite studio photography accessories.
The white background was one of the key elements to the success of this high-key portrait. I used a Westcott soft-cloth white background mounted on a Westcott background stand. The model’s white dress also added to the feeling of the high-key portrait.
You’ll notice that my camera is attached to my laptop with a Tether Tools cable. When I am doing a studio portrait, seeing a larger image on my laptop is an advantage so I can check details.
Low-Key Portrait/Constant Lights

Here’s a behind-the-scenes photo of my same basic constant light setup — minus the Westcott Eye Lighter. I’m using only one light to create the shadows and switching the background to a soft-cloth Westcott Black Background. My goal here was to create a more dramatic mood. Here’s the low-key image created in the same home studio setting.


This is the one-light setup that I used for my low-key image. My point in sharing these two portraits (high-key and low-key) is to illustrate how the background and lighting can dramatically change the mood and feeling of a home studio portrait. This is because the mood of an image always matters most.
Speedlight Portrait

Here’s a photo of the same model from the opening example in this article. This portrait was taken in a natural home setting with a Canon Speedlite and a Westcott Rapid Box. I find this is the fastest and easiest setup for taking home speedlight photos.
I include this example here to illustrate how you can take your home studio “on the road,” and make portraits, quickly and easily on location, in the homes of friends and clients.

Here, too, I used only one light. But the key to the success of this in-home portrait is that I balanced the light from the speedlight to the available light. Here’s how I did it:
- I set my camera to Manual Exposure and set my exposure for the room light, after which I reduced the exposure by about a one f/stop to darken the room.
- Next, I set my speedlight to TTL (through the lens) metering.
- I did a test shot, which showed the model a bit too bright.
- I reduced the TTL exposure about one stop and found that I liked how the speedlight and room light worked together.
You may have noticed that there is no orange cable connecting my camera to my speedlight. That’s because I am using a Canon ST-E3 wireless transmitter, which triggers the flash remotely.
Closing Thoughts and a Few More Tips

Here are five more tips to help you on your way to setting up and working with your home photography studio.
- Play with the position of the lights. For this portrait, a speed light in a rapid box was positioned directly above the model, who was reclining on the floor on a black background.
- Consider the difference between using speedlights or constant lights: Constant lights are not as powerful as speedlight so you will need to use a higher ISO, slower shutter speed, and wider aperture during your portrait session. When using a speedlight, which is much more powerful than a constant light, you can use smaller apertures. Because the speed light fires at a fraction of a second, you do not need to worry about a blurry photograph caused by subject movement.
- When it comes to lenses, I’d recommend using a 100mm (or a zoom lens with that setting). It provides a comfortable working distance between you and the model.
- Keep the model happy! Talk to them, encourage them, and give them direction. Remember: Silence is deadly during a portrait session. Also, show the model your photographs and get their feedback too.
- Play music. Keep it fun!

Have fun with color gels. You can change the mood and feeling of a speedlight photo with color gels. In the photo above, the model is standing on a white background. A speedlight on the right is illuminating the model, and a speedlight on the left — with a blue gel fired through a cardboard cutout — is illuminating the background.

You don’t even need to buy high-tech cardboard cutout — make one at home!
Good luck with setting up your home photography studio. With some effort and planning, you can get some great results.
