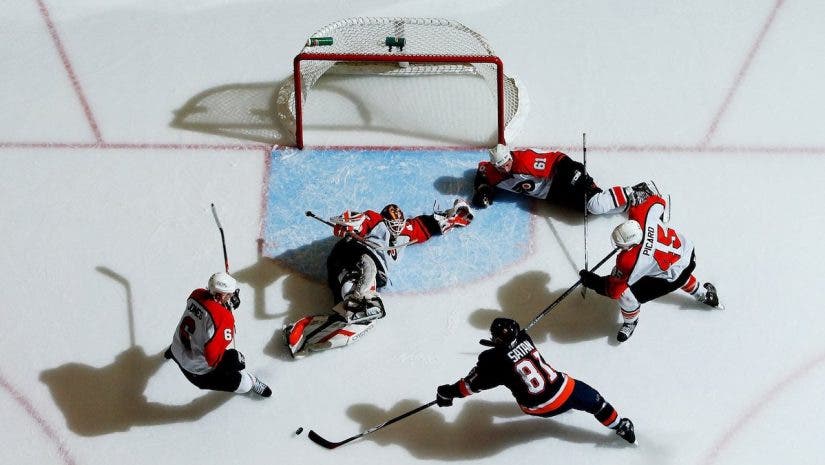
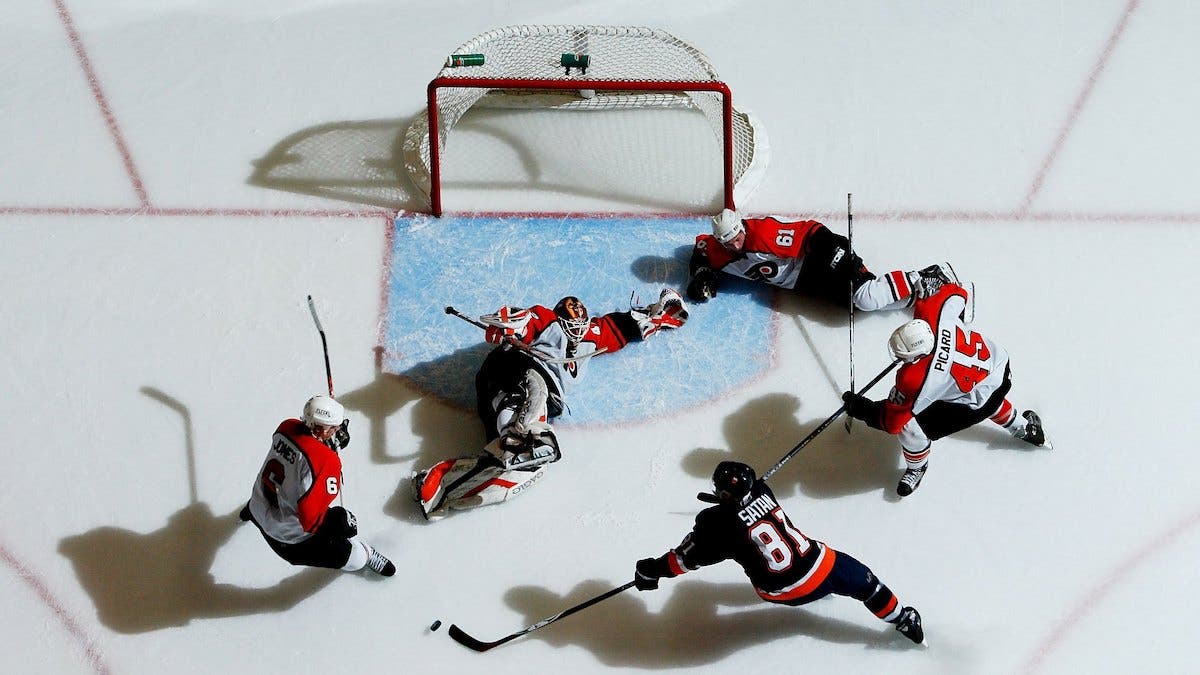
Featured Image – UNIONDALE, NY – JANUARY 02: Miroslav Satan #81 of the New York Islanders reaches for the puck as Robert Esche #42 of the Philadelphia Flyers goes for the save during their game on January 2, 2007 at the Nassau Coliseum in Uniondale, New York. (Photo by Al Bello/Getty Images)
Ice hockey is one of the four major sports that is covered here in North America. As a sports photographer for the last 35 years, I have dipped in and out of covering this fast-moving sport. I photograph many different sports for Getty Images but, in this article, I’ll be sharing everything I’ve learned during my time shooting ice hockey photography.
Positions and Angles for Hockey Photography
Ice Level
There are few positions to shoot from when you are covering an ice hockey game. The most coveted position is shooting from ice level. There are seven total ice level positions to shoot from in most hockey arenas, and one more hole added for the playoffs. They are spaced out in four corners of the ice at two apiece. As a photographer, you will sit behind the plexiglass barrier and there are small holes cut out for you to shoot through.
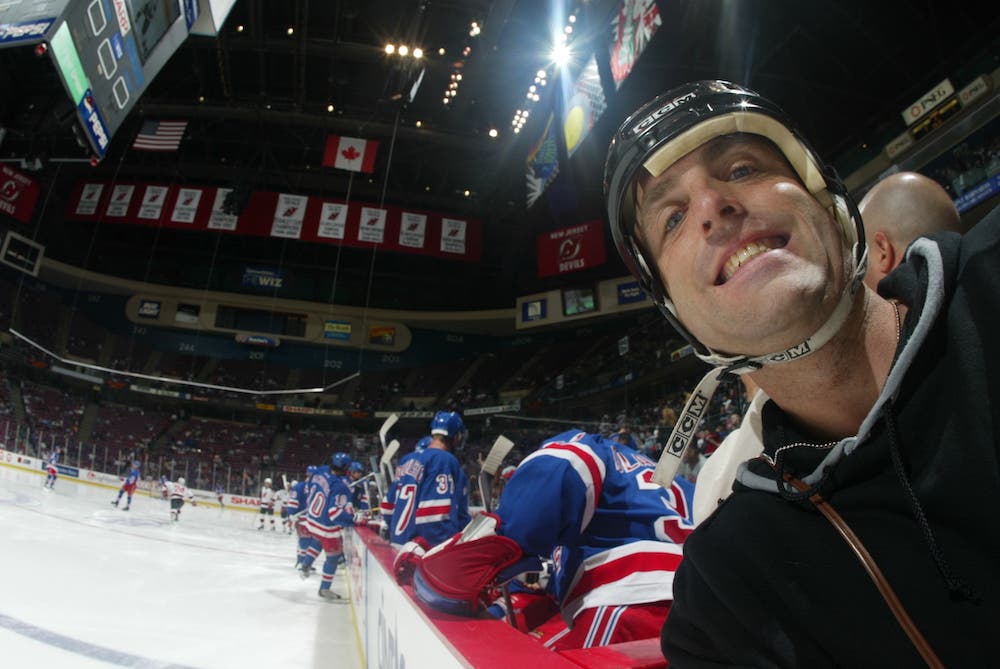
The most recent rule that the NHL has implemented is that you must use a sliding plexiglass door to cover the hole if players get too close. This is for the safety of the players and anyone in the stands. There have been instances where the puck or a stick has gone through the hole and struck people on the other side of the plexiglass. It is an added burden on the photographer, but it is a rule that must be followed to have access to the ice level position.
You are usually sandwiched between fans on either side of you. Depending on the arena, you are either sitting on a stool or crunched up to fit in a small sitting space to fit into the shooting position. It can get quite uncomfortable sitting like this the whole game. Yoga has become my friend after shooting a hockey game.
Elevated Level
The other position to shoot from is an elevated position. You are usually put in the upper level of the stands where the crowd sits. It depends what part of the ice you are shooting from but, ideally, you want to be able to clearly see both goals on either side of the ice.
When you are shooting from ice level, the action is much harder to capture, and everything moves very fast. Ice hockey is a deceivingly tough sport to shoot. It is very hard to get a great hockey photo. There are players always whizzing by you. Its daunting to follow the puck being passed from player to player. Although, you can capture important goals being scored more easily. If you have no obstruction from either end of the ice, you should be able to capture some good shots from an elevated level.
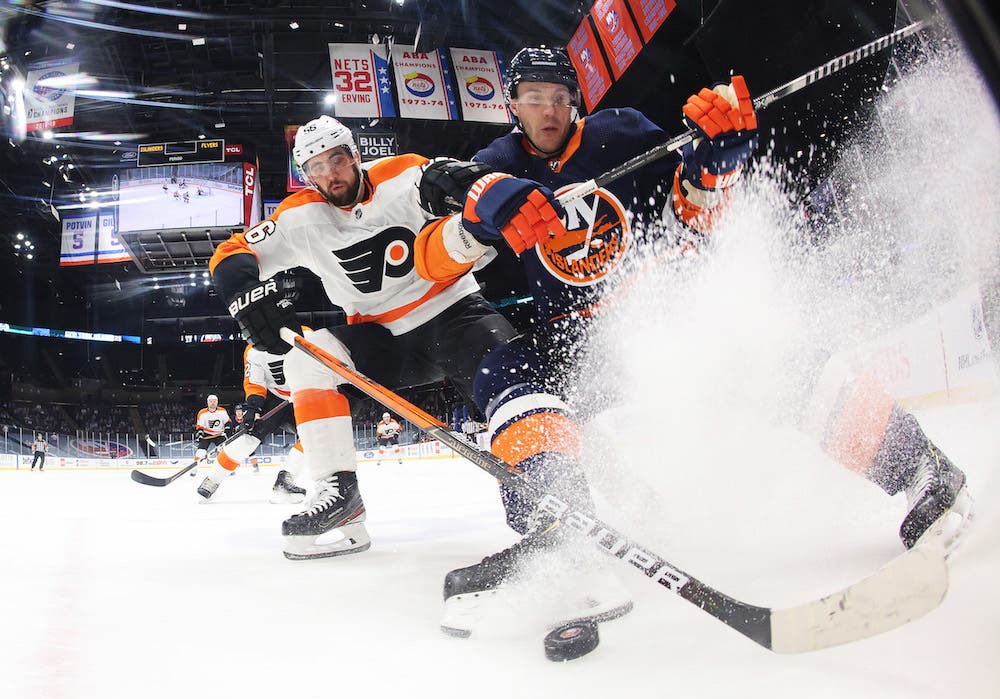
In my opinion, being at ice level is the best position. You can see the players’ eyes and get the expressions on their faces from this angle. When a player is checked into the boards and goes flying, the photos look much more dramatic than shooting from upstairs. The same goes for a goalie making a save or a player scoring a goal and celebrating. When the players fight, it is also better to be ice level. If you are shooting from upstairs, it is probably because you cannot get an ice level position, or you were backing up your photographer who is shooting from the ice level position.
Remote-Controlled Areas
There are other angles you can use to cover hockey. These angles are obtained by inserting remote cameras into these positions. One of the positions is inside the net. A camera can be placed with a plexiglass housing that is approved by the NHL. You can put the camera inside of this housing and it is attached to the back of the net. You then attach a radio receiver to the camera, and you fire the camera from your position with a transmitter on the same channel.
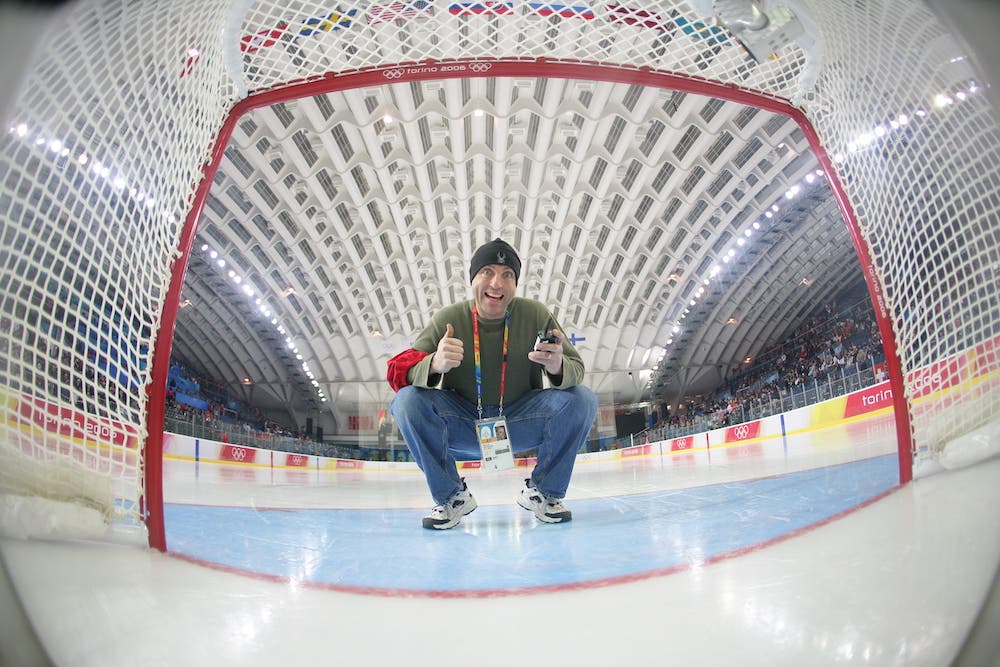
You can also put a remote overhead into the catwalk of an arena. These angles give you different looks that you cannot get anywhere else. If you get a good shot from either of these angles, it is usually quite dramatic and is worth the effort to insert the remote cameras.
Best Gear for Hockey Photography
The camera bodies that I use are two Canon R3 bodies and one Canon R5 body.
The main lens I use from ice level is a Canon RF 70-200mm f/2.8 L IS USM Lens from mid ice to in front of me at the net. Then, I use a Canon EF 100-400mm f/4.5-5.6 lens for anything down on the other side of the ice. I carry a super wide lens, like a Canon 15-35mm f/2.8 lens, around my neck for any checks that are on top of me. Shifting from one lens to the other is quite difficult. You must have a quick reaction to what is going on in front of you.
When you are shooting from the upper level, you should use a much longer lens. I like to use the Canon EF 200-400mm because of its versatility to zoom in and out, so I don’t accidently cut out the players limbs and sticks while photographing the action. I also keep a wide lens and a medium zoom lens with me just in case I need it for crowd shots.
Camera Settings for Hockey Photography
When shooting ice hockey, you are trying to freeze the action. Therefore, I usually set my camera to 1/1600 shutter speed and the widest aperture I can to blur the background. My ISO is usually set around 2,500.
The lighting inside the arena is constant so, once I have my settings, I usually do not need to change them. If I decide to try something like a pan blur, then I will shoot anywhere from. 1/60th – 1/15th of a sec.
Tips for Shooting Hockey Photography
Be Patient
The best thing I can tell you when photographing hockey is to be patient. The action is fast. You can get overwhelmed very easily. This is a sport that takes years of practice. There are many ebbs and flows to this game and you must be able to adapt.
Stick to One Lens — for Now
Get comfortable using one lens. And as you get more experienced, you can try using two lenses.
Stay Alert
Beware of players crashing into you at the boards. It is quite alarming when a player gets checked right in front of you.
Learn the Game
The main thing to know is that the players on either side are trying to score a goal with the hockey puck past the goalie. There are many rules to the game and, as you get more experienced, you will understand the game better. As I do with any sport, I ask many questions to people who know more than me. I have had many mentors in the past and present, and I lean on them for information when I am not sure of what I am doing.
Know What’s Expected of You
Transmitting photos from a hockey game is like many of the sports that I shoot. The deadlines are quick, and you usually want to get photos transmitted between the three periods, during the game. Your best bet is to check with your client establish their expectations before the game starts.
Conclusion
I think the main thing to remember when shooting hockey is that you will not get portfolio pictures every time out of the gate. It is a very humbling sport to shoot. There will be nights where you come away with not many photographs. At the same time, you are trying to tell the story of the game and you want to put out the best images you can give your editors. When I am at a game, I also try to remember that it is not life and death. Hockey, like any sport, has a beginning, middle, and an end to it. Keep your expectations in perspective and try to enjoy yourself. Beware of your surroundings. You are with the fans in many situations, and you need to understand they pay tickets to watch the game. You are in their world, and you need to respect that.
