The Fujifilm X-T1 combines the best of retro camera design with bleeding-edge digital photography technology to produce a tour-de-force MILC that gies a classic DSLR-like experience and more. Read and learn how to get the most out of this outstanding camera.
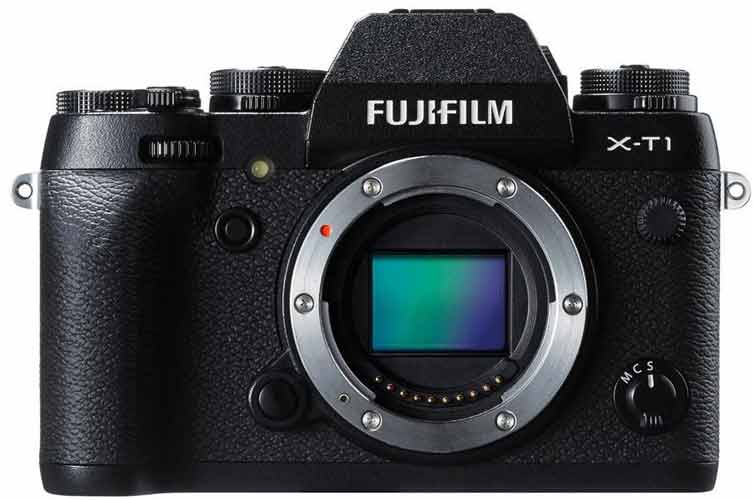
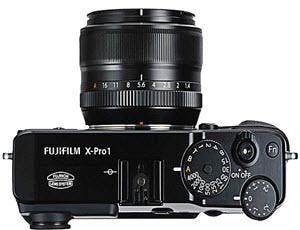
Like the Fujifilm X-Pro 1 before it, the Fujifilm X-T1 is a high-end interchangeable-lens compact digital camera that’s loaded with features, has a classic feature set including manual dials and knobs, and an innovative APS-C (23.6×15.6mm) CMOS sensor that delivers high-quality images, even at higher ISO settings. But while the X-Pro 1 was based on a hybrid optical/digital viewfinder system that put it in competition with Leica’s rangefinder cameras, the X-T1 has a simple (but high-quality) EVF in a DSLR-type design.
The Fujifilm X-T1 is the first Fujifilm X-line interchangeable lens camera to be weather-resistant—it can be used in the rain and under other extreme conditions, but not underwater—as long as you also use a water resistant lens. As of this writing, there is one such lens, the Fujifilm 18-135mm f/3.5-5.6 R LM OIS WR, although more models are promised for the future.
For traditionalists, the Fujifilm X-T1 offers physical exposure and mode controls as well as extensive menu options via its 1080p high-resolution flip-out 3-inch touch screen monitor, while high-tech amenities such as Wi-Fi, HD video capture, a wireless flash system, HDR, bracketing and focus peaking are welcome additions. If you’ve just purchased this camera, join us as we explore the X-T1 in depth
Setting Up The Fujifilm X-T1
Once you’ve charged the battery, and put on the straps, choose a language and set the date and time using the onscreen prompts and the 4-way toggle switch on the back. By default the camera operates on eye-sensor mode, with the LCD on until you bring the camera to your eye. At that point it switches to the EVF. You can change this by pressing the View Mode button on the right side of the EVF housing. You’re ready to go!
Fujifilm X-T1 Basics
A tour of the external controls:
Let’s take a look at all the external physical controls, which allow you to intuitively take manual control of the camera’s main exposure features, starting at the top on the left side.
Sensitivity dial: Choose any ISO from 200-6400. The H1 and H2 settings can be assigned ISO 12800, 25600, or 51200. A switch at the base of the Sensitivity dial lets you choose bracketing (BKT) of ISO, film simulation, dynamic range, autoexposure or white balance (go to the first shooting menu window and select the first item to access your options), fast and slow burst rates (CH and CL), single (S) exposure, in-camera double exposure (two misaligned boxes) , Advanced filter (choose from Toy, Miniature, Pop Color, Dynamic Tone, Partial color and more by going to the first item in the first shooting menu, and choosing Adv. FILTER SELECCT)
Viewfinder housing: A dial on the left side of the viewfinder housing is the diopter control. With the camera focused on a flat but contrasty object (such as a fence) move the dial until the image in the viewfinder is as sharp as possible. Atop the housing is a hot shoe, which accommodates either the included EF-X8 pop-up shoe mount flash or one of Fujifilm’s larger shoe-mount flash units such as the Fujifilm EF-42. The Viewfinder Mode button on the right side of the finder housing lets you activate the viewfinder or LCD manually, or activates the Eye Start feature, which switches from LCD to finder when you bring the camera up to your eye.
The shutter speed dial includes all full-stop shutter speeds from 1 second to 1/4000 second, plus A, Bulb, and Time exposure. Use T to automatically set exposures over 1 second, and Bulb to manually start and stop exposures up to 30 seconds. Keep it on A and your lens aperture ring set manually for aperture priority Autoexposure. (For shutter-priority auto exposure, reverse that: put your lens aperture ring on A and set the exposure manually.)
The on-off switch surrounds the shutter release button, and the Fn Wi-Fi button is by default set to start your Wi-Fi connection with your hot spot, smart phone or tablet. The red dot button to the right of the shutter release starts and stops movie recording when pressed.
The EV dial controls exposure compensation. Unusually, it has a big 3-stop range in each direction, in 1/3-stop detents.. This feature is best used in tandem with autoexposure and advanced filter modes to lighten or darken the image as needed. Suggestion: Turn on the Live Histogram option in the custom display menu. See below under “5 Hacks”.
On to the camera back
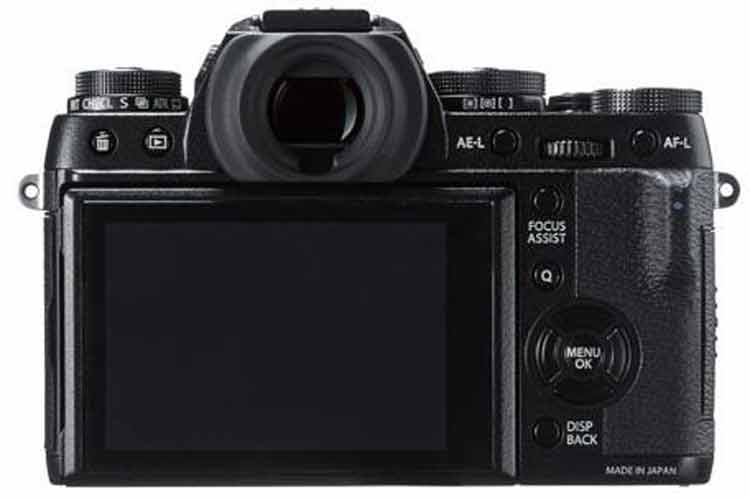
The delete button (top left) and image preview (right-facing arrow) are self-explanatory. AE-L locks autoexposure so you can recompose and shoot after getting the desired exposure. There’s a thumb dial and AF-L, which locks in autofocus so you can also move the camera and recompose while holding it down and maintaining focus.
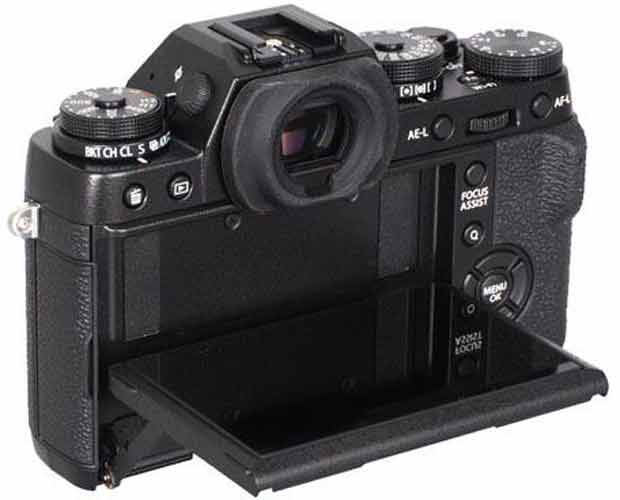
The 3.2-inch LCD monitor flips out 90 degrees facing up, and about 45 degrees facing down, a great tool for low-angle and high-over-the-head shots, respectively.
Quick Menu: The Quick menu lets you quickly find, select and change a grid of 15 frequently-used features, including AF range, dynamic range ISO, White Balance, noise reduction, aspect ratio and image quality, film mode, and more. Use the 4-way toggle switch (the four buttons surrounding the MENU OK button) to navigate, and use the thumb or forefinger wheel to change your settings.
Auto everything: While the X-T1 lacks a Program mode, Autoexposure is easy: Simply turn the shutter speed and aperture dials to A. You can also move the ISO dial to A and the camera will automatically choose the best ISO for the shooting situation. You can also limit the maximum and minimum ISO speeds by going into the third item in the Shooting menu, ISO Auto Control.
Shooting Movies: You can change the frame rate and resolution of the video capture by going to the bottom item in the 4th Shooting Menu, Movie Set-Up. Here you can choose 1080p or 720p resolution at either 60 or 30fps. You can also access mic and remote release adjustments. Note that once movie recording has started, autofocus is disabled and you will have to focus manually. There is a mini plug on the left side of the camera where you can plug in an external microphone.
4 Fujifilm X-T1 Hacks
3 Focus Assist Tools
It can be difficult to manually focus any digital camera using the EVF or LCD. Fortunately, the X-T1 has four focus assist tools:
1. Focus Peaking: This feature highlights the in-focus areas of an image, so you know where the field of focus begins and ends. In Shooting Menu screen 4, go to MF Assist > Peak. Choose Focus Peak Highlight. You’ll be given a range of colors that will appear at the contrasty edges of any subject that is in focus.
2. Focus scale: When you are in manual focus mode, choose the Disp Back screen that displays a focusing scale. It will show in feet or meters where the range of focus lies.
3. Dual display screen: This shows a full-frame image that takes up about 2/3 of the monitor, and a thumbnail detail showing an enlarged view of the center of the image. Focus using the thumbnail to guide you. This can be used in tandem with focus peaking.
EVF or LCD View only (view mode button): By default, the live image will appear in your camera’s LCD finder but will automatically switch to the EVF when you bring your camera up to your eye, or when there’s an object near the back of the camera. You may want to override this. One way is to change the DIsp Back to the Info Display (which provides basic exposure info and displays the live image in the EVF when you bring the camera up to your face.) You could also turn either the EVF or the LCD off entirely via the View Mode button.
Custom Display: If you don’t see the information you want in any of the information screens, you can customize your own and access it via the Disp Back button. Go to Setup Menu > Screen Set-Up, then press Menu/OK to select features you want to see. Be sure to hit the Display Custom Setting button, where you can check or uncheck the information you want to display. One of the options, by the way, is a live histogram!
How To Adjust Aperture On Lenses Without Aperture Rings: Simple: rotate the forefinger wheel, and the aperture will be automatically set. Lenses made for the Fujifilm X-mount all have aperture adjustments, but third party lenses may not; that is when this feature comes in handy.
Did You Know…
You can shoot 8fps burst rate with AF tracking? Move the Drive dial to CH and shoot away.
Time-lapse: You can set the intervalometer for up to 999 images in intervals of 1 second to 24 hours between shots. Go to Menu 2 > Interval/Number of Times to choose start time, number of exposures, and interval between exposures.
There are six function buttons and they can all be customized? Go to Setup Menu 2 .> Function (Fn) Setting . An on-screen diagram will show you the location of each function button on the camera, and the list on the right side of the screen shows you the default settings. Press the right arrow to access custom settings.
For example: You can reassign the Wi-Fi button on the camera’s top plate to turn on RAW image file capture, face detection, Dynamic range or any one of 17 possible options.
You can operate the camera remotely with your smart phone or tablet? Go to Set-up Menu 3 > Wireless Settings to get things set up. Download Fujifilm Camera Remote, which is available for iOS and Android, and follow the setup instructions. You can take pictures, set focus and exposure, geotag and upload images using your wireless device.
You can limit the ISO and aperture: Go to the first Shooting Menu screen and choose ISO Auto Setting. From there you can change the default ISO sensitivity, set a maximum sensitivity (the default is ISO 800), and set a minimum shutter speed—useful for handheld low-light situations.
Learn more: Read Accessorize Your Fujifilm X-T1 so you have the right gear for the right picture-taking situation.
