Whether the subject in front of you is a professional model or a high school senior, it’s your job to make her look confident and beautiful. While more experienced models know their angles and can strike new poses with each click of the shutter, most people require a bit more direction, not to mention positive reinforcement. What you should know as a photographer, however, is that no matter who is in front of your lens, you can rely on some tried and true tips and female model poses to create flattering portraits every time.
We’ve put together a list of five female model poses every photographer should know with tips to help you build a solid portfolio.
5 Female Model Poses Every Photographer Should Know
- Female Model Pose #1: Basic Standing Pose
- Female Model Pose #2: S-Curve
- Female Model Pose #3: In Action
- Female Model Pose #4: Headshots
- Female Model Pose #5: Sitting Pretty
Female Model Pose #1: Basic Standing Pose
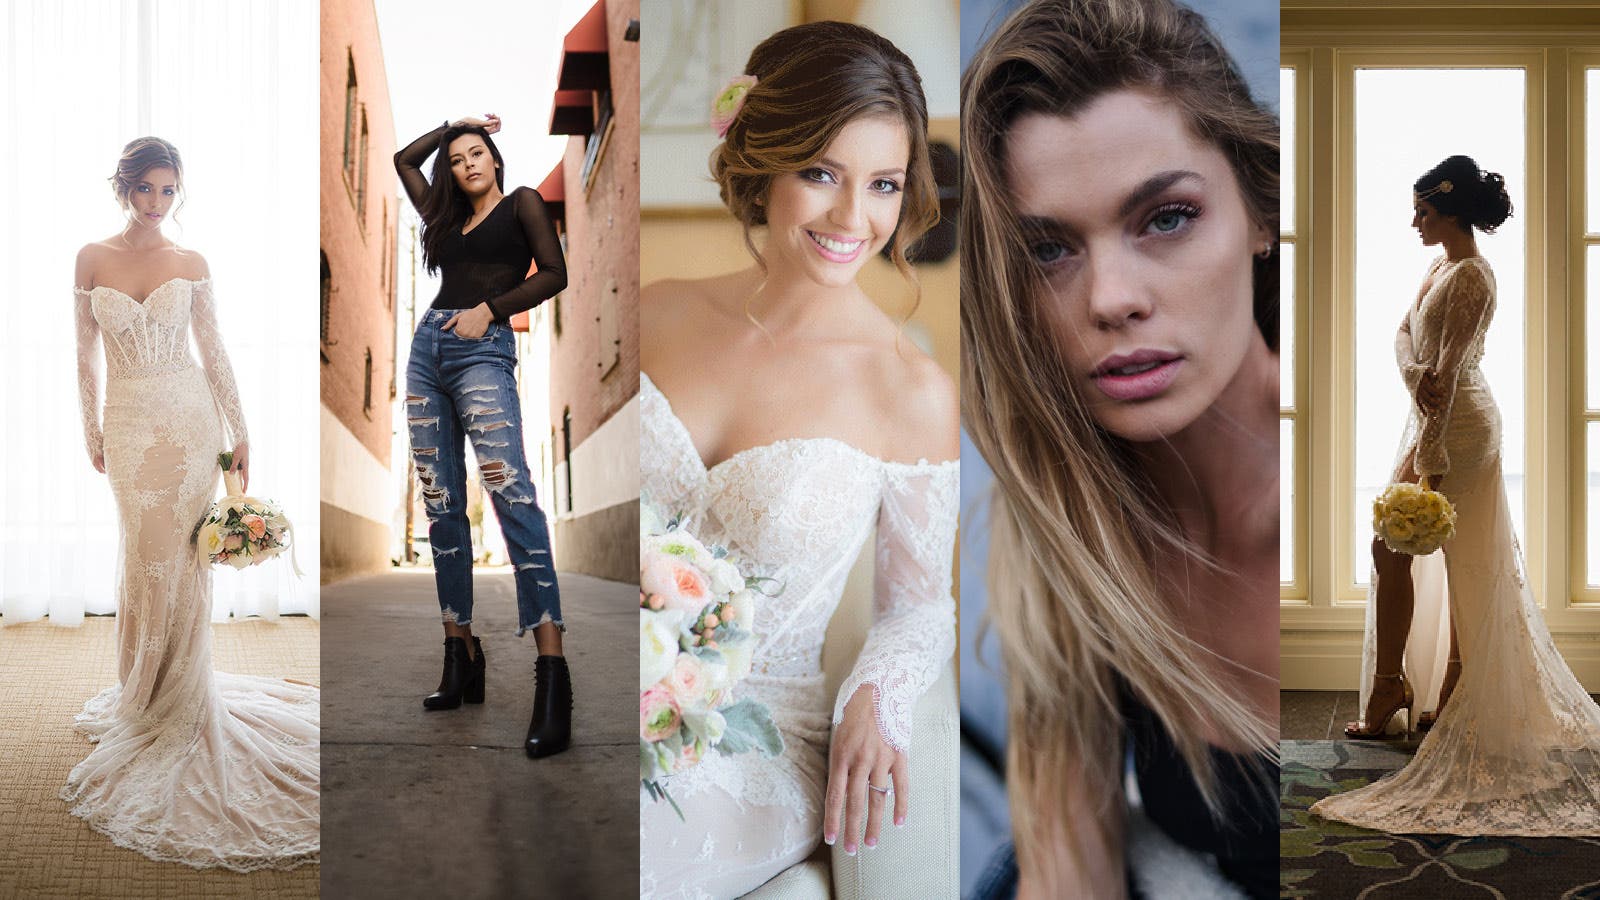
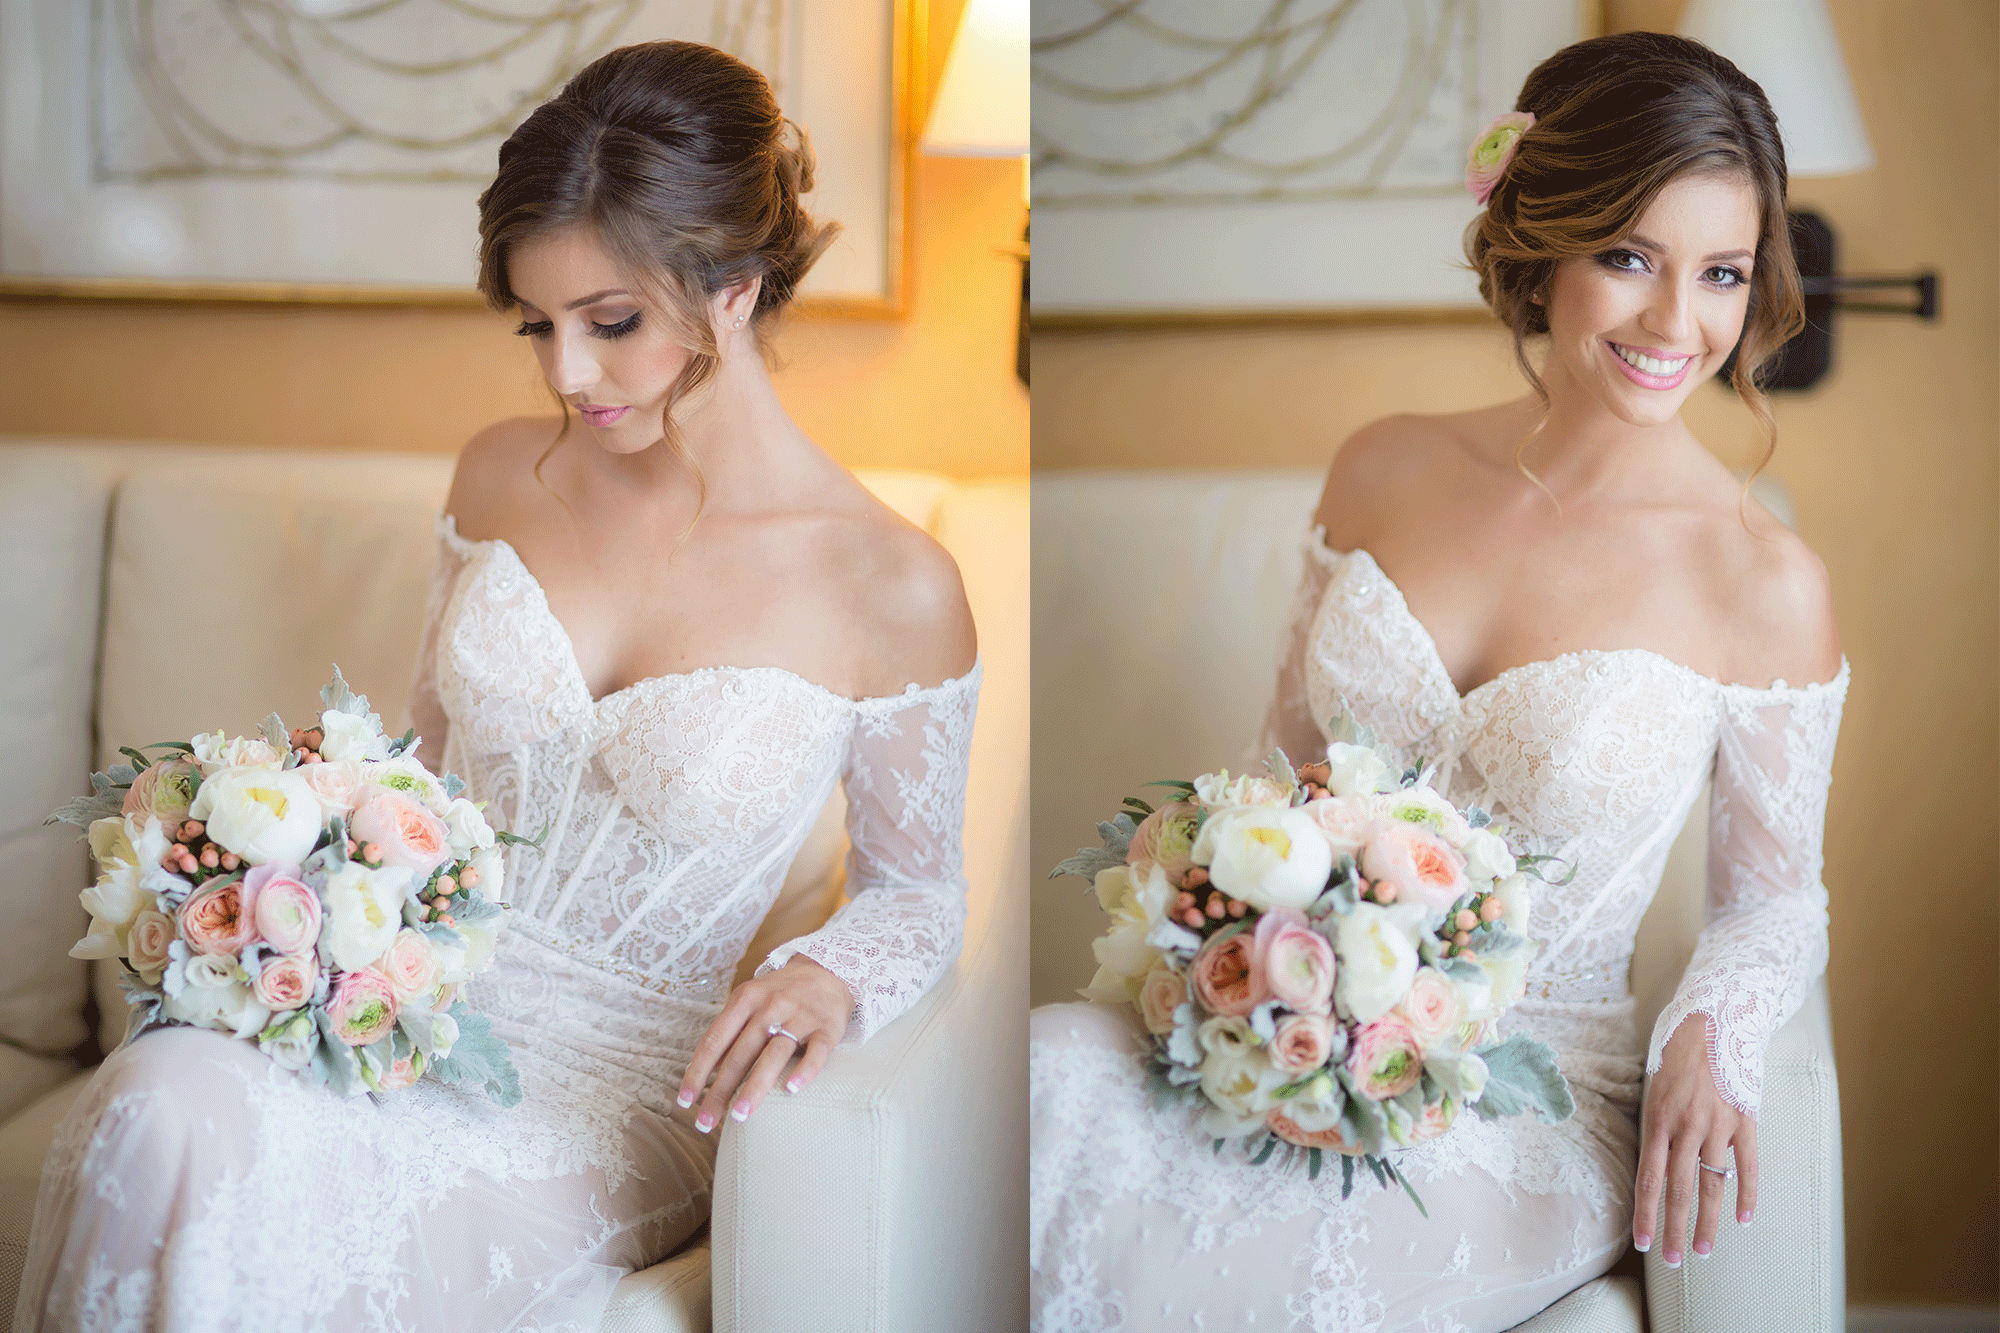
We’ll begin our journey into female model poses with the most basic, and perhaps most versatile pose: standing. We can use standing poses for different purposes, from accentuating curves and highlighting femininity to conveying confidence and power.
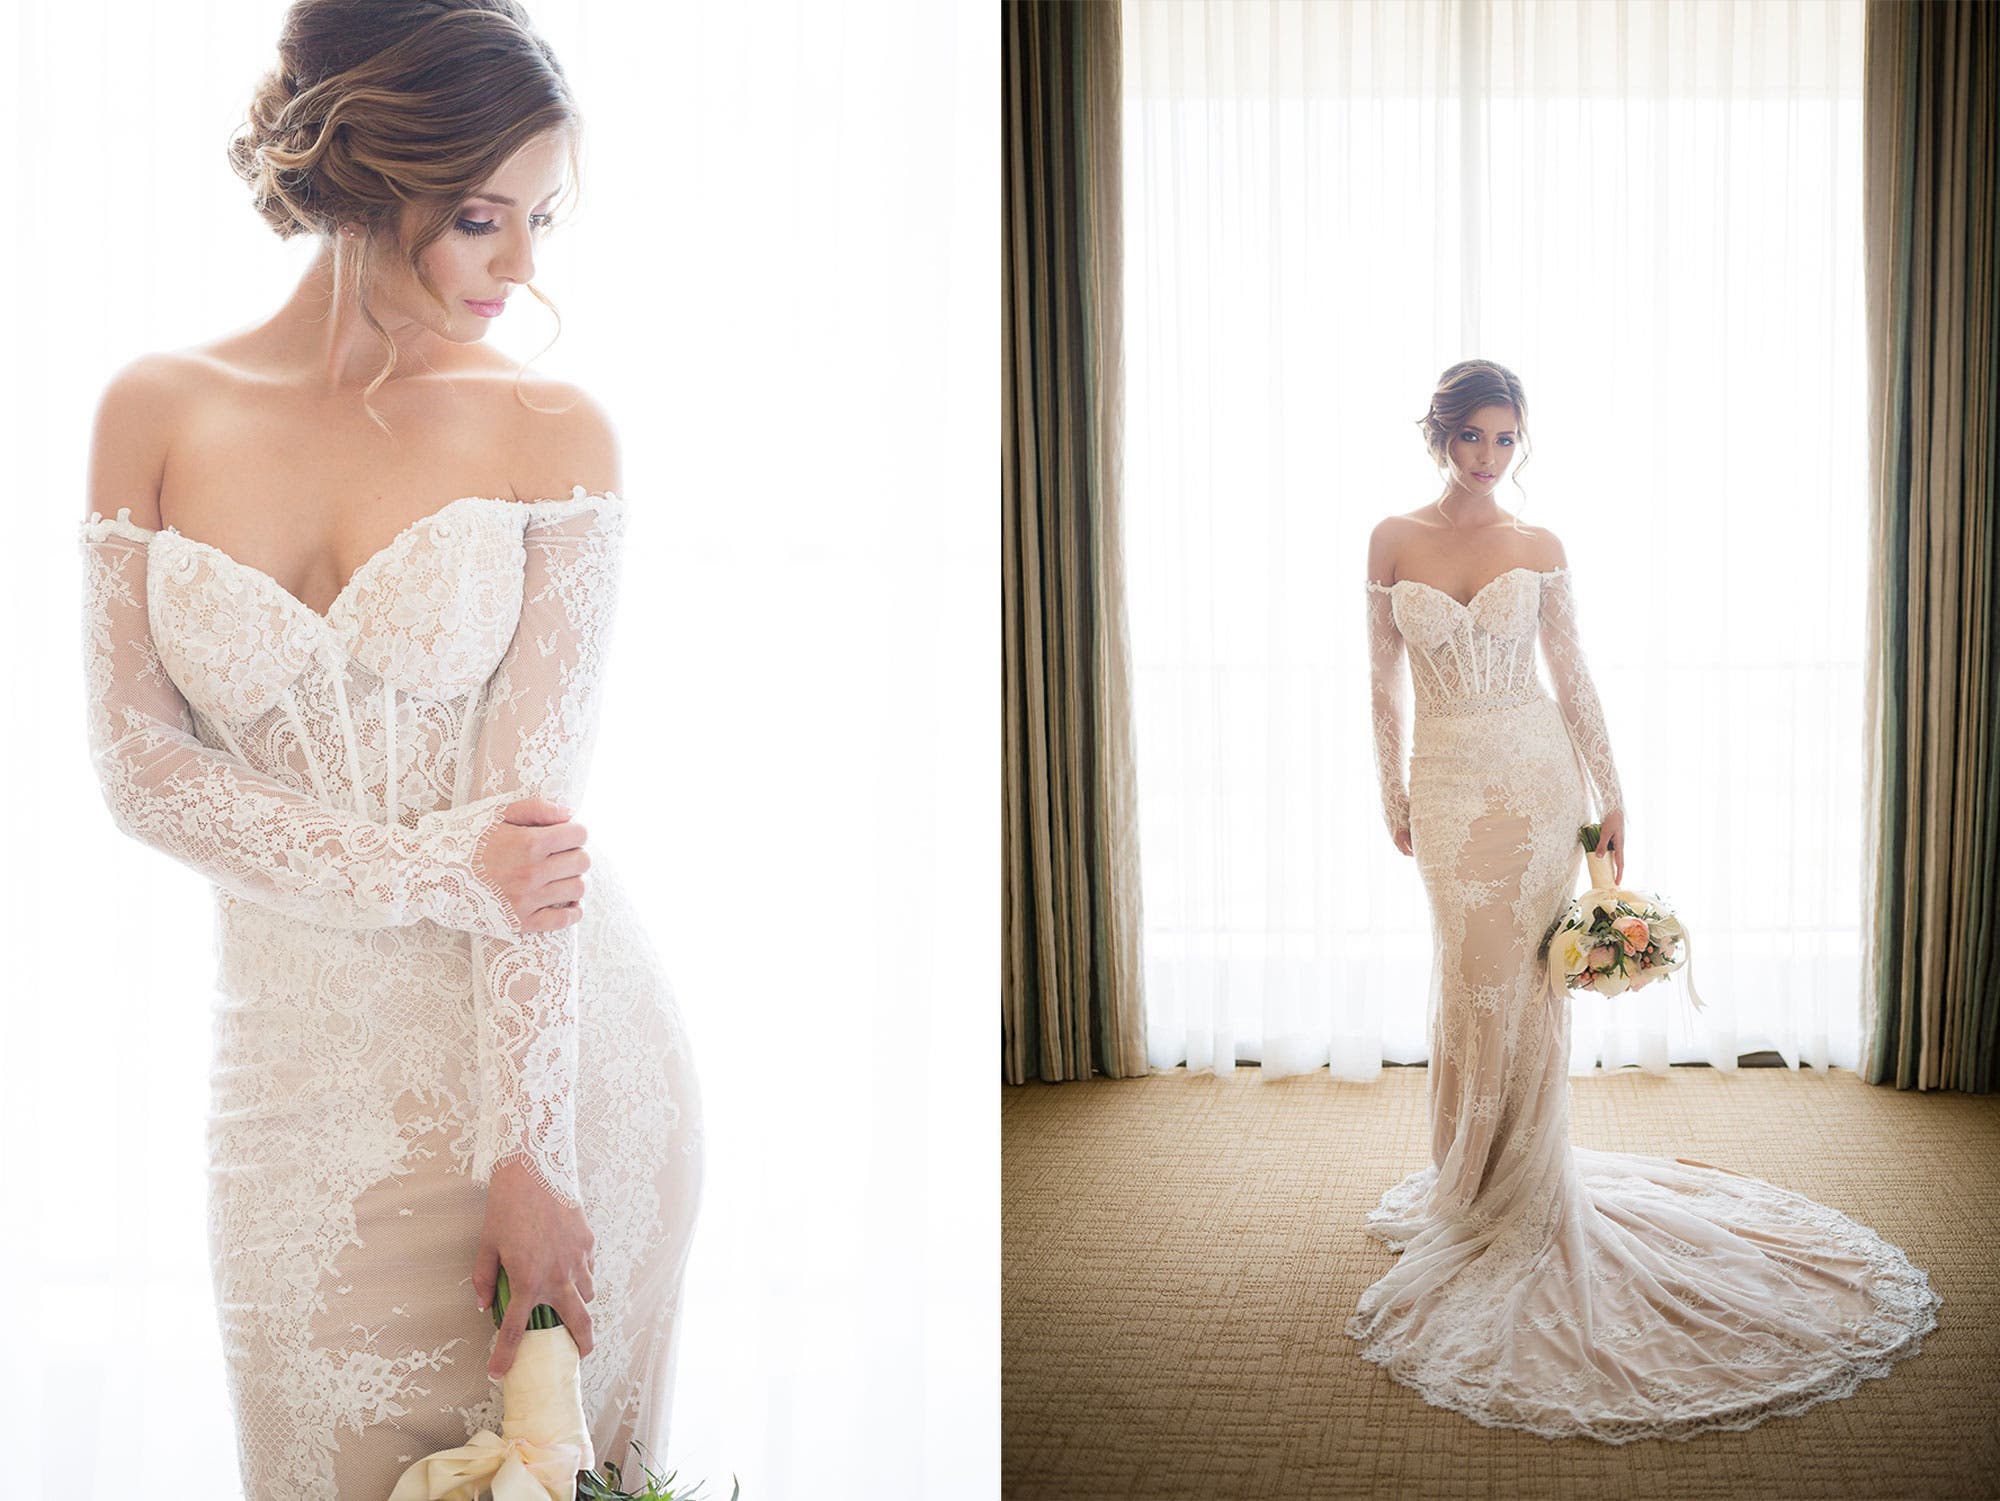
In the images above, we’ve placed our subject (in this case a bride on her wedding day) into a basic standing pose and made specific adjustments between the two images to focus on her dress (on the left) and her curves (in both images). Even though this pose highlights the subject’s curves, it’s actually a slimming pose as it creates an hourglass shape and narrows at the knees. Here are some basic points of reference for directing your subject into the pose on the right.
- Kick the hip to one side, whichever is most comfortable
- Bring the knee from the opposite side forward and overlap the other knee
- Draw the “free” foot back and lift the heel, resting on the ball (and toes) of the foot
- Create space between the arms and sides with a slight bend in the elbows
- Give at least one hand something to do, such as holding a bouquet, or even holding onto the wardrobe when applicable
- Angle the chin slightly down and turn slightly to the side to accentuate the jawline and avoid highlighting any dissymmetry in the face
- Cue the expression and capture the photo
You can also make additional adjustments to further enhance the slimming effect of this pose, especially for tighter shots. Ask your subject to bring a shoulder closer to the camera and turn her head toward the camera as well. Then, shoot slightly from above to better define the jawline.
Speaking of closer shots, for the pose on the left, we used a three-point technique made popular by Roberto Valenzuela. Using this technique, you can make adjustments to the eyes, nose, and chest to direct your viewer’s focus to specific elements of the subject. In this photo, for example, her eyes and chin are pointed away from the camera, but her chest is facing forward, which works well to draw our attention to the dress. This is a popular technique used in fashion photography. In the full-length portrait, we see more of a traditional pose with all three points facing forward. Turn all three away and we would end up with more of a candid portrait.
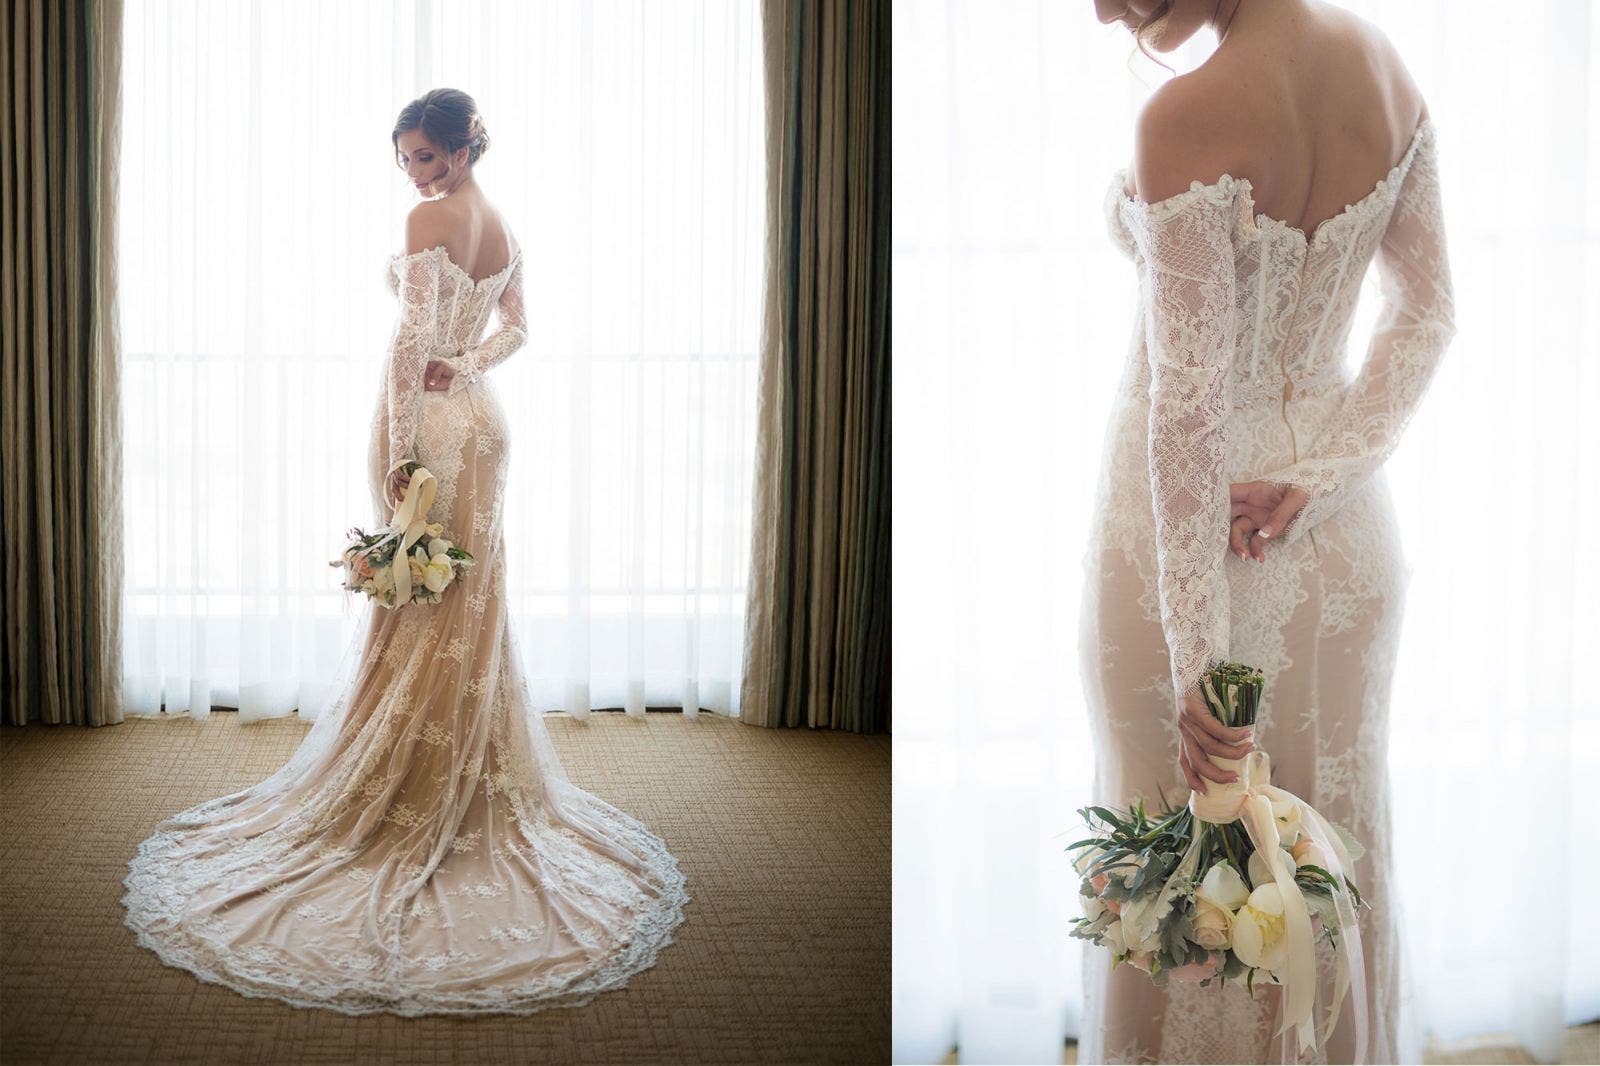
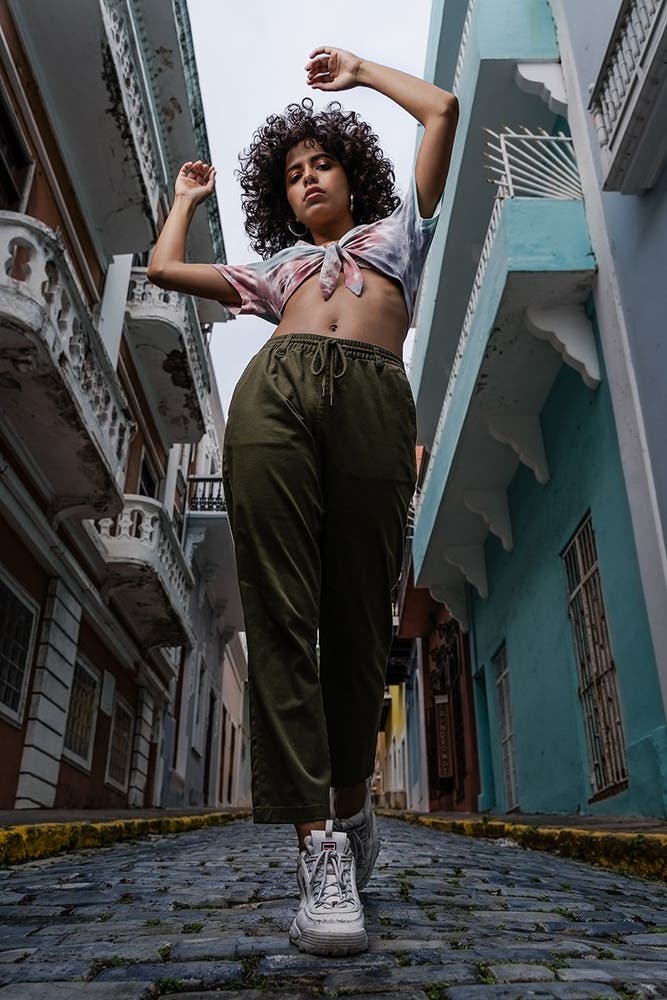
From a basic standing pose, we can simply adjust the arms, hips, and expression to capture a variety of portraits, or even transition into walking or other action poses.
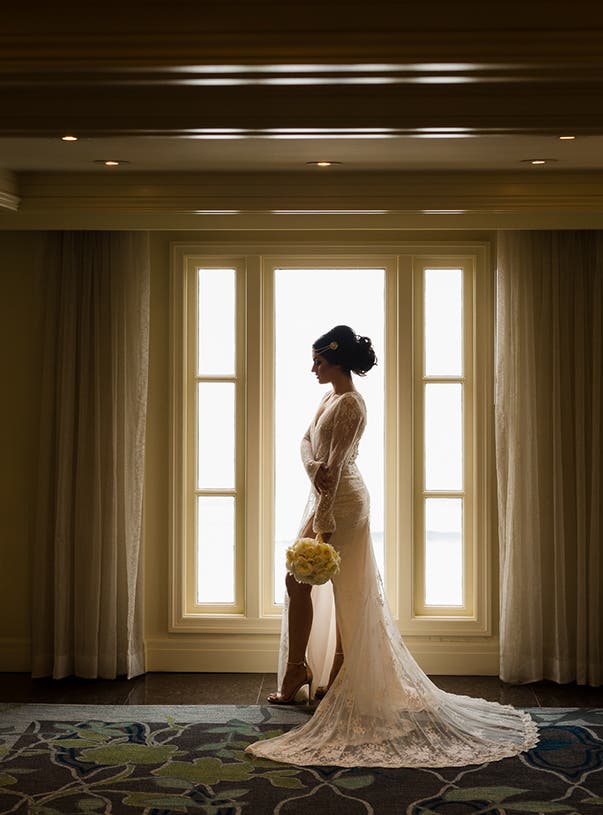
In contrast to the previous full length portrait, the image above features a standing pose that works in tandem with camera angle and focal length to enhance the subject’s apparent confidence. For this shot, the subject stood with a wider stance with one foot closer to the camera, and we chose a low angle and wide focal length to accentuate her size and position within the frame. The use of leading lines and placing her in the brightest area of the frame also helps her command the viewer’s attention.
Female Model Pose #2: S-Curve
With the standing pose, we talked about how to use a female model pose to accentuate or emphasize a subject’s curves. The S-Curve pose builds on that concept, only this time we’re turning our subject away from the camera and using the subject’s hips and lower back to create the curves. This pose also makes for a stellar editorial image when used in concert with dramatic lighting (as seen in the image above).
If your goal is to minimize curves, then ask your subject to place most of her weight on her back foot with the front foot crossed slightly in front. You can further minimize the curves if your subject leans forward just a bit. On the other end of the spectrum, you can accentuate curves by taking an opposite course of action. Have your subject place most of her weight on her front leg.
Female Model Pose #3: In Action
As we noted previously, standing poses also serve as perfect springboards for launching into action shots. Refer to the three-point technique we mentioned earlier and direct your subject into motion. Common action poses include walking, jumping, or adding a sense of motion with dynamic placement of the arms and hands. One thing I like to do is use the arms to create triangles, which also serves as a compositional technique to direct focus to the subject.
Female Model Pose #4: Headshots
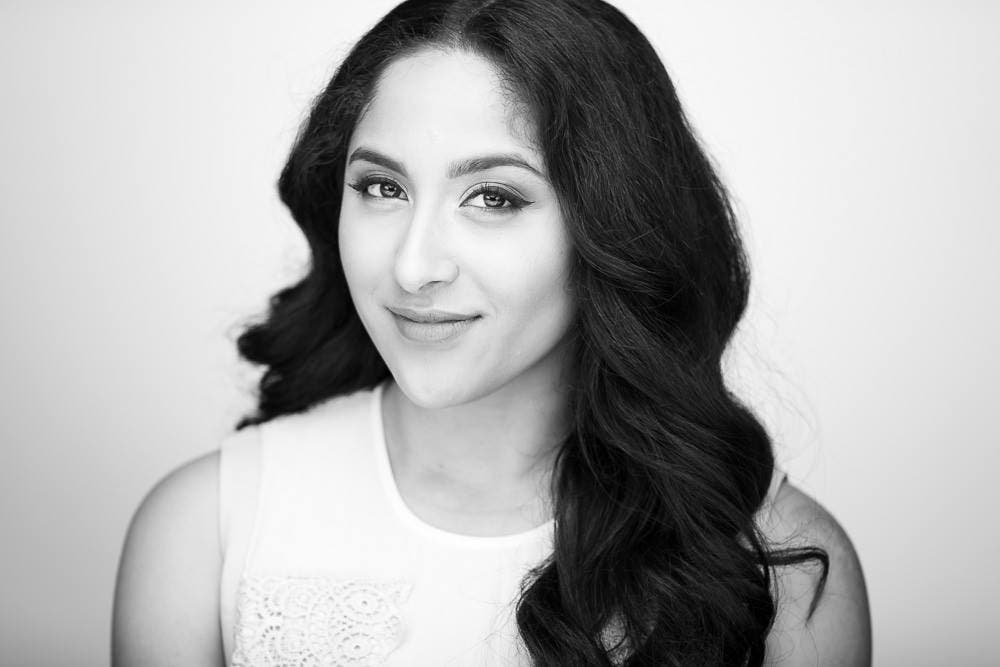
Because headshots focus on the subject’s face, expression is key, and if your subject is uncomfortable, it will show. For this reason, it’s important to start building a rapport through friendly conversation before the shoot (if possible). It also helps to consistently give positive feedback to your subjects as you work through the session. Even if something is not working, frame your feedback positively and make adjustments to try new looks without negatively critiquing whatever it is that isn’t working.
Here are some things to look for when capturing a headshot:
- Finding a “Best Side”: Try the head turn test and simply ask your subject to look slightly to the left and then slightly to the right. Depending on the structure and level of asymmetry in her face, you’ll likely notice that one side will appear more clearly defined and balanced in regard to the size of the eyes and nose. The subject’s hairline will also factor into the decision for choosing a side.
- Defining the Jawline: Push the chin slightly out to accentuate the jawline.
- Focal Length: I prefer to use an 85mm lens for headshots as it is known as a true portrait lens with minimal distortion and a wide aperture for more stylistic options.

- Lighting Patterns: Familiarize yourself with the five basic lighting patterns above. When photographing headshots for females, choose the lighting pattern that best suits your purpose. Flat lighting minimizes shadows and creates a soft look. It is generally the most flattering lighting pattern, but you may want to use another pattern if you’re looking to add more drama to the portrait.
To build upon a standard headshot, shoot a bit wider and position your subject away from you, looking over her shoulder and into the camera. Even though we’re showing more of the subject’s body, it can still be used to direct our attention to the subject’s face. The main thing to focus on here is positioning the subject’s head and face to minimize neck wrinkles and avoid a double chin.
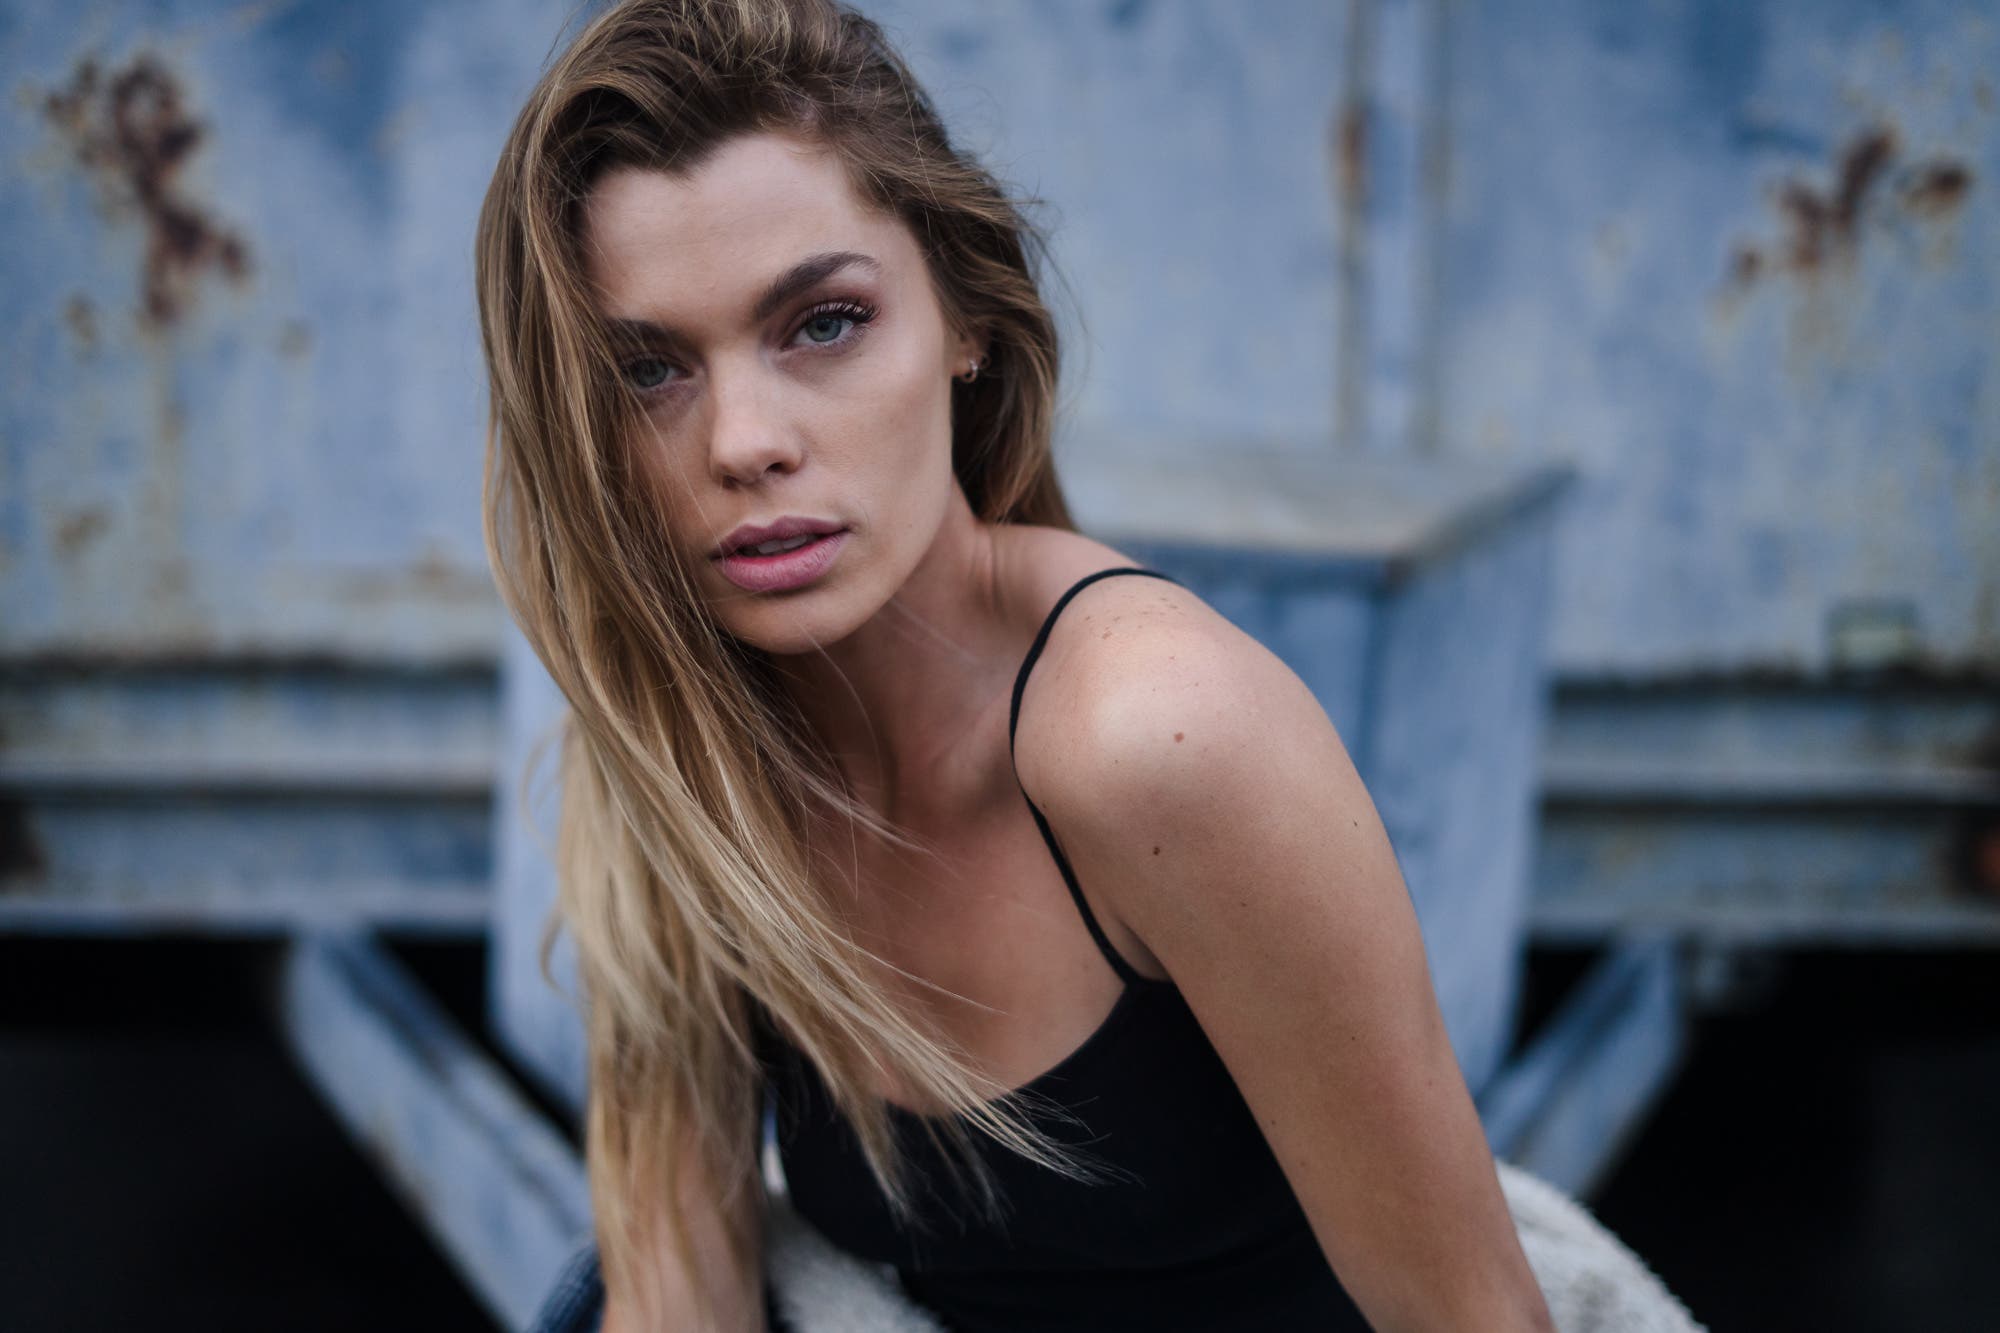
In the image above, which is more of a fashion-oriented, lifestyle headshot, I asked the subject to bring her shoulder toward the camera, and then I adjusted her chin position to define the jawline and I captured the shot.
Female Model Pose #5: Sitting Pretty
This is probably one of the more difficult female model poses on this list, at least at first. It’s actually a simple, solid pose to use when you know what to look for. Seated subjects present certain challenges that we can quickly conquer using a few simple adjustments.
Here’s a quick list of checkpoints for a flattering sitting pose:

- Foot position: This will vary depending on the chair (vs a stool or the ground) and whether or not the feet are visible in the frame. If the subject is too far back into a chair or else hanging her feet off a tall stool, it can press the thighs and make them look larger than they actually are. Scoot your subject to the edge of the chair and adjust accordingly from there. You may already be doing this based on your camera angle (see below).
- Leg position: Opening the legs creates a more masculine feel while narrowing the legs does the opposite.
- Posture: Whether standing or sitting, posture is important. For seated subjects, ask them to imagine that they’re being pulled up from a string on top of their head. This helps correct the curve in their upper back and it extends the neck. If they look too stiff, ask them to roll their shoulders back and reset the pose.
- Hand placement: I often say this when it comes to hand placement, no matter the pose: Try to give the hands a purpose. For a sitting pose specifically, make sure the hands aren’t entirely hidden or tucked beneath the thighs. If you’re using a chair and it has armrests, use those to prop up the arms and then rest the hands on a thigh. Vary the hand placement enough to avoid mirroring, which might make the pose look forced.
- Wrist position: If your subject is resting her head on her hands, keep a soft bend to the wrist and try to avoid hard 90-degree angles.
- Chin position: This will depend in large part on your camera angle, but be careful to avoid bringing the chin down too far and creating a double chin.
- Camera angles: If you decide to shoot from a lower angle, ask your subject to sit on the edge of the seat and lean forward. Positioning her face so that it is closer to the camera than her knees and feet will minimize the distortion and subsequent distractions. Shooting from a higher angle will give your subject a softer appearance.
Conclusion
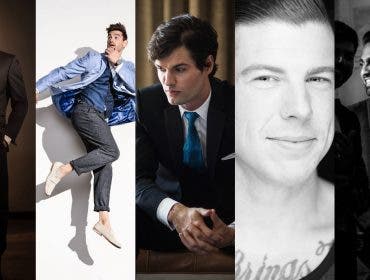
I hope you found these 5 female model poses every photographer should know helpful. It should spell the end of having to rely on memorizing random poses from a pinboard. Being able to pose and direct our subjects, whether they are professional models or not, plays a significant role in our success as photographers. With a bit of practice, you can master these techniques, as well as those we’ve shared for male model poses, and build a portfolio that will also help you build your clientele.