
From time to time, we all want to get a little bit closer to a subject but are forced back by the minimum focus distance of our lens. Moreover, many photographers want to try close-up and macro photography, but dedicated macro lenses can be pricey. The good news is using an expensive dedicated macro lens isn’t the only way to photograph tiny subjects, or achieve some extra magnification. With a simple accessory such as an extension tube, you can increase the magnification factor of your lens.
Here is everything you need to know about extension tubes and how they can improve your photography.

What is an Extension Tube?
An extension tube is a plastic or metal tube that sits between the lens and camera body. It moves the lens’ front element closer to the subject. It is a hollow tube with no optical elements and does not affect image quality.
What the extension tube does is make the minimum focus distance shorter. You’ll be able to get closer to the subject and still focus. As a result, you’ll have a higher magnification factor than the one provided by the lens.
Finding the Right Magnification
To find the extra magnification you achieve using an extension tube, you have to divide the tube’s length by the lens’ focal length. For example, by attaching a 20mm extension tube to a 50mm lens, you achieve a 20/50 = 0.4x magnification. The extra magnification adds to the existing magnification of your lens. So, if you use the Canon EF 50mm f/1.8 lens (which has a 0.21x magnification) you’ll increase the magnification to 0.61x.
The above formula shows that the extra magnification factor decreases with focal length. For example, by attaching the same 20mm extension tube to a 200mm telephoto lens, you achieve an extra magnification of just 0.1x. Therefore, extension tubes are more efficient with short and medium focal length lenses. This is good because most kit lenses are in this range.
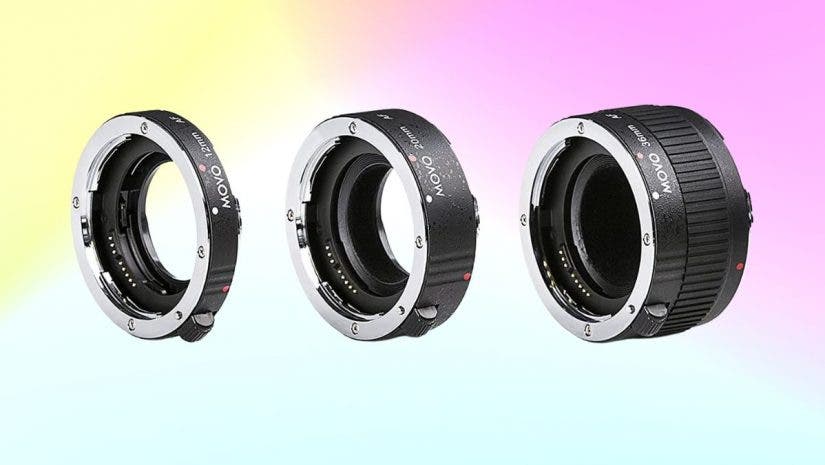
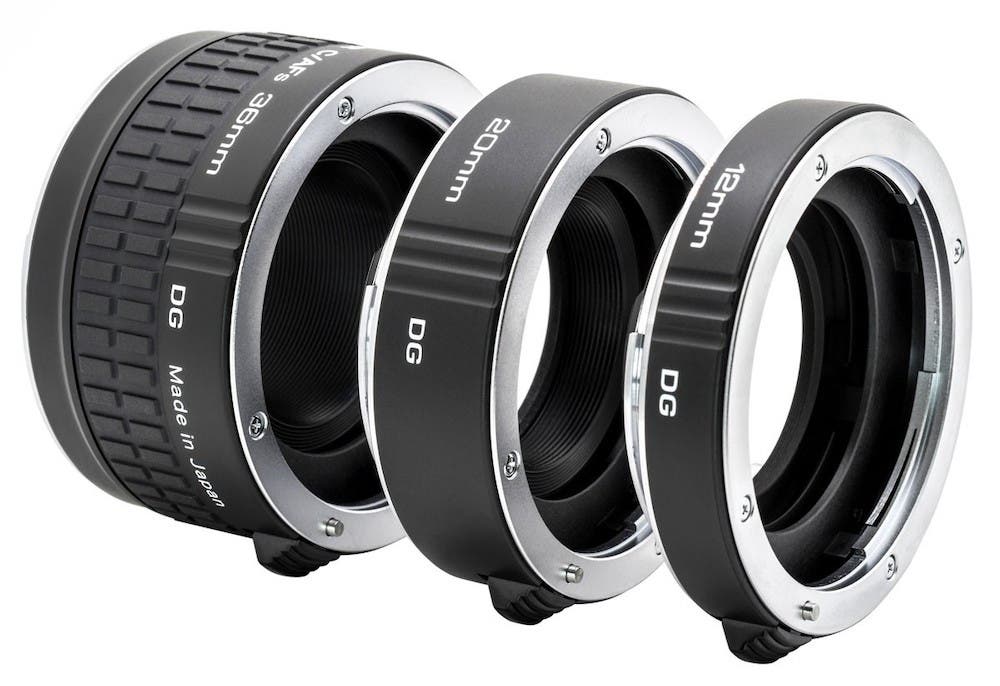
Also, the longer the extension tube, the higher the magnification factor. The thickness of extension tubes ranges between 8-10mm and 50-58mm. They usually come in sets of different sizes. This means you can attach more than one extension tube at a time.
For example, by stacking a set of three extension tubes of 12mm, 20mm, and 36mm, you can achieve a total length of 68mm and many other intermediary lengths. With a 68mm extension on your 50mm lens, you increase the magnification of the lens by 1.36x.
Extension tubes work with any lens, whether a kit lens, zoom or prime one, or a dedicated macro lens. You’ll find extension tubes made by renowned camera brands and third parties but, regardless of their manufacturer, you still have to check they match your lens’ mount (e.g., mirrorless vs. DSLR cameras from the same brand have different lens mount systems).
How to Use Extension Tubes
Start by deciding how much closer to the subject you want the lens to be and the magnification factor you need. Usually, when you photograph a very small subject, you want the shortest focus distance possible. However, if you photograph an animated and shy subject, such as insects, it might not be the case. So, first, choose the right extension for your current photo setup.
Mount the tube (or tubes) on the camera body and attach the lens to the other side. Now move on to camera settings.
Extension tubes may or may not maintain the electrical connection between the camera body and lens. If they do, you can use any focus settings (autofocus or manual) and camera modes (automatic mode, aperture/shutter speed priority mode, manual). If they don’t, the camera loses control over the aperture and focus. In that case, you can only use manual focus and aperture priority/manual modes and adjust the focus and aperture from the rings on the lens.
Not all lenses have aperture control. Make sure your lens has a manual aperture ring before buying extension tubes that don’t maintain the communication between camera and lens. However, if you end up with an extension tube that doesn’t allow the camera to communicate with the lens and a lens without an aperture ring, the lens will be blocked at the widest aperture available. And a wide aperture means a shallow depth of field.

There is, however, a workaround for changing the aperture in this situation. Having just the lens attached to the camera, select the manual or aperture priority mode. Then, set the aperture you need and press the DOF Preview button. While pressing the DOF Preview button, detach the lens, add the extension tube, and attach the lens. It isn’t easy, but it will give you more versatility.
Although extension tubes don’t affect image quality, you’ll notice some light loss. That’s because increasing the distance between lens and camera body increases the effective aperture, even if the camera shows the same f-number. To compensate, you’ll probably need to use slower shutter speeds, higher ISO values, or a lower f-number.
What to Look for When Buying Extension Tubes
Extension tubes aren’t expensive and can be very helpful even in their simplest form. But there are some features you should consider.
The most important feature is maintaining the electric connection between the camera and lens. Even if you have a lens with aperture control, it’s still better to be able to control the lens via the camera and have access to autofocus and all camera modes.
Then, you should consider the length of the tube. Choosing a set gives you considerably more options and allows you to extend the functionality of your lens. However, check the build quality and how well the tubes stack together. You don’t want any space left between tubes. There is no need to skimp on quality just to save a few dollars.
Another thing to consider is the manufacturer. Because extension tubes are relatively cheap, the difference between OEM, third-party compatible ones, and very cheap third-party ones isn’t too big. Therefore, choosing the best quality possible may be more sustainable and efficient in the long term.
Pros of Using Extension Tubes
Like any other photography accessory, extension tubes have advantages and disadvantages you should be aware of before purchasing.
The main advantage is the possibility of taking macro and close-up photographs using the lens you already have. For travel and street photographers, for example, being able to get out of their comfort zone and take a close-up with their regular wide-angle lens means a much more diverse and interesting portfolio. If you couple it with a 1:1 macro lens, you increase the magnification even more. Additionally, because extension tubes are stackable, you can adjust the extension to your subject and environment.
At the same time, versatility doesn’t come at a high price. Extension tubes are cheap, small, and lightweight. So you won’t feel the extra weight in your backpack. They are also easy to mount and use, especially if you use OEM or compatible third-party extension tubes.

Cons of Using Extension Tubes
Extension tubes don’t include optical elements nor affect image quality. Although, they do tend to accentuate the flaws of the lens. For example, if the lens adds any type of distortion or blur, the extension tube will amplify it.
By adding extension tubes between your camera and lens, you lose the ability to focus at infinity. This means that you need to mount it when you need it, and unmount it again when you want to go back to your original photography style.
Also, because extension tubes increase the focal length, they also increase the risk of camera shake. Add the fact that you’ll work at a higher effective f-number, and you’ll reach out for the tripod. You want some extra camera support when using extension tubes.
If you need to increase the depth of field, you need a narrow aperture and thus a slower shutter speed to compensate for the lack of light. The setup won’t allow you to freeze motion easily. Therefore, it is harder to photograph a moving subject such as insects.
On some cameras, especially DSLRs, the loss of light may affect the autofocus performance. Therefore, manual focus and even the live view preview may come in handy for photographing tiny subjects with extension tubes.
Stacking extension tubes may also come with a drawback. If you increase too much the length of the extension and use wide apertures, the camera may capture the margins of the lens and create vignettes. Also, if the tubes don’t join perfectly, they may allow light to get in and create artifacts, lack of contrast, or other distortions.
Examples of Extension Tubes
Here are just a few examples of extension tubes that are available at Adorama.
Final Thoughts
Extension tubes are very cost-effective for experimenting with close-up and macro, although many photographers end up using them as part of their regular workflow. They allow you to diversify your portfolio and try new compositions. Even if you decide macro photography is for you and buy a dedicated macro lens, you can still use extension tubes for extra magnification. They allow you to explore, be creative, and try something new.
If you are looking for more information on macro photography, check out Essential Gear to Start Macro Photography.