Dynamic range is one of the most important, yet least understood features to keep in mind when buying a camera. If you’ve ever gotten home to realize that you’ve lost the details in the bright sky in your image and the foreground seems to be too dark, you’ve experienced dynamic range.
What is Dynamic Range?
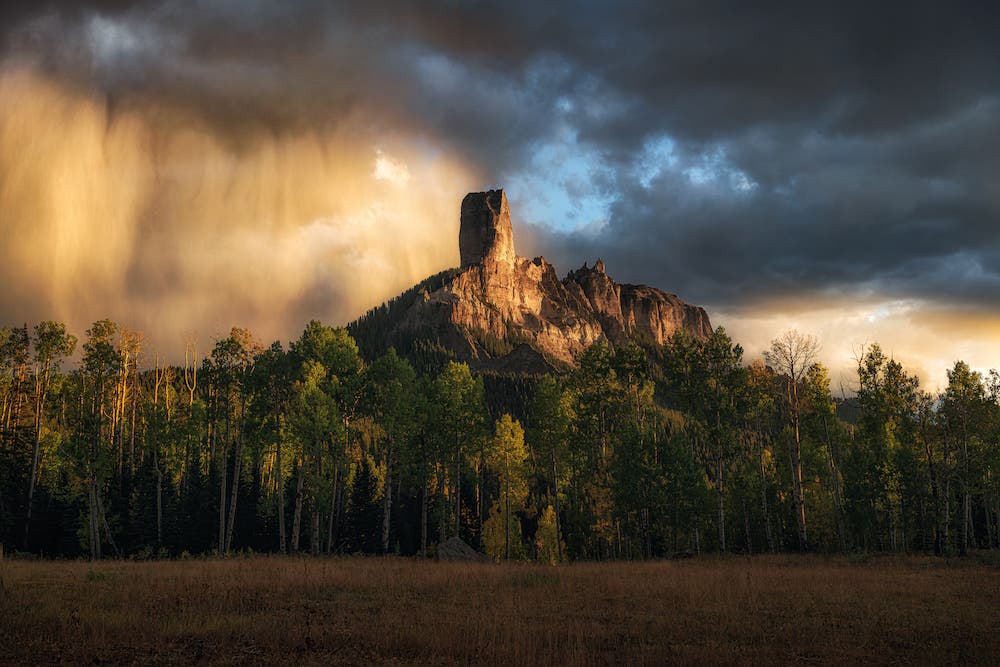
Essentially, dynamic range is how far the brightest spots in your image can vary from the darkest spots in your image and still maintain proper details in a single exposure. The more you have, the more you can capture scenes with a great contrast between lights and darks. This often comes into play when shooting sunsets and sunrises since the sky is usually bright and the foreground is usually dark.
If you’ve ever had to take a photograph on a bright sunny day, chances are pretty high that you would have lost detail, possibly in the shadows or in the highlights, perhaps even both. This is not an exposure problem on your part. It’s more likely a limitation of the dynamic range of your camera. Almost all cameras will come up against this problem at some time.
The 2 Types of Dynamic Range
There are actually two dynamic ranges you need to think about. One is the dynamic range of the subject, the second is the dynamic range of your camera.
The dynamic range of the subject is a measure of the range of light intensities from the shadows to the highlights. In low light conditions, the dynamic range (that is the difference between the darkest and the latest part of the subject) is quite small. On a bright sunny day, that range is much higher and is often outside the range of the camera.
Different cameras and different sensors will have bigger or smaller dynamic ranges. As long as the subject’s dynamic range doesn’t exceed the camera’s dynamic range, you will be able to get a perfectly exposed photograph.
If the subject dynamic range is bigger than the camera’s dynamic range and one part of your subject will be either under or over exposed. You can easily tell if the subject’s dynamic range exceeds that of your camera by using the histogram on your rear screen.
Why is it Important to Consider Dynamic Range?
You should consider dynamic range when purchasing a new camera. Cameras with a higher range are generally more expensive. Although, it will be better for photographers who wish to capture scenes with a great deal of contrast. Photographers that capture scenes without much contrast can choose a camera that offers less dynamic range.
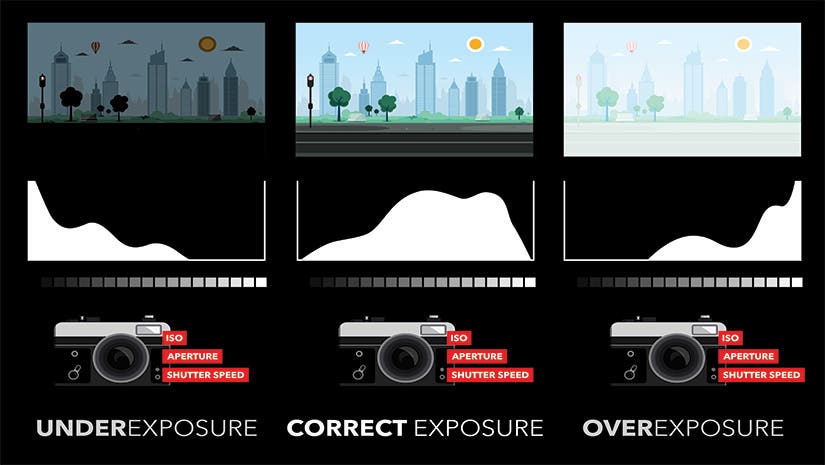
When you’re in the field, consider how much dynamic range your camera has when taking an image and adjust your settings accordingly. To maintain the details in both the highlights and shadows of an image, you’ll need to make sure your exposure isn’t too dark or bright. If you overexpose your image, you will lose details in the highlights. If you underexpose your image, you’ll lose detail in the shadows.
.jpg)
High Dynamic Range vs Low Dynamic Range
It’s easiest to understand and visualize dynamic range by looking at a high contrast scene. In nature, the woods on a sunny day present great opportunities for high contrast photography and exploring dynamic range.
Photographing in the woods can be challenging because the canopy creates deep shadows in some areas. Meanwhile, you’ll see the light that passes through the treetops forms hotspots on the forest floor. The deep shadows mixed with areas of bright highlights creates high dynamic range conditions.
Many photographers struggle with this type of contrast in their photography because their cameras can’t capture the full dynamic range of the scene. When practicing such high-contrast photography, you’ll have some underexposed or overexposed areas.
If you visit those same woods on an overcast day or at blue hour, you’ll see reduced contrast and the hot spots disappear. The scene therefore has a low dynamic range, so it’s much easier to photograph.
Understanding Light: Illuminance and Reflectivity
For photographers, one of the most important skills to develop is an in-depth understanding of light and how it will affect your images. Fortunately, most cameras have built-in metering systems that can evaluate the lighting in a scene and help you by adjusting the exposure settings accordingly.
Illuminance
In some situations, like in studio photography, photographers need more specific measurements of lighting. They want to measure the illuminance, or the incident light as it hits the subject, rather than measuring the reflected light. In those cases, photographers use handheld light meters to measure the lighting, then they manually adjust the exposure settings in their cameras.
If you introduce a light meter to our sunny woods example, you’ll be able to measure just how much light is in the hotspots and how little light is in the shadows.
Reflectivity
Your camera’s lighting meter measures reflected light, or the light that bounces off objects or subjects in the scene. In most situations, choosing exposure settings based on reflectivity works well, especially if the scene has a low dynamic range.
In areas of high dynamic range, the reflectivity of light can be more tricky. Think back to the sunny woods example. Because of those high-contrast photography conditions, your camera will try to balance the hotspot areas containing lots of reflected light with the shadowy areas that have low levels of reflected light. Unless you tell the camera how to solve its exposure woes, you’ll have underexposure and overexposure issues.
How Do You Read a Histogram in Photography?
The histogram shows the range of subject brightness starting with black on the left going to white on the right. The width of the histogram chart represents the dynamic range of your camera sensor.
If the histogram fits inside of the histogram display area then the dynamic range of the subject is inside that of your camera and everything is good. If the histogram is clipped at either end then the subject range is too wide. Try changing your camera exposure and watch the histogram move left or right and see if you can fit the histogram inside of the display.
On the histogram shown you can see you can see the shadow area is outside of the sensor’s ability to register. The signal is “clipped” with no recorded details. The left side of the histogram is crammed against the edge, showing little detail.
On the right of the histogram there is still room – the photographer could open up the iris (or use a slower shutter speed) and get more detail in the shadow area without sacrificing detail in the highlights.
Understanding Your Camera’s Exposure Settings
Most photographers learn early on that they can adjust the exposure of an image by changing any of the three settings in the exposure triangle: shutter speed, aperture, or ISO. Make adjustments to any of these settings, and you’ll shift your image toward overexposure or underexposure.
For many photographers, understanding how the camera measures proper exposure through metering is a bit more challenging. Most cameras today offer a few different metering modes for measuring the proper exposure of a scene. Some work better than others at making the most of your camera’s dynamic range.
Evaluative metering
With evaluative metering (or multi-segment metering), the camera reviews the full scene for reflected light and adjusts the exposure settings accordingly. Evaluative metering is the best option when the lighting is relatively consistent throughout the scene.
Center-weighted metering
With center-weighted metering, the camera pays attention to and evaluates only the center of the frame when determining proper exposure. Center-weighted metering works well for portraiture as long as your subject is in the middle of the frame. The camera will measure the reflected light on your portrait subject and select the best exposure level.
Spot metering
Spot metering is ideal when you want to limit the camera’s internal meter and tell it to pay attention to a specific area in the frame. Some cameras let you use the autofocus point as the spot-metering source. That makes it an ideal choice when you’re trying to avoid overexposing highlights or underexposing shadows.
Relating metering to dynamic range
When you’re struggling with exposure because of high-contrast photography conditions, changing your metering mode is a great way to tell your camera what parts of the frame are most important to you. That lets you leverage more of the dynamic range you need.
Be careful not to over expose the highlights!
A blown out highlight looks terrible whereas a shadow lacking detail is acceptable.
If the subject’s dynamic range is too big and will not fit in the histogram, then you need to choose where you will lose information. Ninety-nine percent of the time a photograph that is exposed so the highlights have full detail and the shadows just go black with no detail is a much better option and gives a much more pleasing photograph than one where there is full detail in the shadow but where the highlights are completely burned out.
The almost golden rule is “expose for the highlights”. This means you’ll expose so the highlights are not clipped. Shadows by definition are dark and it is hard to see detail there, so, if you have to lose a portion of the dynamic range it is almost always preferable to lose in the shadows.
There are ways to lift shadows – consider using a fill in flash or a reflector to lighten up those areas if they are close enough to the flashgun that it would have an effect.
Another option – and always a good piece of equipment to have in your camera kit – is to use a graduated neutral density (ND) filter.

What Does an ND Filter Do?
You can place an ND filter in front of the lens and rotate it so it reduces the brightness of the sky. These are available in a variety of strengths and can reduce the sky brightness by up to three or more f-stops. You can even use a colored graduated ND filter and add some color to the sky. This is probably the quickest and most effective way of bringing the dynamic range of the subject to match that of the camera.
Using High Dynamic Range (HDR)
One way to increase the dynamic range is with High Dynamic Range or HDR photography. HDR photography requires several identical images to be recorded at different exposure value levels. Setting your camera on a tripod is essential as these different exposures will be combined into a single image. You need to set your camera to full manual and then take three (or more) images of the scene. Expose one image as a “normal”. You then take a second and a third exposure, one 1.5 stops under exposing and the other 1.5 stops over exposing.
These images are then combined in special HDR photography software, such as Photomatix, to give a much wider dynamic range than is possible using a single exposure. Some cameras have an HDR mode that can carry out this process automatically for you.
It is important that you change the shutter speed and not the aperture when making the different exposures. Changing the aperture will alter the Depth of Field (the amount that is in focus in each image). The images need to be identical (with the exception of exposure) when you combine them. Changing the shutter speed and not the aperture ensures this.
Tips for Achieving Great Dynamic Range
As mentioned before, the best thing you can do to achieve great dynamic range is to purchase a high-end camera. However, this might not always be possible. Here are a few more tips to help you capture images with a high dynamic range.
Bracket and HDR Your Images
Learn to bracket your images and combine them in post-processing using a HDR blend. This can help you achieve a very high dynamic range. This technique involves shooting multiple images in the field at different exposures, and then combining them. Usually, you’d take one overexposed image, one that is properly exposed, and one that is underexposed. Then, you can combine these images. The highlights will be taken from the underexposed image. The shadows come from the overexposed image to give you a very high range.
Avoid Shooting Directly into the Sun
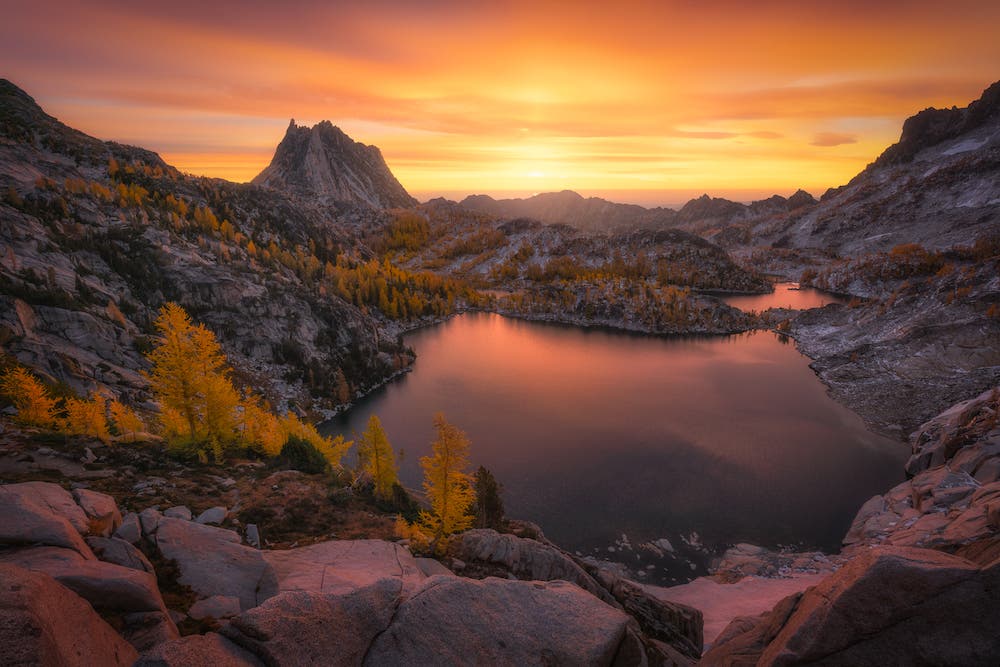
I love shooting into the sun. Although, if you are trying to achieve a high dynamic range, avoid doing this at all costs. The sun is obviously very bright. To properly expose the sun, you must have a very fast exposure. This nearly guarantees that everything else in your frame will be far too dark. On the other hand, you could expose your image for everything else in the scene, but then the sun will be overexposed and you’ll lose detail.
Expose to the Right
Expose to the right is a term used by many photographers. This technique involves using the histogram to expose your image. If you don’t know how to use a histogram, you’ll need to learn first before you can explore this technique. Essentially, exposing to the right means that you increase your exposure as far as possible until the right side of the histogram begins to gain value. Then, you’ll lower the exposure slightly and take your photo. This guarantees that you’ll have the longest exposure possible without losing details in the highlights.
Focus on the Highlights
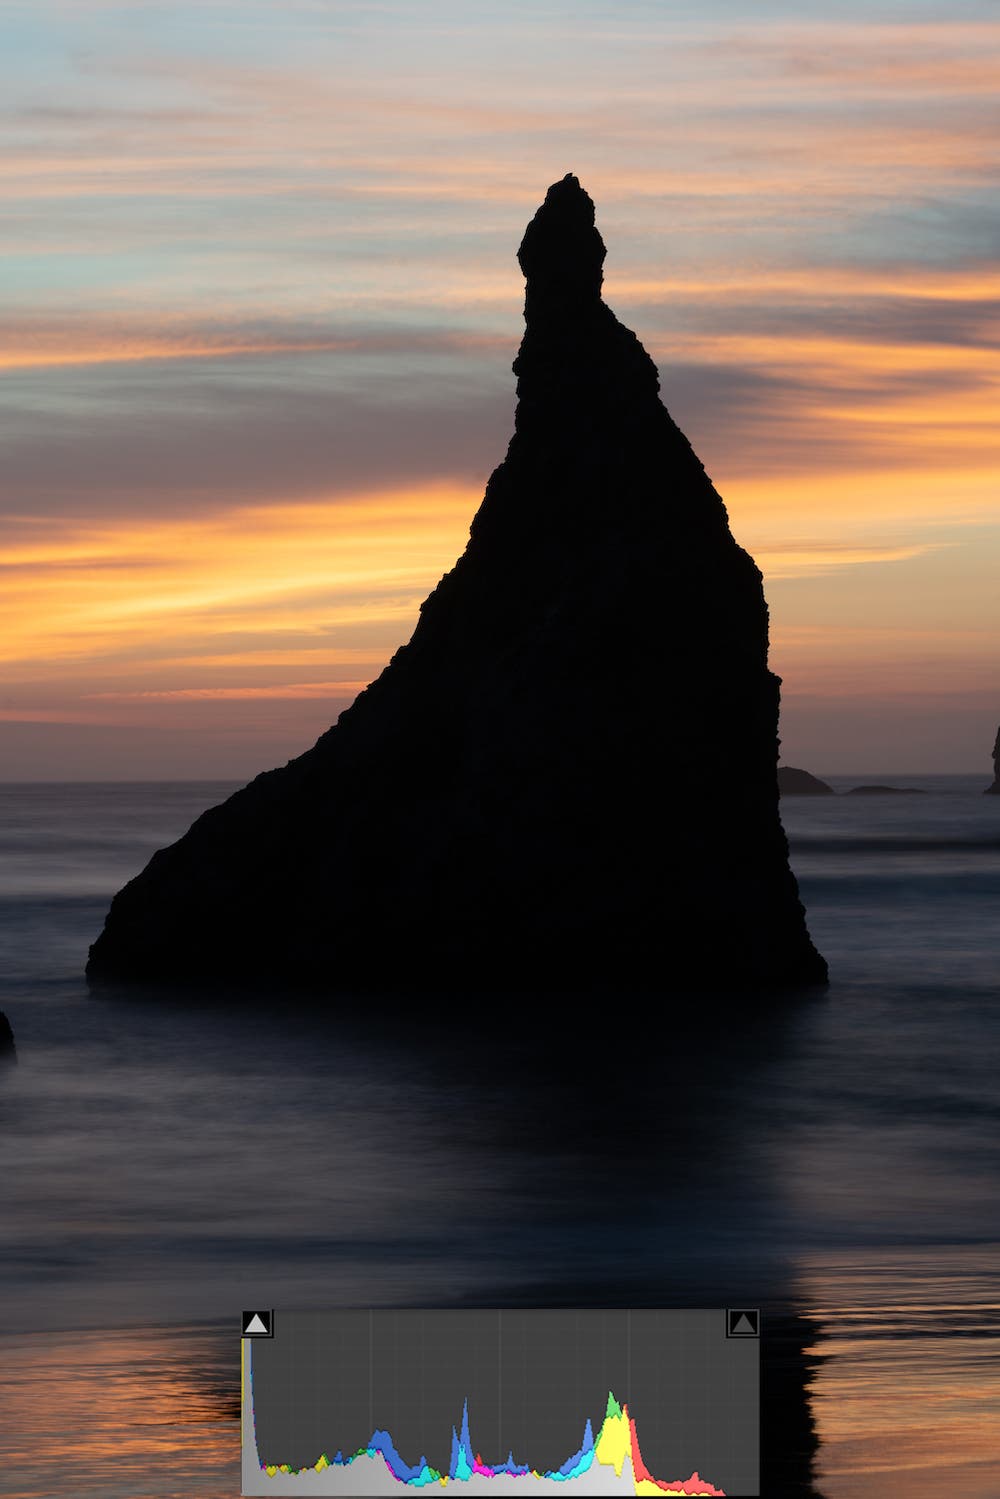
Use the previous technique to make sure you don’t lose details in the highlights. You want to focus on having a proper exposure for the highlights, as they are much more important than the shadows. When highlights are blown out (overexposed), you’ll lose all detail and no matter how much you lower the exposure, the highlights will remain totally white with no detail or color. However, if you underexpose the shadows, you can usually slightly bring them up. In addition, it is much easier on the eyes to have dark shadows with no detail than bright highlights missing details. It is normal for the eye to lose details in the dark shadows, but not in the bright highlights.
Mastering dynamic range takes time, but it is a necessary step if you want to further your photography. Try taking photos of scenes with a high dynamic range and learn the limitations of your camera. You can also use some of the tips above to extend your dynamic range if you don’t have a high-end camera. When you fully understand dynamic range, you’ll be able to create images that harness great detail between the highlights, shadows, and everything in between.
Capturing Your Vision
While photography is filled with plenty of principles that are often referred to as “rules,” it’s important to remember that rules are made to be broken. No two photographers will agree on how to photograph a scene.
You may approach the woods on a sunny day and tackle dynamic range limitations by composing a seven-image HDR, while another photographer cares only about capturing the detail in the hotspots. They’ll use spot metering to expose for the highlights, and let the rest of the image fall into shadow and underexposure. Neither of you is wrong. Neither of you is right.
Because photography is such a subjective art, you have plenty of freedom to approach complex lighting scenarios and dynamic range limitations as you see fit. Use an ND filter if you want to even out the lighting in the scene, or embrace the contrast.
What matters most is that you understand the concepts behind lighting and dynamic range. Things like ND filters, histograms, and metering techniques are tools to help you achieve the photograph you envision. If they support the image you have in mind, then you should absolutely use them, but don’t feel like they’re a requirement for creating great photographs.
.jpg)

