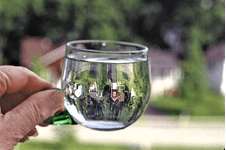
After the next rain, stroll outdoors, paying attention to all the sparkling drops of water clinging to branches and bushes. Look closely. You’ll see an upside down image of a nearby leaf or flower in each drop of water. What wonderful subjects for your photographs!
Water drops act as little lenses, capturing tiny, inverted images, just the way your camera lens does. The phenomenon is known as refraction, not reflection, but you don’t have to know that to photograph it.
What you’ll need:
- A macro lens or close-up attachment; you need to get close to show the detail in the drops!
- A tripod; since macro magnifies any camera movement, you need to keep your camera steady.
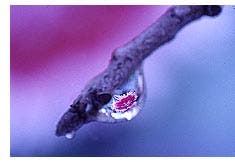 Specular spectacle: An image in a drop of water hanging from a branch makes a spectacular photograph, but finding the right drop in the right position with the right subject to be imaged in it can sometimes be a frustrating experience. Good for you if you do find them. Otherwise, cheat a little bit like I did, and bring a small branch indoors. Prop it up on some sort of support, such as a hunk of florist’s clay or modeling clay. Then position the subject you want to be reflected in the drop.
It’s even easier if you use a photograph of the subject instead of the actual one. Place the print behind the branch, and turn it upside down if you want the image to be right-side up. Use an eye-dropper to carefully place a drop of water on the branch. Or cheat some more and use white corn syrup instead of water–it adheres better and holds its shape longer than water.
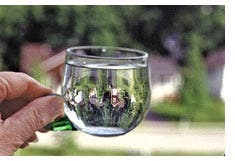 Raise a toast: I’m intrigued by images captured in a glass of water or white wine. The secret is to use a glass that is essentially spherical, like this one. The water in the curved glass acts as a lens, and you will see an upside-down image of the surroundings in it. You don’t need a macro lens to take this kind of shot–just a close-focusing one.
Screen gems: Do you ever notice how water droplets cling between the openings of a window screen after it rains? All those little drops can act as tiny lenses, imaging what’s behind them and providing you with a great subject.
Here’s how you can set up this kind of shot inside: |
|
|
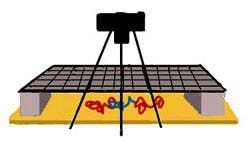 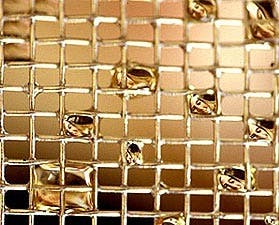 |
The simplest way to capture images in drops of rain is to do it when you are sitting in your car when it’s raining lightly and you’re stopped at a traffic light. Turn off the windshield wipers and focus on the drops on your window. You can make an effective photograph when the tail lights of the cars in front of you are imaged sharply and the rest of the scene is somewhat out of focus.
In Photoshop
To add an image to a picture of a drop of water:
1: Open a picture of a drop of water on a branch and a picture of the subject you want to add.
2: Start with the picture of the subject. Turn it upside-down by going to Image >Rotate Canvas > 180°. Use the Elliptical Marquee tool to place a circular selection around the subject.
3: Copy and paste the selected area onto the water drop.
4: Go to Edit > Free Transform to size and shape it to fit inside the drop.
5: Move it into position with the Move tool.
6: On the Layers Palette, change the blend Mode to Lighten. Adjust the saturation if desired.
