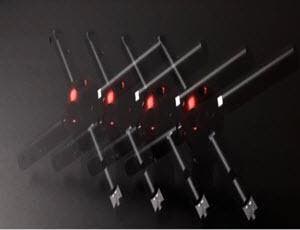
Special-effects photographers use light in some unusual ways. But what happens when the light itself is the subject?
I believe magic happens.
How about drawing with light? Photography literally means writing with light–but this time, we’ll use a penlight– you know, a very small flashlight.
When the room is dark, a narrow beam of light can act like a radiant pen or brush. And just like writing with a pen, you can use a penlight to create “drawings” in the air and photograph them. You’ll need to put your camera on a tripod, because the exposure times will be many seconds long, and you’ll need an assistant wearing dark clothing to wield the light. Your camera must also be able to execute a Bulb or Time exposure– or, at the very least, be able to make a 30-second exposure.
Make sure there are fresh batteries in the flashlight. Some exposure experimentation may be in order, since the brightness of the lamp can vary from unit to unit
Start writing!
The most basic technique is to have your assistant point the light toward the camera and write a word, preferably backwards so it will read forwards with respect to the camera. Or he could draw a simple picture– a star, crescent moon, or spiral.
Whatever words or shapes your assistant decides to write, he should wait for you to start the exposure before he turns on the flashlight, and he should turn off the light as soon as he finishes writing one word or one line. If he draws two or more discontinuous lines, he should be sure to turn the penlight off before he starts the second line, and the third.
As for exposure settings, the shutter simply stays open for as long as it takes to record the light writing. The aperture, therefore, controls the brightness of the image. You’ll probably have to arrive at this by trial and error, although f/5.6 with ISO 200 should put you in the ballpark.
Focus the camera manually before you turn the room lights off. Outdoors, you can use a flashlight to help you set the focus. And be sure you know the limits of the lens’s angle of view by doing a practice run. Want a colored drawing? Tape a piece of colored acetate over the light. You may have to use a wider aperture to compensate for the inevitable loss of light.
A picture made with simple light writing could make a unique title for a slide show. Other than that, it probably isn’t the most exciting of techniques, so let me show you how you can improve on it.

Light tracing
With the light tracing technique, you first do your drawing in the dark, then illuminate the subject with an electronic flash.
Here’s how I made this picture of Nick. He was sitting in a darkened room in front of a background of black velvet. I used black velvet because it won’t reflect the light from the flash. My assistant was dressed in dark clothes and gloves, and she stood behind Nick with a penlight covered with a piece red acetate. She aimed the penlight at the camera and traced around him. Then she turned off the light, changed the colored acetate, turned it on again, and drew another outline.
Finally she repeated the process a third time, turned off the light, got out of the way, and I pushed the “open flash” button to fire the flash.
I was using ISO 200 film. My lens aperture was set at f/5.6 and the flash was set for aperture priority; this exposed Nick correctly. You could also calculate the exposure by setting the aperture recommended by the flash unit for your subject-to-flash distance. By the way, you can produce the same effect by firing the flash either at the beginning or the end of the exposure.
In Photoshop: An advantage of simulating a traced outline in Photoshop is that the background does not have to be dark, but it’s best that it be relatively plain. Open your image and create a new layer. On the new layer, use the paintbrush called “Spray.” Choose any color you like to draw a line around subject. On the Layers palette, click on the Style icon to create an outer glow, adjusting the glow’s width by moving the Size slider a little bit. Click okay. You may want to lower the opacity. Then flatten the image.

Light trails
Another light-drawing effect is to use a candle as your brilliant subject–not the candle itself, as in the obligatory candles on a birthday cake, but a trail of light created by the candle. To take the above picture, the model walked slowly across a dark room carrying a candle. Then she turned to face me, and I fired the flash as I did for the picture of Nick. (The black area on the upper left of her body is her hair– actually a wig she was wearing for a Halloween party.)

Pendulum drawing
Instead of holding the penlight as you do when light writing, try suspending it from the ceiling and giving it a push. It will swing like a pendulum, drawing whirling designs for you. The result is called a physiogram or pendulum drawing.
Here’s the setup: Your camera goes on a table with the lens facing the ceiling. Tie or tape a cord to the penlight and hang it from a ceiling fixture so the bulb is four or five feet above the lens. With the light at that distance, you’ll be able to swing the light within a three-foot width, and a 50mm-or-wider focal length will keep the light within the field of view of the lens.
Manually set the focus by measuring the distance from the film (or sensor) plane to the bulb. Turn off the room lights and wait several minutes until your eyes get accustomed to the dark so you can make sure no stray light is creeping under the door or through the windows. When everything is ready, turn off the room light, start the “light pendulum” in motion, and begin the exposure.
You’ll need about a 20- or 30-second exposure at f/16 on ISO 200 film. This f-stop is an approximation since it depends on your particular setup, especially the brightness of the bulb. It’s a good idea to shoot some tests at several different apertures.
Here are several pendulum variations worth trying. After several seconds, push the pendulum in a different direction and you’ll create a combination of patterns by (see sample above). Lay a colored filter over the lens to color the light, perhaps changing colors when you change the light’s direction. Or put a special-effects filters, such as a diffraction grating filter, over the lens.

All strung up
Just for fun, wind strands of Christmas tree lights around an obliging friend. Turn off the room lights and shoot a one-second exposure. Encourage your friend to move a bit during the exposure so you’ll get some colorful streaks, especially if she raises her arms.
 Here’s a great idea to try when you’re a passenger in a car at night. Set the lens aperture to f/16 or f/22, point your camera out the window, and leave the shutter open for ten seconds or so. The more the car jiggles, the more interesting your picture will be. Or jiggle your camera while you photograph lights at night in an amusement park. While you’re at the amusement park, definitely try taking a long exposure of Ferris wheel lights or the fireworks display.
 To create a picture like this, fill your viewfinder with a neon sign, take your meter reading directly from the light, then make the sign “come alive” by zooming your lens during a 1/2 or one-second exposure.


