
When I shoot still images, I shoot in RAW and do everything I can to maximize their quality in terms of exposure and sharpness. Then, when I process them in RAW conversion, I do my best to maximize tones and colors. I prefer Lightroom for this conversion because it’s faster, but this applies to any converter you might use. However, I still find good reasons to edit my photos in Adobe Photoshop. For anything from final tweaking to extensive creative effects, Photoshop is a very powerful editor.
Even though Adobe’s flagship product is considered difficult and stubborn by some, if you understand the most used adjustment tools, such as Curves and Levels, and a few of the basic image processing terms and practices, you’ll be able to retouch images with precision in seconds. Here is what you need to know.
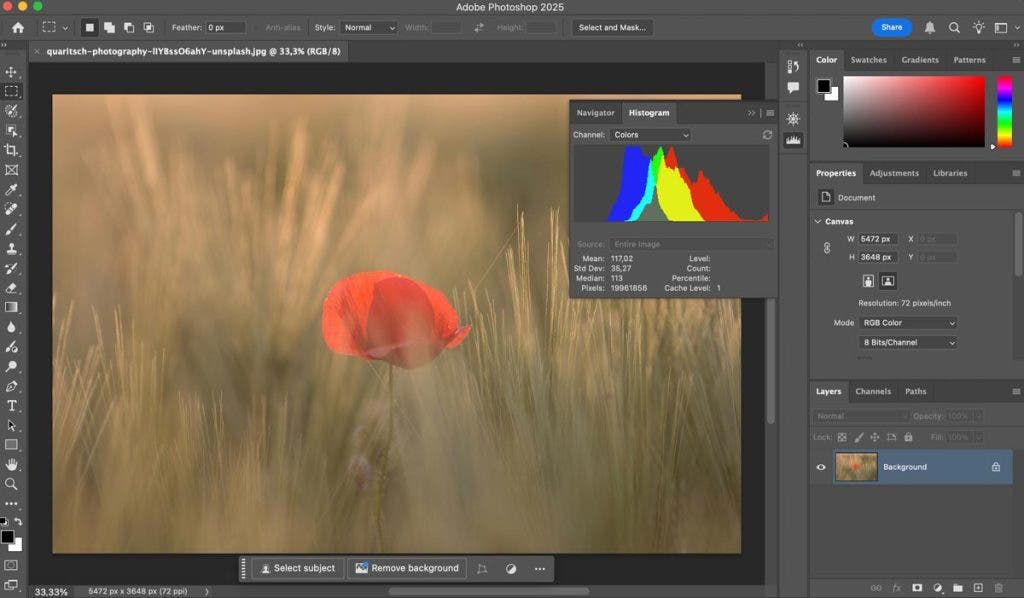
What Is a Histogram?
You need to know what a histogram is because it is the best indicator of a well-exposed photo you can get and an essential part of using adjustment tools such as Curves and Levels. It is a basic term you’ll find in any photo editor and even in most advanced cameras.
The histogram is a graph that shows the distribution of tonal values in an image. The left end of the histogram represents the darkest tones, and the right end represents the brightest. For an 8-bit image, for example, the histogram consists of 256 vertical bars, the height of each one representing the number of pixels that have that tonal value.
To see the histogram of an image in Photoshop, open the Histogram panel by checking it in the Window menu. From the panel’s menu, you can choose to display the histogram for a particular channel. There are six of them: RGB, Red, Green, Blue, Luminosity, and Colors.
Deciphering a Histogram
A well-exposed image has a smooth histogram with pixels of all tonal values. However, it has much fewer pixels with tonal values at both ends of the range (the darkest and the brightest ones) than pixels with tonal values in the middle of the range. The histogram of a well-exposed image looks like a pointy hat with a little more tonal value to the left of the middle.
If the photo is overexposed, the histogram will have a spike at the right-most end, meaning few details in the brightest tones. If it is underexposed, it will have a spike at the left-most end, meaning few or no details in the darkest tones.
However, that’s not to say all images must have this shape of histogram. Low-key photographs, for example, will have many darker pixels than middle-range ones. High-key photographs will have many brighter pixels than middle-range ones.

Curves and Levels are tools that change the shape of the histogram, allowing you to improve the photograph by changing the distribution of tones.
Working with Adjustment Layers in Photoshop
The advantage of working with an adjustment layer is that it can always be tweaked without causing any image degradation because the adjustments aren’t actually applied until the layers are flattened for output. Hence, the original image is preserved, and you can always go back to it for reference or start over. Furthermore, you can use one adjustment layer for each tool and then decide in which order you want to apply their effects. Each layer comes with its own set of settings, such as opacity and blending mode.
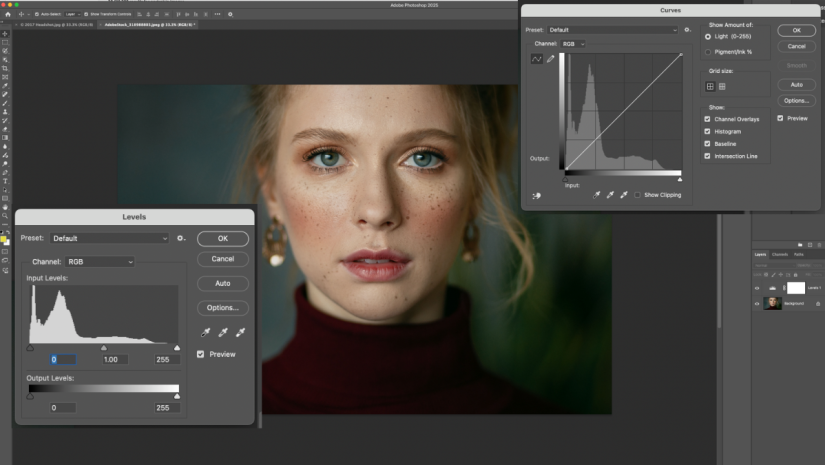
In Photoshop, adjustment tools such as Curves and Levels are available in two separate menus. You can find them under Image – Adjustments and Layer – New Adjustment Layer. Using the former, changes are applied to the currently selected layer. If you didn’t create one, it will be the original image. If you use the latter, Photoshop first creates a new layer and then applies the changes to it. In the vast majority of cases, you will want to create a new adjustment layer. Furthermore, whenever you select the specifically created layer, its properties will be displayed, and you can change them as you like.
How to Work with Levels Tool in Photoshop
The Levels tool allows you to fix the tonal range of a photograph by adjusting intensity levels. You can pick the brightest (white) point, the darkest (black) one, and the middle-gray tone, resulting in a change of contrast and luminosity. You can also adjust highlights, shadows, and mid-tones for each R, G, and B channel or for the entire image. Photoshop provides an Auto option if you want a quick shortcut.
To darken the darkest tones, pull the left slider to the right, and to lighten the lightest tones, pull the right slider to the left, as shown circled in red below.
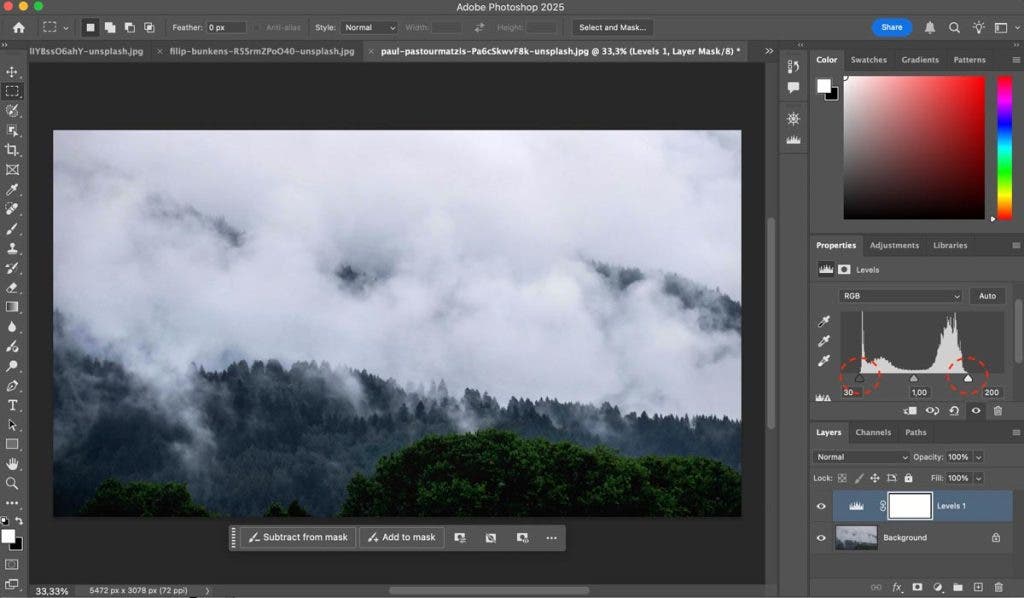
If you pull the sliders just up to the “information” in the histogram like above, you will increase the contrast of the image. But if you pull the sliders underneath the histogram, you are blocking up blacks or blowing out highlights. All the tones to the right of the slider in the figure below will be pushed to full white.
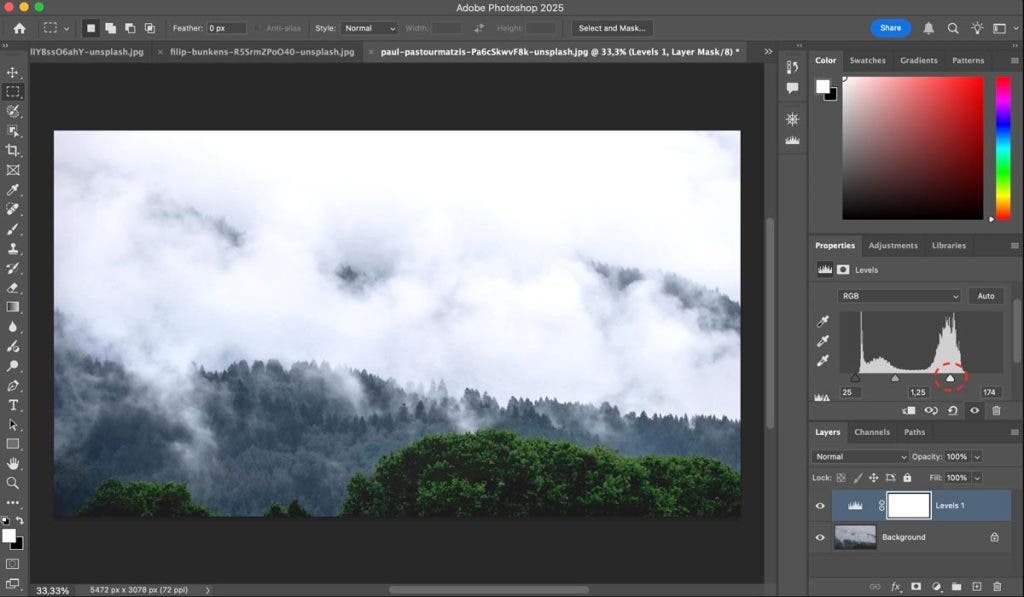
You can get a visual picture of the areas that will be affected as the slider begins to come under the information. If you work on a Windows system, hold Alt as you move the slider, and the areas being blocked up or blown out in the image will show as colors on your image, indicating the color channel(s) involved. If you work on a MacOS system, hold Option. For both systems, you can get the same result by checking Show Clipping for Black/White Points in the Levels panel.
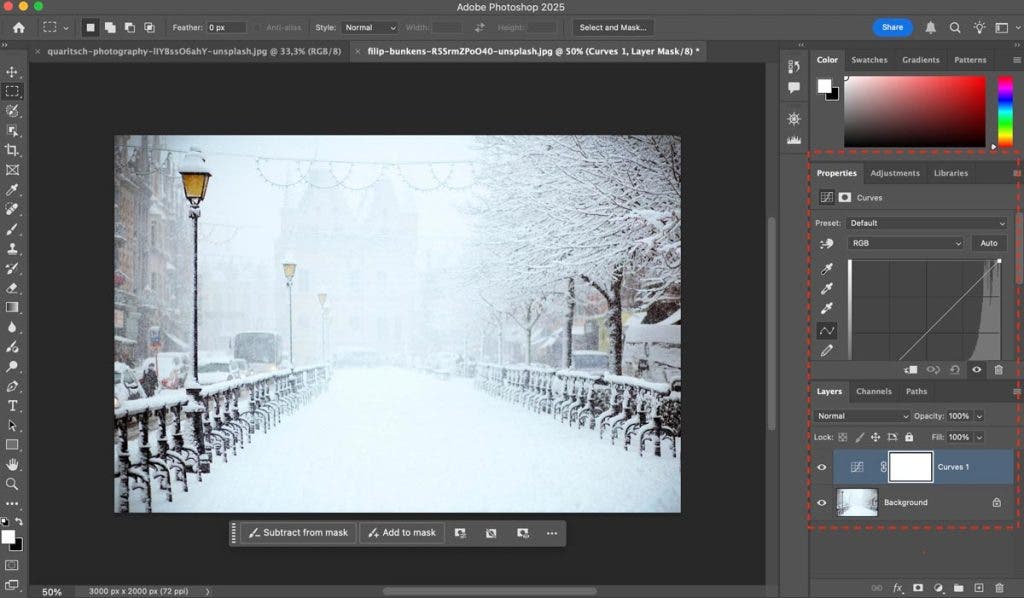
How to Work with Curves Tool in Photoshop
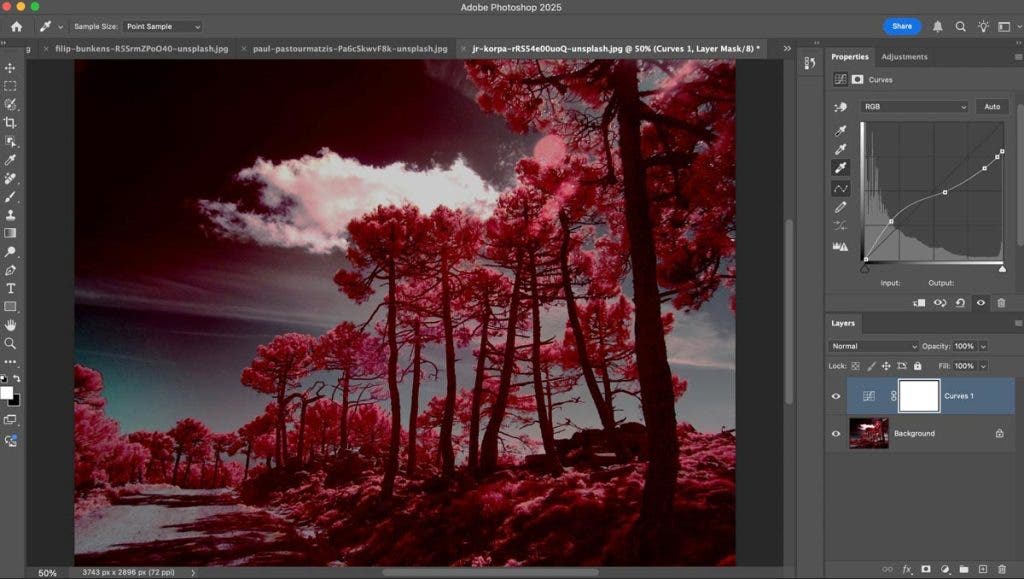
The Curves tool also allows you to adjust the tonal range of a photo and fix issues such as exposure, contrast, and color balance. However, it provides much more control than the Levels tool because you can adjust tonality point-by-point.
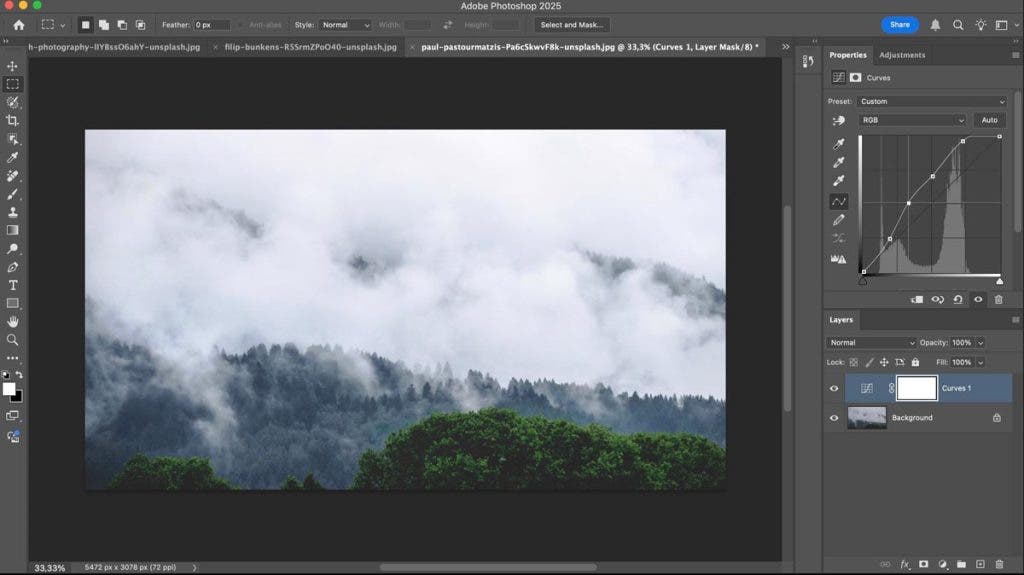
Initially, the image’s tonality is represented as a straight diagonal line overlapping the histogram. For an RGB image, the upper-right area represents the highlights, while the lower-left area represents the shadows. You control all the points on the line and can move them up, down, left, or right. If you move a point either to the right or down, the image will get darker. If you move a point to the left or up, the image will get brighter.
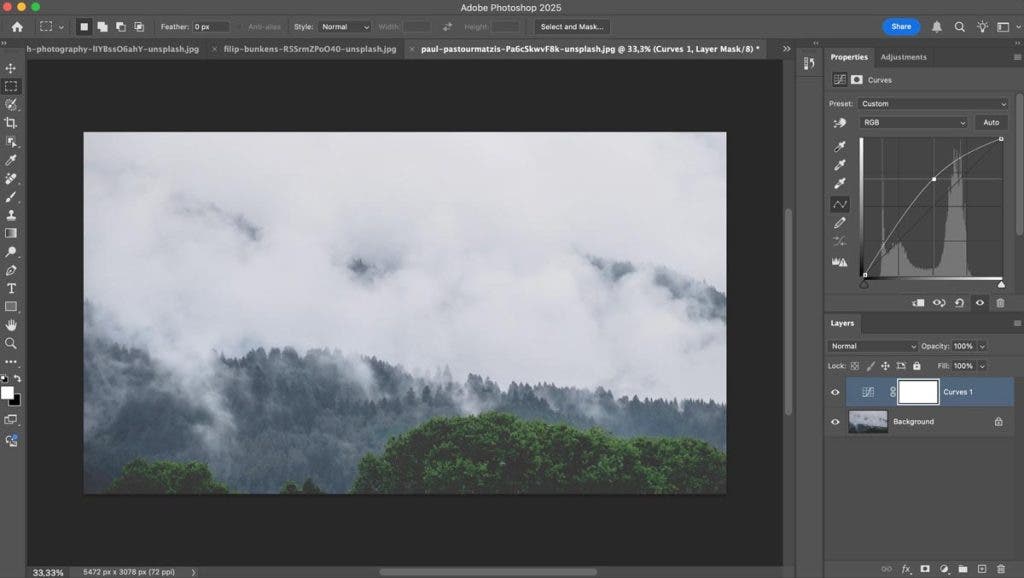
The advantage of Curves over Levels is that you can make a second point to hold down (or even darken further) the darkest tones after you lighten mid-tones. And then a third one to hold the brightest tones in place. You can use as many points as you want to fine-tune the image and create the effect you are after. Each photo is unique and requires unique edits.
To delete control points, just drag them off the chart or select them and press Delete.
In the tonal areas where the slope of the curve is higher than the original diagonal, the contrast is increased, and where the slope is lower, the contrast is decreased. In the image above, the contrast is held as it was in the darkest one-fourth, increased in the mid-tones, and decreased in the lightest one-fourth.
Complex Curves
Increasing contrast in particular tonal areas is the simplest way to use the Curves tool in Photoshop. How about decreasing the contrast in the case of high-contrast photos, like the one below?
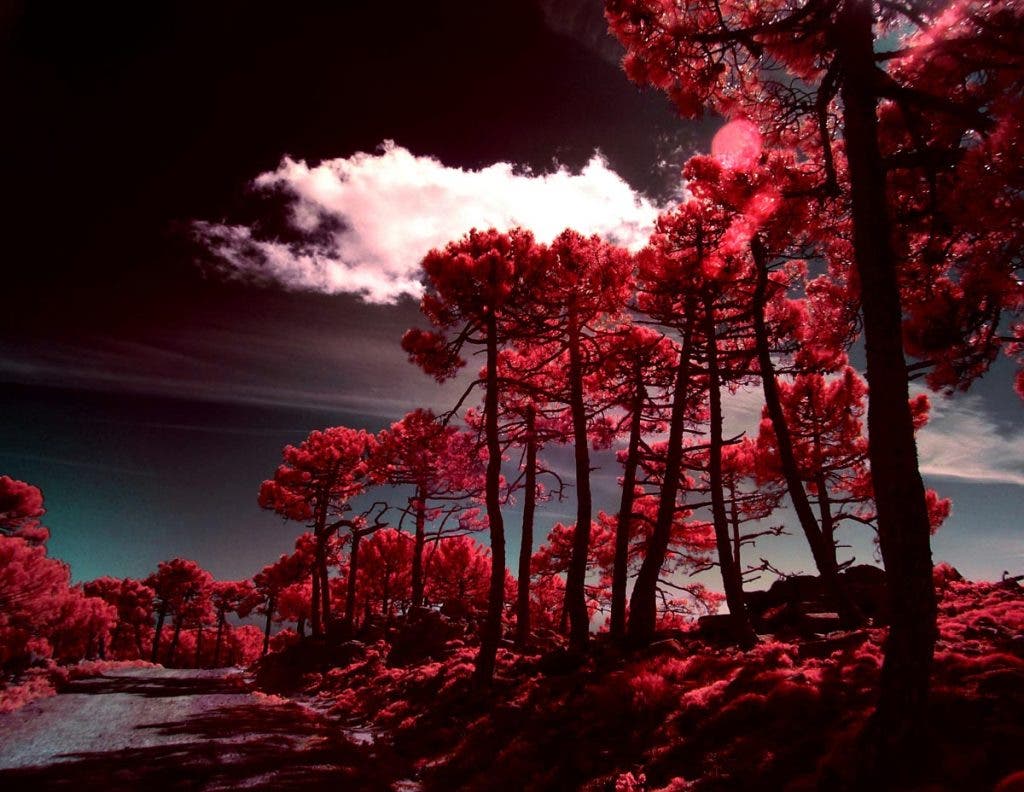
In this case, the histogram is crowded on the left end of the range and has a spike on the right-most end, where the bright tones are. You can decrease contrast by making a slightly reversed S-curve.
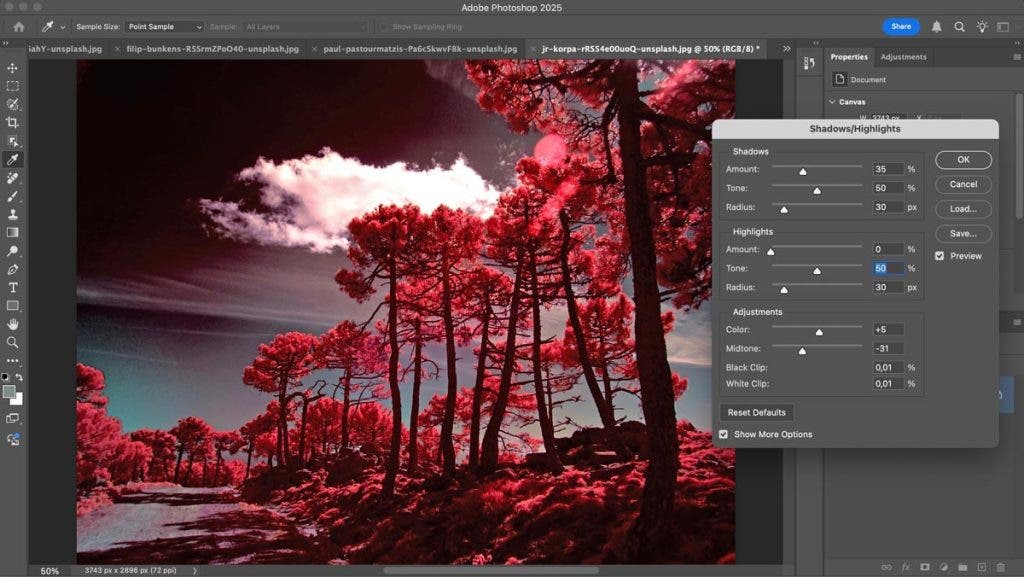
Be careful to keep the curve smooth. Going overboard can give an artificial look. Other Photoshop tools are available for changing tonalities and especially for reducing contrast, which is difficult to do well with Levels or Curves. Among these are the Shadows/Highlights adjustment, high dynamic range (HDR) techniques, and tone mapping.
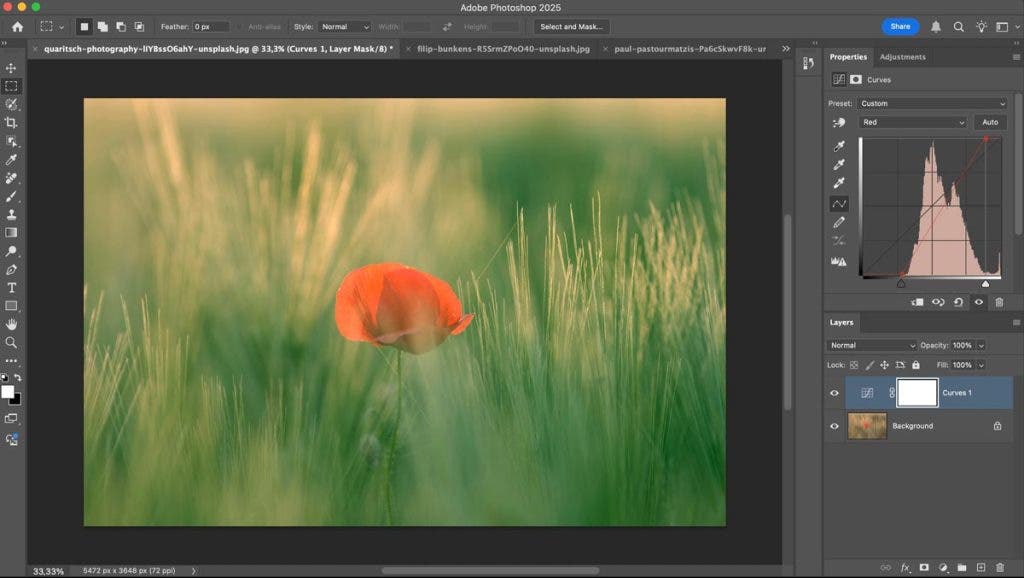
Working with Curves on Individual Color Channels
The Curves tool can affect the entire image or just a particular color channel. Working on a color channel allows you to adjust the image’s color balance and produce more natural-looking or, on the contrary, more artistic images. Select the color channel from the Curves panel drop-down and proceed to add control points as above to either increase or decrease contrast. As Photoshop shows you the effect of your adjustments in real time, you can fine-tune each control point and curve slope as much as you like.
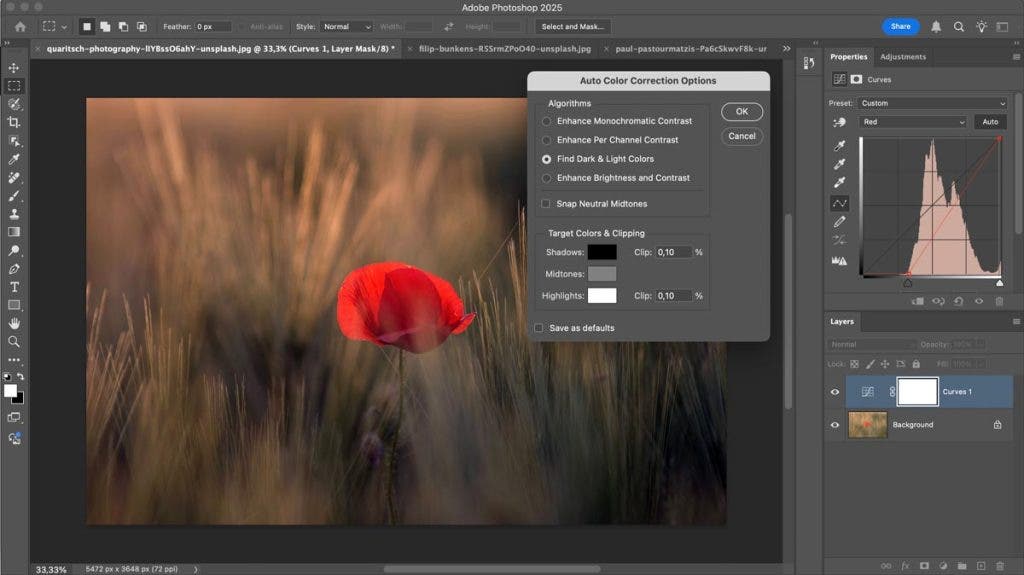
The Automatic Options
Photoshop provides two automatic options for Curves. You can choose one of the provided presets designed to increase or decrease contrast and brighten or darken the image in particular ways or the Auto button. The Auto button applies corrections according to the Auto Color Correction Options. In the case of the Curves tool, they are designed to automatically fix contrast. To open the Auto Color Correction Options window, use Alt-click on a Windows system and Option-click on a MacOS system.
[Include image: auto-color-correction-options.jpg]
When switching from one setting to another, Photoshop shows you the effect on the image in real time. You can save the preferred setting as default.
Final Thoughts
Levels and Curves tools may seem complicated in the beginning, but they will save you a lot of editing time once you get them right. They are versatile tools, able to produce the most subtle corrections or impressive transformations. Furthermore, they give you full control over the editing process, and you can save presets along the