Even if they set out to capture the same subject, no two photographers will capture that subject in the same way. You’ll find variations in lighting, posing, use of location, and even editing. A lot of that has to do with each photographer’s personal style, which they develop by utilizing different techniques to achieve unique looks. The more mindful we are of our options, the more creative freedom we have as photographers. Whenever you need a bit of inspiration for your portrait sessions, or if you just want to try something new, check out the creative portrait photography ideas below and then get out there and put them into practice.
Creative Portrait Photography Ideas and Tips
- Tight Crops
- Color Gels
- Themes
- Reflections
- Gobos
- Double Exposure
- Composites
- Brenizer Method for Panoramic Stitching
- Long Exposure/Light Painting
- Silhouettes
- Ring of Fire
- Dramatic Lighting
- Bokeh
- Creative Props
- Photoshop and AI Editing Software
Tip 1: Tight Crops
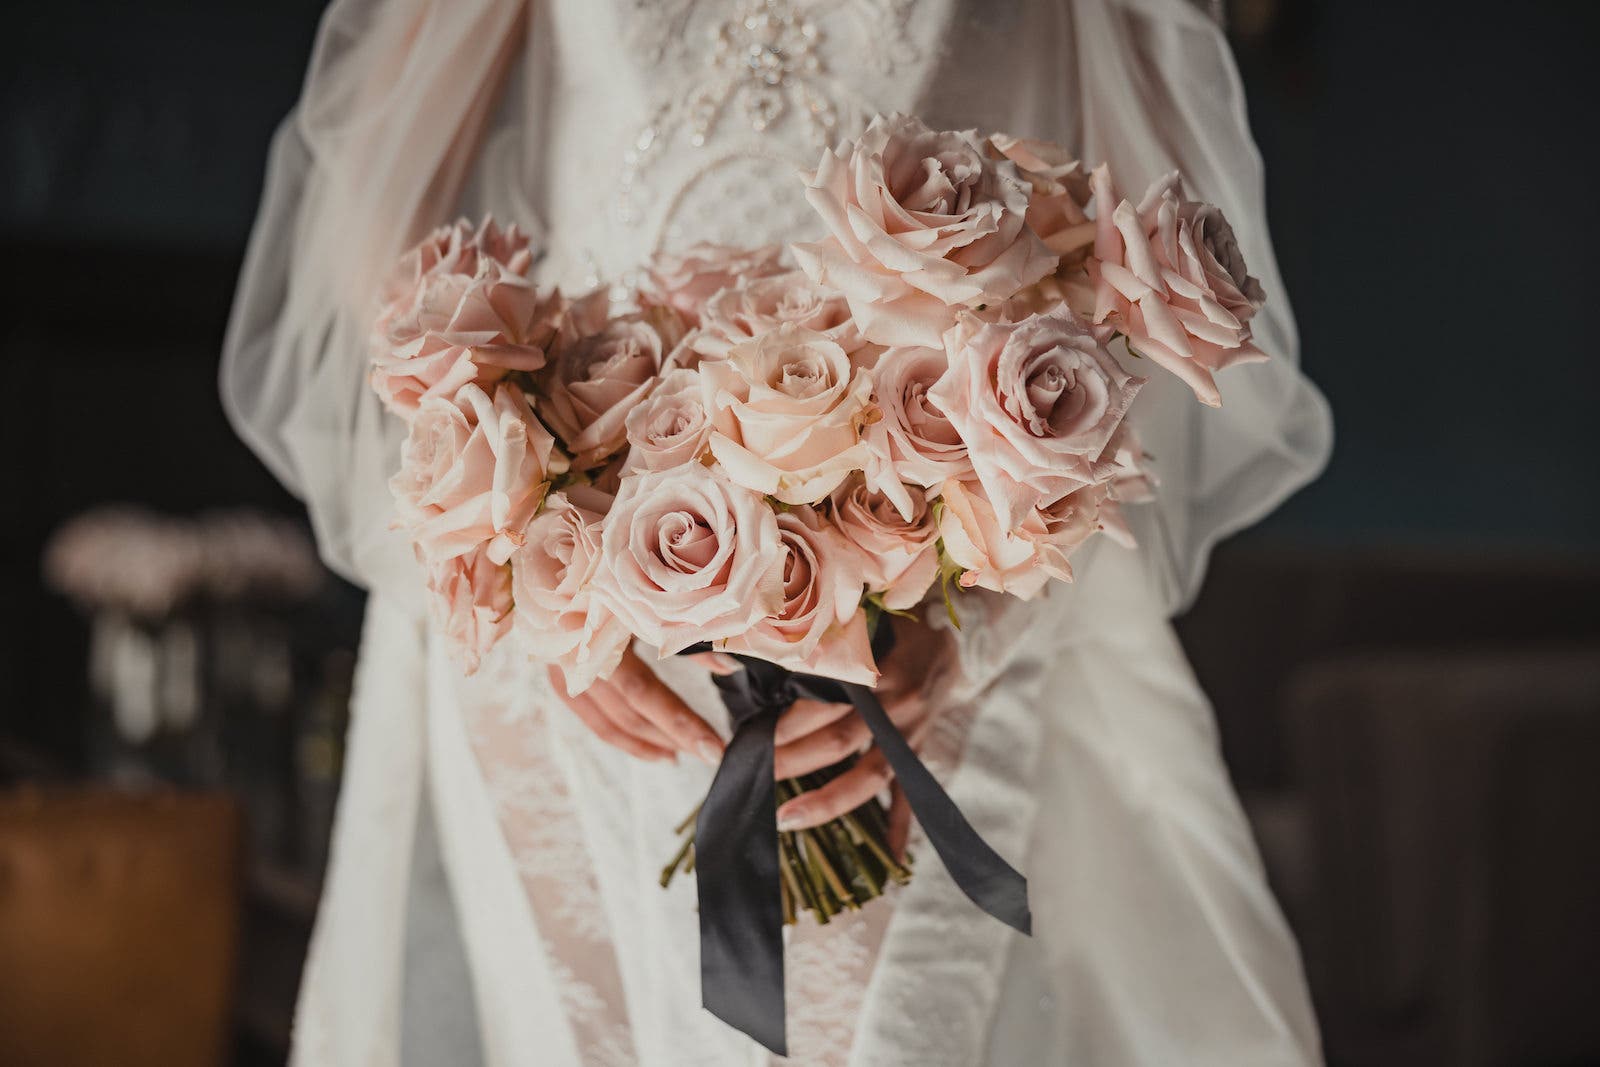
In photography, the term “tight crop” refers to a composition in which the subject fills a large portion of the frame. We often use this technique to create a sense of intimacy or to focus attention on a particular detail. When used judiciously, a tight crop can prove an effective means of adding impact to an image. However, it is important to be aware of the potential pitfalls. Cropping too tight can result in a cluttered or busy composition, and it can also cut off important details that provide context for the subject.
When cropping an image, try to maintain a balance between creating a sense of closeness and ensuring that the viewer can still understand what they are seeing. With a little practice, you’ll be able to use tight crops to add drama and impact to your photos.
Tip 2: Color Gels

Placing color lighting gels on your flash provides an easy and fun way to add a pop of color to your photography or even change the color of the sky. Whether you’re looking to add a subtle tint or make a bold statement, color gels can help you achieve the look you’re going for. Gels are available in a wide range of colors, so you can experiment with different combinations to find the perfect combination for your image.

Check out the video above to learn how to use colored gels to manipulate ambient light and shift the background colors in a scene. I recommend experimenting with different gel placements and angles for both your subject and the background to see how it affects the look of your photos.
Tip 3: Themes
You’ve likely heard photographers talk about using photography as a means of telling stories. It is one of the best tools I know of for that purpose. As photographers, we have an opportunity to explore themes and concepts that help us tell our clients’ stories. We can also choose a theme (such as a holiday theme) to guide a creative portrait session.
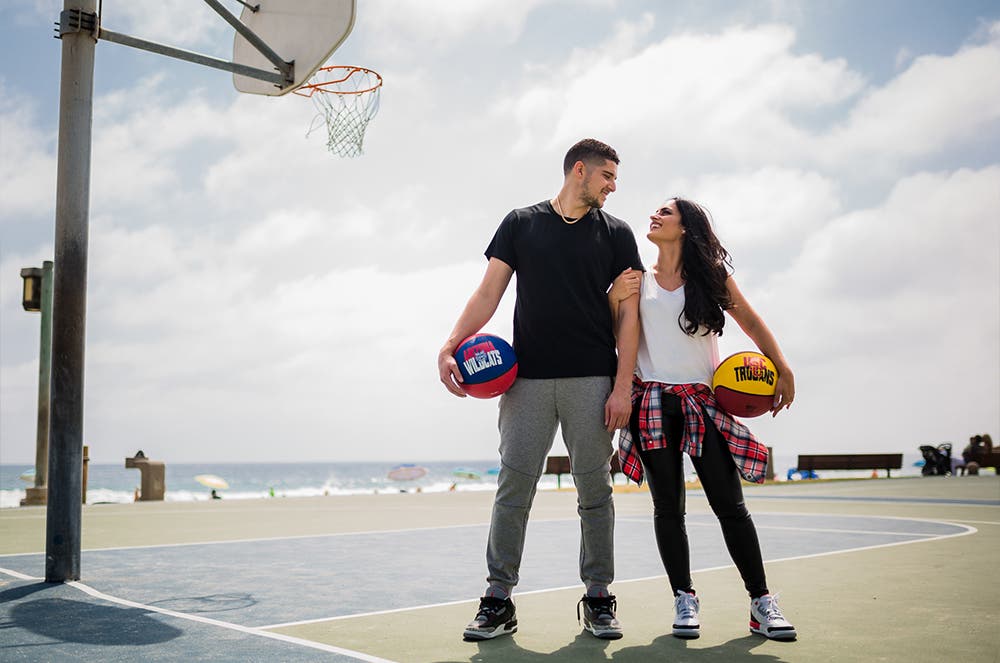
To explore themes for your creative portrait photography sessions, it’s important to spend some time planning the session in advance. Some themes might stem from your clients’ interests or experiences. For example, an engagement session might revolve around clients recreating their first date. Or, if your subject for a high school portrait session plays sports, you might work some athletic-inspired portraits into your session, using props from the actual sport in the pictures.
Read 10 Tips for Beginner Sports Photography if you need some help with this.
Otherwise, we might choose a theme and build a session around it. In this instance, we’d use our subjects as a character, in a way, to help us explore the chosen theme. An example of this might be “a night out on the town,” or “life in the shadows,” the latter of which might inspire how you use lighting and shadows for your creative portrait photography. Fashion photographers use this tool often to give context to the clothes being featured.
Tip 4: Reflections
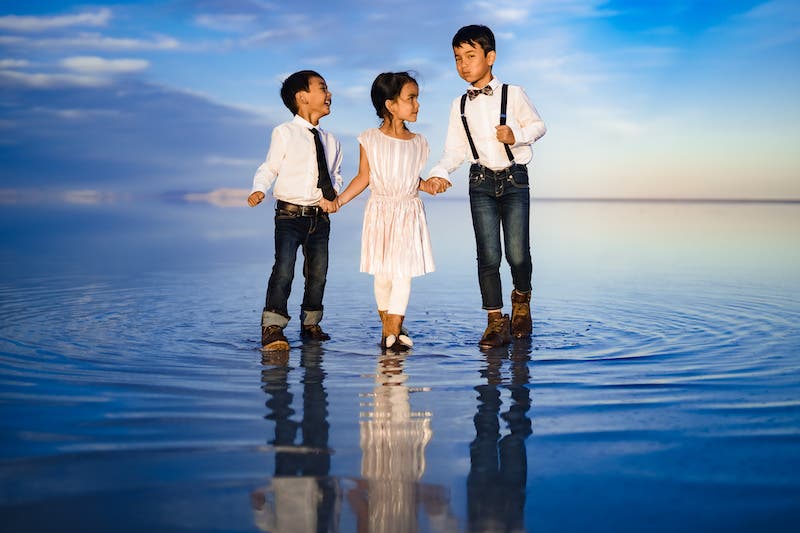
In creative portrait photography, reflections can add an interesting element to your shots. By including a reflection in your frame, you can accentuate compositional elements like symmetry and balance, create a sense of depth and dimensionality, and even convey a certain mood or feeling.
While large bodies of water or mirrors make great reflective objects, they’re not absolutely necessary. We can also put windows, countertops, prisms, or even our smartphones to good use when creating reflection photography.
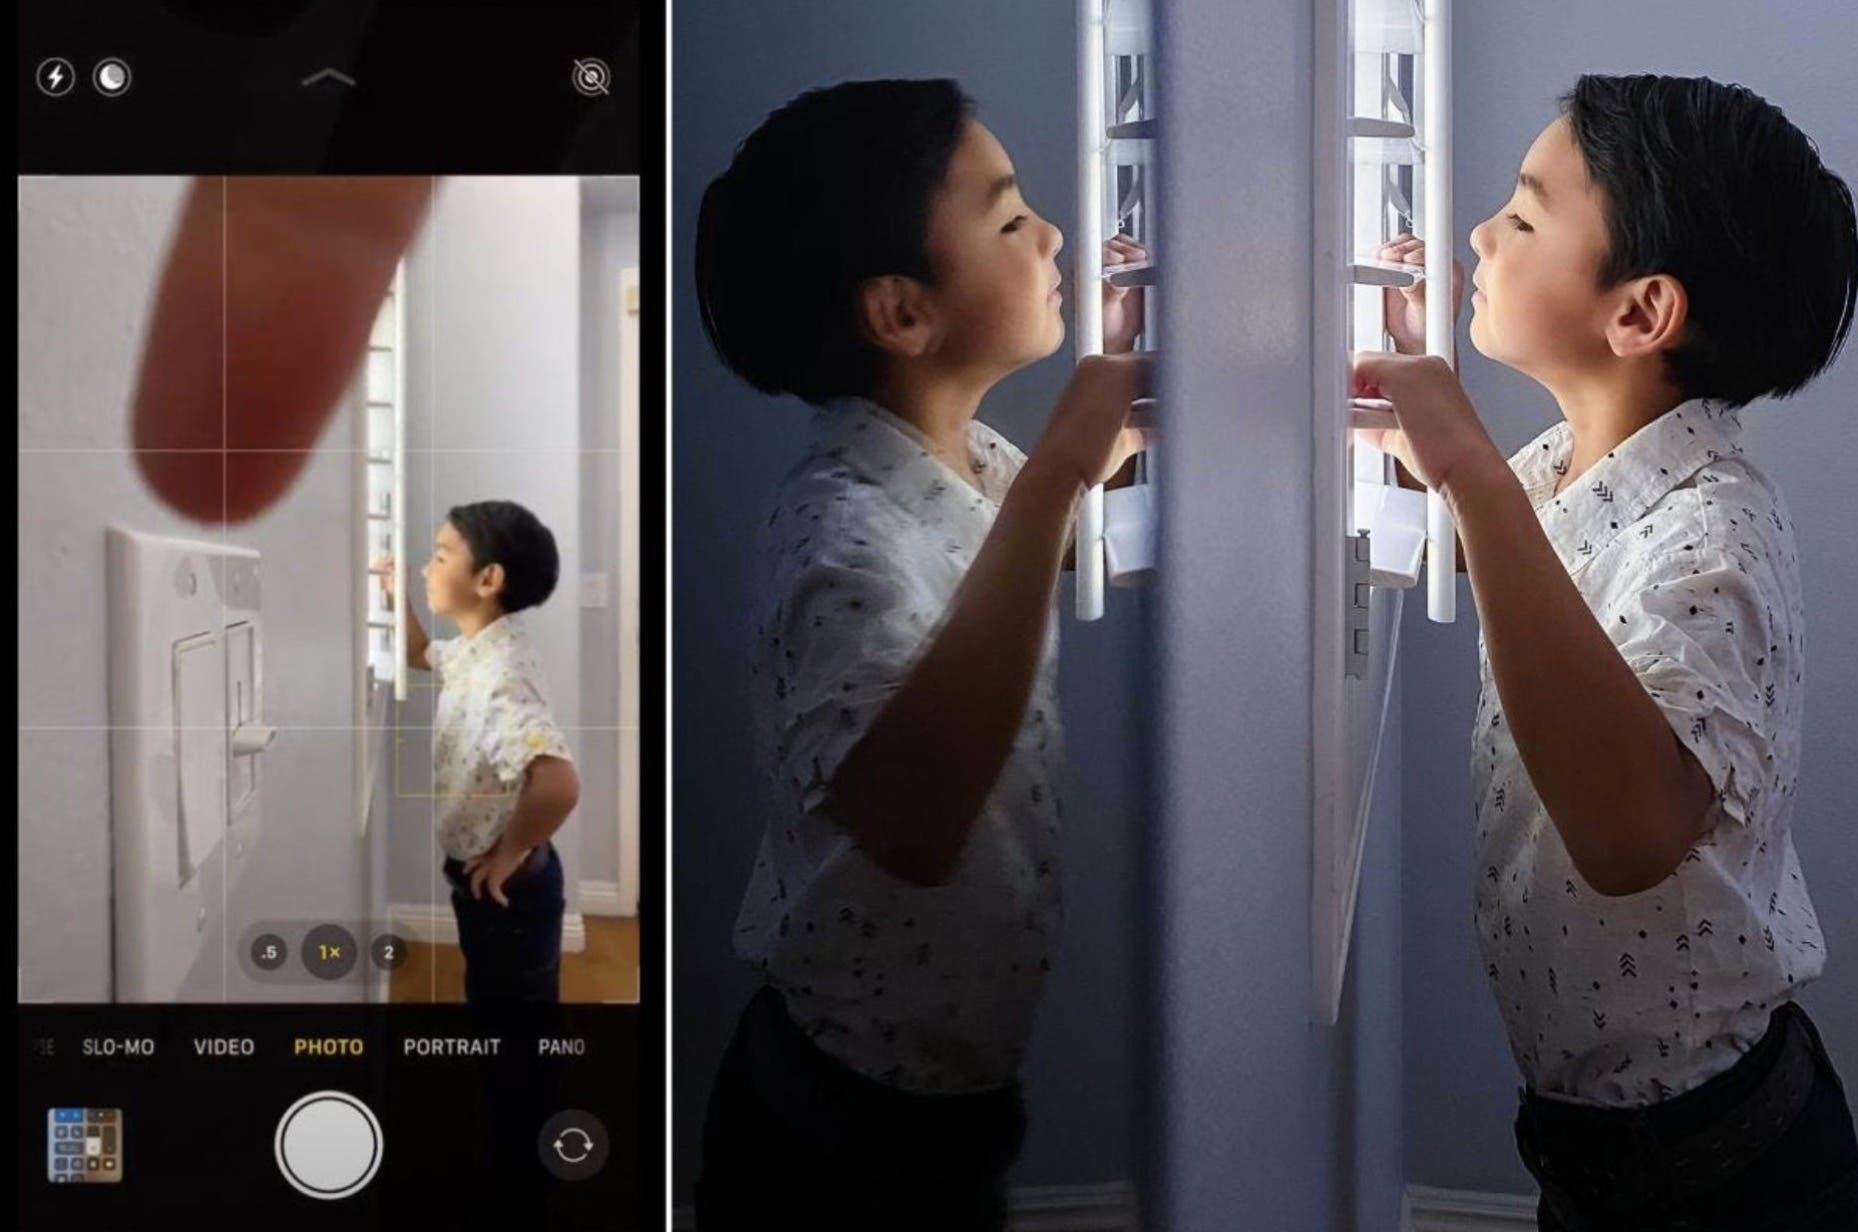
One creative way to use reflections is to conceal unwanted elements in our frame. In the image above, I used a smartphone to create a reflection and conceal the light switch. The beauty of this is that most of us carry a smartphone with us most of the time. In other words, we always have a reflective object on hand to put to use in our creative portrait photography sessions.
At the end of the day, whether you’re trying to add visual interest or conceal distracting elements, experimenting with reflections can add a powerful creative tool to your arsenal.
Check out our Water Reflection Photography Guide for more advice on this subject.
Tip 5: Gobos in Creative Portrait Photography
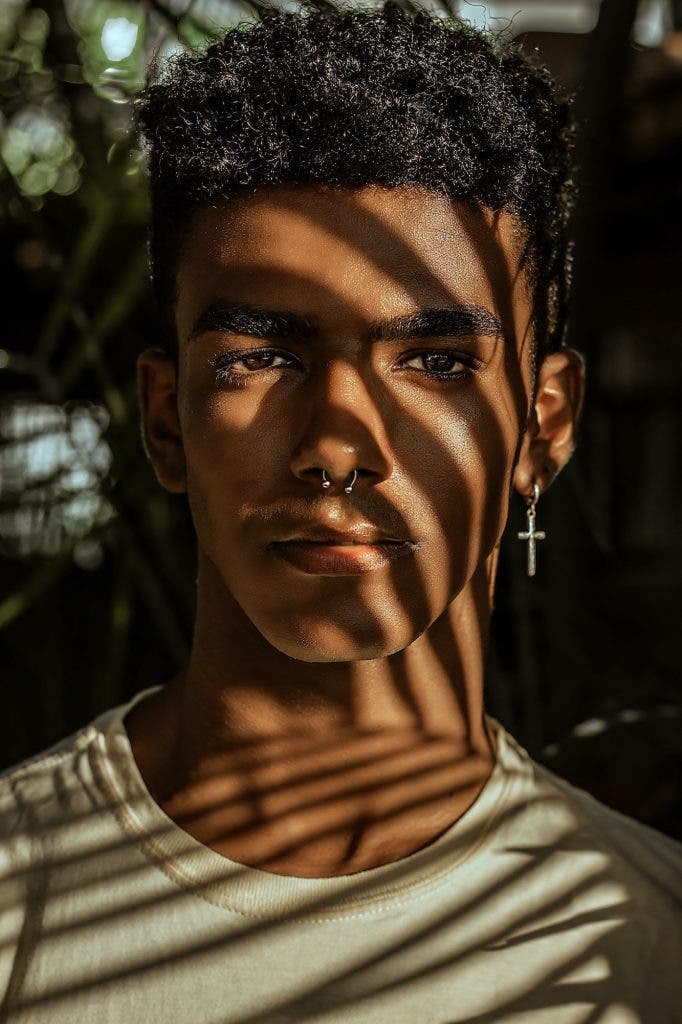
Simply put, a gobo is a photography accessory that is placed between the subject and the light source for the purpose of creating a specific shape or shadow. Gobos can be made from a variety of materials, including metal, glass, and paper, among others. They are often used to add drama to a photo by creating interesting shadows. However, gobos can also be used to simply block out unwanted light or create a smooth gradient of light. How you use a gobo for creative portrait photography is up to you.

When choosing a gobo, it’s important to consider its size, shape, and material. Each type of gobo will produce slightly different results. Like usual, I recommend experimenting with different gobos until you find the effect you want. Whether you are looking to add some drama to your photos or simply block out unwanted light, a gobo can be a useful tool for boosting creativity.
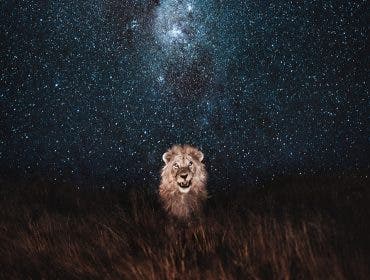
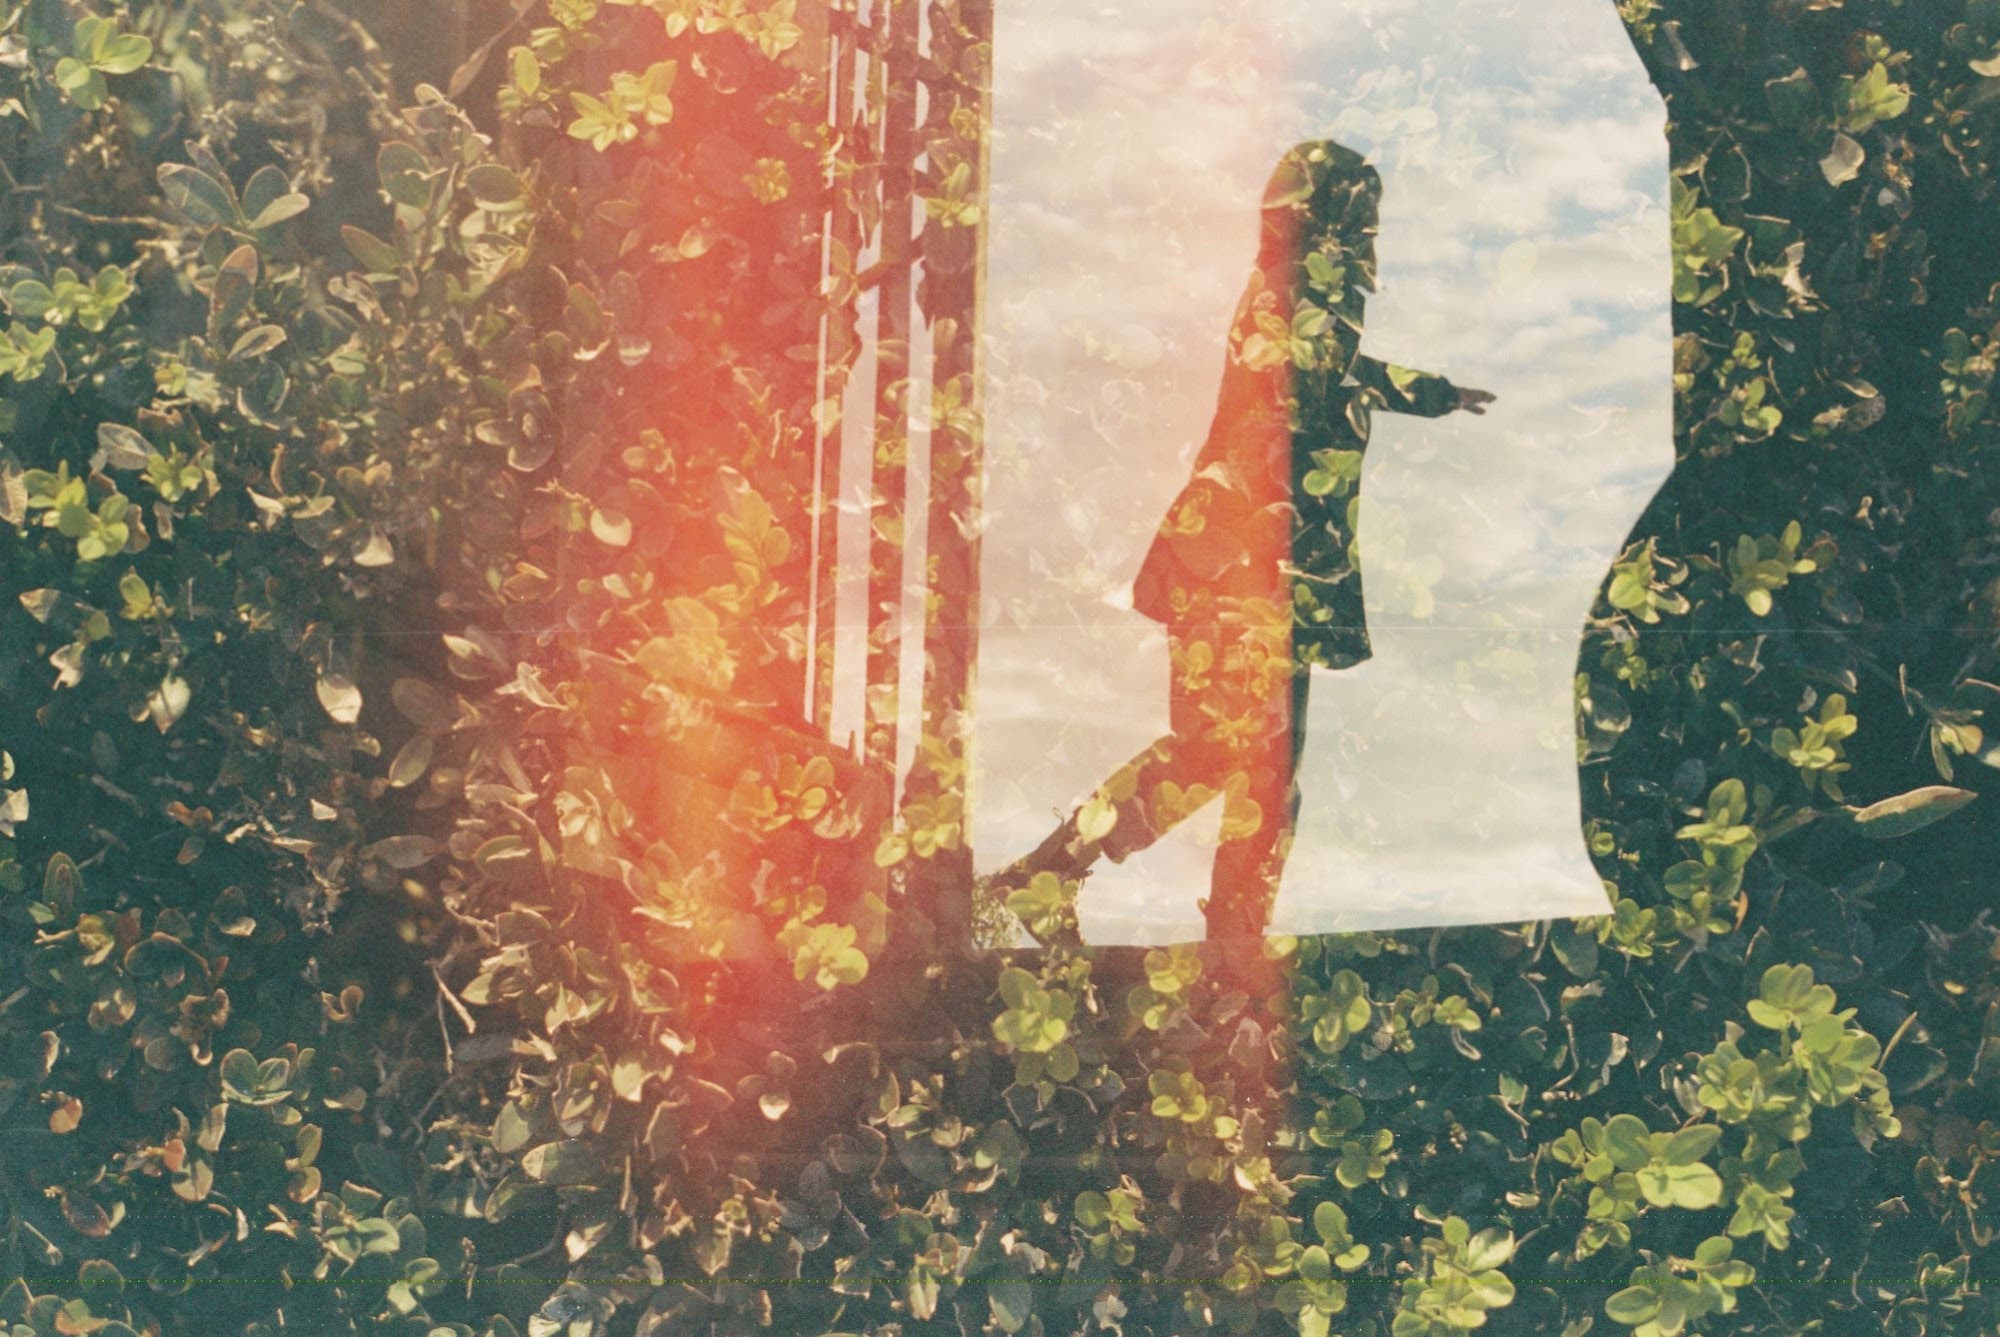
Tip 6: Double Exposure
If you’re unfamiliar with double exposure, it’s a creative portrait photography technique that involves taking two separate images and superimposing them over one another. The effect can be striking, often resulting in a surreal and dreamlike image. Double exposure can be achieved in a number of ways, but the most basic method is to simply take two pictures on the same piece of film (or in-camera, a feature offered on many digital cameras). Otherwise, you can create a double exposure composite in post.
The key to successful double exposure photography is to carefully consider the composition of both images. Depending on the technique used, for example, you might want to capture a lighter or darker background for the base photo in relation to the subject, which you’d then capture in a “layer” photo.

In the video above, Mark Wallace shares some tips for capturing double exposures with a single click by using reflections.
Tip 7: Creative Portrait Photography Composite
In photography, the term “composite” refers to an image that is made up of two or more distinct photographs, but it works differently than a traditional “double exposure.” Composites tend to look cleaner and not look as though they were made by combining multiple images. Photographers can use compositing techniques to create a potentially far more powerful and evocative finished product than they could with a single photograph.
As an example, a photographer might take separate pictures of newlyweds in different poses, and then combine them into a composite image that would be impossible to capture otherwise. Or, let’s say you want to photograph your subject and then give them an entirely different background than the one they’re actually in. In the hands of a skilled photographer, composites can be truly stunning works of art.
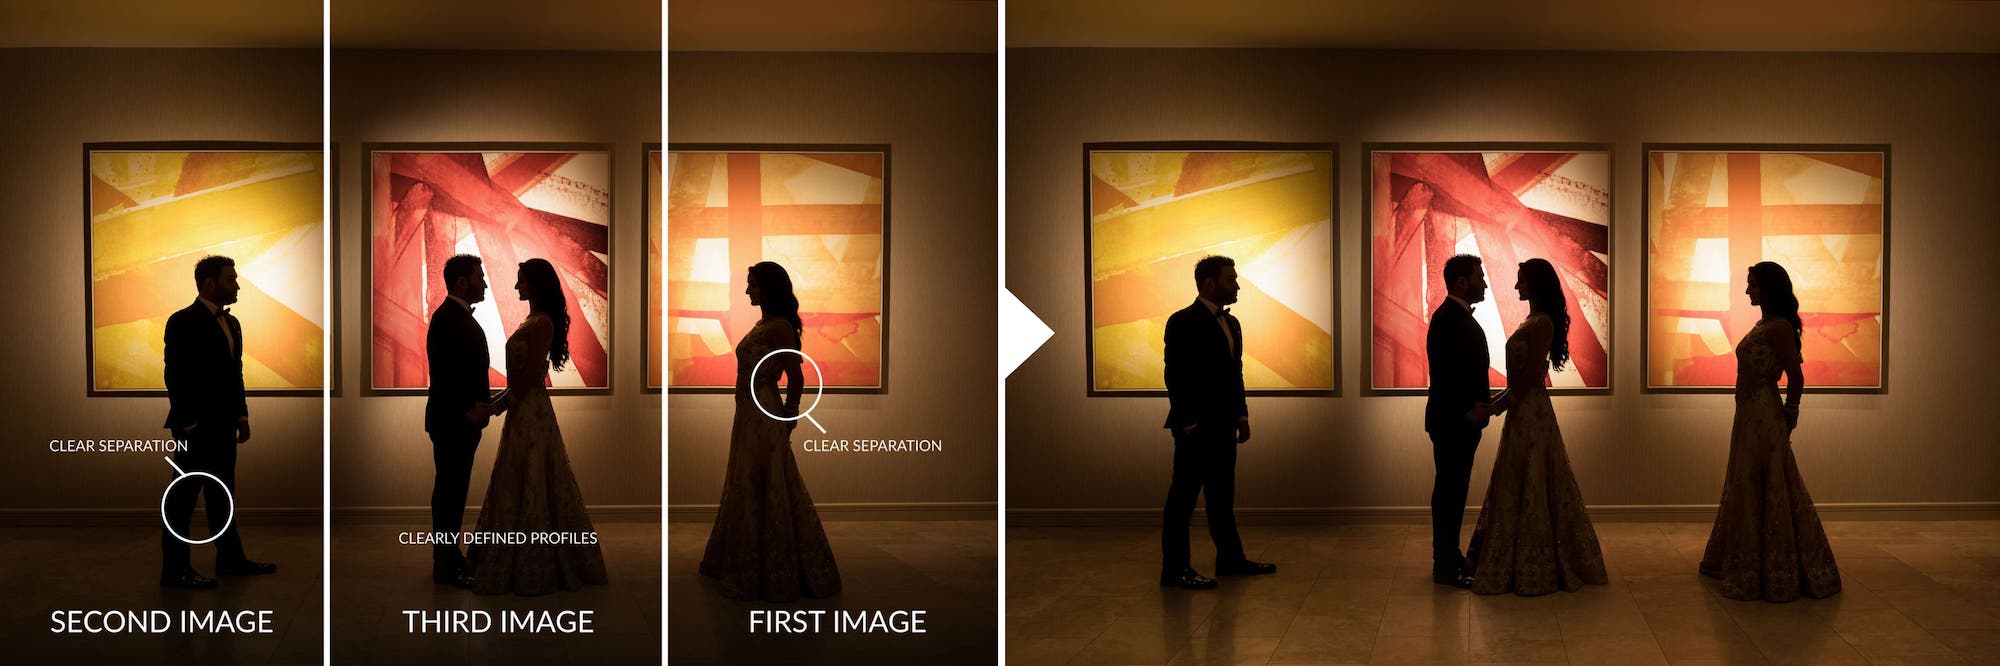
Tip 8: Brenizer Method for Panoramic Stitching
As noted in an earlier article published on this blog, the Brenizer Method “is a composite technique that captures images at a wide aperture and incorporates panoramic stitching in order to create wide angle imagery that features an extremely shallow depth of field.” In other words, we can use a panoramic stitching technique popularized by wedding and portrait photographer Ryan Brenizer to create unique environmental portraits.
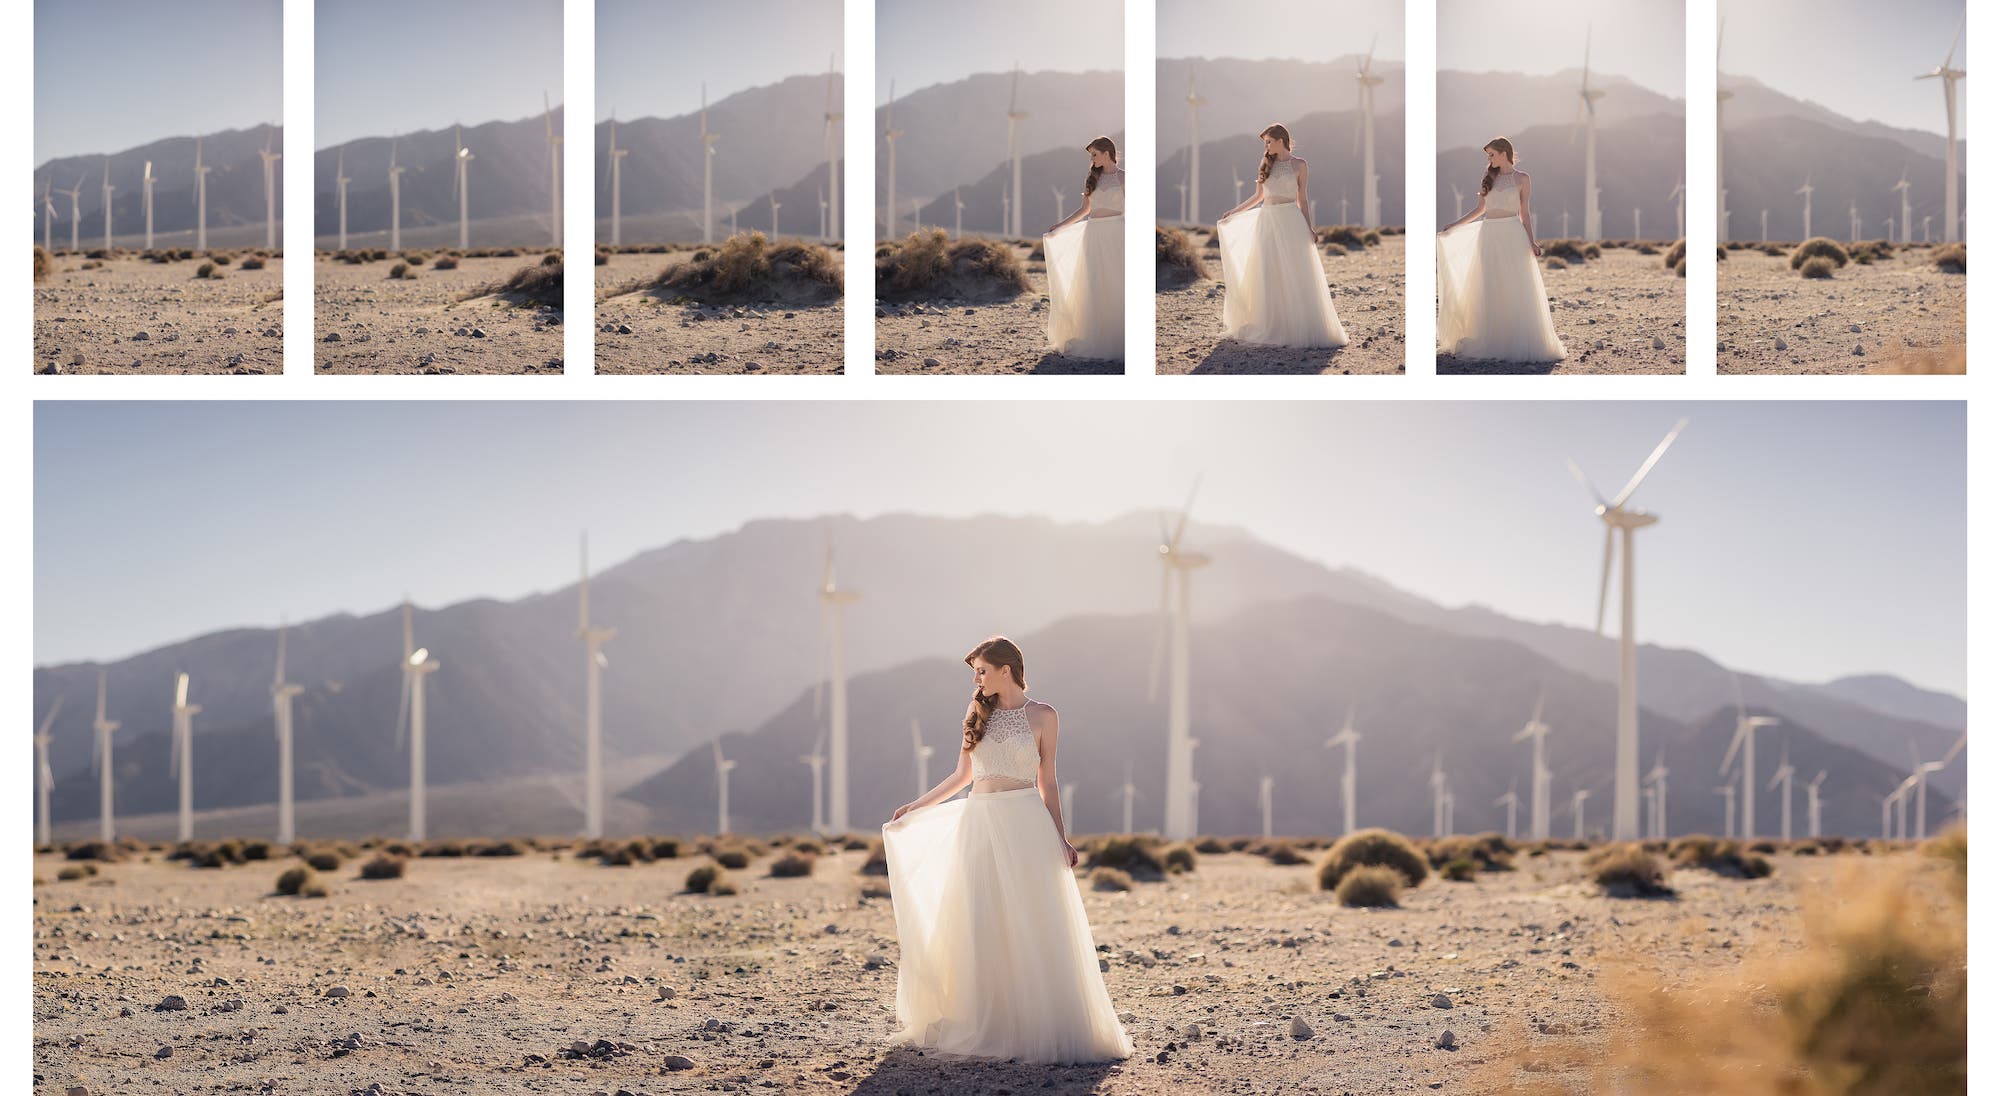
Lightroom will do most of the heavy lifting in terms of stitching together your portraits for a unique panoramic shot, but there are some steps you’ll need to follow in order to make it work. Here’s a quick overview of the steps:
- Pre-Visualize the Final Panoramic Picture
- Shoot RAW Image Files
- Keep It Level
- Start with the Intended Focal Point
- Overlap Each Image
- Zoom In
- Opt for Portrait/Vertical Orientation
- Shoot with a Wide Aperture
- Mind the Moving Objects
- Take a “Big Picture” Approach in Post
Tip 9: Long Exposure/Light Painting
Within this list of creative portrait photography ideas, one that I’d say you have to try is light painting. This lighting technique incorporates long exposures alongside a continuous light source. You may or may not need to use a flash unit (or a tripod), depending on the specific style of light painting you create. One thing you will need in most instances, however, is a dark environment. Dim or dark lighting will allow you to more easily capture movement from either the camera, the subject, or the light source.
Check out this article for more tips on painting with light.
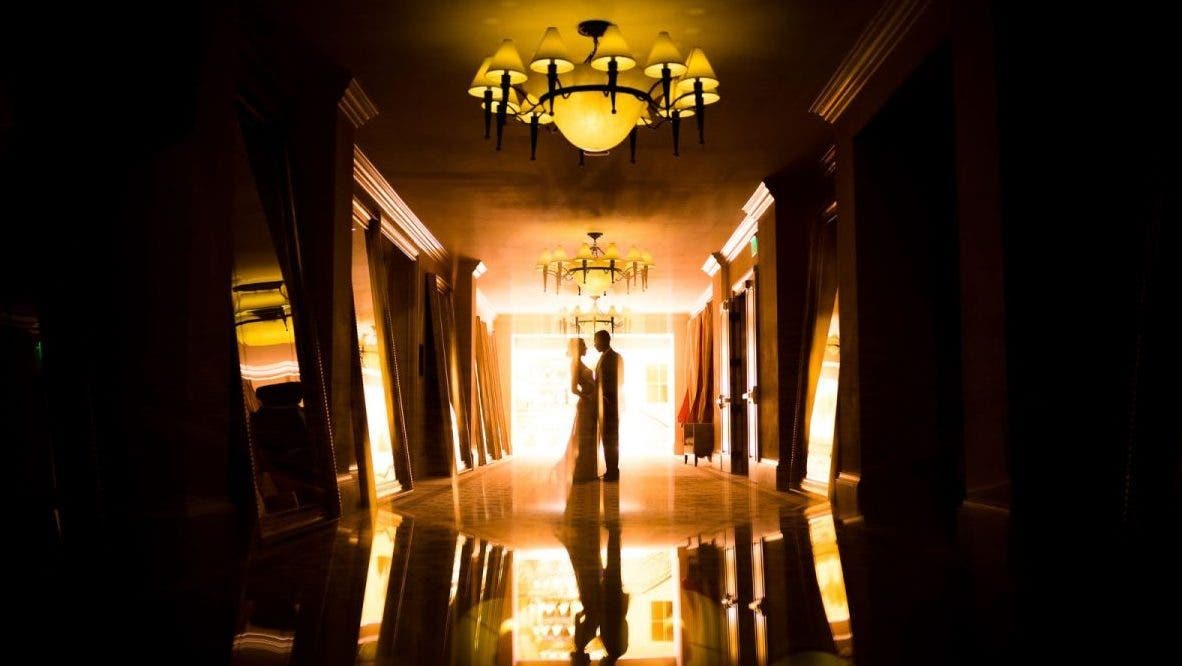
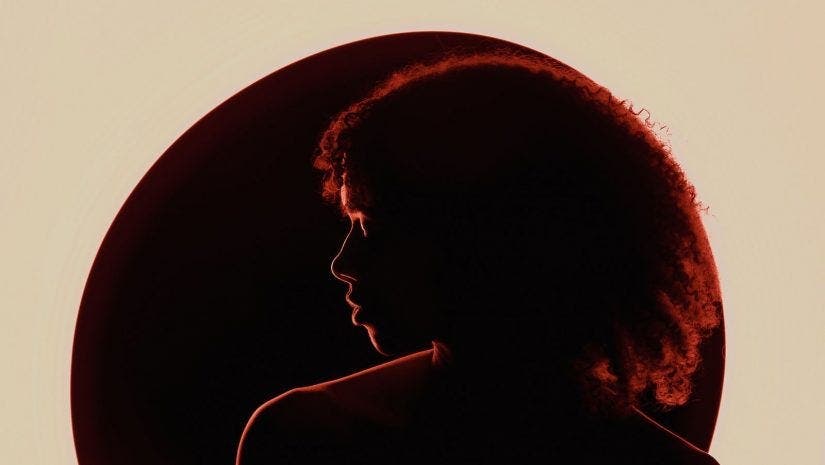
Tip 10: Silhouettes in Creative Portrait Photography
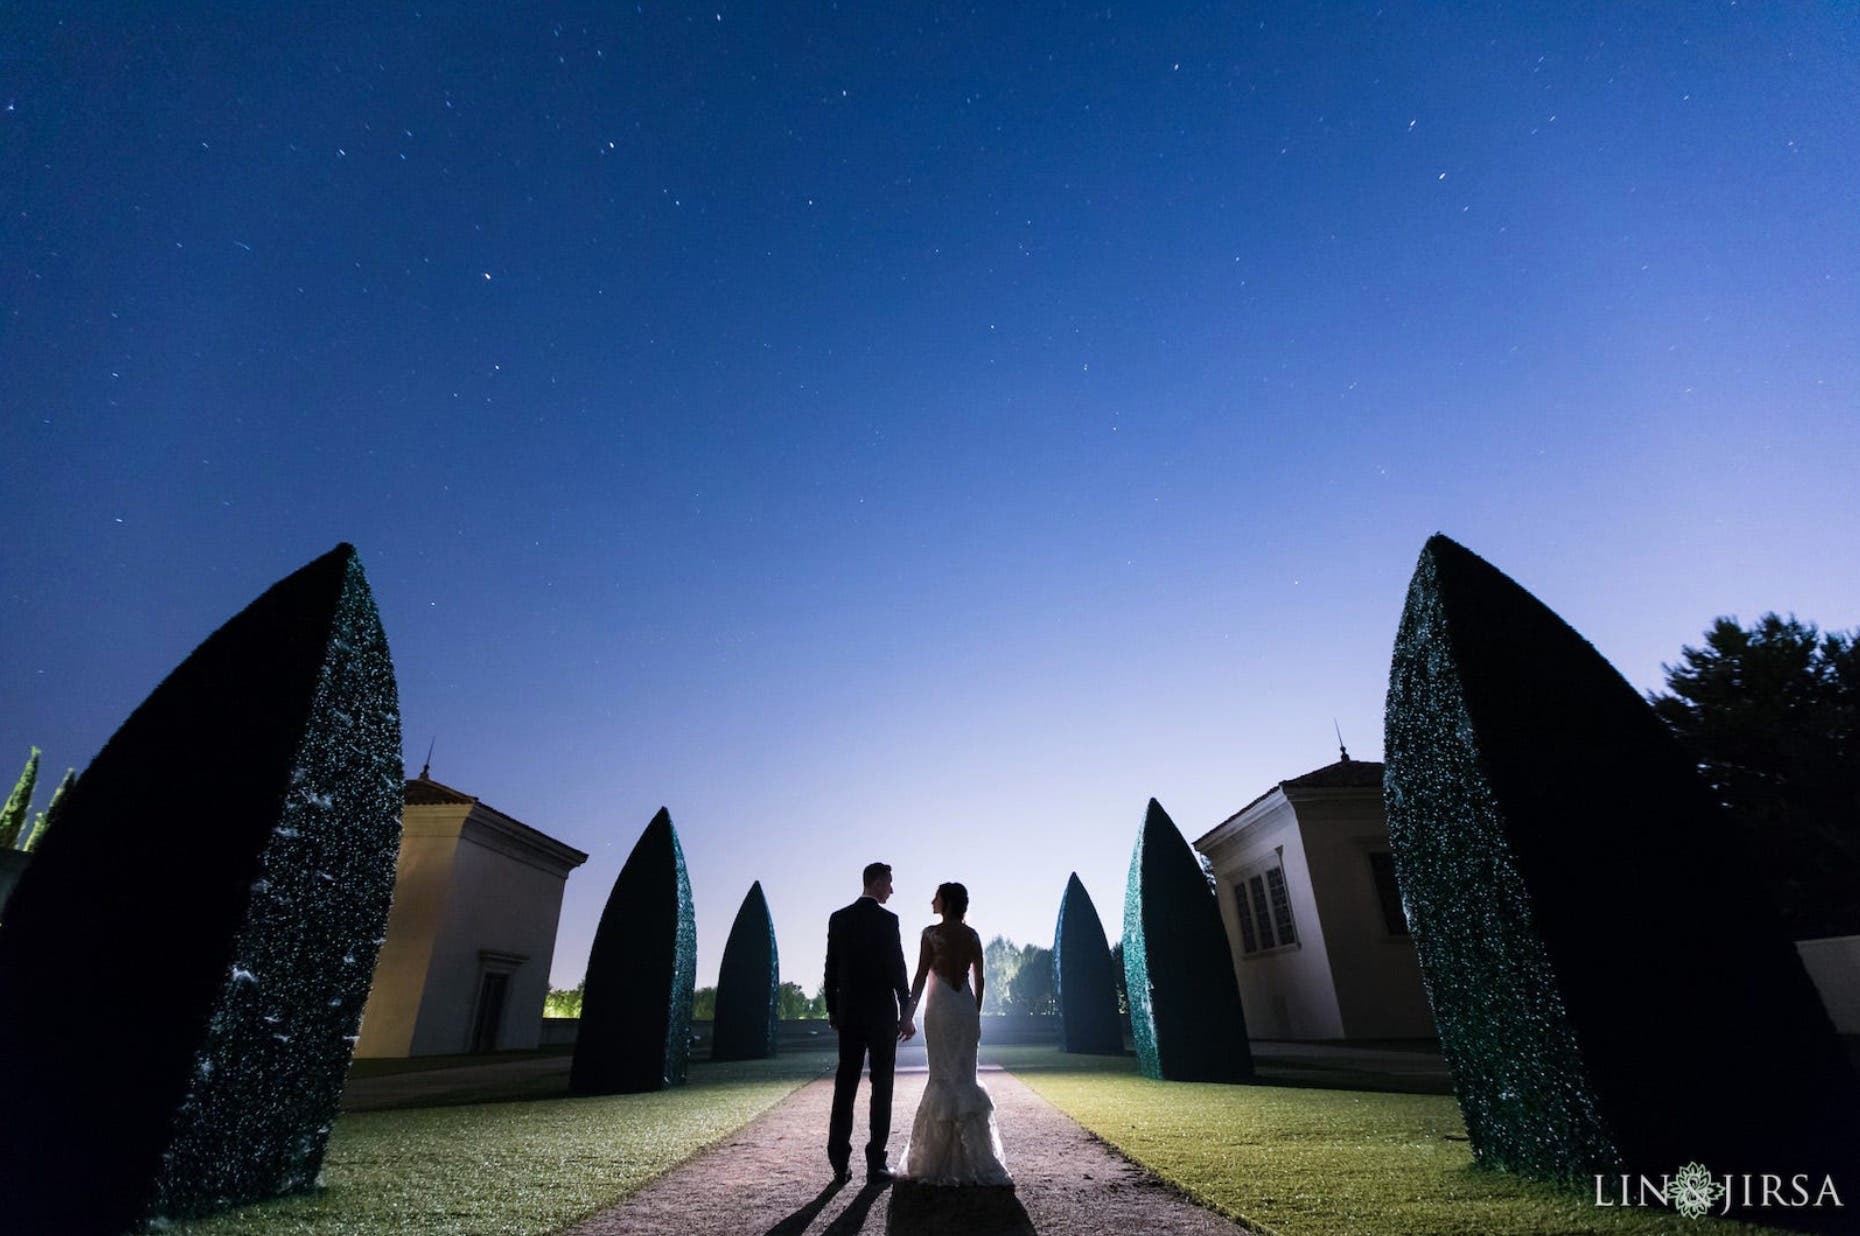
In simple terms, a silhouette is defined as “a dark shape and outline of someone or something visible against a lighter background.” Capturing a silhouette is a simple creative portrait photography technique you can put to use right away. You’ll be happy to know there’s no real special gear needed, either. All you really need is a basic understanding of what a silhouette is (as defined above) and a bright enough backdrop to frame your subjects against, and you’ll soon be able to create silhouettes using any camera (including your smartphone) and available light. You can find additional tips here to inspire your silhouette photography.
Tip 11: Ring of Fire

Get yourself a 2”x1.5” brass tube, a flash or two (or the sun if it’s out and where you want it to be), and a wide-angle, wide-aperture lens to give this unique technique a try. First popularized by Sam Hurd, the Ring of Fire creative portrait photography technique uses a simple tool (the brass tube) and your understanding of light to create incredible light flares.
Master this technique and give your clients a special effects portrait that will wow them every time.
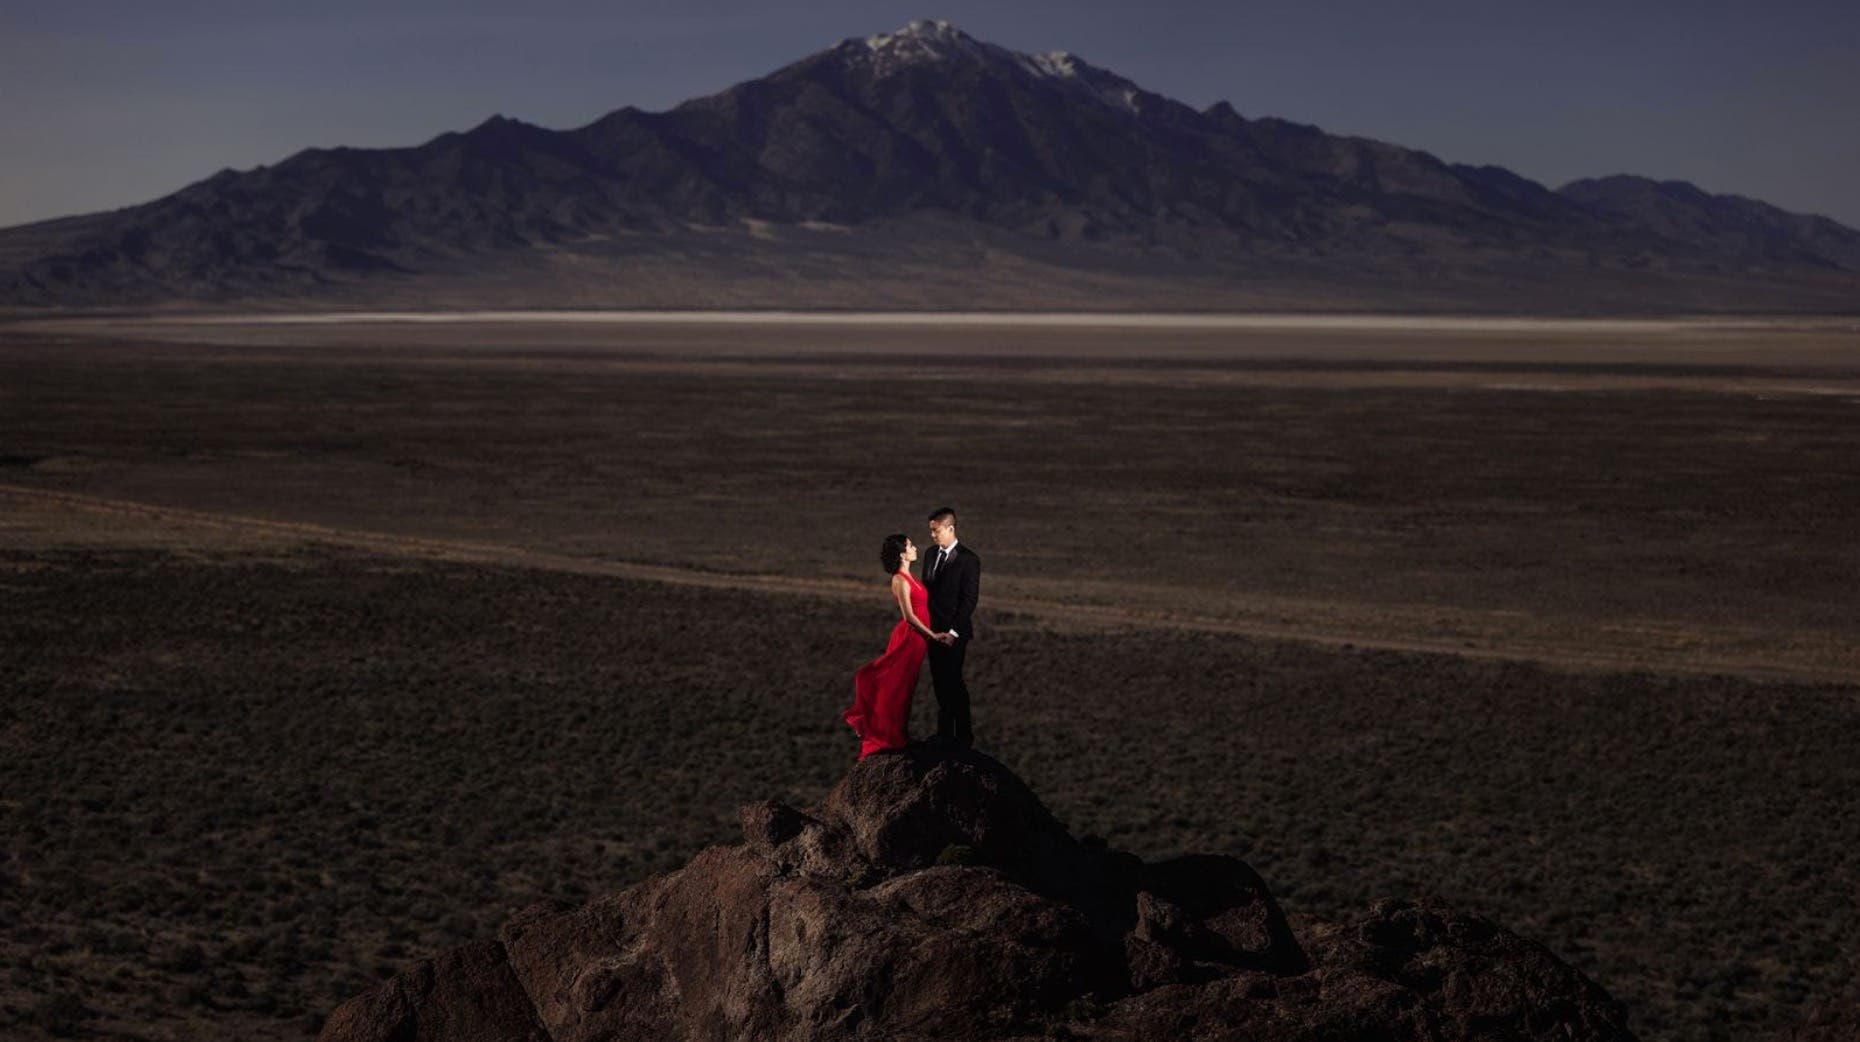
Tip 12: Dramatic Lighting for Creative Portrait Photography
I think we often associate dramatic lighting, which incorporates shadows for depth and interest, with using off-camera flash as a light source. However, we can use natural light as well to create dramatic lighting. Let’s take a quick look at both.
Dramatic Lighting with Flash

Many photographers, especially those early into their journey, find themselves intimidated when it comes to using off-camera flash. Add in more lights and it gets even more intimidating. Fortunately, it doesn’t have to be. The video above explores just one of many ways to use flash to create interesting, dramatic lighting.
Dramatic Lighting with Natural Light

You’d be surprised at just how versatile natural lighting can be. We typically think of bright and airy looks when shooting with natural light, but the truth is we can use it to dramatic effect as well by observing the light direction and making a few quick adjustments, as illustrated in the video above.
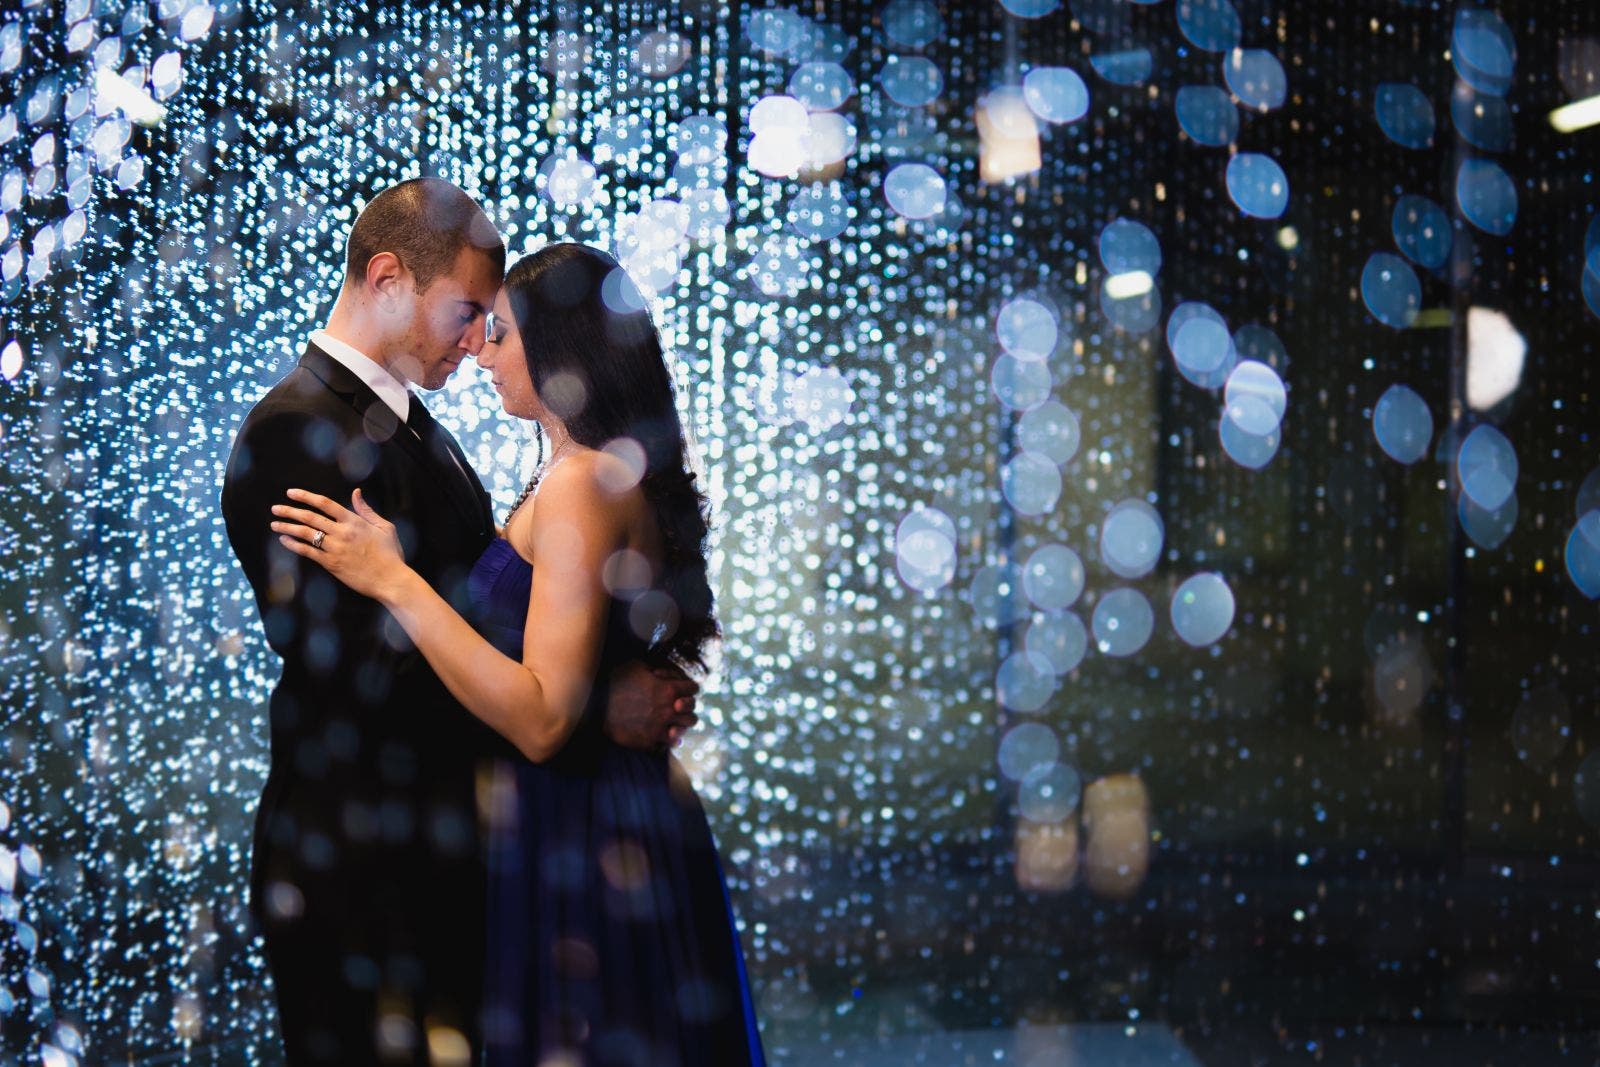
Tip 13: Bokeh
Who doesn’t love a heaping serving of nice, creamy bokeh, at least when it’s beautifully captured. Bokeh is the word we use to describe the blur, or the aesthetically pleasing quality of the blur, in out-of-focus areas of an image. We can use it to add a dreamlike quality to our portraits or to separate our subjects from the background, or in a number of other ways.
One way we can create or control bokeh is to use a wide aperture lens to create a shallow depth of field. This causes the background to blur while the subject remains in sharp focus. Keep this in mind when you want or need to minimize distracting elements like busy backgrounds.
So long as there’s adequate distance between our subject and the background, we can also use a telephoto lens to compress the background and create plenty of worthwhile bokeh. However we achieve it, the amount of blur we opt for represents a creative compositional choice and can drastically impact our portraits.
Tip 14: Creative Props
You may or may not use them, but props can prove useful in portrait sessions. And no, props are not limited to photobooth costume pieces.
On one level, props can help tell the story of who our subjects are. For instance, we might photograph a musician with their instrument, or pose a family (in this case, my family) in a kitchen participating in a fun activity like making pizza. By incorporating props into a portrait, we can help our subjects feel more comfortable and create images that truly capture their essence.

In addition, props can also add a creative element to a photo shoot, making it more visually appealing. In the video above, from Adorama’s YouTube channel, I show how you can use props found on-location (such as a palm frond used as a gobo) to enhance your portrait session. You might not have the same props available, but it’s worth challenging yourself to make use of what you have to kick the portrait up a notch creatively.
Tip 15: Photoshop and AI Editing Software for Creative Portrait Photography

This is a rather general tip, but we have a lot of power at our fingertips when it comes to using editing software. We can use tools like Photoshop to manipulate our imagery and create incredible works of art. Or, we can give AI a try and take a more collaborative approach to creating art. Check out the video above to see my interview with pro-retoucher, Pratik Naik, as we discuss how AI-generated art will impact the creative industry.
Conclusion
I hope that you found these creative portrait photography ideas, tips, and examples helpful. It’s easy to fall into ruts, or to burnout, whether we shoot a lot or a little. Fortunately, we have options for kickstarting our creativity and reigniting our passion to create. Choose from any of the tips above, ideally one you’re less familiar with, and take it for a test run. Chances are you’ll come back more energized about your craft and one step closer to creating your next great portrait.