A photographer’s style is defined by more than raw talent and technical skill.
Adobe Photoshopis a powerful creative tool —New York Times contributing photographer Andrew Scrivani likens it to the artist’s palette. Each and every Photoshop tool can turn a photographer into a creative visionary. Legendary photographer David LaChapelle built his iconic, high-impact aesthetic by meticulously directing every color in every frame — both during a shoot and later during in post-processing.
By learning the opportunities available to you in Photoshop, you will also learn to approach your photography in different, innovative ways. “Photography and retouching work together to express your vision,” says fashion photographer Lindsay Adler, who honed her self-described “clean and bold and graphic” style by shooting with specific post-processing techniques in mind.
Below are two ways you can use Photoshop to push yourself creatively. To further expand your Photoshop skills, enroll for free in creativeLIVE Photoshop Week, featuring 40+ online courses taught by leading photographers.
 |
 |
Lens Flare
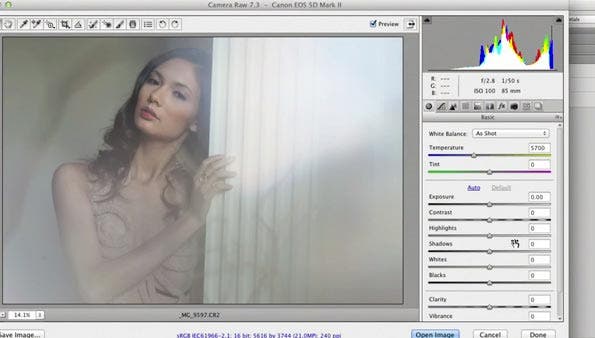
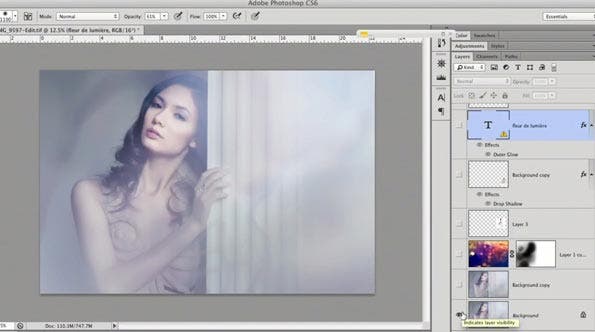
Lens flare has long been seen as a pock mark in a photograph — a fatal flaw of a shoot gone wrong. The rings and starbursts caused by lens flare can be a distraction — taking the eye away from the subject of the image. But now, lens flare has come into vogue, and is often intentionally applied to photographs to create a soft, dreamy effect. If you have backlight during a shoot, you can achieve lens flare in camera, but if you don’t, you can add lens flare in Photoshop.
To add lens flare in post-processing, it’s best if you are working with a raw image that is out-of-focus or features blurry lighting. When shooting, if you know you want to apply lens flare later, change your focus to create the largest bokeh possible. You don’t need to worry about the color of the lights, as you can later adjust that with the Hue/Saturation tool. Once you have an image you want to work with, follow the instructions below:
-
Open both the image with the subject and the lens flare image in Photoshop.
-
Select the lens flare image.
-
Shift+Ctrl/Cmd+V — Drag the lens flare image to the subject image.
-
Adjust the lens flare image as needed by moving the image with the Move tool or using Ctrl/Cmd+T to transform the image size.
-
Adjust the blending mode of the lens flare layer. Overlay and soft light are often good choices, but use whatever Blend Mode that achieves your desired look and feel.
-
Add a layer mask.
-
Press “B” to select the brush tool and paint black to remove the effect from the subject’s face. (Remember, you want the eye to focus on the subject).
-
Paint with black at a lower opacity in areas where you do not want the lens flare effect to be as prominent. You can also lower the layer opacity if you wish to universally lessen the effect.
-
Use additional lens flare images as needed to create your vision.
 |
 |
Selective Color
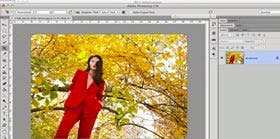
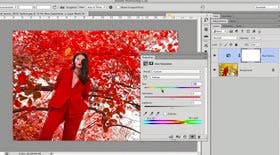
Selective Color is one way to really add couture elements without a couture-level budget. If you don’t have money in the budget for 20 dozen red roses, you can shoot in a field of flowers and then turn that raw photo into a high-impact image in Photoshop. During her creativeLIVE course, Creative Retouching Techniques, Lindsay Adler recounted a time she had an idea for a fashion editorial — one that, if shot raw, would have cost tens of thousands of dollars. “I wanted to shoot red outfits on red leaves, red flowers, red everything. And no money,” Lindsay said, adding, “But I knew I could do it in Photoshop. It looks like it takes a lot of work, but really it takes 15 seconds. You just have to know what tools are available to you.”
Lindsay shot her model in a red outfit in front of a tree with bright yellow leaves. Here’s how you do it: Go to Adjustment Layers, and select Hue. Lindsay then went to her color channels — which display all the main color tones in the photograph — and selected yellow. “All I really want to do here is change the yellows to reds,” Lindsay explained as she demonstrated how to drag the tool to the left on the color spectrum — until the leaves turned the desired red. However, after making this change, Lindsay identified an issue: the new red color was “out of gamut,” a term that means a color is so oversaturated individual hues are not visible.
One note: When changing colors and hues, be careful with skin tones. Skin tones are comprised of yellow and red hues, and when Lindsay made the change to the yellow color channel, she turned the model’s skin a bright pink. To fix, she switched over to her back brush and used the Paint tool to brush back to the model’s original skin tone.
Ta-da! This is a super easy example of selectively altering different colors in the background of an image. All in all, it took Lindsay about 10 minutes from start to finish.
Article by:Whitney Ricketts via creative live

