Does the NexStar telescope allow you to boldly go where you’ve never gone before?
Over the years, as telescopes have become more advanced, many models have also become much more complicated to use. When Celestron’s NexStar SE family of telescopes was introduced a few years back, they were designed to put the focus on the ease of use and the fun of astronomy by offering many of the advanced viewing features commonly found on more expensive telescopes but offering a more intuitive user interface.
The NexStar 4 SE is a 4-inch Maksutov-Cassegrain telescope and is the smallest in Celestron’s NexStar line up. Combining the classic look of the orange tube telescope with state-of-the-art features, such as a fully computerized operating system, flash upgradeable hand control, and superior StarBright XLT coatings, the NexStar 4SE telescope is designed to give users a high-performance telescope that can turn a dark backyard into a deep-space observatory for the entire family.
Computerized Mount
Probably the biggest feature of the NexStar is the computerized mount. The mount allows the telescope to automatically point itself at any visible object with the push of a button. The NexStar 4 SE telescope utilizes Celestron’s innovative technology to help automatically align the telescope for optimum viewing of stars, planets or galaxies that are selected by the user from a computer database menu of over thousands of celestial objects. Upon locating each celestial object, the NexStar SE telescopes will display interesting historical and scientific facts about the star, planet or galaxy being viewed via the LCD screen located on the telescope’s backlit handheld control unit.

The hand-controlled computerized mount allows the telescope to automatically point itself at any visible object with the push of a button.
Easy Set Up Right Out of the Box
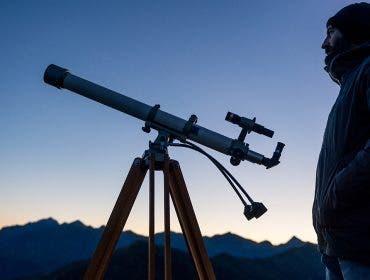
The telescope comes nicely packed, and there is not much assembly required. The NexStar 4 SE includes a sturdy adjustable tripod, a motorized alt-azimuth mount, and the NexStar hand-held computer controller. Basically you just need to secure the mount/telescope on the tripod and then attach the finderscope and eyepiece on the telescope. On the telescope there is a star pointer finderscope, a 53X eyepiece, flip mirror control, and a focusing knob. The steel tripod and alt-azimuth mount provide a solid base for the NexStar 4 SE. A small level is also included to make sure the telescope sits on level ground. Overall, I found the telescope to be very portable and I was able to easily fold it up and load into my car to take to a field at a local school for better viewing conditions.
Computer Controller Set Up
The hand-held computer controller is used for accessing many of the telescope’s features. With the hand control you can select the planets, stars, and other objects you want to see as well as change the speed that the telescope moves. It’s powered by 8 AA batteries and I suggest you purchase rechargeable NiMH batteries or an optional power adapter if you plan on using it in your backyard.
Before you can begin using the telescope, you must set up the computerized hand controller and go through the SkyAlign alignment procedure. In order for the NexStar to accurately point to the objects in the sky, it must be first aligned with known positions (stars) in the sky. With this information, the telescope can create a model of the sky, which it uses to locate any object in its database. The SkyAlign setup procedure can be little tricky and it took a while to get it programmed properly.
The next thing you need to do is align the finderscope and telescope. The easiest way to align them is to point the telescope at the moon or another easily findable object like Polaris, and then adjust the finderscope and a red dot will appear in the center of that object. Once you have set up the finderscope you are ready to begin your celestial journey.

NexStar SE telescopes come equipped with computerized Sky Tours, that provide a hands-off tour of the night sky using a customized list of the “best objects” available for viewing according to time and location. Here, the author is Checking out all the night’s sky has to offer.
Watcher of the Skies
The Nexstar 4SE’s SkyAlign feature points you in the right direction. You only need to point it to three bright objects in the sky. I found one of the easiest ways to align it to the night sky was using the Solar System Align feature. If you don’t want to choose and point it at three bright objects, you can choose the moon. The moon is very easy to spot on most any clear night. Simply point the telescope’s finderscope to it, the red dot appears, and the magic begins.
Once the telescope is properly aligned, viewing stars and other objects is easy. You can either control the telescope manually by using the arrows on the hand control, or pick an object on the hand control and have the telescope go there automatically.
The Bright Side of the Moon
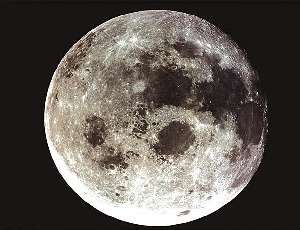
It was a stroke of good luck that the moon was in the full phase during one of my viewings and I able to easily see many of its intimate details, such as the famous crater Tycho. After a few minutes, I found both Saturn and Venus after using the moon as the alignment object. Unfortunately, they appeared just as white dots. Just near Saturn I found the bright star Spica in the constellation of Virgo that lit up the June night’s sky. The standard equipment 25mm E-Lux plossl eyepiece gives a magnification of 53X, enough to see many stars and some planets. You also can purchase optional eyepieces to zoom in for more detail. The NexStar 4 SE is smallest in the series. It is ideal for someone just dipping their foot in the star gazing pool. If you are a little more advanced and are expecting to see more details and color in the planets and stars you probably want to buy a higher-powered telescope in the NexStar line.
The NexStar SE telescope includes a version of SkyX First Light Edition astronomy software for exploring the universe on any PC and printing out custom star charts of the sky, in addition, NexRemote software allows users to operate the telescope from their PC. The NexStar has a computer interface and will connect to your computer with a RS-232 cable. The big problem here is that an RS-232 port is a thing of the past. You will need to purchase a USB adapter to hook up the RE-232 cable to your laptop. I would strongly suggest that Celestron make the change to a USB port on future models.
Astrophotography Option
The NexStar 4 SE also has the ability to mount your DSLR this lets you take pictures of your favorite objects in the sky. To use this mount you will need to purchase on optional T-Adapter and a T-Ring that matches your DSLR camera’s lens opening. There is an included cable that can plug into the telescope and camera and take the pictures for you.
Conclusion
A good telescope can literally open your eyes to a universe of celestial delights. The Celestron NexStar 4 SE offers good optics and computerized “GoTo” tracking in a package that’s lightweight and transportable at a little over 20 pounds. It is an ideal telescope for a beginner, its four-inch optics produce clear and sharp images and is well worth the money at an under $500 price point. But you’ll need to purchase additional accessories needed for taking photos of the night sky and connecting the telescope with your laptop. This sturdy and portable Celestron scope is ideal for astronomy enthusiasts committed to spending less time searching for celestial objects and more time looking at them.


