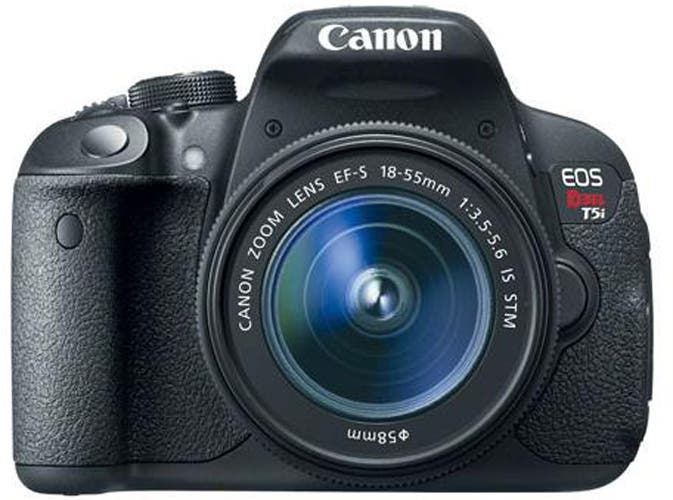
Whether you’ve just bought the Canon EOS Rebel T5i or are seriously considering it, this Guide gives you an in-depth look at the camera’s key features and the nuts and bolts of how it works.
The Canon EOS Rebel T5i is the latest in a long line of beginner-oriented SLRs that go back to the film era. While it is an easy camera for first-time DSLR users to pick up and use, Canon has packed it with both a top-quality sensor and advanced features that will let you learn and grow as a photographer if that’s what you want to do. It also opens the door to Canon’s extensive lineup of lenses, flashes and other accessories.
If you’re a snapshooter and are intimidated by all the buttons and dials on the camera, you can simply keep the T5i on the green “A+” mode and shoot away, and you’ll get great shots most of the time. But when you’re ready to explore and learn how to take control, there are plenty of options that will let you become more creative. All the while, the T5i offers a top-notch 18MP APS sensor, a flip-out, touch screen LCD monitor, and a through-the-lens viewfinder all in a lightweight body.
So, if you’ve already bought this camera, congratulations! Read on to learn how to get the most out of your experience with it. If you’re thinking about buying the camera, this will take you beyond its basic functions so you can understand how it operates and if it fits into your shooting style.
Setting Up This Camera
Charge and insert the battery and a new SD card. Format the card before shooting by opening the Menu and navigating to the first Setup menu (the wrench) and selecting Format Card. This is after you’re prompted to set the time and date.
Basic Functions
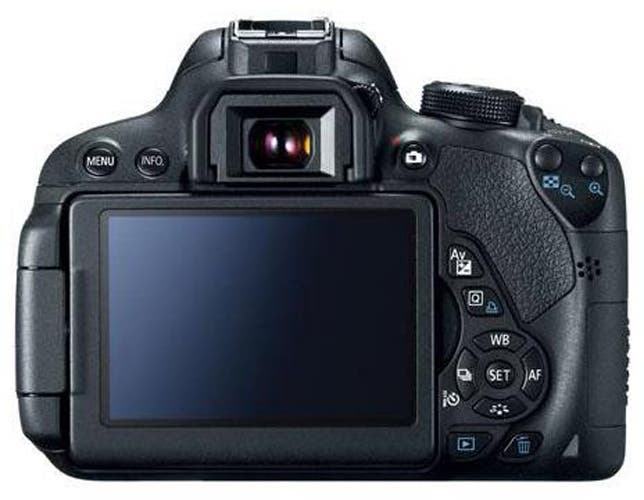
The Q button (a trapezoidal-shaped button located to the right of the LCD on the camera back) is your best friend. It displays the most important controls, depending on the mode you’ve selected using the top-camera Mode dial. When shooting in “A+” mode it will simply give you the choice of single- or multi-frame shooting and self-timer settings. In P mode, it lets you set ISO, EV, color balance, color intensity, RAW and JPEG files and more all controllable via either navigation dials or touching the screen.
To use any touchscreen, simply touch the desired item once. An explanatory statement will come up. Touch the screen again to access the choices for that function.
Around the dial: The Mode Dial options
A+: This is the auto-everything mode. Just point and shoot, and the camera chooses the most appropriate set of exposures for the current shooting situation. Recommended for snapshooters.
P (Program Auto): Chooses the best exposure, but you can adjust via the EV adjustment You can also use the touchscreen to change the ISO, metering pattern, and advanced onboard and wireless single and multiple flash control.
Tv: Shutter speed control. Move the forefinger control dial to change shutter speed; aperture is chosen automatically. Great for shooting sports.
Av: Aperture Priority exposure. Move the forefinger control dial to change the aperture. This control over focus depth is helpful when shooting portraits.
M: Manual. Set the shutter speed or aperture by touching the appropriate item in the Q menu, then turning the forefinger dial. (f you’re not using the Q menu, you can change shutter speed by turning the forefinger dial and aperture by turning the forefinger dial while simultaneously pressing the AV button.
The picture-taking modes—Sports, Macro, Landscape, and Portrait, should be self-explanatory. Read on for the more advanced options.
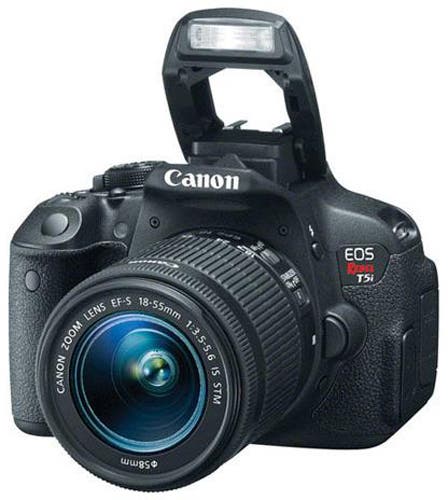
Operating The Flash
If you simply wish to turn on the flash, that’s easy: press the Flash button on the left side of the reflex mirror housing and the flash pops up and is activated. You can override the flash by turning the mode dial to the Flash-Off setting. Those are the basics, but if you dig deeper into the menu options, you have access to almost all flash controls available on Canon’s top DSLRs—including operating multiple wireless flash units, balancing flash with existing light, changing multiple flash ratios, and using the on-board and wireless flashes simultaneously. For more advanced (or learning) photographers, that’s impressive.
To easily access the plethora of flash options (not available in A+ or Flash Off modes, or in the various shooting scene modes), turn on the Q menu and select the Flash Icon. There you get the choice of normal flash (choose first or second curtain sync), Easy Wireless Flash (choose a channel), or the most advanced option, CustomWireless Flash. Use the Info button to dig deeper. This will open a menu of options that includes flash mode (ETTL or Manual exposure), wireless flash operation, flash output intensity, and flash firing groups. This gives you extensive control over multiple flash output, and works in tandem with Canon’s lineup of shoe-mount flashes such as theCanon Speedlite 430 EX II or 320EX.
Shooting Movies
To capture movies, flip the on-off switch to the movie camera Icon, and you’re ready to shoot. You can adjust exposure, focus method, white balance, movie resolution and frame rates, color intensity (“Picture Style”). The default setting is 1920x1080p at 30fps; you can switch to 20fps, or 60fps at 720p.
5 Hacks: Shortcuts to great shots
My Menu: This is a great Canon feature that will save you a lot of time. You can set up a custom menu page with up to six adjustable features that you select. This way you can get quick access to your most frequently-used features—a real time-saver. Go to the star menu in the menu screen, and press Register. This brings up all 70 menu items. Choose up to six, and they will appear the next time you access the Star menu page.
Creative Auto is a fast, efficient way to change depth of field, drive mode and flash firing. Select CA on the mode dial, then press the Q menu button. 3 options come up: a depth-of-field scale, the drive mode (which includes the self-timer), and flash settings. Touch the screen to change them. It’s that easy!
HDR (High Dynamic Range): HDR increases shadow detail and reduce blown-out highlights in the same image by combining an over, under and correctly exposed image, and taking the best aspects of each image and combining them. Make sure the camera is steady as you shoot. A tripod is recommended. To access HDR, turn the mode dial to SCN and press the Q button. HDR is one of three options; select it, and you’re ready to go.
Fine-Tune Focus in Live View: If you are shooting in manual focus mode and you want to make sure it is accurate, switch to Live View (press the button to the right of the viewfinder). Then press the magnify button (far right corner of the camera back) once and a rectangle indicating the area to be magnified appears. Use the up/down and right/left button to move the rectangle around the screen, then press the magnify button twice for a 10x magnified view of the indicated area. Now refocus. This is a great way to shoot portraits and be certain that the eyes are in focus.
Wi-Fi using Eye-Fi: While the Canon T5i doesn’t have manual focus, it is compatible with Eye-Fi SD cards, which add Wi-Fi capabilities to the camera. Insert the Eye-Fi card and press Menu. Go to the first Setup menu and choose the option “Eye-Fi Settings” (this option only appears when an Eye-Fi card is inserted). Select Set and Eye-Fi Trans Enable, and you’re ready to go. Now you can upload images from your camera when you’re in a Hot Spot.
Grid Display: Grid Display is a great way to learn composition—especially the Rule of Thirds.
Did You Know…
…the camera will automatically correct images for the results of lens aberrations? It will get rid of red/blue fringing that may appear against some contrasty edges within the image (chromatic aberration) and correct for vignetting (peripheral illumin.) Go to the first Camera menu screen and select Lens aberration correction. If you’re using a Canon lens, the camera will recognize it. Select the settings you want to compensate for and hit Set.
…you can automatically optimize image quality in-camera? Auto Lighting Optimizer adjusts brightness and contrast, maintaining highlight details and opening up shadows. This feature can be applied as you shoot to JPEGs, or after the fact in RAW images. Go to the second Camera menu item and select Auto Lighting Optimizer. You will be prompted to select low, standard, or high. Try Standard first but experiment to see how much of the effect works best for you.
…you can apply creative filters after the fact? Shoot an image with no creative filters, then open a preview of the image you want to work on. Press the Q button, then select the Creative Filters option (4th item down). Choose from Grainy B&W, Soft Focus, Fish-Eye, Bold, Water Painting, Toy camera, or Miniature effects. Hit the “Set” button to apply the effect.
Be sure to trick out your Canon T5i with the right accessories for your kind of photography! See our T5i buying guide.

