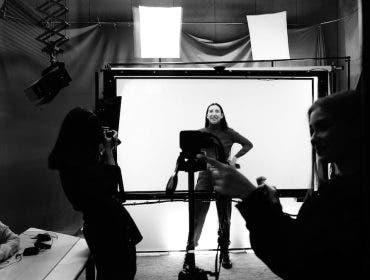

Since the launch of the Canon R5 Camera, I have found it indispensable for my work as a professional photographer. I specialize in fashion and beauty studio photography, and working with this mirrorless camera has allowed me to work faster and smarter. As you likely know, Canon mirrorless cameras have a lot of options to customize and control settings. Therefore, it may be hard to know where to start. In this article, I’m going to share the most important settings that I utilize on my Canon R5 Camera — particularly when working in a studio.
Image Quality
I shoot all of my work in RAW. Shooting in RAW will provide more flexibility in my files and more information. This is essential for my color grading, or perfecting exposure and white balance after the fact.
White Balance
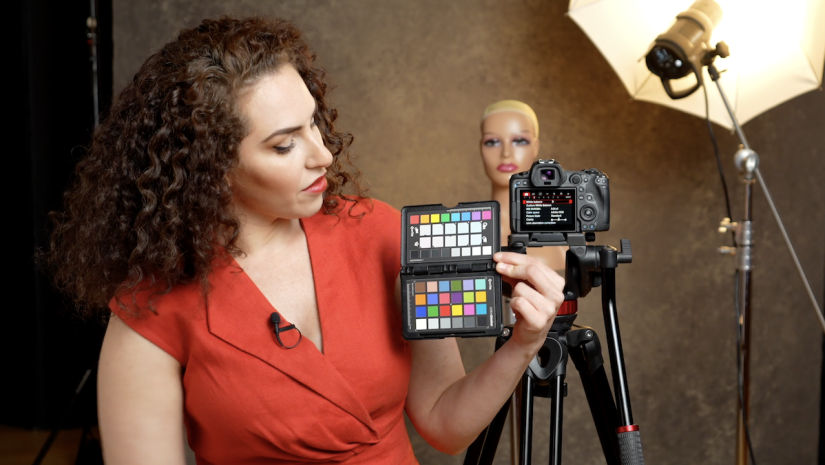
Typically I’ll select the appropriate white balance preset for the situation I’m shooting (i.e. flash in studio). I also utilize a Calibrite Colorchecker Passport to give me a neutral reference point. This is invaluable for achieving consistent white balance and flattering skin tones. I never shoot on auto white balance because it is too inconsistent and sometimes will change in unpredictable ways.

Picture Style
By default, I select a picture style of “standard.” Although, I also will choose “monochromatic” when on location if I’m intending the end result to be in black and white.
I always shoot with an image quality of RAW, so the picture style does not change the image I am taking. It only adjusts the JPG preview I’m seeing in my camera. As soon as I pop it over into Lightroom or CaptureOne, the file will still have all the original information. In other words, this setting is only adjusting your preview, not the end result.
Manual Exposure Mode
I almost always shoot in manual exposure mode, whether in the studio or on location. On location, I use my electronic viewfinder with exposure simulation (see below) to help me achieve accurate exposures. Shooting in manual allows me to be precise and to “outsmart” my camera when I am going for a more creative exposure approach. Sometimes I like to vastly over or under expose the shot for creative effect. Manual allows me to make these decisions.
In the studio with strobes, I always shoot manual (100 percent of the time). I shoot tethered and check the histogram for accurate exposures, and periodically use a light meter. I am in control of the light in the studio, so there is no benefit to another exposure mode.

Exposure simulation:
- Studio: Disabled
- On Location: Enabled
When on location or outdoors, I leave exposure simulation ON (enable) to give me exposure previews. This is an amazing benefit of shooting with a mirrorless camera because I can easily adjust my exposure to changes in the lighting. Whether the subject is moving in and out of light, or the weather is changing, I can easily see how this changes the exposure.
When shooting in the studio, I always turn exposure simulation OFF (disable) because my camera settings eliminate ambient light and thus make it difficult to see. Typically, in the studio, your camera settings are intended to eliminate the ambient light and this works counter to the purpose of exposure simulation.

Auto Focus (General Settings)
Another incredible benefit of the Canon R5 Camera is it’s fantastic autofocus. It makes my job a lot easier, particularly when using a narrower depth of field. I allow the camera to help me do a lot of the focus heavy lifting. For that reason, I use Face and Eye Tracking with Eye Detection enabled. With these settings, the camera finds the eye closest toward camera and keeps focus on that eye. I typically set up Touch and Drag AF with the active area in the bottom right. This is helpful if the face is obscured or with multiple people in the frame.

Auto Focus Operation
I most often use One-Shot because of it’s precision, but I will sometimes switch to Servo if the subject is moving a lot, twirling, or walking toward camera. “
Go-To Settings for the Canon R5
My go-to camera settings are 1/200, f11, ISO 200 when shooting in the studio. Of course there are instances when this varies, but I use this as a starting point.
- Shutter speed – 1/200 of a second allows me to reduce the amount of ambient light in the scene.
- Aperture – F11 allows me to ensure I nail focus and attain a lot of detail in my shots. I may change this variable for several reasons including wanting a narrower depth of field (to blur out the background) or if I’m working with lower power lights (and a wider aperture is more light sensitive).
- ISO – I regularly shoot ISO 200/400 in the studio. The files are clean with minimal noise, and I can quickly adjust up or down to other ISO to increase/decrease the exposure.
When I am on location, my camera exposure settings vary drastically depending on the lighting conditions.

Other Settings
There are endless other settings that allow you to further customize your camera. You can adjust what different dials and buttons control, how the camera capturing certain motion, and more. These settings discussed above, however, are truly the ones I use most often and only vary in extremely specific situations. These get me through 99 out of 100 shoots.
My favorite part of the Canon r5 Camera is the Face and Eye Tracking and Exposure Simulation. If you have this under control then you can really start to take advantage of the power of this mirrorless camera.