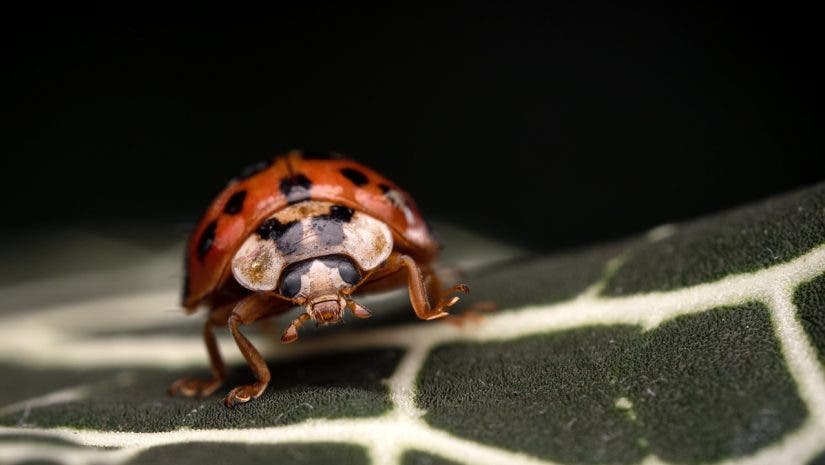
Wouldn’t it be great if there were perfect settings that would give you predictable, beautiful macro results every time you went into the field? Unfortunately, perfect one-size-fits-all settings don’t exist. Although, you can dramatically improve your chance at success by configuring your camera with some baseline settings before ever leaving the house. Predefining settings will help you save time and enjoy far more in-focus, properly-exposed macro images. The OM SYSTEM OM-1 and Olympus M.Zuiko 60mm F2.8 Macro is my camera and lens combination of choice, but the following camera settings for macro photography can be applied for any camera system.
Basic Camera Settings for Macro Photography
In the simplest of terms, a good photo should be properly exposed with the subject in focus. To set yourself in the right direction, let’s take a look at shooting mode, flash usage, aperture, shutter speed, and ISO.
Shooting Mode
Interchangeable lens cameras typically allow you to choose from a variety of shooting modes. I prefer to use manual mode for my photography. If you aren’t yet comfortable with manual, you can use aperture priority mode. Manual mode will give you complete control over your exposure as situations and needs change. Aperture priority can be useful as it will maintain a preferred aperture but adjust other exposure settings automatically. With macro photography, it’s important to manage your depth of field. If you allow your camera to determine aperture (by using shutter priority, for instance), you may end up with very little in focus due to a large aperture.
Flash
If you haven’t already considered using a flash for macro photography, now is the time to start. I distinctly remember the first time I tried a flash for macro. I lined up my shot, pressed the shutter button, reviewed my photo, and said “Oh, this changes everything.” It was in that instant when my concerns about camera shake, motion blur, and sufficient light began to disappear.
Almost any shoe-mounted speedlight can work for macro. I prefer the Flashpoint Zoom-Mini (TT350) for its affordable price, simple operability, and small size. When I first started, I simply set my flash to TTL (“Through the Lens”) mode. TTL adjusts the flash power to determine the appropriate power for a well-balanced shot. To maximize control, you can manually manage flash power. I like to start with flash power around 1/8 and adjust up or down as needed. If you notice bright hotspots or heavy shadows from the flash, simply add a layer of diffusion between your subject and light source.
You can also check out How to Pick Continuous LED Light for Macro Photography.
Aperture
Most people understand that large apertures (low f-numbers) allow for more light, reduce depth of field, and yield soft backgrounds. Conversely, small apertures (high f-numbers) limit light, increase depth of field, and bring more background elements into focus. Some people forget that working distance also has a tremendous impact on depth of field. When subject-to-sensor distance decreases, depth of field quickly reduces. Since macro photos are made from extremely close range, your aperture sizes should be fairly small.
I have my baseline aperture set to F8.0 and usually keep it between F7.1 and F10. This range provides me with decent light transfer and sharp results. Larger apertures would limit how much of my subject is in focus, and smaller apertures could suffer from diffraction (loss of sharpness). Since my camera uses a four thirds sensor, I’ll see a bit more depth of field in my photos than I would if I were using similar apertures on a full frame or APS-C camera. If your camera has a larger sensor than mine, be sure to close the aperture a bit more than I do, so your photos have ample depth of field.
Shutter Speed
As surprising as it may be, I don’t worry too much about shutter speed. This is one of the major benefits of using a flash. The flash increases the amount of light on my subject and helps to freeze motion. Because of this, I can use relatively low shutter speeds that usually range from 1/50 sec. to 1/250 sec. As a starting point, I’ll set my shutter speed to 1/100 sec.
ISO
ISO value determines light sensitivity. Low ISO values are less sensitive to light and result in lower amounts of noise than high ISO values. With that in mind, I recommend keeping ISO as low as possible and using the light from a flash as supplemental illumination. Just be careful not to use too much flash power. Increasing flash power beyond half may be too intense and create results that look overly artificial. If half power isn’t enough, you can bump ISO levels to brighten your output.
You should also check to see if your camera’s manufacturer offers a recommended base ISO value. For instance, my OM-1 lets me shoot with ISO values all the way down to 80, but the results are simulating the look of ISO 80. The OM-1’s base ISO is 200. Therefore, shooting at (or near) 200 will yield the cleanest results with the least noise. If you choose to shoot without a flash, you will need to increase ISO further and use much faster shutter speeds.
Focus
People often ask whether I use autofocus or manual focus for macro photography. I’d love to reply definitively, but the answer is actually both. I recommend establishing a quick method for toggling focus modes. If your lens has a dedicated button or clutch, use that. If your camera allows custom function button programming, use a button to bounce between manual and autofocus. Enabling back button focus is a great way to prevent your shutter button from refocusing when it’s time to fire. Regardless of which method you choose, the ability to quickly choose the appropriate focus mode will help you to nail focus and capitalize on split-second opportunities.
Autofocus
Modern autofocus (AF) is pretty amazing. Most cameras have a ton of AF options and focus points. AF is fast, accurate, and can be extremely helpful for macro photography. When subjects refuse to stay still, AF is a must. I also use AF to find my subject in the viewfinder. It’s easy to get lost when your field of view is magnified. Since it’s easier to locate a subject at lower magnification, I like to move toward my subject while tapping the focus button along the way. This allows me to keep my subject within frame. Once my scene is composed, I like to move to manual focus.
Manual Focus
Manual Focus (MF) offers extreme precision. It also guarantees consistent magnification from shot to shot. You can let AF do the work of approximating focus. Although, unless your subject is on the move, don’t shoot just yet. First, gently rock forward and back to find perfect focus. I find this method to be much easier and more dependable than spinning the lens barrel’s focus ring. When you see your subject in focus, press the shutter button to take your shot.
Focusing Tools
There are a couple of handy features to help ensure critical focus when shooting macro photography. My favorite is focus assist magnification. This feature essentially zooms the field of view so you can get a closer look at what is in (and out of) focus. It’s my favorite way to confirm focus. Alternatively, your camera may have focus peaking. Focus peaking brings attention to in-focus areas by highlighting them with a color. Rather than relying on what seems to be in focus, focus peaking will identify what actually is in focus.
Obtaining perfect focus with tiny, moving subjects isn’t always easy, Although, if you employ a combination of the listed techniques, it’s absolutely possible! Take your time, lean into your surroundings to gain stability, and try not to get discouraged if you miss. Be selective with your focus. Don’t just aim for the eyes, aim for the front plane of the eyes. Every little bit matters in macro photography.
Additional Macro Settings and Tips
Once you’ve got the hang of flash operation and have gotten comfortable with proper exposure settings, you’ll probably want to find those little tricks to take your macro to the next level.
Shoot in RAW
While in-camera JPG compression is better than ever, shooting in RAW will still give you the most flexibility to push your images’ highlights and shadows during processing. RAW files can be a savior when your straight-out-of-camera result is slightly under or overexposed. If you prefer a more stylized look, shooting in RAW will allow you that extra bit of creative control to really make your results unique.
If you still aren’t sure, read RAW vs JPEG: Which Should You Choose?
White Balance
I’m a big fan of auto white balance. It tends to produce results that look natural and can be easily tweaked in post processing. If you like a slightly warmer or cooler look, you can pre-set your white balance accordingly. Remember, low numbers are warm and high numbers are cool.
Be Still
A steady camera is critical for producing razor-sharp macro results. Camera body and/or lens image stabilization are welcome assistants. Some people choose to go a step further by introducing a monopod or tripod to the equation. Both are effective, but I prefer to remain as unrestricted as possible when I’m in the field. If you also choose to shoot handheld, do anything you can to relax — mentally and physically — so your camera stays steady when your shutter is released. I always check my surroundings for branches or rocks that can be used for support. If I’m on the ground, I’ll use my own elbows. To maximize stability, I’ll take a deep breath, hold it for a few seconds, exhale slowly, and gently press the shutter button.
Save Your Settings
Many cameras give the option of saving your camera settings for macro photography using customizable user modes. If your camera has this option, use it! Not only can you store baseline exposure settings, but some models will allow the customization of buttons and levers to provide an experience that’s completely tailored to your needs. I use ‘C1’ on my OM-1’s dial to ensure my most-used features and settings are right where I want them.
